day2_实现webservice的接口测试
1 、Web service
2、 使用SoapUI实现webservice的接口测试
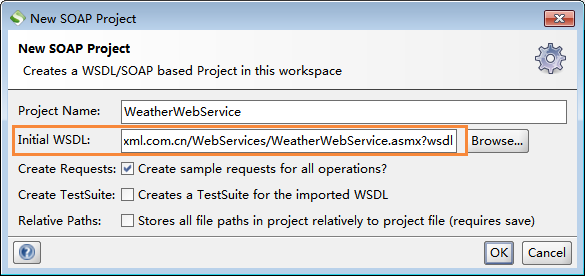
- 新建soapui项目→Initial WSDL输入wsdl
(天气预报wsdl http://www.webxml.com.cn/WebServices/WeatherWebService.asmx?wsdl)
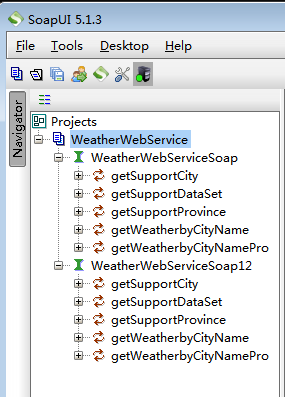
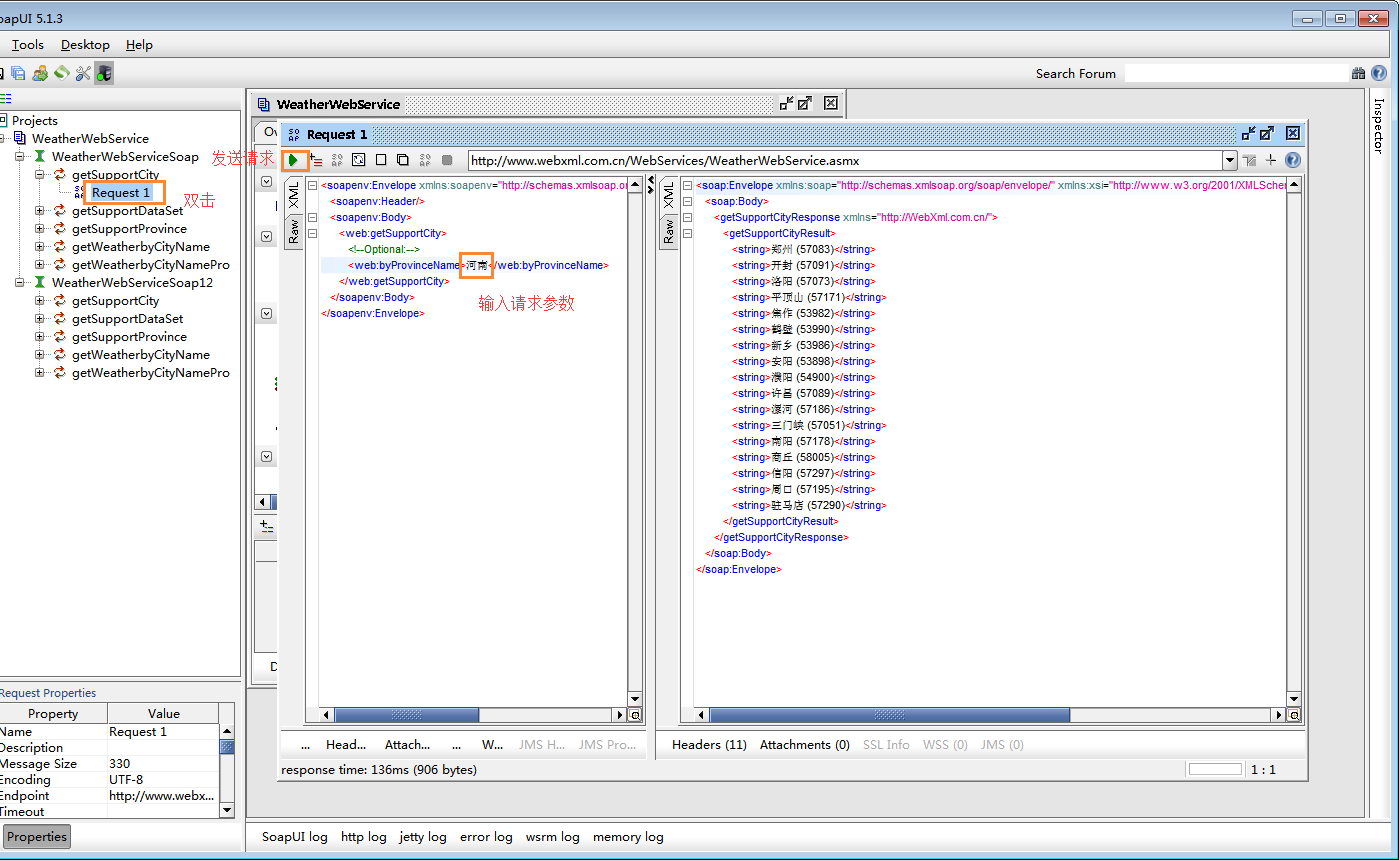
- 左侧发送请求报文,点执行按钮,右侧显示响应报文
3、使用Jmeter发送SOAP请求对WebService接口测试
测试的URL:http://ws.webxml.com.cn/WebServices/WeatherWS.asmx
测试接口:getSupportCityString
获取城市的编码:http://ws.webxml.com.cn/WebServices/WeatherWS.asmx/getRegionDataset
(该页面下显示的是所有城市的编码信息)如下图:
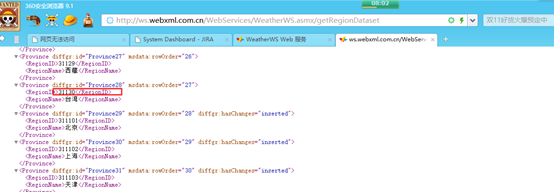
使用北京的编码信息:311101
输入参数:theRegionCode = 省市、国家ID或名称,返回数据:一维字符串数组
3.1、Jmeter发送SOAP请求对WebService接口测试
前提:以下是 SOAP 1.2 请求和响应示例。所显示的占位符需替换为实际值
POST /WebServices/WeatherWS.asmx HTTP/1.1
Host: ws.webxml.com.cn
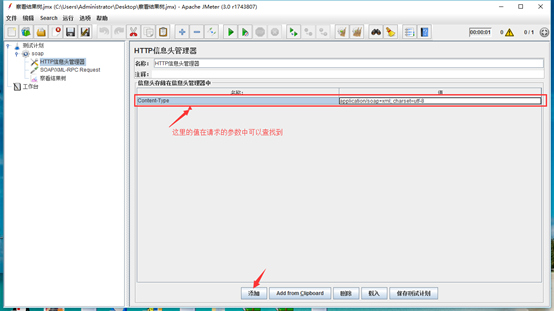
Content-Type: application/soap+xml; charset=utf-8
Content-Length: length

<?xml version="1.0" encoding="utf-8"?>
<soap12:Envelope xmlns:xsi="http://www.w3.org/2001/XMLSchema-instance" xmlns:xsd="http://www.w3.org/2001/XMLSchema" xmlns:soap12="http://www.w3.org/2003/05/soap-envelope">
  <soap12:Body>
    <getSupportCityString xmlns="http://WebXml.com.cn/">
      <theRegionCode>string</theRegionCode>
    </getSupportCityString>
  </soap12:Body>
</soap12:Envelope>
HTTP/1.1 200 OK
Content-Type: application/soap+xml; charset=utf-8
Content-Length: length

<?xml version="1.0" encoding="utf-8"?>
<soap12:Envelope xmlns:xsi="http://www.w3.org/2001/XMLSchema-instance" xmlns:xsd="http://www.w3.org/2001/XMLSchema" xmlns:soap12="http://www.w3.org/2003/05/soap-envelope">
  <soap12:Body>
    <getSupportCityStringResponse xmlns="http://WebXml.com.cn/">
      <getSupportCityStringResult>
        <string>string</string>
        <string>string</string>
      </getSupportCityStringResult>
    </getSupportCityStringResponse>
  </soap12:Body>
</soap12:Envelope>
步骤一: 添加线程组,如下图:
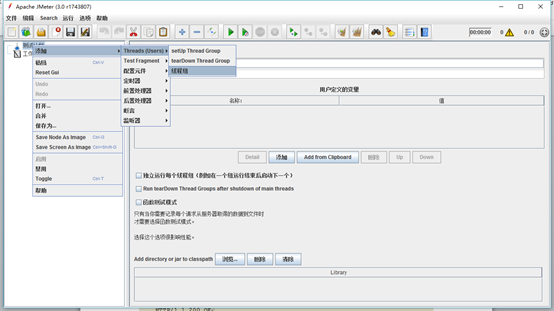
添加完成后设置名称为soap
步骤二、添加SOAP/XML-RPC Request Sampler,如下图:
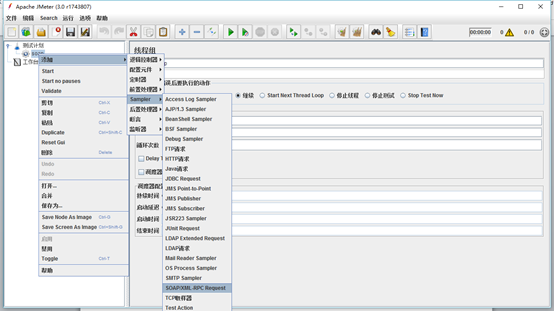
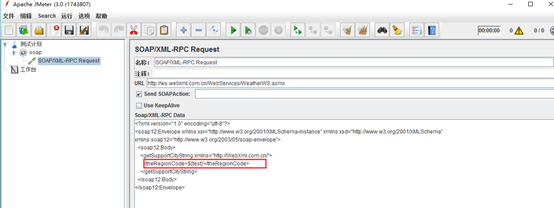
步骤三、配置soap
在URL中填写测试地址:http://ws.webxml.com.cn/WebServices/WeatherWS.asmx
在Soap/XML-RPC Data中输入:
<?xml version="1.0" encoding="utf-8"?>
<soap12:Envelope xmlns:xsi="http://www.w3.org/2001/XMLSchema-instance" xmlns:xsd="http://www.w3.org/2001/XMLSchema" xmlns:soap12="http://www.w3.org/2003/05/soap-envelope">
  <soap12:Body>
    <getSupportCityString xmlns="http://WebXml.com.cn/">
      <theRegionCode>string</theRegionCode>
    </getSupportCityString>
  </soap12:Body>
</soap12:Envelope>
注意:在发送的信息中,要填写真正的参数替换占位符,string的值需要替换成需要的值
<theRegionCode>string</theRegionCode>
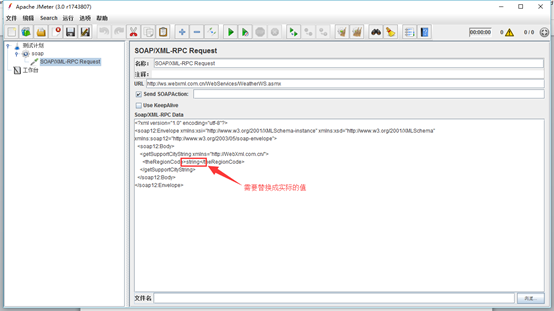
步骤四、在测试计划中添加用户定义的变量
点击测试计划>添加,如下图:
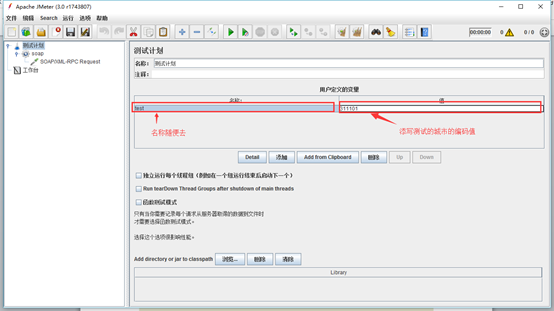
最终步骤3发送的数据为:<theRegionCode>${test}</theRegionCode>,如下图:
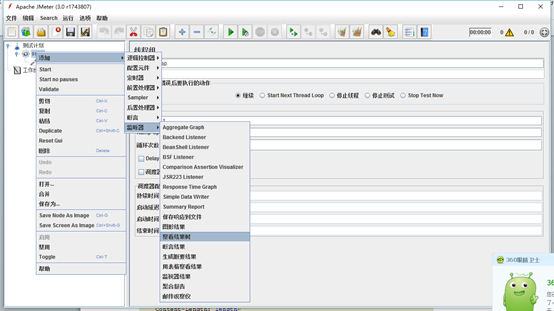
步骤五、插入查看结果树,如下图:
点击运行,发送请求后会发现响应数据错误,提示“服务器未能识别 HTTP 头 SOAPAction 的值: ”,如下图:

这是因为服务器不知道以何种类型来解析请求数据,才导致没有正确的数据返回。
所以在发送请求之前,还有一个重要的步骤,就是添加HTTP信息头管理器
步骤六、添加HTTP信息头管理器
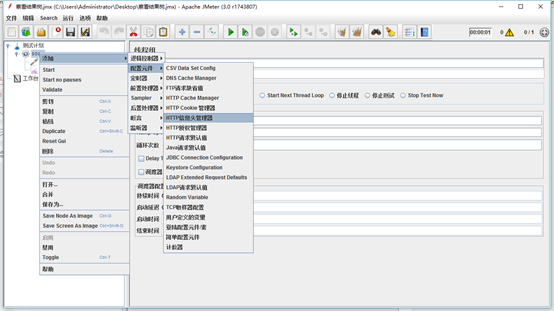
添加完成后需要手动拖动到改线程组的最上方,配置如下:
步骤七、验证
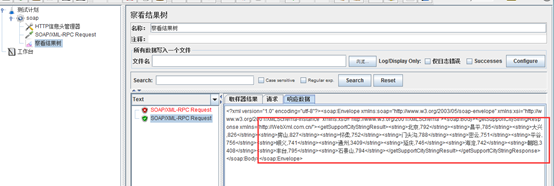
3.2、Jmeter发送post请求对Webservice接口测试
前提:以下是 HTTP POST 请求和响应示例。所显示的占位符需替换为实际值
POST /WebServices/WeatherWS.asmx/getSupportCityString HTTP/1.1
Host: ws.webxml.com.cn
Content-Type: application/x-www-form-urlencoded
Content-Length: length

theRegionCode=string
HTTP/1.1 200 OK
Content-Type: text/xml; charset=utf-8
Content-Length: length

<?xml version="1.0" encoding="utf-8"?>
<ArrayOfString xmlns="http://WebXml.com.cn/">
  <string>string</string>
  <string>string</string>
</ArrayOfString>
步骤一:添加线程组,并改名为post,如下图:
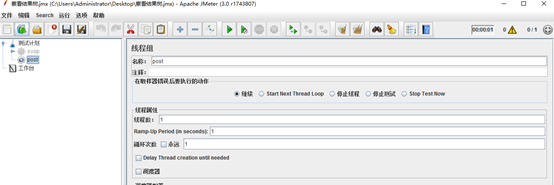
步骤二、添加HTTP请求并进行配置,如下图:
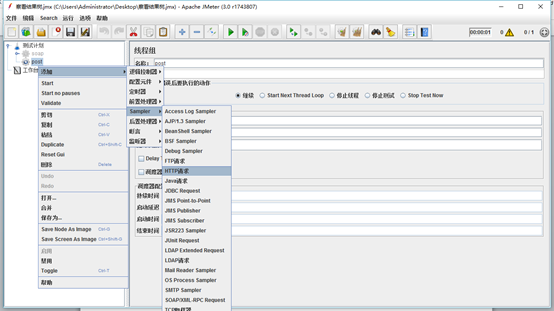
配置如下:
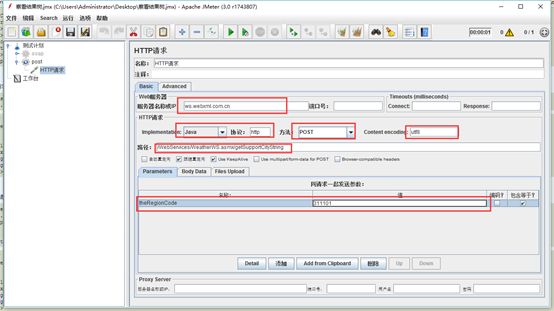

在请求响应中都有,直接去找就行
Implementation:java
协议:http
方法:post
Content encoding:utf8
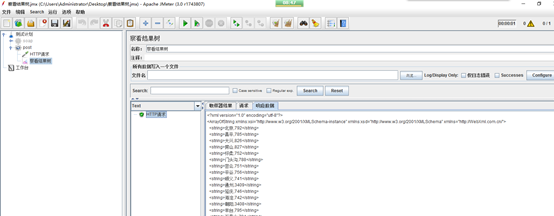
步骤三、查看结果树并运行查看结果,如下图:
3.3、Jmeter发送get请求对webservice接口测试
前提:以下是 HTTP GET 请求和响应示例。所显示的占位符需替换为实际值。
GET /WebServices/WeatherWS.asmx/getSupportCityString?theRegionCode=string HTTP/1.1
Host: ws.webxml.com.cn
HTTP/1.1 200 OK
Content-Type: text/xml; charset=utf-8
Content-Length: length

<?xml version="1.0" encoding="utf-8"?>
<ArrayOfString xmlns="http://WebXml.com.cn/">
  <string>string</string>
  <string>string</string>
</ArrayOfString>
步骤1:添加线程组,并改名为get,如下图:

步骤二、添加HTTP请求并进行配置,如下图:

步骤三、查看结果树并运行查看结果,如下图:


