EFCore项目入门
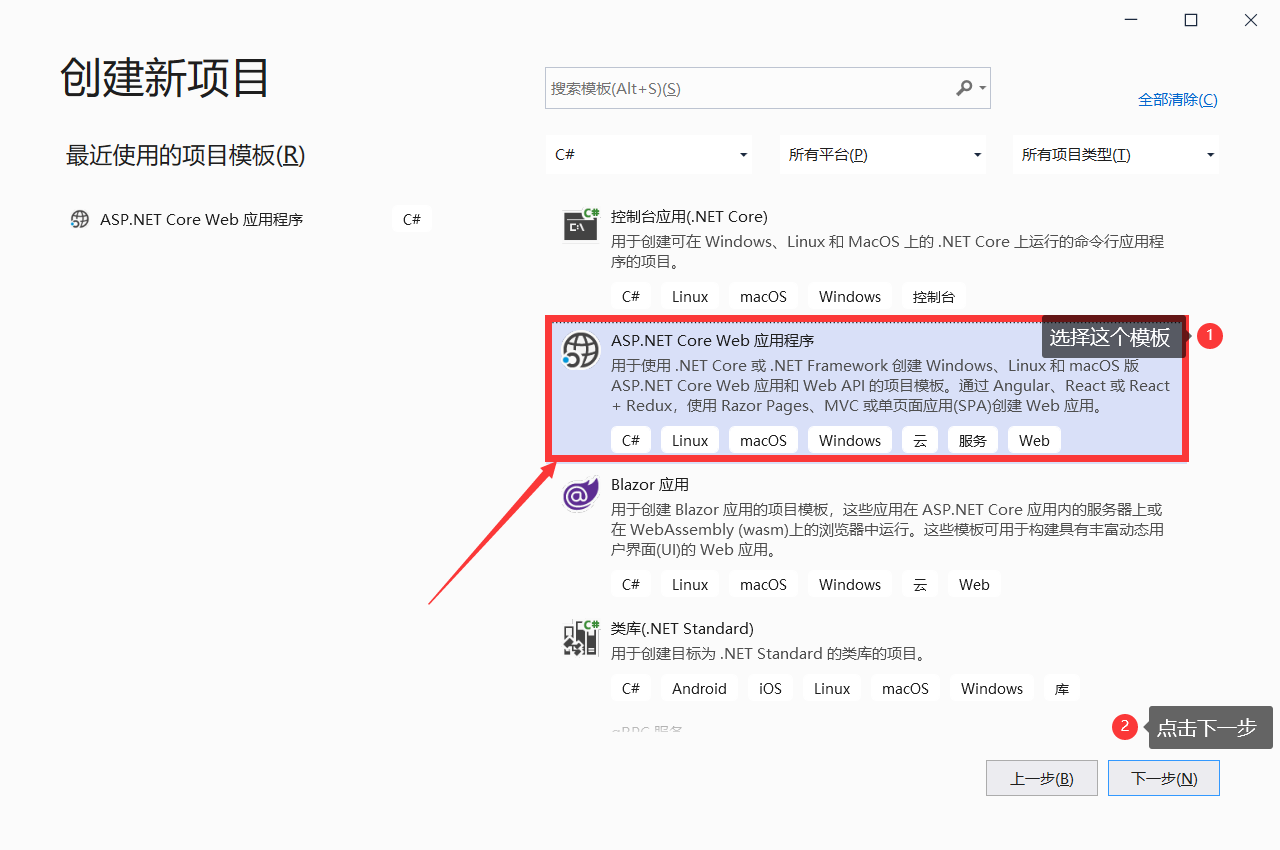
第一步:选择ASP.NET Core Web创建C#解决方案
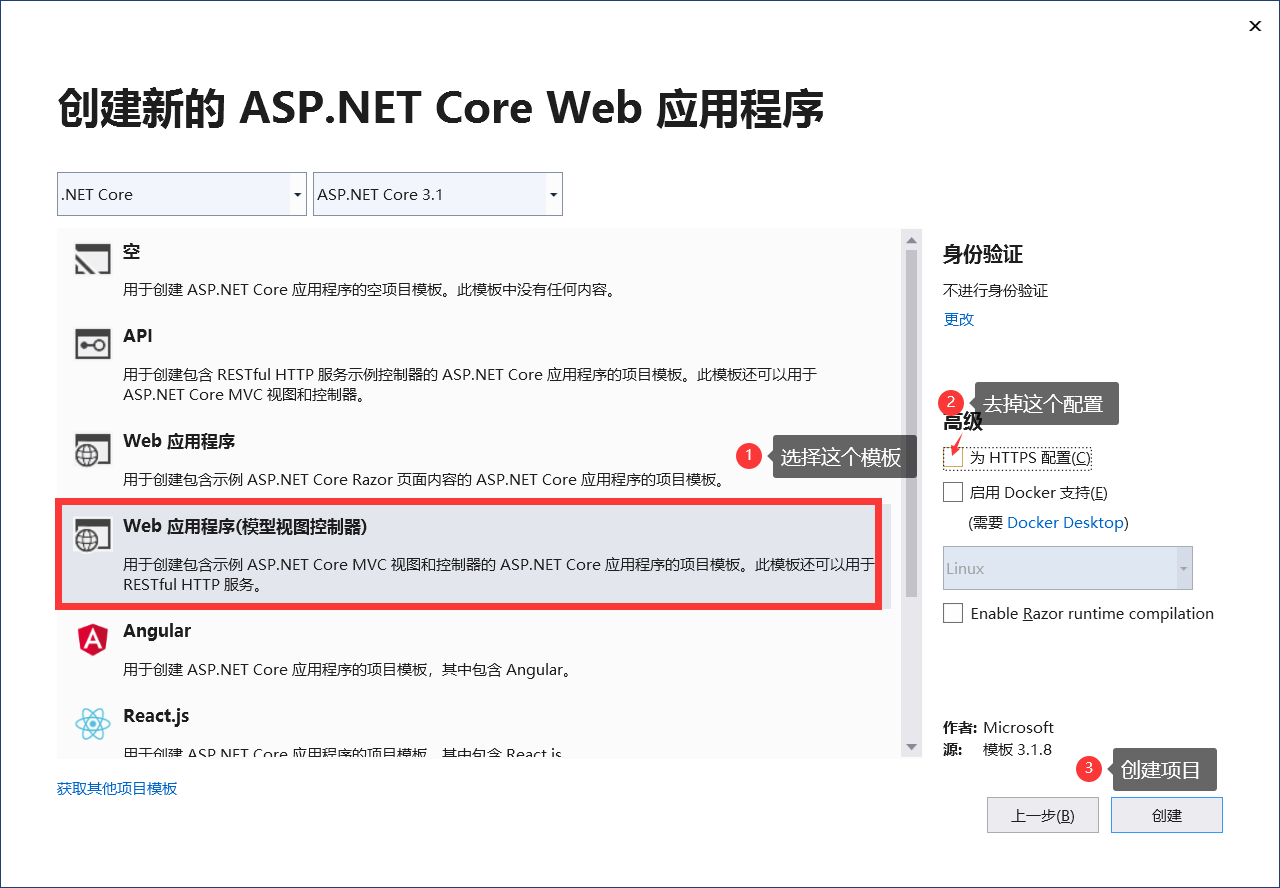
第二步:重命名项目名称,创建项目

第三步:选择模板创建Web程序
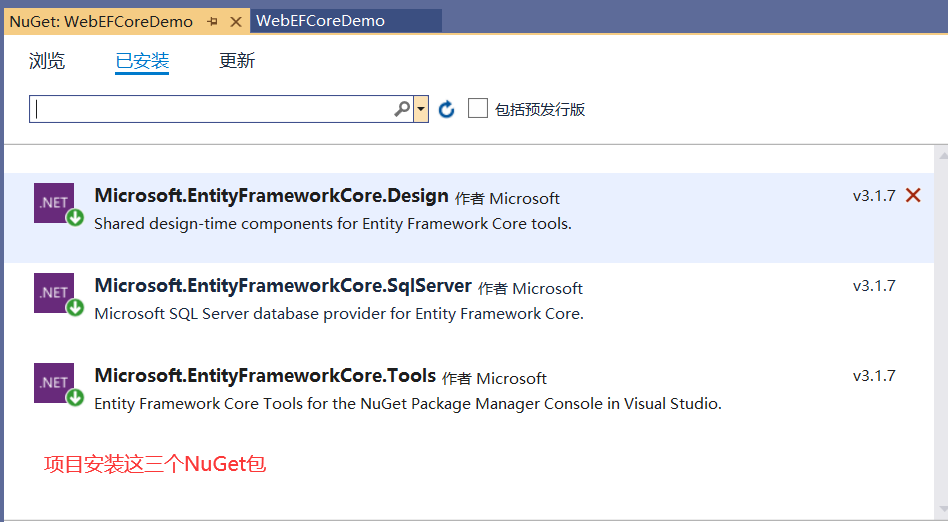
第四步:安装三个NuGet包
Microsoft.EntityFrameworkCore.Design、Microsoft.EntityFrameworkCore.SqlServer、Microsoft.EntityFrameworkCore.Tools
第五步:项目Models文件夹添加类文件
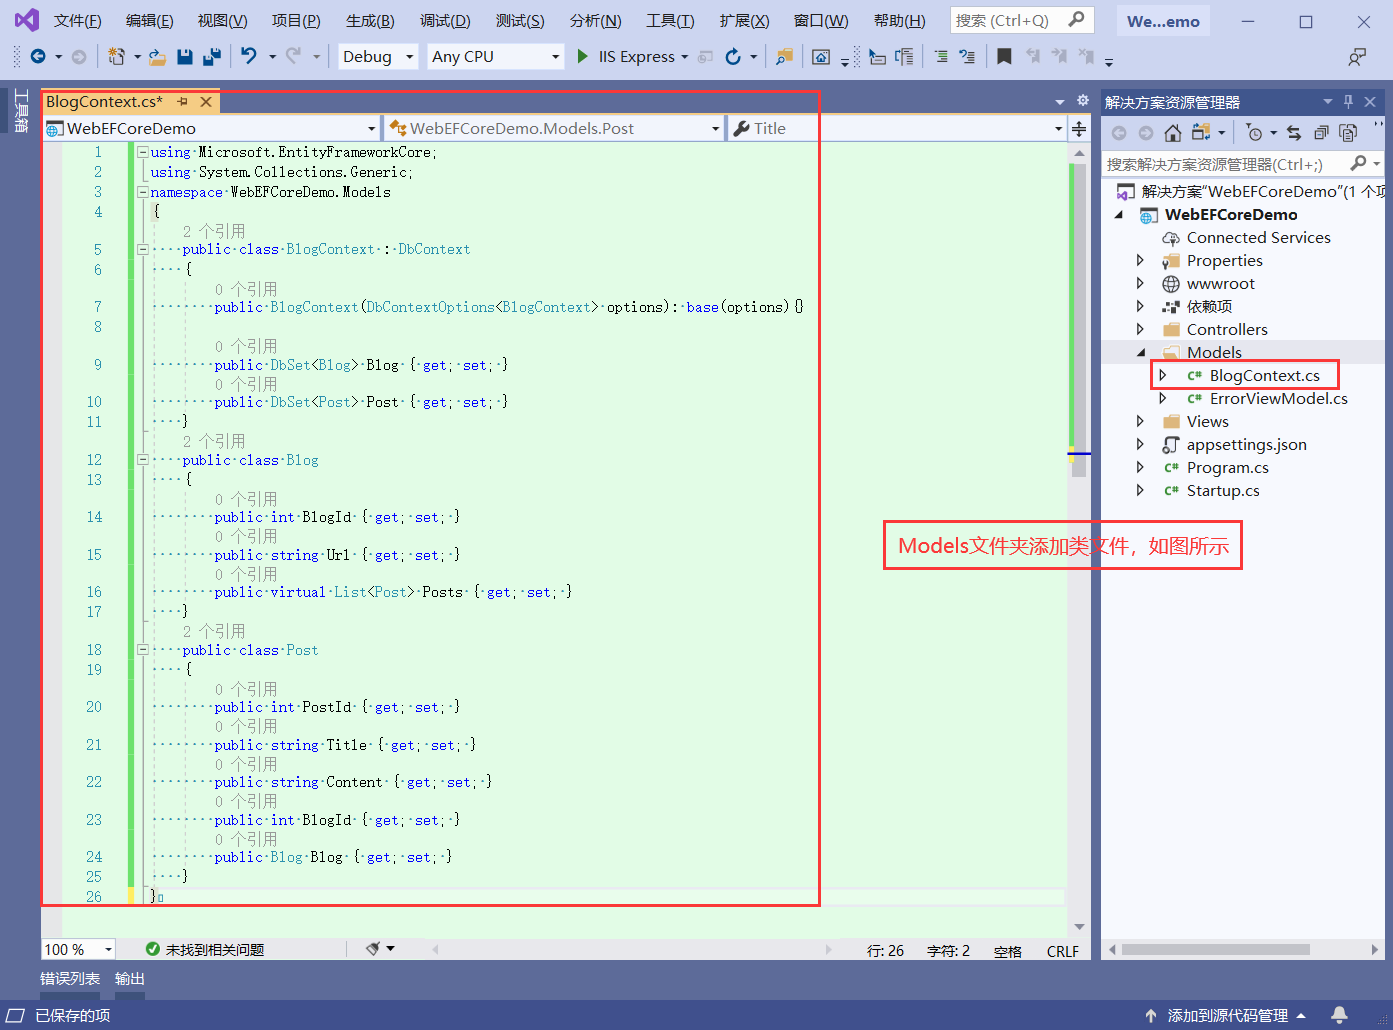
    public class Blog
    {
        public int BlogId { get; set; }
        public string Url { get; set; }
        public virtual List<Post> Posts { get; set; }
    }
    public class Post
    {
        public int PostId { get; set; }
        public string Title { get; set; }
        public string Content { get; set; }
        public int BlogId { get; set; }
        public Blog Blog { get; set; }
    }
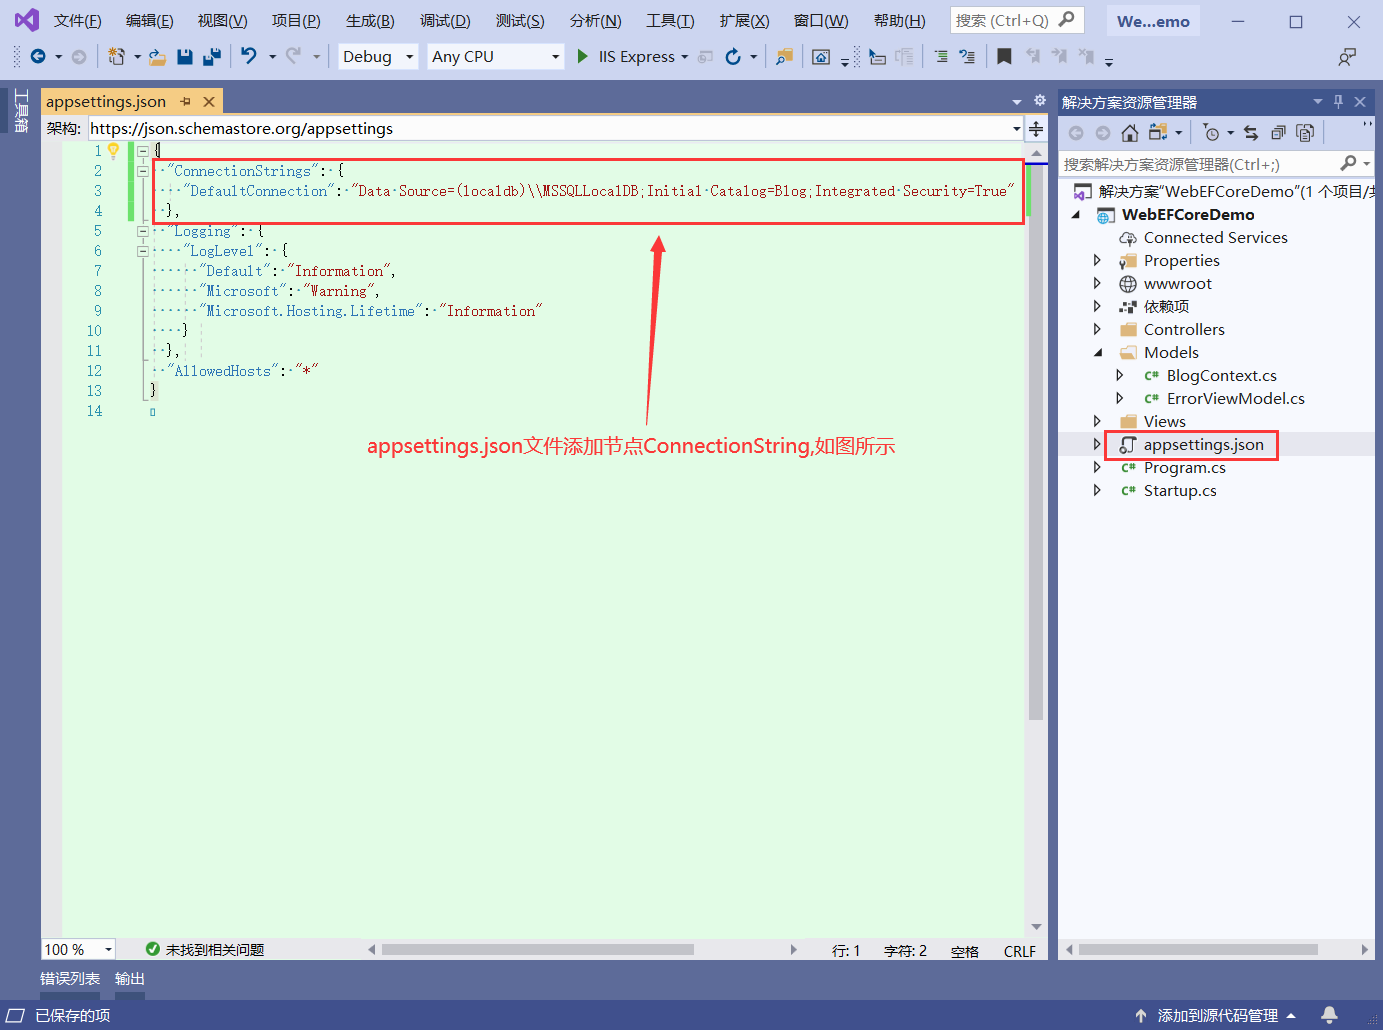
第六步:在appsettings.json中添加链接数据库字符串
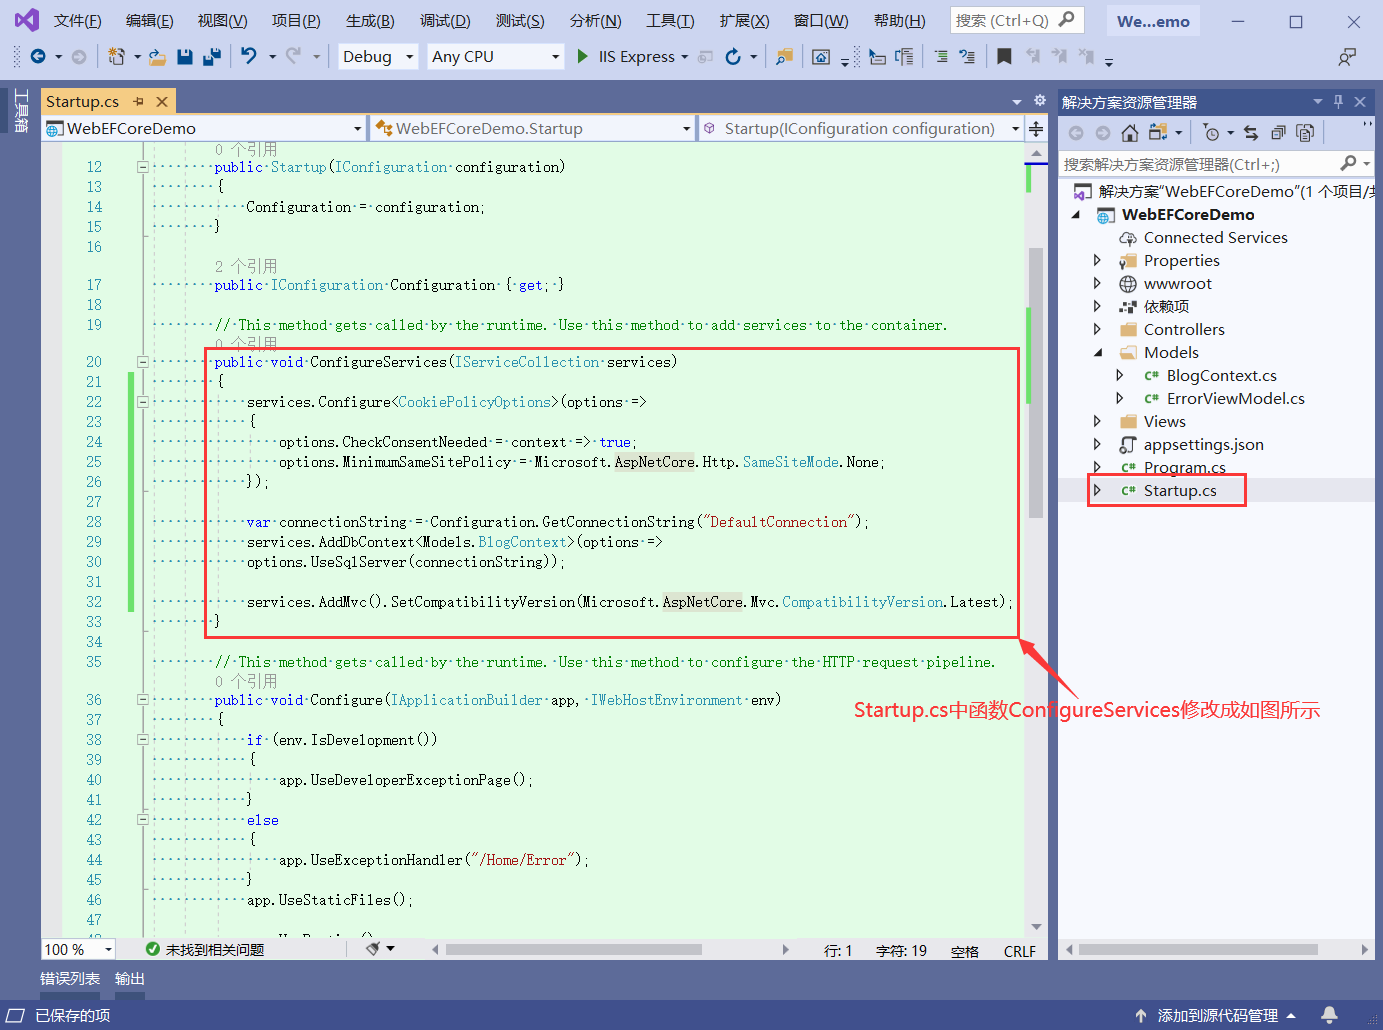
第七步:在ConfigureServices方法中添加上下文依赖注入
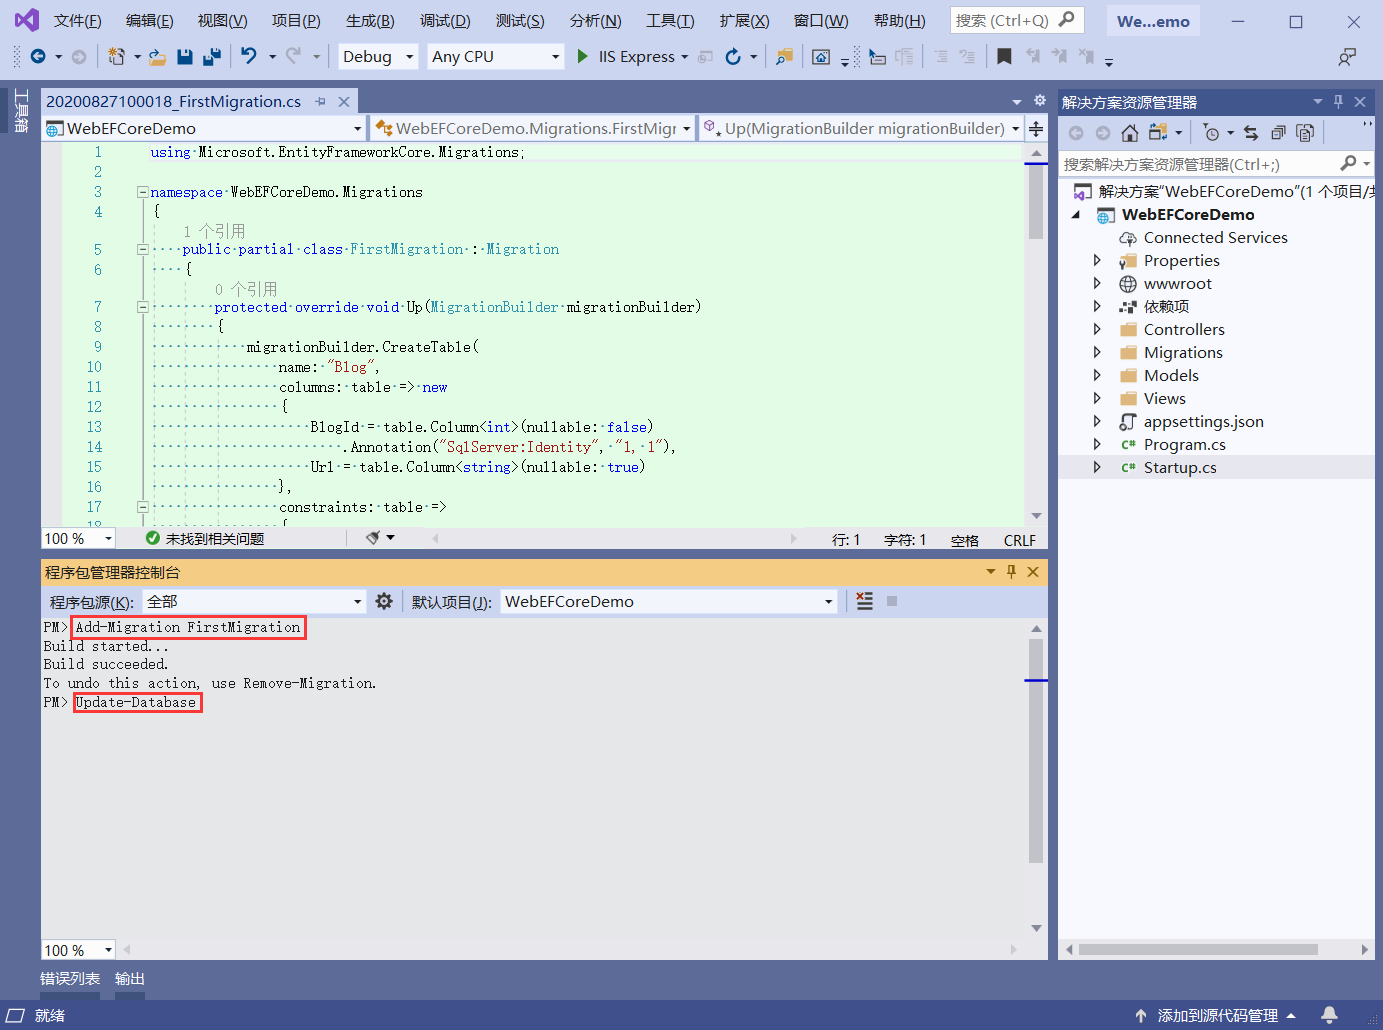
第八步:打开程序包管理器控制台

第九步:先输入 Add-Migration FirstMigration

第十步:在输入Update-Database。迁移成功后,会创建数据库,以及会在项目中生成一个Migrations文件夹,里面时迁移记录。
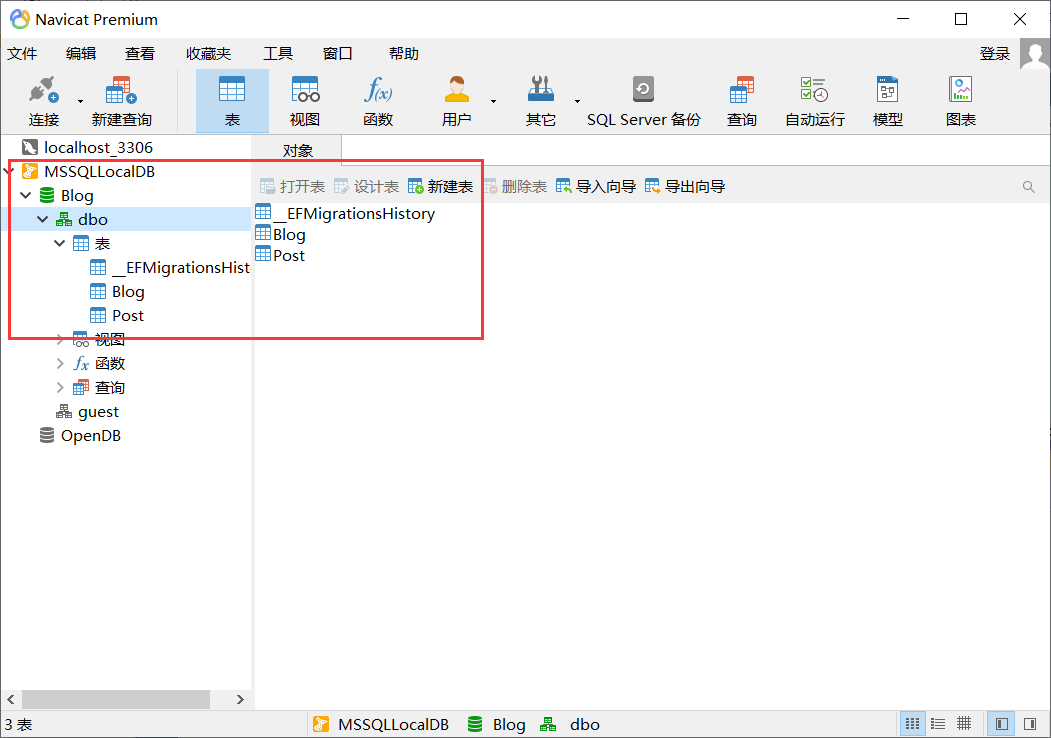
第十一步:自动生成的数据库截图
一个自由.NET开发者
bingqiang1903@gmail.com
https://www.cnblogs.com/sunbingqiang/

 浙公网安备 33010602011771号