自定义springboot-starter 动态数据源
自定义springboot-starter 动态数据源
如果使用的是spring或springboot框架,spring提供了一个实现动态数据源的一个抽象类AbstractRoutingDataSource
当我们实现这个类后需要实现一个方法
@Override
protected Object determineCurrentLookupKey() {

}
spring获取连接代码最终会走到AbstractRoutingDataSource类中的determineTargetDataSource方法
protected DataSource determineTargetDataSource() {
    Assert.notNull(this.resolvedDataSources, "DataSource router not initialized");
    //主要这一段
    Object lookupKey = determineCurrentLookupKey();
    DataSource dataSource = this.resolvedDataSources.get(lookupKey);
    if (dataSource == null && (this.lenientFallback || lookupKey == null)) {
        dataSource = this.resolvedDefaultDataSource;
    }
    if (dataSource == null) {
        throw new IllegalStateException("Cannot determine target DataSource for lookup key [" + lookupKey + "]");
    }
    return dataSource;
}
通过this.resolvedDataSources.get(lookupKey);来获取一个dataSource之后才能获取连接
resolvedDataSources是AbstractRoutingDataSource类中的一个map类型的变量,里面的数据是在afterPropertiesSet方法时从targetDataSources获取的
@Override
public void afterPropertiesSet() {
  ....
    this.resolvedDataSources = CollectionUtils.newHashMap(this.targetDataSources.size());
  ....
}
也就是说通过设置map的k-v,再通过determineCurrentLookupKey方法返回对应的key,就可以进行数据源的切换
首先创建一个配置类用来保存每个数据源的信息
@Component(value = "dynamicDataSourceConfig")
@ConfigurationProperties(prefix = "dynamic")
public class DynamicDataSourceConfig{

    private Map<String, DataSourceProperties> dataSources;

    public Map<String, DataSourceProperties> getDataSources() {
        return dataSources;
    }

    public void setDataSources(Map<String, DataSourceProperties> dataSources) {
        this.dataSources = dataSources;
    }

}
之后创建一个ThreadLocal持有类来保存每个线程需要的数据源
public class DynamicContextHolder {

    private static final ThreadLocal<String> CONTEXT_HOLDER = new ThreadLocal<>();

    public static void choose(String dbName) {
        CONTEXT_HOLDER.set(dbName);
    }

    public static String get() {
        return CONTEXT_HOLDER.get();
    }

    public static void clear() {
        CONTEXT_HOLDER.remove();
    }
}
最后创建一个继承AbstractRoutingDataSource的子类,功能就完成了
@Component
public class RoutingDataSource extends AbstractRoutingDataSource {


    public RoutingDataSource(DynamicDataSourceConfig dynamicDataSourceConfig) {
        HashMap<Object, Object> routingDataSourceMap = parseConfig(dynamicDataSourceConfig);
        this.setTargetDataSources(routingDataSourceMap);
    }

    @Override
    protected Object determineCurrentLookupKey() {
        return DynamicContextHolder.get();
    }

    @Override
    public void setDefaultTargetDataSource(Object defaultTargetDataSource) {
        super.setDefaultTargetDataSource(defaultTargetDataSource);
    }

    private HashMap<Object, Object> parseConfig(DynamicDataSourceConfig config) {
        Map<String, DataSourceProperties> map = config.getDataSources();

        HashMap<Object, Object> routingDataSourceMap = new HashMap<>();
        for (Map.Entry<String, DataSourceProperties> entry : map.entrySet()) {
            String dataSourceKey = entry.getKey();
            DataSourceProperties sourceProperties = entry.getValue();

            String driverClassName = sourceProperties.getDriverClassName();
            String url = sourceProperties.getUrl();
            String username = sourceProperties.getUsername();
            String password = sourceProperties.getPassword();

            Class<Driver> driverClass;
            try {
                driverClass = (Class<Driver>) Class.forName(driverClassName);
            } catch (ClassNotFoundException e) {
                throw new RuntimeException(e);
            }
            try {
                SimpleDriverDataSource source = new SimpleDriverDataSource(
                        driverClass.newInstance(),
                        url,
                        username,
                        password);
                routingDataSourceMap.put(dataSourceKey, source);
            } catch (InstantiationException | IllegalAccessException e) {
                throw new RuntimeException(e);
            }
        }
        return routingDataSourceMap;
    }
}
首先是将数据库连接配置删除掉,修改为如下代码
dynamic:
  default-data-source-key: master
  data-sources:
    master:
      url: jdbc:mysql://127.0.0.1/master_data_source?characterEncoding=UTF8&serverTimezone=Asia/Shanghai
      username: root
      password: root
      driver-class-name: com.mysql.cj.jdbc.Driver
    slave:
      url: jdbc:mysql://127.0.0.1/slave_data_source?characterEncoding=UTF8&serverTimezone=Asia/Shanghai
      username: root
      password: root
      driver-class-name: com.mysql.cj.jdbc.Driver
测试代码
@GetMapping("master")
public List<User> master() {
    DynamicContextHolder.choose("master");
    System.out.println(userService.list());
    return null;
}

@GetMapping("slave")
public List<User> slave() {
    DynamicContextHolder.choose("slave");
    System.out.println(userService.list());
    return null;
}
结果
[User{id=1, name=master_user_1}, User{id=2, name=master_user_2}]
[User{id=1, name=slave_user_1}, User{id=2, name=slave_user_2}]
功能就算完成了,只需要在方法调用前指定使用的数据源即可,也可以给加个aop,更方便点
然后我就想给他整一个starter,starter相比代码中直接写会有两个问题,一个是spring如何将外部的类添加到容器中,另一个是容器扫描的顺序
第一个:在starter项目中resources文件夹下添加META-INF/spring.factories文件
org.springframework.boot.autoconfigure.EnableAutoConfiguration=\
work.jame.dynamic.config.DynamicDataSourceConfig
这个文件会被springboot扫描,之后去加载里面指定的类,我们有一个类能被springboot加载到后其他的也都不是问题了
@Order(Ordered.HIGHEST_PRECEDENCE)
@Component(value = "dynamicDataSourceConfig")
//这个注解必须要加,否则先去加载spring默认的数据源了
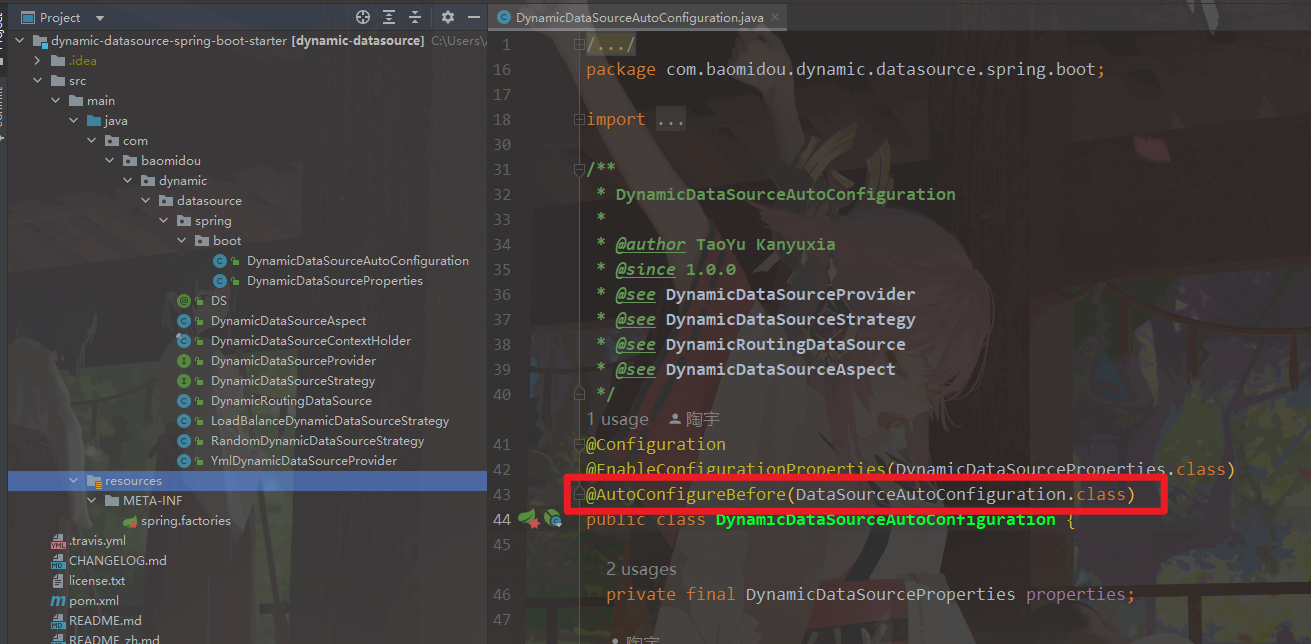
@AutoConfigureBefore(DataSourceAutoConfiguration.class)
//加载其他类的类
@Import(AutoHandler.class)
@ConfigurationProperties(prefix = "dynamic")
public class DynamicDataSourceConfig {

    private Map<String, DataSourceProperties> dataSources;

    private String defaultDataSourceKey = "master";


}
@Configuration
public class AutoHandler {

    @Autowired
    private DynamicDataSourceConfig config;

    @Bean
    public DataSource abstractRoutingDataSource() {
        return new RoutingDataSource(config);
    }

    //使用aop扫描方法注解,方便使用
    @Bean
    public Advisor dynamicDataSourceAnnotationAdvisor() {
        DynamicDataSourceAnnotationInterceptor interceptor = new
            DynamicDataSourceAnnotationInterceptor(config.getDefaultDataSourceKey());
        DynamicDataSourceAnnotationAdvisor advisor = new DynamicDataSourceAnnotationAdvisor(interceptor);
        advisor.setOrder(Ordered.HIGHEST_PRECEDENCE);
        return advisor;
    }
}
代码都在git上了,功能不难
https://gitee.com/sunankang/dynamic-data-source/tree/master
下面说说写这个过程中遇到的问题和解决办法吧
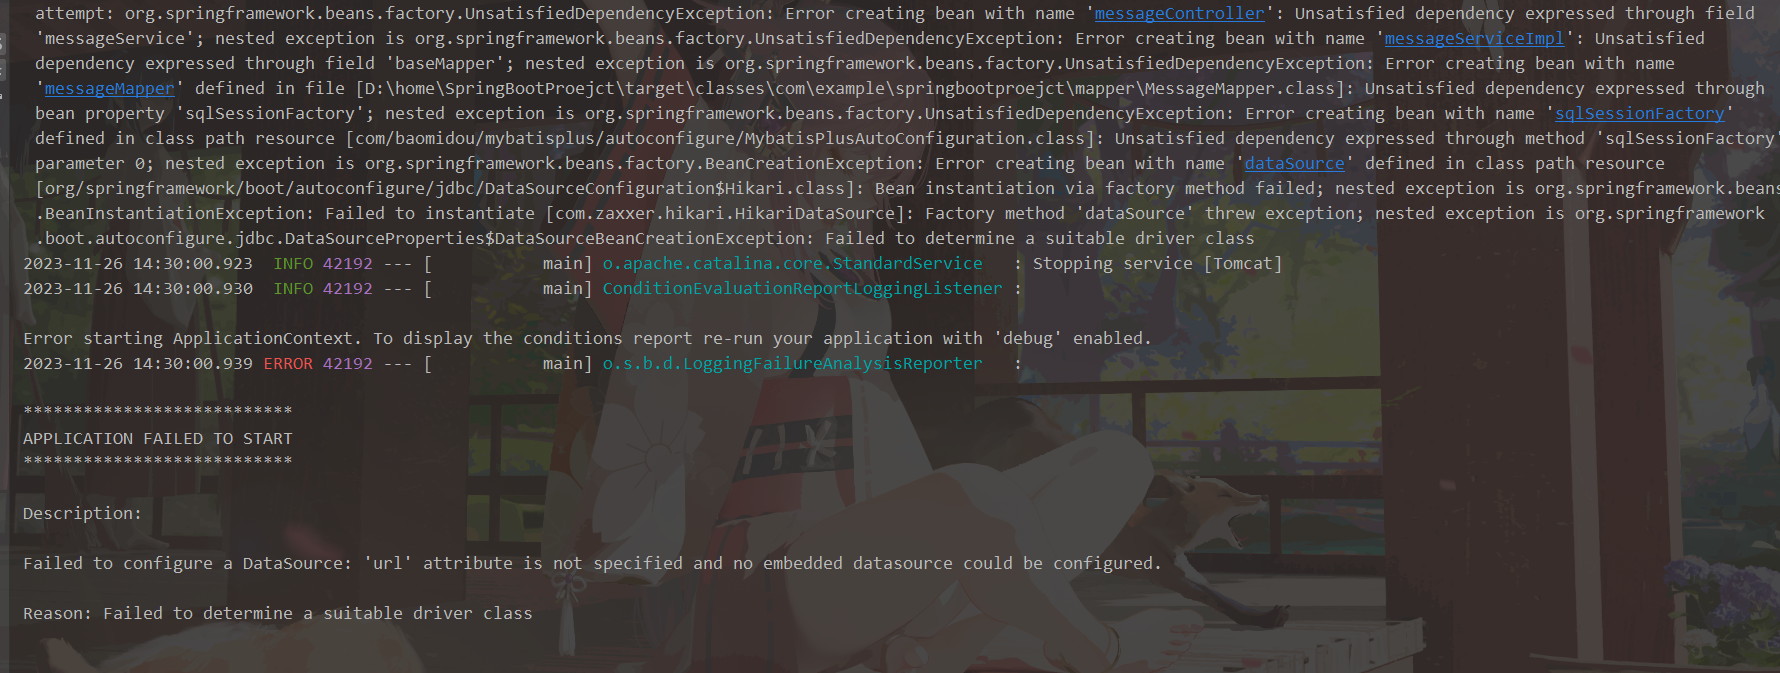
第一个就是我把代码挪到starter后,启动项目启动一直报

我一看,经典的导入了连数据库的配置,但是没配spring-datasource下url的错误,但是我就是不要配url,账号密码,用自定义的动态配置,我没有把代码抽出去之前还是可以用的,抽出去之后就不行了,很纳闷,看容器中也有自定义的动态数据源的类,后来我一想,之前见到过一个动态数据源的开源框架,和mybatis-plus是一个组织的,然后就去下载了,抄袭借鉴下别人是怎么做的
打开之后根本不知道从哪开始看,类太多了,模块也很多,然后我git切换到了一个比较早的版本,类还比较少

这个注解意思是在指定的类之前进行注入,然后就去看了下这个DataSourceAutoCoonfiguration类

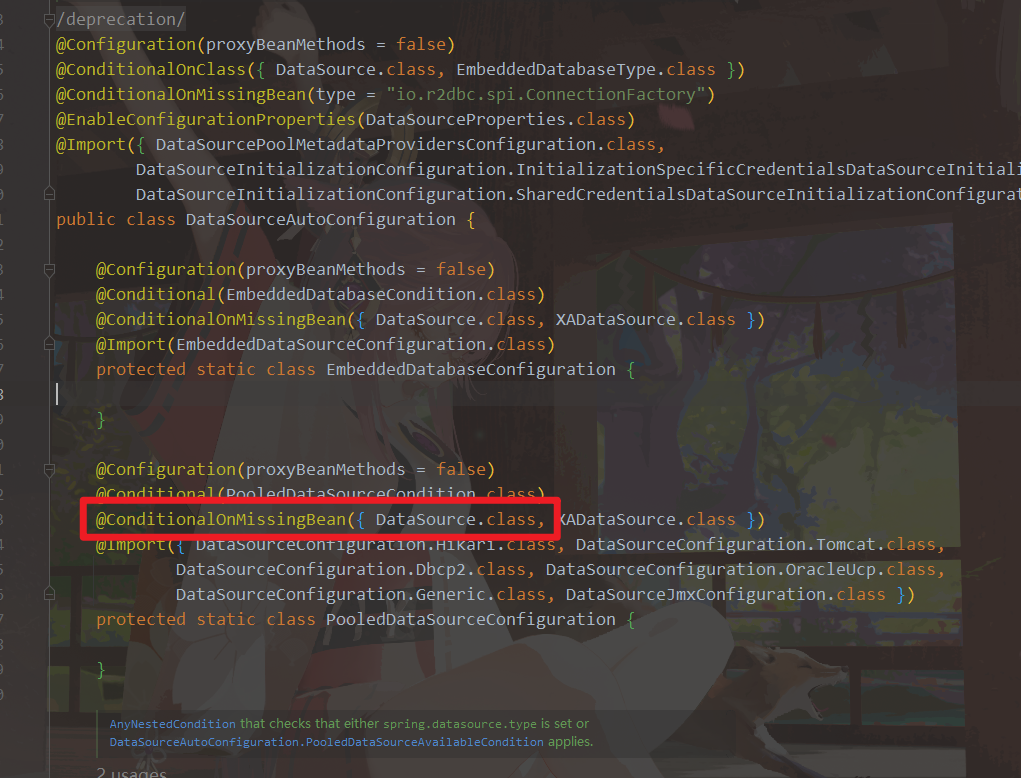
这个注解是当容器中没有DataSource类型的bean时,才执行下面的这个类,这个类上的@Import导入了DataSourceConfiguration.Hikari.class,springboot默认的数据池就是Hikari,到这里其实已经大概明白了,当前项目加载bean和外部扫出的bean执行顺序应该是不一样的,所以在项目中直接写没问题,抽出个starter就报错了


 浙公网安备 33010602011771号