Django学习案例一(blog):五. 开发主页(博客列表展示)
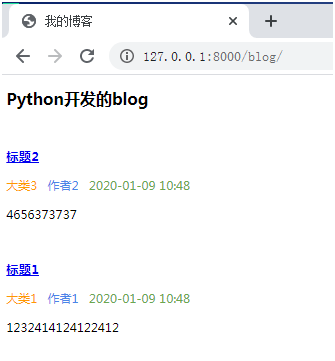
主页是一个“博客列表”页。博客要按发布时间的倒序来排列,每个博客都要包含标题、作者、分类、发布时间的显示(年-月-日 时:分)及节选的正文内容(前 100 个字)。点击单独的博客可以进入其详情页。
1. 建立视图
将数据库中的数据按需求中所需的发布时间的倒序取出,然后构造模板,最终将结果返回给用户。
编辑blog/views.py
from django.shortcuts import render
from .models import Blog, Comment
def get_blogs(request):
    blog_list=Blog.objects.all().order_by('-created')
    return render(request, 'blog-list.html', {'blogs':blog_list})
或
from django.shortcuts import render
from .models import Blog, Comment
def get_blogs(request):
    ctx = {
        'blogs': Blog.objects.all().order_by('-created')
    }
    return render(request, 'blog-list.html', ctx)
使用Django 的 ORM 对博客数据进行查询,并依发布时间的倒序进行排列,然后将结果集(一个 QuerySet 对象)放在一个字典对象 ctx 的 blogs 中。然后调用 render 方法来渲染模板,render第一个参数始终接收 request 对象,第二个参数是要渲染的模板文件,第三个参数则是可选的上下文参数。注意观察视图函数的入参,其第一个参数一定是 request 对象。
上面视图中用到模板文件blog-list.html,下面来建立。
2. 确定模板的位置
Myblog/settings中的TEMPLATES中修改模板路径
'DIRS': ['templates/'],
3. 建立首页模板blog-list.html
在项目根目录下新建templates 文件夹,里面新建一个blog-list.html 文件。
作为上下文传入的参数在模板中可以以变量的形式直接访问。这里对 blogs 进行了一次 for 迭代,然后为每一篇博客生成一个 div 容器供其展示。在 div 内部又通过变量属性的访问来获取诸如博客标题、分类名称、作者、正文和发布时间等内容。重点为for 循环:
{% for xx in xxs%}
HTML语句
{% endfor %}
博客标题以后是要做链接进入博客内容页面的,此处链接以”#”替代。
<!DOCTYPE html>
<html lang="en">
<head>
    <meta charset="UTF-8">
    <title>我的博客</title>
    <style>
            .blog {
    padding: 20px 0px;
            }
            .blog .info span {
    padding-right: 10px;
            }
            .blog .summary {
    padding-top: 20px;
            }
    </style>
</head>

<body>

    <div class="header">
    <h2>Python开发的blog</h2>
    </div>

    {% for blog in blogs %}
        <div class="blog">
        <div class="title">
        <a href="{#}"><h3>{{ blog.title }}</h3></a>
        </div>
        <div class="info">
        <span class="category" style="color: #ff9900;">{{ blog.category.name }}</span>
        <span class="author" style="color: #4a86e8">{{ blog.author }}</span>
        <span class="created" style="color: #6aa84f">{{ blog.created|date:"Y-m-d H:i" }}</span>
        </div>
        <div class="summary">
                    {{ blog.content|truncatewords:100 }}
        </div>
        </div>
    {% endfor %}

</body>
</html>
4. 修改路由myblog/urls.py
from django.contrib import admin

from django.urls import path

from blog.views import get_blogs

urlpatterns = [

    path('admin/', admin.site.urls),

    path('blog/',get_blogs,name='blog_get_blogs'),

]
5. 运行开发服务器
在manage.py所在的目录中执行命令:
python manage.py runserver
默认端口号8000,可在语句最后指定其他端口号。命令行窗口不能关闭。

 浙公网安备 33010602011771号