图文并茂手把手教你基于React+md多种方案调用OpenAI接口实现ChatGPT打字机效果
代码仓库
前期准备
- 前端项目
- 后端接口(OpenAI接口即可)
启动一个新的 React 项目
- 如果小伙伴们有现有项目,可跳过此步骤直接进入下一步~
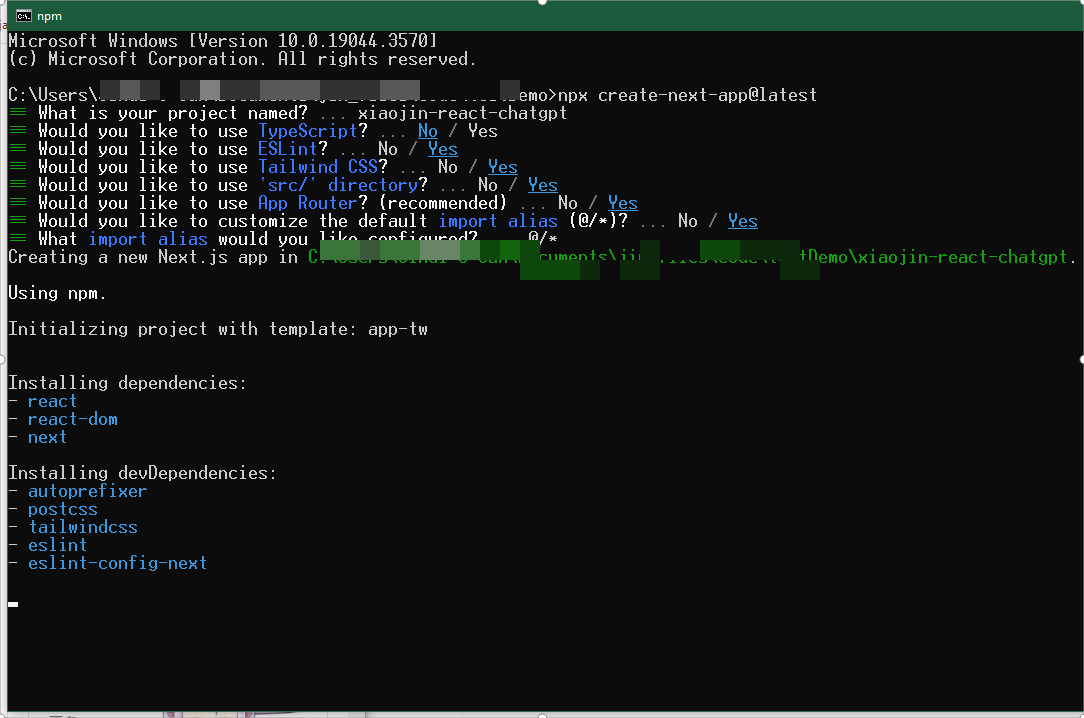
- Next.js 是一个全栈式的 React 框架。它用途广泛,可以让你创建任意规模的 React 应用——可以是静态博客,也可以是复杂的动态应用。要创建一个新的 Next.js 项目,请在你的终端运行:
npx create-next-app@latest
下载依赖
cd xiaojin-react-chatgpt

npm i
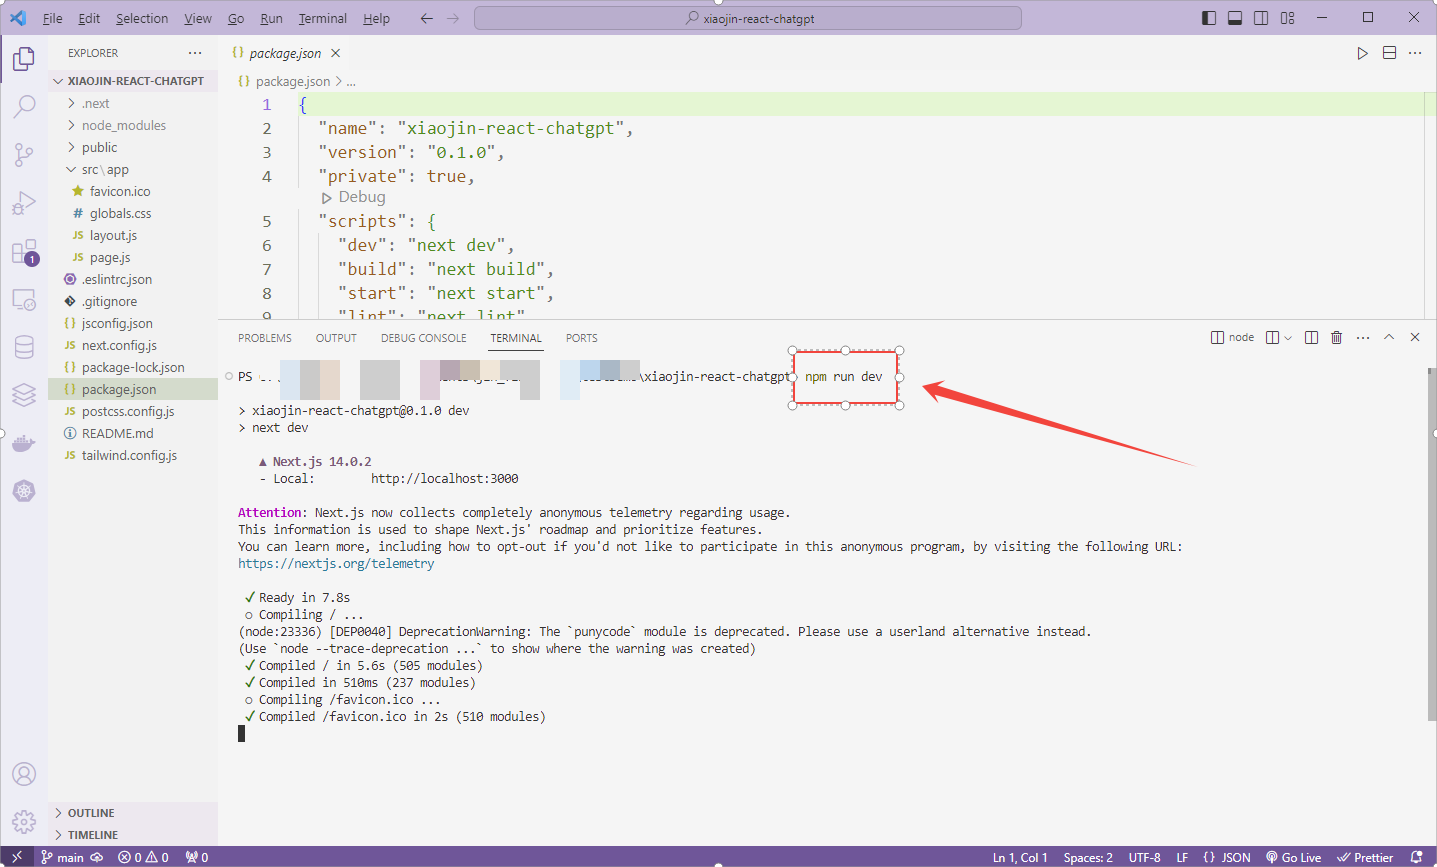
运行项目
npm run dev

引入 antd
安装并引入 antd
npm install antd --save
基础页面准备
- 我们先使用简单的代码来实现效果
- 修改src\app\page.js代码如下
"use client";
import { useState } from "react";
import { Input, Button } from "antd";

const { TextArea } = Input;
export default function Home() {
  let [outputValue, setOutputValue] = useState("");
  return (
    <main className="flex min-h-screen text-black flex-col items-center justify-between p-24">
      <h2>Chat GPT 打字机效果</h2>
      <TextArea rows={17} value={outputValue} />
      <Button>发送请求</Button>
    </main>
  );
}
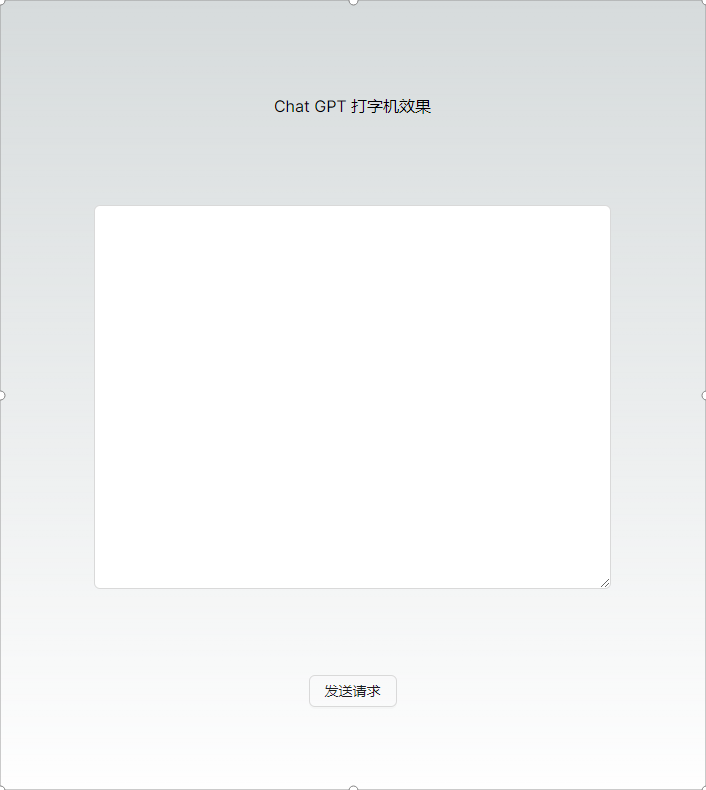
页面效果如下
接口准备
- 注册一个OpenAI账号(或者使用其他接口也可以)
接口文档示例
- 参考 OpenAI 中文文档
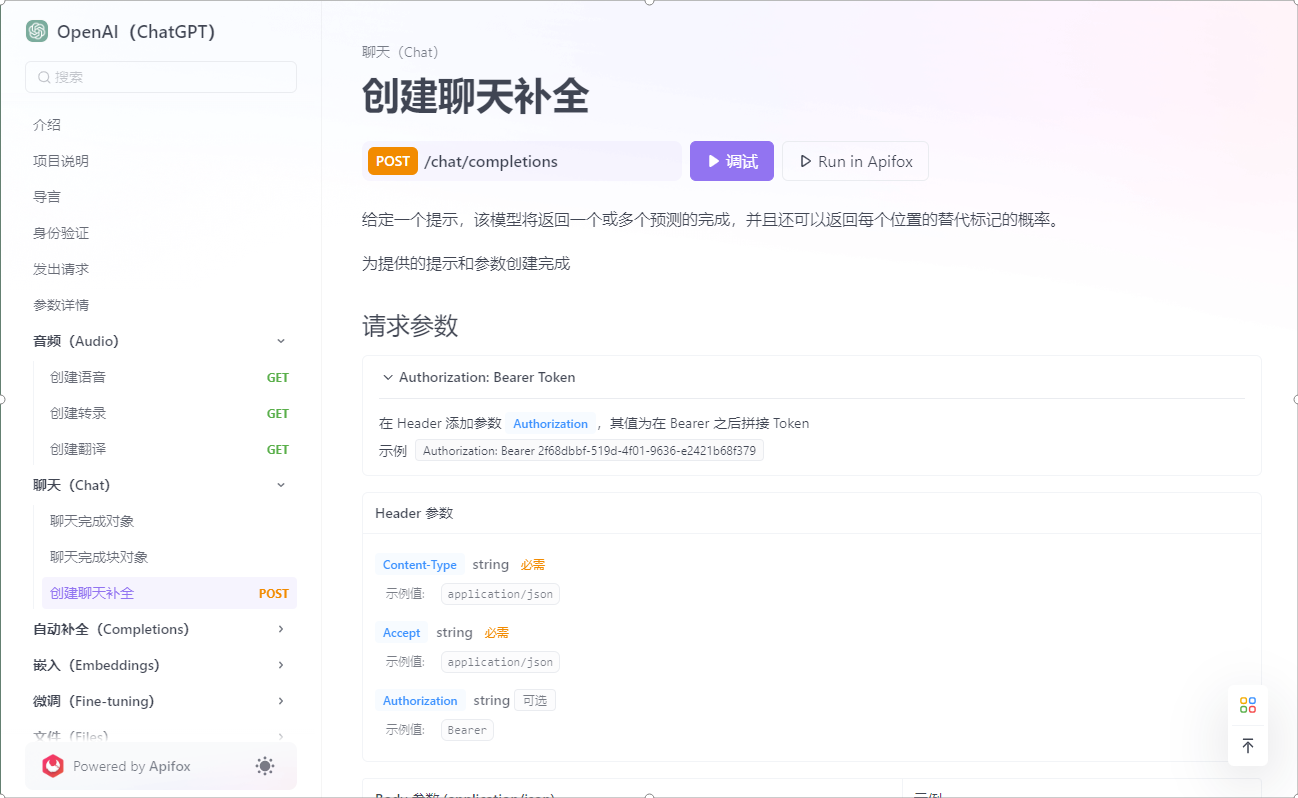
Chat聊天-聊天完成对象-请求参数说明
export interface RequestModel {
    /**
     * 默认为 0 -2.0 到 2.0 之间的数字。正值根据文本目前的存在频率惩罚新标记,降低模型重复相同行的可能性。  有关频率和存在惩罚的更多信息。
     */
    frequency_penalty?: number;
    /**
     * 修改指定标记出现在补全中的可能性。
     *
     * 接受一个 JSON 对象,该对象将标记(由标记器指定的标记 ID)映射到相关的偏差值(-100 到 100)。从数学上讲,偏差在对模型进行采样之前添加到模型生成的 logit
     * 中。确切效果因模型而异,但-1 和 1 之间的值应减少或增加相关标记的选择可能性;如-100 或 100 这样的值应导致相关标记的禁用或独占选择。
     */
    logit_bias?: null;
    /**
     * 默认为 inf
     * 在聊天补全中生成的最大标记数。
     *
     * 输入标记和生成标记的总长度受模型的上下文长度限制。计算标记的 Python 代码示例。
     */
    max_tokens?: number;
    /**
     * 至今为止对话所包含的消息列表。Python 代码示例。
     */
    messages: Message[];
    /**
     * 要使用的模型的 ID。有关哪些模型可与聊天 API 一起使用的详细信息,请参阅模型端点兼容性表。
     */
    model: string;
    /**
     * 默认为 1
     * 为每个输入消息生成多少个聊天补全选择。
     */
    n?: number;
    /**
     * -2.0 和 2.0 之间的数字。正值会根据到目前为止是否出现在文本中来惩罚新标记,从而增加模型谈论新主题的可能性。
     * [查看有关频率和存在惩罚的更多信息。](https://platform.openai.com/docs/api-reference/parameter-details)
     */
    presence_penalty?: number;
    /**
     * 指定模型必须输出的格式的对象。  将 { "type": "json_object" } 启用 JSON 模式,这可以确保模型生成的消息是有效的 JSON。  重要提示:使用
     * JSON 模式时,还必须通过系统或用户消息指示模型生成
     * JSON。如果不这样做,模型可能会生成无休止的空白流,直到生成达到令牌限制,从而导致延迟增加和请求“卡住”的外观。另请注意,如果
     * finish_reason="length",则消息内容可能会被部分切断,这表示生成超过了 max_tokens 或对话超过了最大上下文长度。  显示属性
     */
    response_format?: { [key: string]: any };
    /**
     * 此功能处于测试阶段。如果指定,我们的系统将尽最大努力确定性地进行采样,以便使用相同的种子和参数进行重复请求应返回相同的结果。不能保证确定性,您应该参考
     * system_fingerprint 响应参数来监控后端的更改。
     */
    seen?: number;
    /**
     * 默认为 null 最多 4 个序列,API 将停止进一步生成标记。
     */
    stop?: string;
    /**
     * 默认为 false 如果设置,则像在 ChatGPT 中一样会发送部分消息增量。标记将以仅数据的服务器发送事件的形式发送,这些事件在可用时,并在 data: [DONE]
     * 消息终止流。Python 代码示例。
     */
    stream?: boolean;
    /**
     * 使用什么采样温度,介于 0 和 2 之间。较高的值(如 0.8)将使输出更加随机,而较低的值(如 0.2)将使输出更加集中和确定。
     * 我们通常建议改变这个或`top_p`但不是两者。
     */
    temperature?: number;
    /**
     * 控制模型调用哪个函数(如果有的话)。none 表示模型不会调用函数,而是生成消息。auto 表示模型可以在生成消息和调用函数之间进行选择。通过 {"type":
     * "function", "function": {"name": "my_function"}} 强制模型调用该函数。  如果没有函数存在,默认为
     * none。如果有函数存在,默认为 auto。  显示可能的类型
     */
    tool_choice: { [key: string]: any };
    /**
     * 模型可以调用的一组工具列表。目前,只支持作为工具的函数。使用此功能来提供模型可以为之生成 JSON 输入的函数列表。
     */
    tools: string[];
    /**
     * 一种替代温度采样的方法,称为核采样,其中模型考虑具有 top_p 概率质量的标记的结果。所以 0.1 意味着只考虑构成前 10% 概率质量的标记。
     * 我们通常建议改变这个或`temperature`但不是两者。
     */
    top_p?: number;
    /**
     * 代表您的最终用户的唯一标识符,可以帮助 OpenAI
     * 监控和检测滥用行为。[了解更多](https://platform.openai.com/docs/guides/safety-best-practices/end-user-ids)。
     */
    user?: string;
    [property: string]: any;
}

export interface Message {
    content?: string;
    role?: string;
    [property: string]: any;
}
准备接口参数
 const data = {
      model: "XXX",
      messages: [
        {
          role: "user",
          content: "写一篇1000字关于春天的作文",
        },
      ],
      prompt: "写一篇1000字关于春天的作文",
      temperature: 0.75,
      stream: true,
    };
方案1:使用fetch来处理stream流实现打字机效果
使用流的方式处理 Fetch
-
Fetch API 允许你跨网络获取资源,它提供了现代化的 API 去替代 XHR。它有一系列的优点,真正好的是,浏览器最近增加了将 fetch 响应作为可读流使用的能力。
-
Request.body 和 Response.body 属性也是这样,它们将主体内容暴露作为一个可读流的 getter。
Chat聊天-聊天完成对象-接口返回参数说明
| 参数 | 类型 | 描述 |
|---|---|---|
| id | string | 聊天完成的唯一标识符 |
| choices | array | 聊天完成选项列表。如果n大于1,可以有多个选项 |
| created | integer | 创建聊天完成的Unix时间戳(秒) |
| model | string | 用于聊天完成的模型 |
| system_fingerprint | string | 该指纹表示模型运行的后端配置 |
| object | string | 对象类型,总是 chat.completion |
| usage | object | 完成请求的使用统计信息 |
| completion_tokens | integer | 生成的完成中的标记数 |
| prompt_tokens | integer | 提示中的标记数 |
| total_tokens | integer | 请求中使用的标记总数(提示 + 完成) |
调用代码示例
    const response = await fetch(url, {
      method: "POST",
      body: JSON.stringify(data),
      headers: {
        "Content-Type": "application/json",
      },
    });

    const reader = response.body.getReader();
    while (true) {
      const { done, value } = await reader.read();
      if (done) {
        console.log("***********************done");
        console.log(value);
        break;
      }
      console.log("--------------------value");
      console.log(value);
    }
- 在函数中,我们使用 response.body.getReader() 将 reader 锁定到该流,然后遵循我们之前看到的相同的模式——使用 reader 读取每个分块,在再次运行 read() 方法之前,检查 done 是否为 true,如果是 true,处理结束,如果是 false,读取下一个分块并且处理它。
- 通过循环获取传输的数据
编写页面逻辑代码
- 我们暂时使用固定参数来进行模拟
- 写一个简单的demo来演示
"use client";
import { useState } from "react";
import { Input, Button } from "antd";
const { TextArea } = Input;
export default function Home() {
  let [outputValue, setOutputValue] = useState("");
  const send = async () => {
    const url = "http://xxxxxx/v1/chat/completions";
    const data = {
      model: "chatglm2-6b",
      messages: [
        {
          role: "user",
          content: "写一篇1000字关于春天的作文",
        },
      ],
      prompt: "写一篇1000字关于春天的作文",
      temperature: 0.75,
      stream: true,
    };
    const response = await fetch(url, {
      method: "POST",
      body: JSON.stringify(data),
      headers: {
        "Content-Type": "application/json",
      },
    });

    const reader = response.body.getReader();
    while (true) {
      const { done, value } = await reader.read();
      if (done) {
        console.log("***********************done");
        console.log(value);
        break;
      }
      console.log("--------------------value");
      console.log(value);
    }
  };
  return (
    <main className="flex min-h-screen text-black flex-col items-center justify-between p-24">
      <h2>Chat GPT 打字机效果</h2>
      <TextArea rows={17} value={outputValue} />
      <Button onClick={send}>发送请求</Button>
    </main>
  );
}
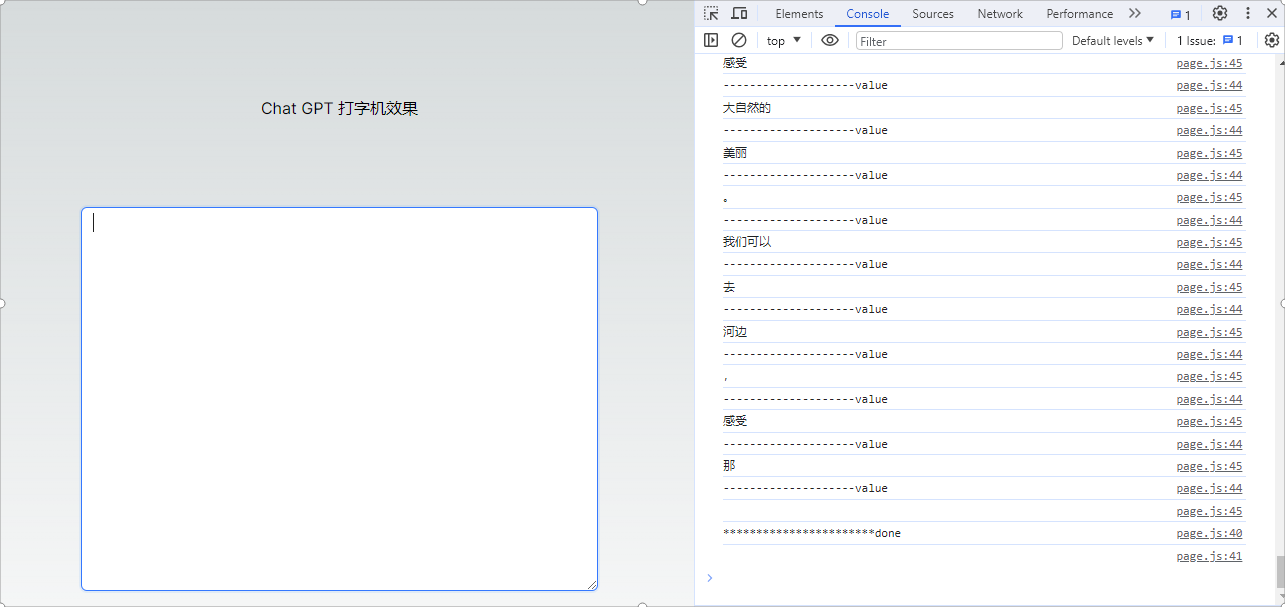
点击按钮查看打印结果

- 我们可以看到打印出来的都是buffer字符串,我们需要对其进行解析才可以得知最终结果
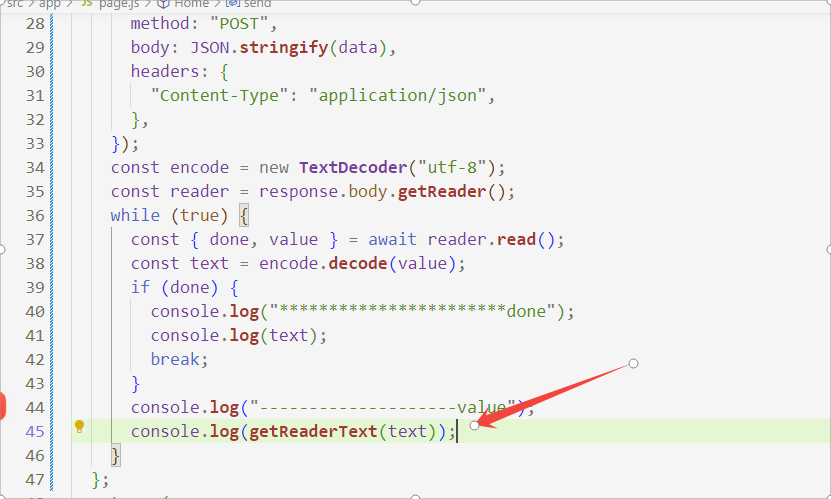
解析buffer

const encode = new TextDecoder("utf-8");
const reader = response.body.getReader();
 while (true) {
      const { done, value } = await reader.read();
      const text = encode.decode(value);
      if (done) {
        console.log("***********************done");
        console.log(text);
        break;
      }
      console.log("--------------------value");
      console.log(text);
    }
查看解析
我们可以看到解析结果格式如下

data: {"id": "chatcmpl-3zmRJUd4TTpm9xP9NbQVHw", "model": "chatglm2-6b", "choices": [{"index": 0, "delta": {"content": "希望"}, "finish_reason": null}]}
观察返回的数据
- 我们可以发现,返回的数据是一些字符串,而且每次个数不一致,但是数据结构是固定的,我们需要正则来进行解析,将每次返回的数据使用正则解析为一个数组,再合并起来字符串哦~~
- 如果其他小伙伴有更好的办法,欢迎留言哦~

使用正则解析数据
我们编写一个函数~~然后打印数据
 const getReaderText = (str) => {
    let matchStr = "";
    try {
      let result = str.match(/data:\s*({.*?})\s*\n/g);
      result.forEach((_) => {
        const matchStrItem = _.match(/data:\s*({.*?})\s*\n/)[1];
        const data = JSON.parse(matchStrItem);
        matchStr += data?.choices[0].delta?.content || '';
      });
    } catch (e) {
      console.log(e);
    }
    return matchStr;
  };
赋值数据到文本框
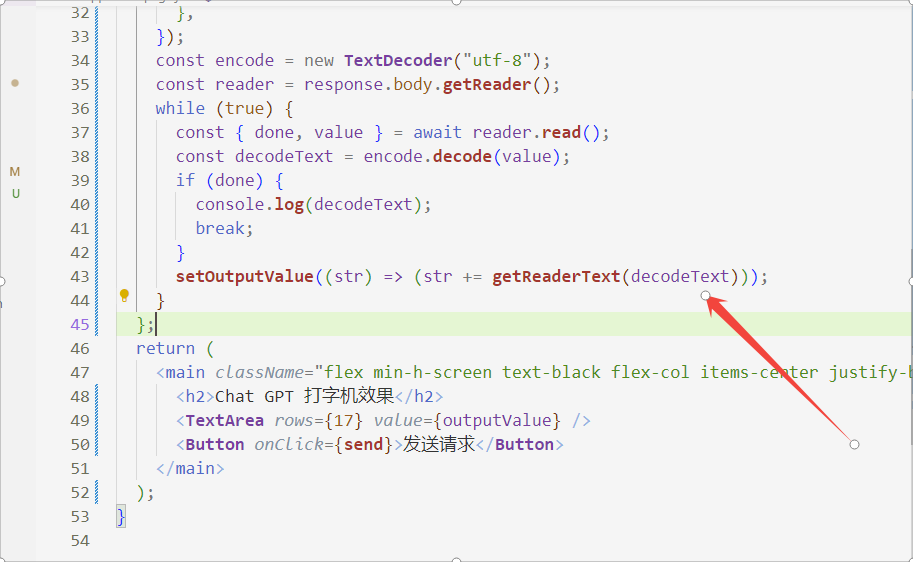
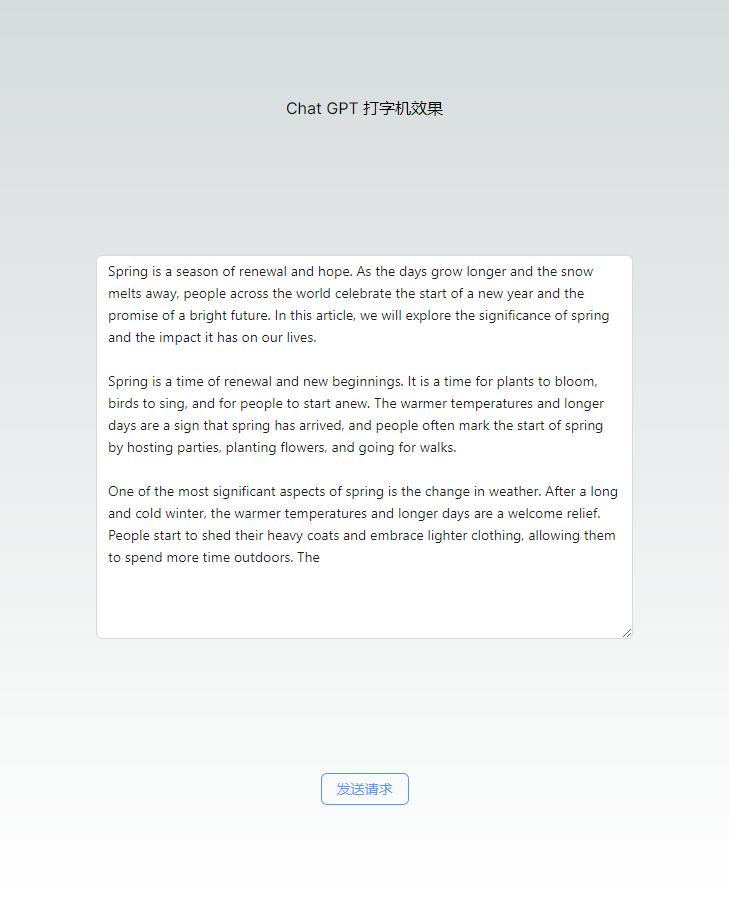
初步实现简易打字机效果

基础版本打字机效果代码(几乎无依赖)
"use client";
import { useState } from "react";
import { Input, Button } from "antd";
const { TextArea } = Input;
export default function Home() {
  let [outputValue, setOutputValue] = useState("");
  const getReaderText = (str) => {
    let matchStr = "";
    try {
      let result = str.match(/data:\s*({.*?})\s*\n/g);
      result.forEach((_) => {
        const matchStrItem = _.match(/data:\s*({.*?})\s*\n/)[1];
        const data = JSON.parse(matchStrItem);
        matchStr += data?.choices[0].delta?.content || "";
      });
    } catch (e) {
      console.log(e);
    }
    return matchStr;
  };

  const send = async () => {
    const url = "http://xxx.xxx.xxx.xxx:xxx/v1/chat/completions";
    const data = {
      model: "chatglm2-6b",
      messages: [
        {
          role: "user",
          content: "帮我写一篇2000字关于春天的英文文章",
        },
      ],
      temperature: 0.75,
      stream: true,
    };
    const response = await fetch(url, {
      method: "POST",
      body: JSON.stringify(data),
      headers: {
        "Content-Type": "application/json",
      },
    });
    const encode = new TextDecoder("utf-8");
    const reader = response.body.getReader();
    while (true) {
      const { done, value } = await reader.read();
      const decodeText = encode.decode(value);
      if (done) {
        console.log(decodeText);
        break;
      }
      setOutputValue((str) => (str += getReaderText(decodeText)));
    }
  };
  return (
    <main className="flex min-h-screen text-black flex-col items-center justify-between p-24">
      <h2>Chat GPT 打字机效果</h2>
      <TextArea rows={24} value={outputValue} />
      <Button onClick={send}>发送请求</Button>
    </main>
  );
}
自动滚动
import { useState } from "react";


const ref = useRef();

// 文本框赋值后添加:
ref.current &&
      (ref.current.resizableTextArea.textArea.scrollTop =
        ref.current.resizableTextArea.textArea.scrollHeight);
html
<TextArea rows={24} value={outputValue} ref={ref}/>

如果想要更慢的那种打字机效果呢?
- 因为一次解析出来多个字,所以有的时候看起来不是一个字一个字的那种,我们可以使用下面的方案来解决
- 解决思路:保存起来已经获取的数据字符串,将所有字符串进行切割,通过setTimeout设置50毫秒的时间间隔, 每隔50毫秒向dom中更新
- 下面仅仅只展示案例,不建议这么写哦,我最后是把这个代码去掉啦~~~
完整自定义速度打字机代码
"use client";
import { useState, useRef, useEffect } from "react";
import { Input, Button } from "antd";
import "./index.css";
const { TextArea } = Input;
let testDataString = "";
export default function Home() {
  const ref = useRef();
  let [outputValue, setOutputValue] = useState("");

  const getReaderText = (str) => {
    let matchStr = "";
    try {
      let result = str.match(/data:\s*({.*?})\s*\n/g);
      result &&
        result.forEach((_) => {
          const matchStrItem = _.match(/data:\s*({.*?})\s*\n/)[1];
          const data = JSON.parse(matchStrItem);
          matchStr += (data?.choices[0].delta?.content || '');
        });
    } catch (e) {
      console.log(e);
    }
    return matchStr;
  };
  const writing = (index) => {
    const data = testDataString.split("");
    if (index === 0 && data.length > 0) {
      setOutputValue(data[index]);
    }
    if (index < data.length - 1) {
      setOutputValue((str) => (str += data[index]));
    }
    ref.current &&
      (ref.current.resizableTextArea.textArea.scrollTop =
        ref.current.resizableTextArea.textArea.scrollHeight);
    setTimeout(writing, 100, ++index);
  };
  const send = async () => {
    setOutputValue("");
    const url = "http://xxx.xxx.xxx.xxx:xxx/v1/chat/completions";
    const data = {
      model: "chatglm2-6b",
      messages: [
        {
          role: "user",
          content: "hello",
        },
      ],
      temperature: 0.75,
      stream: true,
    };

    testDataString = "";
    const response = await fetch(url, {
      method: "POST",
      body: JSON.stringify(data),
      headers: {
        "Content-Type": "application/json",
      },
    });

    const encode = new TextDecoder("utf-8");
    const reader = response.body.getReader();
    while (true) {
      const { done, value } = await reader.read();
      const decodeText = encode.decode(value);
      if (testDataString.length === 0) {
        testDataString += getReaderText(decodeText);
        writing(0);
      } else {
        testDataString += getReaderText(decodeText);
      }
      if (done) {
        console.log(decodeText);
        break;
      }
    }
  };
  return (
    <main className="chat-container flex min-h-screen text-black flex-col items-center justify-between p-24">
      <h2>Chat GPT 打字机效果</h2>
      <TextArea rows={3} value={outputValue} ref={ref} />
      <Button onClick={send}>发送请求</Button>
    </main>
  );
}
代码块支持(待补充)
下载依赖
npm i @uiw/react-md-editor
添加关键代码
import MDEditor from '@uiw/react-md-editor';
html
<MDEditor.Markdown source={outputValue} className="markdown-body" ref={ref}/>
配置样式
- 我在网上随便搜索了一个样式案例,直接复制粘贴到项目里啦,大家可以参考一下哦~~
- 点击这里直达:github-markdown-css
查看效果

核心代码如下
"use client";
import { useState, useRef, useEffect } from "react";
import MDEditor from '@uiw/react-md-editor';
import { Input, Button } from "antd";
import "./index.css";
import './md.css'
const { TextArea } = Input;
let testDataString = "";
export default function Home() {
  const ref = useRef();
  let [outputValue, setOutputValue] = useState("");

  const getReaderText = (str) => {
    let matchStr = "";
    try {
      let resultList = str.match(/data:\s*({.*?})\s*\n/g);
      resultList &&
      resultList.forEach((_) => {
          const matchStrItem = _.match(/data:\s*({.*?})\s*\n/)[1];
          const data = JSON.parse(matchStrItem);
          matchStr += (data?.choices[0].delta?.content || '');
        });
    } catch (e) {
      console.log(e);
    }
    return matchStr;
  };

  const send = async () => {
    setOutputValue("");
    const url = "http://xxx.xxx.xxx.xxx:xxx/v1/chat/completions";
    const data = {
      model: "chatglm2-6b",
      messages: [
        {
          role: "user",
          content: "请实现一个登陆功能",
        },
      ],
      temperature: 0.75,
      stream: true,
    };

    testDataString = "";
    const response = await fetch(url, {
      method: "POST",
      body: JSON.stringify(data),
      headers: {
        "Content-Type": "application/json",
      },
    });

    const encode = new TextDecoder("utf-8");
    const reader = response.body.getReader();
    while (true) {
      const { done, value } = await reader.read();
      const decodeText = encode.decode(value);
      if (done) {
        console.log(decodeText);
        break;
      }
      setOutputValue((str) => (str += getReaderText(decodeText)));
      console.log(ref.current.mdp.current)
       ref.current &&
        (ref.current.mdp.current.scrollTop =
          ref.current.mdp.current.scrollHeight);
    }
  };
  return (
    <main className="chat-container flex min-h-screen text-black flex-col items-center justify-between ">
      <h1>Chat GPT 打字机效果</h1>
      <MDEditor.Markdown source={outputValue}  className="markdown-body" ref={ref}/>
      <Button onClick={send}>发送请求</Button>
    </main>
  );
}
方案2:axios请求方式(该方式不适用于浏览器端,可以用在nodejs代码中)
- 在浏览器端调用axios stream 类型 请求的时候,使用 XMLHttpRequest 对象来实现请求,XMLHttpRequestResponseType类型不支持stream,会报如下警告:
The provided value 'stream' is not a valid enum value of type XMLHttpRequestResponseType.
nodejs中使用axios stream调用OpenAI完整案例
接下来给大家演示axios的写法
const axios = require("axios");
let testDataString = "";
const getReaderText = (str) => {
  let matchStr = "";
  try {
    let resultList = str.match(/data:\s*({.*?})\s*\n/g);
    resultList &&
      resultList.forEach((_) => {
        const matchStrItem = _.match(/data:\s*({.*?})\s*\n/)[1];
        const data = JSON.parse(matchStrItem);
        matchStr += data?.choices[0].delta?.content || "";
      });
  } catch (e) {
    console.log(e);
  }
  return matchStr;
};
const url = "http://10.169.112.194:7100/v1/chat/completions";
const data = {
  model: "chatglm2-6b",
  messages: [
    {
      role: "user",
      content: "请实现一个登陆功能",
    },
  ],
  temperature: 0.75,
  stream: true,
};
const encode = new TextDecoder("utf-8");
axios
  .post(url, data, {
    responseType: "stream",
    headers: { "Content-Type": "application/json" },
  })
  .then((response) => {
    response.data.on("data", (value) => {
      const currentString = getReaderText(encode.decode(value));
      testDataString += currentString;
      console.log(currentString);
    });
    response.data.on("end", () => {
      console.log(testDataString);
    });
  });
调用效果

今天就写到这里啦~
- 小伙伴们,( ̄ω ̄( ̄ω ̄〃 ( ̄ω ̄〃)ゝ我们明天再见啦~~
- 大家要天天开心哦
欢迎大家指出文章需要改正之处~
学无止境,合作共赢


 浙公网安备 33010602011771号