[Win 8/WP 8]简单实现弹出页更换头像的功能
在Win 8应用里,对弹出页(Popup)的灵活操作必不可少,下面我们就来简单实现一个。
一、先让Popup弹出到指定位置
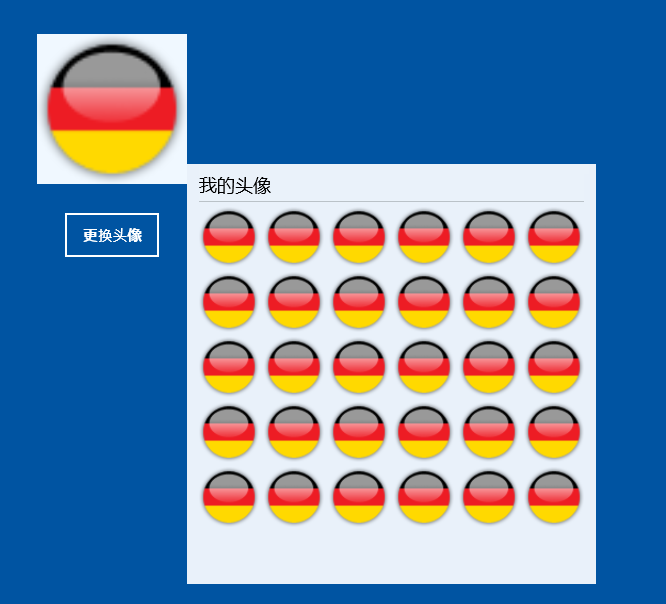
先来看看效果图,如图[1]:

下面是前端代码,代码段[1]:

1  <Grid Background="#0054a2">
2         <Border Background="AliceBlue" Margin="40,40,1126,528" Width="150" Height="150">
3             <Image x:Name="Img" Width="150" Height="150"/>
4         </Border>
5         <Button Margin="90,241,0,477" Content="更换头像" Width="100" Height="50" Click="Button_Click"></Button>
6  </Grid>
接着是后台代码,代码段[2]:

 1  private Popup headPopup;
 2
 3  private void Button_Click(object sender, RoutedEventArgs e)
 4  {
 5      if (headPopup != null)
 6      {
 7          headPopup.IsOpen = !headPopup.IsOpen;
 8      }
 9      else
10      {
11          headPopup = new Popup();
12          //给headPopup添加内容
13          HeadControl headControl = new HeadControl();
14          headPopup.Child = headControl;
15          //确定headPopup的弹出位置
16          Rect imgRect = new Rect(new Point(0, 0), new Size(0, 0));
17          GeneralTransform transform = this.Img.TransformToVisual(this);
18          imgRect = transform.TransformBounds(imgRect);
19          headPopup.HorizontalOffset = imgRect.Left + 150;
20          headPopup.VerticalOffset = imgRect.Bottom + 130;
21          //弹出Popup
22          headPopup.IsOpen = true;
23      }
24  }
这里比较有趣的是确定Popup的弹出位置,我们是想在头像框的右下角弹出它。代码的具体实现方式是:通过控件Img的TransformToVisual方法获得一个通用的变换对象,这个变换对象可以把控件(也就是Img)变换成控件所对应的可视化图形,比如这里的Img就可以变换成一个矩形,通过这个矩形的属性我们就可以获得页面中控件Img各个边框的水平或者垂直位移,进而可以帮助我们确定Popup的位置。
二、弹出框中显示和选定头像
上文中已经给Popup设定了子控件HeadControl,我们将在HeadControl里填充要显示的内容。这里有两个选择:
1、在HeadControl中添加WebView控件,通过内嵌html页面来实现。
2、在HeadControl中添加普通的Gridiew控件,用传统的方式绑定图片来显示。
这里我们选择第一种方式,很显然,html页面可以更灵活的控制页面的样式,有助于我们做出更cool的应用!
下面为HeadControl控件的前端代码,代码段[3]:

1  <Grid HorizontalAlignment="Left" VerticalAlignment="Top" Background="#FFFFFFFF">
2         <WebView x:Name="wvHead" HorizontalAlignment="Left" VerticalAlignment="Top"  Margin="0,0,0,-250"
3                     Height="420" Width="409"
4                     LoadCompleted="wvHead_LoadCompleted" ScriptNotify="wvHead_ScriptNotify" />
5  </Grid>
代码中我们为WebView控件添加了LoadCompleted事件和ScriptNotify事件。还有个未列出的HeadControl的Loaded事件。其中:
Loaded事件(HeadControl):当加载HeadControl控件时发生。如代码段[4]:

1   private void UserControl_Loaded(object sender, RoutedEventArgs e)
2   {
3       //WebView加载指定的head.html页面
4       this.wvHead.Navigate(new Uri("ms-appx-web:///Assets/head.html"));
5   }
LoadCompleted事件(WebView):在WebView加载完成时发生。这里用来调用head.html中的js代码来给head.html页面写入内容,如代码段[5]:

 1   private void wvHead_LoadCompleted(object sender, NavigationEventArgs e)
 2   {
 3       //构造html,用来显示头像。
 4       StringBuilder sbSystem = new StringBuilder();
 5       string systemImg = "<li><img style=\"width:60px;height:60px;\" src=\"{0}\" onclick='FaceImageClick(\"{0}\")' alt=\"\" title=\"\"/></li>";
 6       string systemImg6 = "<li style=\"margin-right:0;\"><img style=\"width:60px;height:60px;\" src=\"{0}\" onclick='FaceImageClick(\"{0}\")' alt=\"\" title=\"\"/></li>";
 7       //加载记录有头像信息的xml
 8       var xml = XDocument.Load("Assets/Portraits/Portraits.xml");
 9       int syscount = 0;
10       foreach (var ele in xml.Root.Elements("Portraits").Elements("file"))
11       {
12           syscount++;
13           //每行放6个,第一个跟其他几个样式不太一样,单独处理。
14           if (syscount % 6 == 0)
15           {
16               sbSystem.Append(string.Format(systemImg6, "/Assets/Portraits/" + ele.Attribute("name").Value));
17           }
18           else
19           {
20               sbSystem.Append(string.Format(systemImg, "/Assets/Portraits/" + ele.Attribute("name").Value));
21           }
22       }
23       //调用head.html中的js方法将构造好的字符串写入。
24       wvHead.InvokeScript("WriteSystemHtml", new string[] { sbSystem.ToString() });
25   }
ScriptNotify事件(WebView):当包含在WebView中的内容使用JavaScript给应用程序传递字符串时发生。这里用来当head.html中图片的onclick被触发时通知后台代码哪个图片被点击了,以便于后台代码响应相应的事件。如代码段[6]:

 1   public event EventHandler SelectEvent;
 2
 3   private void wvHead_ScriptNotify(object sender, NotifyEventArgs e)
 4   {
 5       if (!string.IsNullOrEmpty(e.Value))
 6       {
 7           if (SelectEvent != null)
 8               SelectEvent(e.Value, null);
 9       }
10   }
有人会有疑问,上面的SelectEvent在什么时候绑定方法呢?当然是在初始化HeadControl控件时,也就是在代码段[2]中加上:
1  headControl.SelectEvent += inputInfo;
2
3  private async void inputInfo(object sender, EventArgs e)
4  {
5      //设置Image控件图像的源
6      this.Img.Source = new BitmapImage(new Uri("ms-appx://" + sender, UriKind.RelativeOrAbsolute));
7  }
注意:其实上面几个事件的关键点在于后台c#与html中的JavaScript的交互,掌握了这点,其他的就不是问题了!
下面就来看看head.html里的具体实现吧,代码段[7]:
 1  <script type="text/javascript">
 2         var $ = function (id) { return (typeof id == 'string') ? document.getElementById(id) : id; }
 3         //设置id为systempic的div的显示内容。
 4         var WriteSystemHtml = function (str) {
 5             $("systempic").focus();
 6             $("systempic").innerHTML = str;
 7         }
 8         var FaceImageClick = function (facePath) {
 9             //通知应用程序,向应用程序传递字符串。
10             window.external.notify(facePath);
11         }
12  </script>
来看看最后的效果图吧! 图[2]:

没错,我是一名德国球迷!哈哈。 html页面可以更生动的展现,就看你自己的需求了。


 浙公网安备 33010602011771号