
-
elasticsearch集群正确关闭、重启方式
问题原因:
在elasticsearch集群中,当集群发现某个节点关闭时,将延迟一分钟后(默认)再开始将该节点上的分片复制到集群中的其他节点,这可能涉及很多I / O。由于该节点不久将要重新启动,因此该I / O是不必要的。您可以通过在关闭节点之前禁用副本分配来避免。
正确关闭方式:
第一步:
禁止分片自动分布
curl -X PUT "localhost:9200/_cluster/settings?pretty" -H 'Content-Type: application/json' -d'
{
  "persistent": {
    "cluster.routing.allocation.enable": "primaries"
  }
}
'
第二部:
执行同步刷新
curl -X POST "localhost:9200/_flush/synced?pretty"
注意:
执行同步刷新时,请检查响应以确保没有失败。尽管请求本身仍返回200 OK状态,但在响应正文中列出了由于挂起索引操作而失败的同步刷新操作。如果失败,请重新发出请求。
第三部:
关闭所有节点
如果您使用以下命令运行Elasticsearch systemd:
sudo systemctl stop elasticsearch.service

如果您正在使用SysV运行Elasticsearch init:
sudo -i service elasticsearch stop

如果您将Elasticsearch作为守护程序运行:
kill $(cat pid.txt)
关闭结束后可以执行你任何的更改
正确重启方式:
第一步:
执行完操作后逐个启动节点
cd $ES_HOME
./bin/elasticsearch -d -p $ES_HOME/pid.txt
第二步:
等所有节点启动完成后,可以通过执行如下请求查看集群状态:
curl -X GET "localhost:9200/_cat/health?pretty"
curl -X GET "localhost:9200/_cat/nodes?pretty"
状态分别有:red,yellow,green。
当节点加入集群时,它开始恢复本地存储的所有主分片。该_cat/healthAPI最初将报告status中red,表明并非所有的初级碎片已被分配。一旦节点恢复了其本地分片,集群status就会切换到 yellow,表示所有主分片都已恢复,但并非所有副本分片都已分配。这是可以预期的,因为您尚未重新启用分配。将副本的分配延迟到所有节点都yellow可用之后,主服务器便可以将副本分配给已经具有本地分片副本的节点。
第三步:
启用分片自动分布
当所有节点都已加入集群并恢复了其主要分片后,可通过恢复cluster.routing.allocation.enable为其默认值来重新启用分配:
curl -X PUT "localhost:9200/_cluster/settings?pretty" -H 'Content-Type: application/json' -d'
{
  "persistent": {
    "cluster.routing.allocation.enable": null
  }
}
'
重新启用分配后,集群便开始将副本分片分配给数据节点。此时,恢复索引和搜索是安全的,但是如果您可以等待直到成功分配了所有主分片和副本分片并且所有节点的状态为,集群就会恢复得更快green。
您可以使用_cat/health和 _cat/recoveryAPI 监视进度
curl -X GET "localhost:9200/_cat/health?pretty"
curl -X GET "localhost:9200/_cat/recovery?pretty"
-
备份与删除
配置文件elasticsearch.yml
在配置文件config/elasticsearch.yml 中添加一行数据,设置ES备份的快照数据存储路径。如果没有此目录则须要自行建立。配置好后,须要重启ES
path.repo: ["/app/es_backup"]建立仓库
curl -X PUT http://IP:9200/_snapshot/es_backup -H 'Content-Type: application/json' -d'
{
"type": "fs",
"settings": {
"location": "/app/es_backup"
}
}'
备份数据
curl -X PUT http://IP:9200/_snapshot/es_backup/2022.06 -H 'Content-Type: application/json' -d'
{
"indices": "<k8s-node*-2022.06*>",
"ignore_unavailable": true,
"include_global_state": false
}'
删除数据
恢复数据
curl -X POST http://ES的ip:端口/_snapshot/es_backup/2022.06/_restore
- 查看备份是否完成
http://IP:9200/_cat/snapshots/es_backup
-
在线修改配置
curl -X PUT "IP:9200/_cluster/settings?pretty" -H 'Content-Type: application/json' -d'
{
"persistent": {
"cluster": {
"routing": {
"allocation.disk.watermark.high": "95%",
"allocation.disk.watermark.low": "90%"
}
}
}
}'
注意:根据官方文件,当硬盘空间使用超过80%,es写入可能会有问题,所以要及时关注硬盘空间。上面是修改配置,硬盘空间超过90%,es才报警,95%则无法写入
定时任务删除数据脚本
 1 # cat es-dele-indices.sh
 2 #!/bin/bash
 3 #delete elasticsearch indices
 4 searchIndex=fluentd-k8s
 5 elastic_url=127.0.0.1
 6 elastic_port=
 7
 8 date2stamp(){
 9   date --utc --date "$1" +%s
10 }
11
12 dateDiff(){
13   case $ in
14     -s)  sec=;     shift;;
15     -m)  sec=;    shift;;
16     -h)  sec=;  shift;;
17     -d)  sec=; shift;;
18      *)  sec=; shift;;
19   esac
20   dte1=$(date2stamp $)
21   dte2=$(date2stamp $)
22   diffSec=$((dte2-dte1))
23   if ((diffSec < )); then abs=-; else abs=; fi
24   echo $((diffSec/sec*abs))
25 }
26
27 for index in $(curl -s "${elastic_url}:${elastic_port}/_cat/indices?v" | grep -E " ${searchIndex}-20[0-9][0-9]\.[0-1][0-9]\.[0-3][0-9]" | awk '{     print $3 }');do
28   date=$(echo ${index: -}|sed 's/\./-/g')
29   cond=$(date +%Y-%m-%d)
30   diff=$(dateDiff -d $date $cond)
31   echo -n "${index} (${diff})"
32   if [ $diff -gt  ]; then
33     #echo "/ DELETE"
34     curl -XDELETE "${elastic_url}:${elastic_port}/${index}?pretty"
35   else
36     echo ""
37   fi
38 done
-
es查看
-
删除备份:curl -X DELETE "IP:9200/_snapshot/es_backup/2022.06
- 终止备份:curl -X POST "IP:9200/_snapshot/es_backup/2022.06/_cancel"
- 查看所有备份:http://IP:9200/_snapshot/es_backup/_all
- 查看健康状态:curl -X GET "IP:9200/_cat/health?pretty"
- 查看节点:curl -X GET "IP :9200/_cat/nodes?pretty"
- 查看indices:curl -X GET "IP ::9200/_cat/indices/k8s-node*2022.07*"
- 查看index.highlight.max_analyzed_offset配置:curl -X GET http://IP:9200/_settings/index.highlight.max_analyzed_offset
- 在线修改index.highlight.max_analyzed_offset配置
curl -X PUT "http://IP:9200/_settings" -H 'Content-Type: application/json' -d' {

"index" : {

"highlight.max_analyzed_offset" : 100000000

}

}'
或者在config/elasticsearch.yml文件中增加 index.highlight.max_analyzed_offset: <new_value>,然后重启elasticsearch
最后http://IP:9200/_settings/index.highlight.max_analyzed_offset,查看修改结果
- 查看索引同步异常原因
curl -X GET IP:9200/_cluster/allocation/explain
查看索引状态
curl -X GET IP:9200/_cat/shards?h=index,shard,prirep,state,unassigned.reason
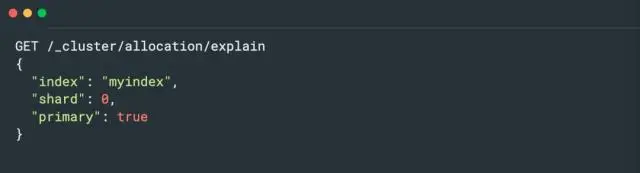
对于集群 RED 或 YELLOW 的问题诊断推荐使用 Cluster Allocation Explain API,该 API 可以给出造成分片未分配的具体原因。例如,如下请求可以返回第一个未分配的分片的具体原因:

也可以只查看特定分片未分配的原因:
在Elasticsearch中,/_cluster/reroute?retry_failed=true命令用于重新路由集群中的分片。当Elasticsearch集群中的某些分片无法分配时,可以使用此命令来重新分配这些分片。
通过将retry_failed参数设置为true,Elasticsearch将尝试重新分配之前失败的分片。这可能会涉及将分片从一个节点移动到另一个节点,以平衡集群中的资源。
请注意,执行此命令可能需要管理员权限。另外,重新路由分片可能会对集群的性能和稳定性产生一定的影响,因此请谨慎使用。
curl -X POST "10.129.203.10:9200/_cluster/reroute?retry_failed=true"
- 副本设置
-
先将现有的index的副本数量为0个
此步骤是为了解决现有的索引副本数。
PUT */_settings { "index" : { "number_of_replicas" : 0 } } -
创建模板匹配所有index,并设置副本数量为0
此步骤是为了解决新增的索引副本数PUT _template/template_log
{
"order": 0,
"template": "*",
"settings": {
"index": {
"number_of_replicas": "0",
"refresh_interval": "30s"
}
},
"mappings": {},
"aliases": {}
}
