SpringMvc 有关 Restful 接口开发和调用总结
具体什么是 Restful ,可以查询一下百度百科,简单的理解就是根据 Http 的请求方式(Get、Post、Put、Delete)来决定处理方式。Restful 的优点主要在于请求地址书写简化,隐藏资源的访问和数据发送细节,对网站有一定的保护作用。
Restful 在实际应用场景中多用于开发接口,大家习惯的约定为: Get 请求用于查询,Post 请求用于添加,Put 请求用于修改,Delete 请求用于删除。但是这仅仅是约定而已,并不是必须要遵守的规范,可以随意打破。比如我个人就是喜欢使用 Post 请求开发所有接口(增删改查),这也是可以的。
本篇博客主要通过代码的方式演示 SpringMvc 如何开发 Restful 接口,页面如何采用 form 表单调用 Restful 接口,页面如果通过 ajax 请求异步调用 Restful 接口。在本篇博客的最后会提供 Demo 的源代码下载。
一、搭建工程
新建一个 maven 项目,导入相关 jar 包,我所导入的 jar 包都是最新的,内容如下:
有关具体的 jar 包地址,可以在 https://mvnrepository.com 上进行查询。
<dependencies>
    <!--导入 servlet 相关的 jar 包-->
    <dependency>
        <groupId>javax.servlet</groupId>
        <artifactId>javax.servlet-api</artifactId>
        <version>4.0.1</version>
        <scope>provided</scope>
    </dependency>
    <dependency>
        <groupId>javax.servlet.jsp</groupId>
        <artifactId>jsp-api</artifactId>
        <version>2.2</version>
        <scope>provided</scope>
    </dependency>

    <!--导入 Spring 核心 jar 包-->
    <dependency>
        <groupId>org.springframework</groupId>
        <artifactId>spring-context</artifactId>
        <version>5.3.18</version>
    </dependency>
    <!--导入 SpringMvc 的 jar 包-->
    <dependency>
        <groupId>org.springframework</groupId>
        <artifactId>spring-webmvc</artifactId>
        <version>5.3.18</version>
    </dependency>

    <!--导入 jackson 相关的 jar 包-->
    <dependency>
        <groupId>com.fasterxml.jackson.core</groupId>
        <artifactId>jackson-databind</artifactId>
        <version>2.13.1</version>
    </dependency>
</dependencies>
配置好引用的 jar 包后,打开右侧的 Maven 窗口,刷新一下,这样 Maven 会自动下载所需的 jar 包文件。
搭建好的项目工程整体目录比较简单,具体如下图所示:
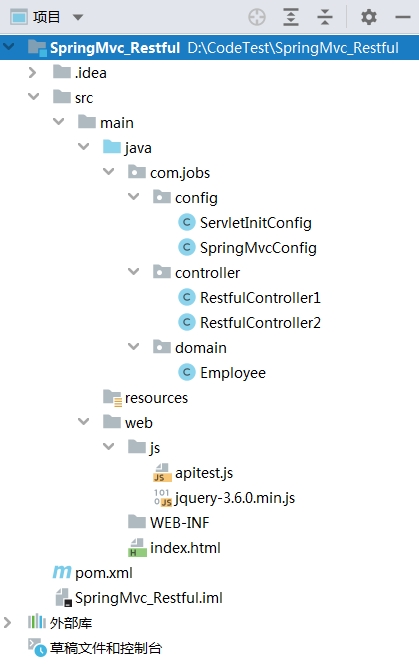
com.jobs.config 包下存储的是 SpringMvc 的配置文件和 Servlet 的初始化文件
com.jobs.controller 包下存储的是用于提供 api 接口的类
com.jobs.domain 包下存储的是 JavaBean 实体类
web 目录下放置的是网站文件,只有一个静态页面和一些 js 文件
二、SpringMvc 配置相关
com.jobs.config 下的 SpringMvcConfig 类是 SpringMvc 的配置类,具体内容如下:
package com.jobs.config;

import org.springframework.context.annotation.Bean;
import org.springframework.context.annotation.ComponentScan;
import org.springframework.context.annotation.Configuration;
import org.springframework.context.annotation.FilterType;
import org.springframework.http.MediaType;
import org.springframework.http.converter.HttpMessageConverter;
import org.springframework.http.converter.StringHttpMessageConverter;
import org.springframework.http.converter.json.MappingJackson2HttpMessageConverter;
import org.springframework.stereotype.Controller;
import org.springframework.web.servlet.config.annotation.*;
import org.springframework.web.servlet.view.InternalResourceViewResolver;
import org.springframework.web.servlet.view.JstlView;

import java.nio.charset.Charset;
import java.util.ArrayList;
import java.util.List;

@Configuration
@ComponentScan("com.jobs")
//启用 mvc 功能,配置了该注解之后,SpringMvc 拦截器放行相关资源的设置,才会生效
@EnableWebMvc
public class SpringMvcConfig implements WebMvcConfigurer {

    //配置 SpringMvc 连接器放行常用资源的格式(图片,js,css)
    @Override
    public void configureDefaultServletHandling(DefaultServletHandlerConfigurer configurer) {
        configurer.enable();
    }

    //配置响应数据格式所对应的数据处理转换器
    @Override
    public void configureMessageConverters(List<HttpMessageConverter<?>> converters) {

        //如果响应的是 application/json ,则使用 jackson 转换器进行自动处理
        MappingJackson2HttpMessageConverter jsonConverter =
                        new MappingJackson2HttpMessageConverter();
        jsonConverter.setDefaultCharset(Charset.forName("UTF-8"));
        List<MediaType> typelist1 = new ArrayList<>();
        typelist1.add(MediaType.APPLICATION_JSON);
        jsonConverter.setSupportedMediaTypes(typelist1);
        converters.add(jsonConverter);

        //如果响应的是 text/html 和 text/plain ,则使用字符串文本转换器自动处理
        StringHttpMessageConverter stringConverter = new StringHttpMessageConverter();
        stringConverter.setDefaultCharset(Charset.forName("UTF-8"));
        List<MediaType> typelist2 = new ArrayList<>();
        typelist2.add(MediaType.TEXT_HTML);
        typelist2.add(MediaType.TEXT_PLAIN);
        stringConverter.setSupportedMediaTypes(typelist2);
        converters.add(stringConverter);
    }

    //注解配置 SpringMvc 返回配置的字符串所表示的页面,从哪些去找
    //可以注释掉下面的方法,这样需要在 SpringMvc 方法返回时,指定全局路径的页面地址
    //这里配置的是:根据 SpringMvc 方法返回的字符串,到 /WEB-INF/pages/ 下找对应名称的 jsp 页面
    @Bean
    public InternalResourceViewResolver getViewResolver() {
        InternalResourceViewResolver viewResolver = new InternalResourceViewResolver();
        viewResolver.setPrefix("/WEB-INF/pages/");
        viewResolver.setSuffix(".jsp");
        //如果页面需要使用JSTL标签库的话
        //viewResolver.setViewClass(JstlView.class);
        return viewResolver;
    }
}
ServletInitConfig 类初始化 Servlet 容器,装载 SpringMvc 的配置,具体如下:
package com.jobs.config;

import org.springframework.web.context.WebApplicationContext;
import org.springframework.web.context.support.AnnotationConfigWebApplicationContext;
import org.springframework.web.filter.CharacterEncodingFilter;
import org.springframework.web.filter.HiddenHttpMethodFilter;
import org.springframework.web.servlet.support.AbstractDispatcherServletInitializer;

import javax.servlet.*;
import java.util.EnumSet;

public class ServletInitConfig extends AbstractDispatcherServletInitializer {

    //初始化 Servlet 容器,加载 SpringMvc 配置类
    //创建 web 专用的 Spring 容器对象:WebApplicationContext
    @Override
    protected WebApplicationContext createServletApplicationContext() {
        AnnotationConfigWebApplicationContext cwa = new AnnotationConfigWebApplicationContext();
        cwa.register(SpringMvcConfig.class);
        return cwa;
    }

    //注解配置 SpringMvc 的 DispatcherServlet 拦截地址,拦截所有请求
    @Override
    protected String[] getServletMappings() {
        return new String[]{"/"};
    }

    @Override
    protected WebApplicationContext createRootApplicationContext() {
        return null;
    }

    //添加过滤器
    @Override
    protected Filter[] getServletFilters() {
        //采用 utf-8 作为统一请求的编码
        CharacterEncodingFilter characterEncodingFilter = new CharacterEncodingFilter();
        characterEncodingFilter.setEncoding("UTF-8");

        //该过滤器,能够让 web 页面通过 _method 参数将 Post 请求转换为 Put、Delete 等请求
        HiddenHttpMethodFilter hiddenHttpMethodFilter = new HiddenHttpMethodFilter();
        return new Filter[]{characterEncodingFilter, hiddenHttpMethodFilter};
    }
}
需要注意的是:这里换了一种添加过滤器的方式(重写了 getServletFilters 方法),在该方法中添加了两个过滤器(统一请求编码设置过滤器,以及允许将 Post 请求转化为 Put、Delete 等请求的过滤器),其中这个过滤器:【允许将 Post 请求转化为 Put、Delete 等请求】很重要,它是页面发起 Restful 请求调用接口的基础条件。
三、接口开发介绍
还是首选介绍一下 domian 下的 Employee 实体类,具体内容如下:
package com.jobs.domain;

import java.io.Serializable;
import java.util.List;

public class Employee implements Serializable {

    //姓名
    private String name;
    //年龄
    private Integer age;

    public Employee() {
    }

    public Employee(String name, Integer age) {
        this.name = name;
        this.age = age;
    }

    //这里省略了相关字段的 get 和 set 方法...

    @Override
    public String toString() {
        return "Employee{" +
                "name='" + name + '\'' +
                ", age=" + age +
                '}';
    }
}
下面列出 Restful 接口的开发细节,RestfulController1 和 RestfulController2 开发的 Restful 接口的功能是相同的,只不过采用的注解不一样。
RestfulController1 采用的是普通的注解,RestfulController2 采用的是简化注解,具体内容如下:
package com.jobs.controller;

import com.jobs.domain.Employee;
import org.springframework.web.bind.annotation.*;

@RestController
@RequestMapping("/rest1")
public class RestfulController1 {

    //restful风格的接口,在路径上可以包含请求参数
    //如果没有注明接收的请求方式,则表示所有请求方式(Get,Post,Put,Delete)都支持
    //使用 @PathVariable 注解获取路径上配置的同名变量
    //produces 表示返回的数据类型
    @RequestMapping(value = "/{test}", produces = "text/plain")
    public String restfulTest1(@PathVariable String test) {
        System.out.println("获取到参数值为:" + test);
        return "获取到参数值为:" + test;
    }

    //仅仅支持 Get 请求,模拟通过 id 查询员工
    //增加上 method = RequestMethod.GET 表示仅仅支持 Get 请求
    @RequestMapping(value = "/emp/{id}", method = RequestMethod.GET)
    public Employee restfulTest2(@PathVariable Integer id) {
        System.out.println("接收到 Get 提交的数据,id为:" + id);
        Employee emp = new Employee("任肥肥", 40);
        return emp;
    }

    //仅仅支持 Post 请求,模拟添加一条员工信息(通过路径参数获取数据)
    //增加上 method = RequestMethod.POST 表示仅仅支持 Post 请求
    @RequestMapping(value = "/emp/{name}/{age}", method = RequestMethod.POST)
    public Employee restfulTest3(
            @PathVariable String name,
            @PathVariable Integer age) {
        Employee emp = new Employee(name, age);
        System.out.println("接收到 Post 提交的数据,封装成对象:" + emp);
        return emp;
    }

    //仅仅支持 Post 请求,模拟添加一条员工信息(通过请求的 body 获取数据)
    //这次直接 Post 提交过来 json 数据,Json 的字段名称与 Employee 的字段名称一致
    @RequestMapping(value = "/emp", method = RequestMethod.POST, produces = "text/plain")
    public String restfulTest4(Employee emp) {
        System.out.println("接收到 Post 提交的数据,封装成对象:" + emp);
        return "获取 Json 数据,并封装成功对象成功";
    }

    //仅仅支持 Put 请求,模拟修改一条员工信息
    @RequestMapping(value = "/emp", method = RequestMethod.PUT)
    public Employee restfulTest5(Employee emp) {
        System.out.println("接收到 Put 提交的数据,封装成对象:" + emp);
        //修改员工信息并返回
        emp.setName(emp.getName() + "111");
        emp.setAge(emp.getAge() + 10);
        return emp;
    }

    //仅仅支持 Delete 请求,模拟通过 id 删除一条员工信息
    @RequestMapping(value = "/emp/{id}", method = RequestMethod.DELETE, produces = "text/plain")
    public String restfulTest6(@PathVariable Integer id) {
        System.out.println("接收到 Delete 提交的数据,id为:" + id);
        return "接收到 Delete 提交的数据,id为:" + id;
    }
}
package com.jobs.controller;

import com.jobs.domain.Employee;
import org.springframework.web.bind.annotation.*;

@RestController
@RequestMapping("/rest2")
public class RestfulController2 {

    //如果没有注明接收的请求方式,则表示所有请求方式(Get,Post,Put,Delete)都支持
    //Restful 只是一种接口编写的风格,并不是规范
    //大家习惯于 Get 请求用于查询,Post 请求用于添加,Put 请求用于修改,Delete 请求用于删除
    //实际上,你也可以不遵循这样的规则,比如你可以使用 Post 请求执行查询功能。
    @RequestMapping(value = "/{test}")
    public String restfulTest1(@PathVariable String test) {
        System.out.println("获取到参数值为:" + test);
        return "获取到参数值为:" + test;
    }

    //仅仅支持 Get 请求,模拟通过 id 查询员工
    //可以使用 @GetMapping 注解,简化 Get 请求编写方式
    @GetMapping(value = "/emp/{id}")
    public Employee restfulTest2(@PathVariable Integer id) {
        System.out.println("接收到 Get 提交的数据,id为:" + id);
        Employee emp = new Employee("任肥肥", 40);
        return emp;
    }

    //仅仅支持 Post 请求,模拟添加一条员工信息(通过路径参数获取数据)
    //可以使用 @PostMapping 注解,简化 Post 请求编写方式
    @PostMapping(value = "/emp/{name}/{age}")
    public Employee restfulTest3(
            @PathVariable String name,
            @PathVariable Integer age) {
        Employee emp = new Employee(name, age);
        System.out.println("接收到 Post 提交的数据,封装成对象:" + emp);
        return emp;
    }

    //仅仅支持 Post 请求,模拟添加一条员工信息(通过请求的 body 获取数据)
    //这次直接 Post 提交过来 json 数据,Json 的字段名称与 Employee 的字段名称一致
    @PostMapping(value = "/emp")
    public String restfulTest4(Employee emp) {
        System.out.println("接收到 Post 提交的数据,封装成对象:" + emp);
        return "获取 Json 数据,并封装成功对象成功";
    }

    //仅仅支持 Put 请求,模拟修改一条员工信息
    //可以使用 @PutMapping 注解,简化 Put 请求编写方式
    @PutMapping(value = "/emp")
    public Employee restfulTest5(Employee emp) {
        System.out.println("接收到 Put 提交的数据,封装成对象:" + emp);
        //修改员工信息并返回
        emp.setName(emp.getName() + "111");
        emp.setAge(emp.getAge() + 10);
        return emp;
    }

    //仅仅支持 Delete 请求,模拟通过 id 删除一条员工信息
    //可以使用 @DeleteMapping 注解,简化 Delete 请求编写方式
    @DeleteMapping(value = "/emp/{id}")
    public String restfulTest6(@PathVariable Integer id) {
        System.out.println("接收到 Delete 提交的数据,id为:" + id);
        return "接收到 Delete 提交的数据,id为:" + id;
    }
}
编写静态 html 页面,其中 form 表单调用的是 RestfulController1 的接口,超链接采用 ajax 请求异步调用 RestfulController2 的接口,具体内容如下:
<!DOCTYPE html>
<html>
<head>
    <meta charset="UTF-8">
    <title>Restful接口测试</title>
</head>
<body>
    <h1>这里是 SpringMvc 的 Restful 接口开发测试</h1>
    <fieldset>
        <legend>采用 Form 表单提交发起 Get 请求</legend>
        <form action="/rest1/emp/1" method="get">
            <input type="submit" value="发起 Get 请求"/>
        </form>
    </fieldset>
    <hr/>
    <fieldset>
        <legend>采用 Form 表单提交发起 Post 请求</legend>
        <form action="/rest1/emp/乔豆豆/30" method="post">
            <input type="submit" value="发起 Post 请求"/>
        </form>
    </fieldset>
    <hr/>
    <fieldset>
        <legend>采用 Form 表单提交发起 Post 请求</legend>
        <form action="/rest1/emp" method="post">
            name值:<input type="text" name="name" value="任肥肥"><br/>
            age值:<input type="text" name="age" value="40"><br/>
            <input type="submit" value="发起 Post 请求"/>
        </form>
    </fieldset>
    <hr/>
    <fieldset>
        <legend>采用 Form 表单提交发起 Put 请求</legend>
        <form action="/rest1/emp" method="Post">
            <input type="hidden" name="_method" value="put"/>
            name值:<input type="text" name="name" value="候胖胖"><br/>
            age值:<input type="text" name="age" value="42"><br/>
            <input type="submit" value="发起 Put 请求"/>
        </form>
    </fieldset>
    <hr/>
    <fieldset>
        <legend>采用 Form 表单提交发起 Delete 请求</legend>
        <form action="/rest1/emp/100" method="Post">
            <input type="hidden" name="_method" value="delete"/>
            <input type="submit" value="发起 Delete 请求"/>
        </form>
    </fieldset>
    <hr/>
    <fieldset>
        <legend>使用 Ajax 发送 Restful 请求</legend>
        <a href="javascript:void(0);" id="test1">发送Get请求查询数据</a><br/>
        <a href="javascript:void(0);" id="test2">发送Post请求添加数据(从路径上获取数据)</a><br/>
        <a href="javascript:void(0);" id="test3">发送Post请求添加数据(发送 json 数据)</a><br/>
        <fieldset>
            <legend>Ajax 发送 Put 请求</legend>
            提交数据时,需要参加参数:_method:put
            <a href="javascript:void(0);" id="test4">发送Put请求修改数据(发送 json 数据)</a><br/>
        </fieldset>
        <fieldset>
            <legend>Ajax 发送 Delete 请求</legend>
            提交数据时,需要参加参数:_method:delete
            <a href="javascript:void(0);" id="test5">发送Delete请求删除数据</a><br/>
        </fieldset>
    </fieldset>
    <script src="./js/jquery-3.6.0.min.js"></script>
    <script src="./js/apitest.js"></script>
</body>
</html>
在该静态页面中,引用了 js 目录中编写的 apitest.js 文件,具体内容如下:
$(function () {
    $('#test1').click(function () {
        $.ajax({
            type: "get",
            url: "/rest2/emp/100",
            dataType: "json",
            success: function (data) {
                alert("返回的数据:" + data.name + "," + data.age);
            }
        });
    });

    $('#test2').click(function () {
        $.ajax({
            type: "post",
            url: "/rest2/emp/乔豆豆/30",
            //如果没有指定 dataType ,
            //则服务器会自动根据接口返回的 mime 类型,推断返回的数据类型
            success: function (data) {
                alert("返回的数据:" + data.name + "," + data.age);
            }
        });
    });

    $('#test3').click(function () {
        $.ajax({
            type: "post",
            url: "/rest2/emp",
            data: {name: "任肥肥", age: 40},
            dataType: "text", //服务器接口返回的是 text 类型的数据
            success: function (data) {
                alert(data);
            }
        });
    });

    $('#test4').click(function () {
        $.ajax({
            type: "post",
            url: "/rest2/emp",
            data: {name: "任肥肥", age: 40, _method: "put"},
            dataType: "json", //服务器接口返回的是 json 类型的数据
            success: function (data) {
                alert("返回的数据:" + data.name + "," + data.age);
            }
        });
    });

    $('#test5').click(function () {
        $.ajax({
            type: "post",
            url: "/rest2/emp/88",
            data: {_method: "delete"},
            dataType: "text", //服务器接口返回的是 text 类型的数据
            success: function (data) {
                alert(data);
            }
        });
    });

})
然后运行网站,在首页 index.html 静态页面中,即可进行接口的测试。也可以采用 Postman 工具进行测试。
到此为止,有关从 SpringMvc 开发和调用 Restful 接口,已经介绍完毕。希望对大家有所帮助。
本篇博客的 Demo 源代码下载地址为:https://files.cnblogs.com/files/blogs/699532/SpringMvc_Restful.zip

 浙公网安备 33010602011771号