文件上传之本来好好的上传为什么忽然无法上传了
前置条件
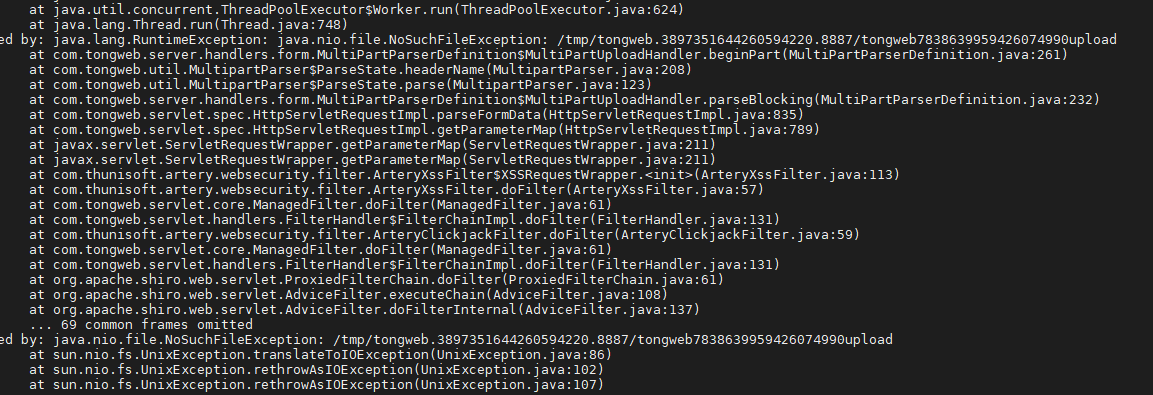
springboot单jar包后端服务,有个功能,需要导入文件。测试通过了,也发到了现场,感觉很好。忽然有一天,现场丢过来一个报错
排查过程
先在公司服务器上了试了下,复现了。本地起了一个,没复现。哈哈,典型的我本地没问题啊。
然后搜了下这个路径,发现其实大多数中间件,不管是tomcat、jetty、tas、还是tongweb,都会创建一个临时目录。父路径为System.getProperty("java.io.tmpdir"),在linux中对应/tmp目录(也可以通过jinfo pid| grep "java.io.tmpdir"查看)。
启动的时候会调用AbstractConfigurableWebServerFactory#createTempDir来创建一个/tmp/tongweb.3897351644260594220.8887这样的目录。
protected final File createTempDir(String prefix) {
		try {
			File tempDir = File.createTempFile(prefix + ".", "." + getPort());
			tempDir.delete();
			tempDir.mkdir();
			tempDir.deleteOnExit();
			return tempDir;
		}
		catch (IOException ex) {
			throw new WebServerException(
					"Unable to create tempDir. java.io.tmpdir is set to " + System.getProperty("java.io.tmpdir"), ex);
		}
	}
你上传的文件也会临时存储在这个文件夹下。
题外话,还会创建一个tongweb-docbase.4901402598652682849.8887这样的文件夹
但是,linux 的tmp目录10天之后会清除。/usr/lib/tmpfiles.d/tmp.conf
#  This file is part of systemd.
#
#  systemd is free software; you can redistribute it and/or modify it
#  under the terms of the GNU Lesser General Public License as published by
#  the Free Software Foundation; either version 2.1 of the License, or
#  (at your option) any later version.

# See tmpfiles.d(5) for details

# Clear tmp directories separately, to make them easier to override 看这行
q /tmp 1777 root root 10d
q /var/tmp 1777 root root 30d

# Exclude namespace mountpoints created with PrivateTmp=yes
x /tmp/systemd-private-%b-*
X /tmp/systemd-private-%b-*/tmp
x /var/tmp/systemd-private-%b-*
X /var/tmp/systemd-private-%b-*/tmp

# Remove top-level private temporary directories on each boot
R! /tmp/systemd-private-*
R! /var/tmp/systemd-private-*
也就是,如果长时间没用,这个目录被清空了,但是上传文件还是往这个目录上传,就会找不到这个目录了,所以就找不到。
解决方案
- 创建这个临时文件夹,临时解决。
- 环境参数设置
-Djava.io.tmpdir=/opt/tmp建立如/opt/tmp这个目录 - application.yml文件中配置如下,不过要确保这个路径存在
spring:
  servlet:
    multipart:
      location: /upload/file
这个配置只是更改了上传文件临时目录,原来启动创建的目录仍旧是java.io.tmpdir对应的目录。而且,针对windows开发情况,路径就对应c://upload/file需要手动创建文件夹。
- 通过注入
MultipartConfigElementbean的方式。
@Bean
public MultipartConfigElement multipartConfigElement() {
    MultipartConfigFactory factory = new MultipartConfigFactory();
    String path = System.getProperty("user.dir");
    File tmpFile = new File(path);    //需要修改:选择要创建的路径,不然直接放user.dir下了
    if (!tmpFile.exists()) {
        tmpFile.mkdirs();
    }
    // 明确指定上传文件的临时目录
    factory.setLocation(path);
    return factory.createMultipartConfig();
}
总体来说,1最简单但只能作为临时方案。推荐方案2和方案4.方案3针对服务器和本地开发两套环境有些不方便。
当你准备好了,机会来临的时候,你才能抓住

 浙公网安备 33010602011771号