Vue.js 3 + Vite + TypeScript 实战项目开发
一、使用 Vite 创建项目
npm init vite@latest

√ Project name: ... lagou-shop-admin
√ Select a framework: » vue
√ Select a variant: » vue-ts

Scaffolding project in C:\Users\lpz\Projects\lagou-shop-admin...

Done. Now run:

  cd lagou-shop-admin
  npm install
  npm run dev
初始目录结构说明
.
├── public
│   └── favicon.ico
├── src
│   ├── assets
│   │   └── logo.png
│   ├── components
│   │   └── HelloWorld.vue
│   ├── App.vue
│   ├── main.ts
│   ├── shims-vue.d.ts
│   └── vite-env.d.ts
├── .gitignore
├── README.md
├── index.html
├── package-lock.json
├── package.json
├── tsconfig.json
└── vite.config.ts
在安装了 Vite 的项目中,可以在 npm scripts 中使用 vite 可执行文件,或者直接使用 npx vite 运行它。下面是通过脚手架创建的 Vite 项目中默认的 npm scripts:
{
  "scripts": {
    "dev": "vite", // 启动开发服务器
    "build": "vite build", // 为生产环境构建产物
    "serve": "vite preview" // 本地预览生产构建产物
  }
}
可以指定额外的命令行选项,如 --port 或 --https。运行 npx vite --help 获得完整的命令行选项列表
二、代码规范和 ESLint
基础配置
1、安装 ESLint 到项目中
npm install eslint --save-dev
2、初始化 ESLint 配置
npx eslint --init

? How would you like to use ESLint? ...
  To check syntax only
  To check syntax and find problems
> To check syntax, find problems, and enforce code style

? What type of modules does your project use? ...
> JavaScript modules (import/export)
  CommonJS (require/exports)
  None of these

 ? Which framework does your project use? ...
  React
> Vue.js
  None of these

? Does your project use TypeScript? » No / Yes

? Where does your code run? ...  (Press <space> to select, <a> to toggle all, <i> to invert selection)
√ Browser
√ Node

? How would you like to define a style for your project? ...
> Use a popular style guide
  Answer questions about your style
  Inspect your JavaScript file(s)

? Which style guide do you want to follow? ...
  Airbnb: https://github.com/airbnb/javascript
> Standard: https://github.com/standard/standard
  Google: https://github.com/google/eslint-config-google
  XO: https://github.com/xojs/eslint-config-xo

 ? What format do you want your config file to be in? ...
> JavaScript
  YAML
  JSON

 Checking peerDependencies of eslint-config-standard@latest
The config that you've selected requires the following dependencies:

eslint-plugin-vue@latest @typescript-eslint/eslint-plugin@latest eslint-config-standard@latest eslint@^7.12.1 eslint-plugin-import@^2.22.1 eslint-plugin-node@^11.1.0 eslint-plugin-promise@^4.2.1 || ^5.0.0 @typescript-eslint/parser@latest
? Would you like to install them now with npm?

+ eslint-plugin-import@2.23.4
+ eslint-plugin-node@11.1.0
+ eslint-config-standard@16.0.3
+ eslint-plugin-vue@7.11.1
+ eslint@7.29.0
+ @typescript-eslint/parser@4.27.0
+ @typescript-eslint/eslint-plugin@4.27.0
+ eslint-plugin-promise@5.1.0
3、ESLint 配置文件
这里改成 vue3-strongly-recommended
// .eslintrc.js
module.exports = {
env: {
browser: true,
es2021: true
},
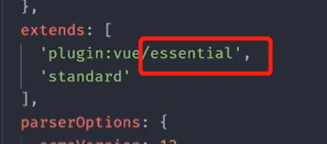
extends: [
// 'plugin:vue/essential',
// 使用 Vue 3 规则
// https://eslint.vuejs.org/user-guide/#bundle-configurations
'plugin:vue/vue3-strongly-recommended',
'standard'
],
parserOptions: {
ecmaVersion: 12,
parser: '@typescript-eslint/parser',
sourceType: 'module'
},
plugins: [
'vue',
'@typescript-eslint'
],
rules: {}
}
4、在 npm scripts 中添加验证脚本
"scripts": {
	...
  "lint": "eslint src/**/*.{js,jsx,vue,ts,tsx} --fix",
}
注意:eslint 后面的路径最好加上引号,否则在类 Unix 系统(比如 macOS)中会报错说找不到资源。
vue-eslint-plugin
https://eslint.vuejs.org/
编译器宏和 defineProps、defineEmits、no-undef 规则警告
您需要定义全局变量 (打开新窗口)在您的 ESLint 配置文件中。
如果您不想定义全局变量,请使用 import { defineProps, defineEmits } from 'vue'
示例 .eslintrc.js:
module.exports = {
  globals: {
    defineProps: "readonly",
    defineEmits: "readonly",
    defineExpose: "readonly",
    withDefaults: "readonly"
  }
}
另请参阅 ESLint - 指定全局变量 > 使用配置文件。
三、编辑器集成
● 禁用 Vetur
● 安装 eslint 插件
● 安装 volar 插件
使用dbaeumer.vscode-eslint (打开新窗口)微软官方提供的扩展。
您必须配置eslint.validate扩展的选项来检查.vue文件,因为扩展默认只针对*.js或*.jsx文件。
示例**.vscode/settings.json:**
{
  "eslint.validate": [
    "javascript",
    "javascriptreact",
    "vue"
  ]
}
如果您使用该 Vetur 插件,请设置 “vetur.validation.template”: false 为避免默认 Vetur 模板验证。查看vetur 文档 (打开新窗口)了解更多信息
1、在 vscode 中使用 ESLint 规则格式化代码
1)安装 vscode 扩展 ESLint

2)在 vscode 配置文件中找到 ESLint 启用该选项

3)重启 vscode
4)打开带有 ESLint 配置文件的项目中任意的 .js 或是 .vue 文件

右键选择 文档格式设置方式

选择 配置默认格式化程序

选择 ESLint
6)如果你喜欢保存文件的时候自动格式化代码,也可以开启这个功能

7) 如果你修改了项目中 ESLint 的校验规则,一定要重启 vscode 才能生效。
四、配置 git commit hook
● https://github.com/okonet/lint-staged
安装:
npx mrm@2 lint-staged
// package.json
{
  "version": "0.0.0",
  "scripts": {
    "dev": "vite",
    "build": "vue-tsc --noEmit && vite build",
    "serve": "vite preview",
    "tsc": "vue-tsc --noEmit",
    "lint": "eslint ./src/**/*.ts ./src/**/*.vue --cache --fix",
    "prepare": "husky install"
  },
  "dependencies": {
    "@form-create/element-ui": "^2.5.7",
    "axios": "^0.21.1",
    "element-plus": "^1.0.2-beta.48",
    "nprogress": "^0.2.0",
    "path-to-regexp": "^6.2.0",
    "utility-types": "^3.10.0",
    "vue": "^3.1.1",
    "vue-router": "^4.0.8",
    "vuex": "^4.0.1",
    "vxe-table": "^4.0.22",
    "xe-utils": "^3.3.0"
  },
  "devDependencies": {
    "@types/node": "^15.12.2",
    "@types/nprogress": "^0.2.0",
    "@typescript-eslint/eslint-plugin": "^4.27.0",
    "@typescript-eslint/parser": "^4.27.0",
    "@vitejs/plugin-vue": "^1.2.3",
    "@vue/compiler-sfc": "^3.1.1",
    "eslint": "^7.29.0",
    "eslint-config-standard": "^16.0.3",
    "eslint-plugin-import": "^2.23.4",
    "eslint-plugin-node": "^11.1.0",
    "eslint-plugin-promise": "^5.1.0",
    "eslint-plugin-vue": "^7.11.1",
    "husky": "^6.0.0",
    "lint-staged": "^11.0.0",
    "sass": "^1.34.1",
    "typescript": "^4.1.3",
    "vite": "^2.3.5",
    "vue-tsc": "^0.0.24"
  },
  "lint-staged": {
    "*.{js,jsx,vue,ts,tsx}": [
      "npm run lint",
      // "git add" 之前的版本需要手动把 lint 过程中修改的代码手动 add,新版本不需要了
    ]
  }
}
1、在开发和构建中进行代码规范校验
● https://github.com/vitejs/awesome-vite#plugins
● https://github.com/gxmari007/vite-plugin-eslint
npm install vite-plugin-eslint --save-dev
vite.config.ts里面做下配置
效果:

五、Git commit 提交规范
● Commit message 和 Change log 编写指南
● Git 使用规范流程
● Git 工作流程
统一团队 Git commit 日志标准,便于后续代码 review,版本发布以及日志自动化生成等等。
● commitlint:验证 git commit 日志是否符合规范
● Commitizen:辅助编写符合 git commit 规范的工具
六、Vite中得TS环境说明
● TS 环境说明
● shimes-vue.d.ts 文件的作用
● vite-env.d.ts 文件的作用
● vue-tsc 和 tsc
○ tsc 只能验证 ts 代码类型
○ vue-tsc 可以验证 ts + Vue Template 中的类型(基于 Volar)
建议在 package.json 中新增一个 scripts 脚本用来单独执行 TS 类型验证:
"scripts": {
  ...
  "build": "npm run tsc && vite build",
  "tsc": "vue-tsc -noEmit"
},
-noEmit 表示只验证类型,不输出编译结果。
跳过第三方包类型检查
{
  "compilerOptions": {
    ...
    "baseUrl": "./",
    "skipLibCheck": true
  }
}
1、Vue 3 中的 TS 支持
建议参考:
● https://v3.cn.vuejs.org/guide/typescript-support.html
Vue 3 中的
Vue 3 支持三种写法:
● Option API
● Composition API
● <script setup>(Composition API 的语法糖)
渲染函数和 JSX/TSX
● 什么是渲染函数:渲染函数
● 在渲染函数中使用 JSX:在渲染函数中使用 JSX
● 在 Vite 中提供 jsx/tsx 支持:@vitejs/plugin-vue-jsx
● Vue 中的 JSX 语法:Babel Plugin JSX for Vue 3.0
提示:
● 编辑器中的 ESLint 需要配置 “eslint.validate”: [“typescriptreact”] 才能验证和格式化 .tsx 文件。
全局api eslint不识别 需要配置下
七、初始化 Vue Router
1、安装 vue-router
npm install vue-router@4
2、初始化路由实例
// src\router\index.ts
import { createRouter, RouteRecordRaw, createWebHashHistory } from 'vue-router'

const routes: RouteRecordRaw[] = [
  {
    path: '/',
    component: () => import('../views/home/index.vue')
  },
  {
    path: '/login',
    component: () => import('../views/login/index.vue')
  }
]

const router = createRouter({
  history: createWebHashHistory(),
  routes
})

export default router
// src\main.ts
import { createApp } from 'vue'
import router from './router'
import App from './App.vue'

createApp(App).use(router).mount('#app')
404 未找到
{ path: '/:pathMatch(.*)*', name: 'NotFound', component: NotFound, meta: { requiresAuth: false } },
注意:由于路由匹配是从前往后的,所有 404 路由记录一定要放到最后。
八、初始化 Vuex
1、安装
npm install vuex@next --save
2、配置
// src\store\index.ts
import { createStore } from 'vuex'

const store = createStore({
  state: {},
  getters: {},
  mutations: {},
  actions: {},
  modules: {}
})

export default store
// src\main.ts
import { createApp } from 'vue'
import router from './router'
import store from './store'
import App from './App.vue'
import ElementPlus from 'element-plus'
import 'element-plus/lib/theme-chalk/index.css'

createApp(App).use(store).use(router).use(ElementPlus).mount('#app')
●官方文档方案(仅支持 state): https://next.vuex.vuejs.org/zh/guide/typescript-support.html
●第三方方案(仅供参考): https://dev.to/3vilarthas/vuex-typescript-m4j
Vuex 4 版本依然没有很好的解决 TS 类型问题,官方宣称会在 Vuex 5 中提供更好的方案。
九、配置模块路径别名
在 Vite 中支持模块路径别名自定义,参考文档。
npm i -D @types/node
示例如下:
// vite.config.ts
import { defineConfig } from 'vite'
import vue from '@vitejs/plugin-vue'
// 注意:在 ts 模块中加载 node 核心模块需要安装 node 的类型补充模块:npm i -D @types/node
import path from 'path'

// https://vitejs.dev/config/
export default defineConfig({
  ...
  resolve: {
    alias: {
      '@': path.resolve(__dirname, './src')
    }
  }
})
如果项目中使用了 TS,则还需要告诉 TS 别名的路径,否则 TS 会报错。
// tsconfig.json
{
  "compilerOptions": {
    ...
    "baseUrl": ".",
    "paths": {
      "@/*": ["src/*"]
    }
  },
  ...
}
使用示例:
// js
import xxx from '@/api/user.ts'

// html
<img src="@/assets/logo.png">

// css
@import url("@/styles/index.scss");
background: url("@/assets/logo.png");
还有一些插件可以快速配置路径别名:
● vite-aliases:基于项目结构自动生成别名路径
十、CSS 样式管理
Vite 中的样式支持
Vite 中对 CSS 的支持:
● https://cn.vitejs.dev/guide/features.html#css
(1)由于 Vite 的目标仅为现代浏览器,因此建议使用原生 CSS 变量和实现 CSSWG 草案的 PostCSS 插件(例如 postcss-nesting)来编写简单的、符合未来标准的 CSS。
(2)但 Vite 也同时提供了对 .scss, .sass, .less, .styl 和 .stylus 文件的内置支持。没有必要为它们安装特定的 Vite 插件,但必须安装相应的预处理器依赖:
# .scss and .sass
npm install -D sass

# .less
npm install -D less

# .styl and .stylus
npm install -D stylus
如果是用的是单文件组件,可以通过 <style lang=“sass”>(或其他预处理器)自动开启。
注意事项:
● Vite 为 Sass 和 Less 改进了 @import 解析,以保证 Vite 别名也能被使用。
● 另外,url() 中的相对路径引用的,与根文件不同目录中的 Sass/Less 文件会自动变基以保证正确性。
● 由于 Stylus API 限制,@import 别名和 URL 变基不支持 Stylus。
● 你还可以通过在文件扩展名前加上 .module 来结合使用 CSS modules 和预处理器,例如 style.module.scss。
样式作用域
● 深度作用操作符新语法::deep()
样式目录结构
variables.scss  # 全局 Sass 变量
mixin.scss      # 全局 mixin
common.scss     # 全局公共样式
transition.scss # 全局过渡动画样式
index.scss      # 组织统一导出
常见的工作流程是,全局样式都写在 src/styles 目录下,每个页面自己对应的样式都写在自己的 .vue 文件之中。
// index.scss
@import './variables.scss';
@import './mixin.scss';
@import './transition.scss';
@import './common.scss';
然后在 main.ts 中导入 index.scss:
import "./styles/index.scss"
这里仅仅是加载了全局样式,并不能实现在组件内直接使用全局变量。
配置使用全局样式变量
为了能够在组件内直接使用全局变量、mixin 等,需要特殊配置。
具体配置参见 Vite 官方文档:css.preprocessorOptions。
这是一个常见的配置参考示例。
scss: {
      additionalData: `@import "~@/variables.scss";`
    },
看下面
css: {
  loaderOptions: {
    // 给 sass-loader 传递选项
    sass: {
      // @/ 是 src/ 的别名
      // 所以这里假设你有 `src/variables.sass` 这个文件
      // 注意:在 sass-loader v8 中,这个选项名是 "prependData"
      additionalData: `@import "@/styles/variables.scss"`
    },
    // 默认情况下 `sass` 选项会同时对 `sass` 和 `scss` 语法同时生效
    // 因为 `scss` 语法在内部也是由 sass-loader 处理的
    // 但是在配置 `prependData` 选项的时候
    // `scss` 语法会要求语句结尾必须有分号,`sass` 则要求必须没有分号
    // 在这种情况下,我们可以使用 `scss` 选项,对 `scss` 语法进行单独配置
    scss: {
      additionalData: `@import "~@/variables.scss";`
    },
    // 给 less-loader 传递 Less.js 相关选项
    less: {
      // http://lesscss.org/usage/#less-options-strict-units `Global Variables`
      // `primary` is global variables fields name
      globalVars: {
        primary: '#fff'
      }
    }
  }
}
十一、基于axios封装请求模块
● 基于 axios 的二次封装
● 关于接口的类型问题
● 多环境 baseURL
● 跨域处理
● 数据 mock
基于 axios 封装请求模块
安装 axios:
npm i axios
基本配置:
// src/utils/request.ts

import axios from 'axios'

const request = axios.create({
  baseURL: 'https://shop.fed.lagou.com/api/admin' // 基础路径
})

// 请求拦截器
request.interceptors.request.use(
  config => {
    // 统一设置用户身份 Token
    return config
  },
  error => {
    return Promise.reject(error)
  }
)

// 响应拦截器
request.interceptors.response.use(
  response => {
    // 统一处理响应错误,例如 token 无效、服务端异常等
    return response
  },
  err => {
    return Promise.reject(err)
  }
)

export default request
封装 API 请求模块:
/**
 * 公共基础接口封装
 */
import request from '@/utils/request'

export const getLoginInfo = () => {
  return request({
    method: 'GET',
    url: '/login/info'
  })
}
在组件中使用:
import { getLoginInfo } from '@/api/common'
import { onMounted } from '@vue/runtime-core'

onMounted(() => {
  getLoginInfo().then(res => {
    console.log(res)
  })
})
关于接口的类型问题
axios 的请求快捷方式都支持使用泛型参数指定响应数据类型。
interface User {
  name: string
  age: number
}

axios.get<User[]>('xxx')
封装泛型请求方法:
// src/utils/request.ts

// 其它代码...

export default <T = any>(config: AxiosRequestConfig) => {
  return request(config).then(res => {
    return (res.data.data || res.data) as T
  })
}
封装请求方法:
// src\api\common.ts
import request from '@/utils/request'
import { ILoginInfo } from './types/common'

export const getLoginInfo = () => {
  return request<ILoginInfo>({
    method: 'GET',
    url: '/login/info'
  })
}
// src\api\types\common.ts
export interface ILoginInfo {
  logo_square: string
  logo_rectangle: string
  login_logo: string
  slide: string[]
}
在组件中调用:
import { getLoginInfo } from '@/api/common'

getLoginInfo().then(data => { // 这里的 data 就有类型了
  console.log(data)
})
十二、环境变量和模式
● Vite - 环境变量和模式
# .env.development
# 开发模式下加载的环境变量
VITE_API_BASEURL=http://a.com
# .env.production

# 生产模式下加载的环境变量
VITE_API_BASEURL=http://b.com
// src\utils\request.ts

const request = axios.create({
  // localhost:8080/xxx
  // abc.com/xxx
  // test.com/xxx
  baseURL: import.meta.env.VITE_API_BASEURL
})
十三、跨域问题
推荐方案:
开发环境 生产环境
在服务端配置 CORS。 在服务端配置 CORS。
配置开发服务器代理,比如 vite-server.proxy。 配置生产服务器代理,比如 nginx。
1、CORS
CORS 全称为 Cross Origin Resource Sharing(跨域资源共享)。这种方案对于前端来说没有什么工作量,和正常发送请求写法上没有任何区别,工作量基本都在后端(其实也没啥工作量,就是配置一些 HTTP 协议)。
● 跨源资源共享(CORS)
● 跨域资源共享 CORS 详解
2、服务器代理
可能有些后端开发人员觉得配置 CORS 麻烦不想搞,那纯前端也是有解决方案的。
在开发模式下可以下使用开发服务器的 proxy 功能,比如 vite - server.proxy
export default defineConfig({
  server: {
    proxy: {
      // 字符串简写写法
      '/foo': 'http://localhost:4567',
      // 选项写法
      '/api': {
        target: 'http://jsonplaceholder.typicode.com',
        changeOrigin: true,
        rewrite: (path) => path.replace(/^\/api/, '')
      },
      // 正则表达式写法
      '^/fallback/.*': {
        target: 'http://jsonplaceholder.typicode.com',
        changeOrigin: true,
        rewrite: (path) => path.replace(/^\/fallback/, '')
      },
      // 使用 proxy 实例
      '/api': {
        target: 'http://jsonplaceholder.typicode.com',
        changeOrigin: true,
        configure: (proxy, options) => {
          // proxy 是 'http-proxy' 的实例
        }
      }
    }
  }
})
但这种方法在生产环境是不能使用的。在生产环境中需要配置生产服务器(比如 nginx、Apache 等)进行反向代理。在本地服务和生产服务配置代理的原理都是一样的,通过搭建一个中转服务器来转发请求规避跨域的问题。

十四、Layout 布局
Container 布局容器
<template>
  <el-container>
    <el-aside width="200px">
      <AppMenu />
    </el-aside>
    <el-container>
      <el-header>
        <AppHeader />
      </el-header>
      <el-main>
        <router-view />
      </el-main>
    </el-container>
  </el-container>
</template>

<script lang="ts" setup>
import AppMenu from './AppMenu/index.vue'
import AppHeader from './AppHeader/index.vue'

</script>

<style lang="scss" scoped>
.el-container {
  height: 100vh;
}

.el-header {
  background-color: #fff;
  color: #333;
  display: flex;
  justify-content: space-between;
  align-items: center;
}

.el-aside {
  background-color: #304156;
  color: #333;
}

.el-main {
  background-color: #E9EEF3;
  color: #333;
}

</style>
菜单栏
<template>
  <el-menu
    :unique-opened="true"
    default-active="2"
    class="el-menu-vertical-demo"
    background-color="#304156"
    text-color="#bcc0c5"
    active-text-color="#2d8cf0"
    router
  >
    <el-menu-item index="/">
      <i class="el-icon-menu" />
      <template #title>
        首页
      </template>
    </el-menu-item>
    <el-submenu index="1">
      <template #title>
        <i class="el-icon-location" />
        <span>商品</span>
      </template>
      <el-menu-item index="/product/product_list">
        <i class="el-icon-menu" />
        <template #title>
          商品列表
        </template>
      </el-menu-item>
      <el-menu-item index="/product/product_attr">
        <i class="el-icon-menu" />
        <template #title>
          商品规格
        </template>
      </el-menu-item>
    </el-submenu>
    <el-menu-item index="2">
      <i class="el-icon-menu" />
      <template #title>
        导航二
      </template>
    </el-menu-item>
    <el-menu-item
      index="3"
      disabled
    >
      <i class="el-icon-document" />
      <template #title>
        导航三
      </template>
    </el-menu-item>
    <el-menu-item index="4">
      <i class="el-icon-setting" />
      <template #title>
        导航四
      </template>
    </el-menu-item>
    <el-submenu index="5">
      <template #title>
        <i class="el-icon-location" />
        <span>导航一</span>
      </template>
      <el-menu-item-group>
        <template #title>
          分组一
        </template>
        <el-menu-item index="5-1">
          选项1
        </el-menu-item>
        <el-menu-item index="5-2">
          选项2
        </el-menu-item>
      </el-menu-item-group>
      <el-menu-item-group title="分组2">
        <el-menu-item index="5-3">
          选项3
        </el-menu-item>
      </el-menu-item-group>
    </el-submenu>
  </el-menu>
</template>

<script lang="ts" setup></script>

<style lang="scss" scoped>
.el-menu {
  border-right: none;
}
</style>
头部
<template>
  <el-space size="large">
    <ToggleSidebar />
    <Breadcrumb />
  </el-space>
  <el-space size="large">
    <MenuSearch />
    <FullScreen />
    <Notification />
    <UserInfo />
  </el-space>
</template>

<script lang="ts" setup>
import ToggleSidebar from './ToggleSidebar.vue'
import Breadcrumb from './Breadcrumb.vue'
import MenuSearch from './MenuSearch.vue'
import FullScreen from './FullScreen.vue'
import Notification from './Notification.vue'
import UserInfo from './UserInfo.vue'

</script>

<style lang="scss" scoped>
i {
  font-size: 19px;
  cursor: pointer;
}
</style>
ToggleSidebar
<template>
  <i
    :class="collapseIcon"
    @click="handleCollapse"
  />
</template>

<script lang="ts" setup>
import { useStore } from '@/store'
import { computed } from 'vue'

const store = useStore()

const collapseIcon = computed(() => {
  return !store.state.isCollapse ? 'el-icon-s-fold' : 'el-icon-s-unfold'
})

const handleCollapse = () => {
  store.commit('setIsCollapse', !store.state.isCollapse)
}
</script>

<style lang="scss" scoped></style>
Breadcrumb
<template>
  <el-breadcrumb separator-class="el-icon-arrow-right">
    <el-breadcrumb-item
      v-for="item in routes"
      :key="item.path"
    >
      {{ item.meta.title }}
    </el-breadcrumb-item>
  </el-breadcrumb>
</template>

<script lang="ts" setup>
import { computed } from '@vue/runtime-core'
import { useRouter } from 'vue-router'

const router = useRouter()

console.log(router.currentRoute.value.matched)

const routes = computed(() => {
  return router.currentRoute.value.matched.filter(item => item.meta.title)
})
</script>

<style lang="scss" scoped></style>
MenuSearch
<template>
  <el-input
    placeholder="请输入内容"
    prefix-icon="el-icon-search"
    v-model="input2"
  />
</template>

<script lang="ts" setup>
const input2 = ''
</script>

<style lang="scss" scoped></style>
FullScreen
<template>
  <i class="el-icon-full-screen" />
</template>

<script lang="ts" setup></script>

<style lang="scss" scoped></style>
Notification
<template>
  <i class="el-icon-bell" />
</template>

<script lang="ts" setup></script>

<style lang="scss" scoped></style>
UserInfo
<template>
  <el-dropdown>
    <span class="el-dropdown-link">
      admin
      <i class="el-icon-arrow-down el-icon--right" />
    </span>
    <template #dropdown>
      <el-dropdown-menu>
        <el-dropdown-item>个人中心</el-dropdown-item>
        <el-dropdown-item>退出登录</el-dropdown-item>
      </el-dropdown-menu>
    </template>
  </el-dropdown>
</template>

<script lang="ts" setup></script>

<style lang="scss" scoped></style>
十五、配置基础路由页面
import { createRouter, createWebHashHistory, RouteRecordRaw } from 'vue-router'
import AppLayout from '@/layout/AppLayout.vue'
import productRoutes from './modules/product'
import orderRoutes from './modules/order'
import permissionRoutes from './modules/permission'
import mediaRoutes from './modules/media'

const routes: RouteRecordRaw[] = [
  {
    path: '/',
    component: AppLayout,
    children: [
      {
        path: '', // 默认子路由
        name: 'home',
        component: () => import('../views/home/index.vue')
      },
      productRoutes,
      orderRoutes,
      permissionRoutes,
      mediaRoutes
    ]
  },
  {
    path: '/login',
    name: 'login',
    component: () => import('../views/login/index.vue')
  }
]

const router = createRouter({
  history: createWebHashHistory(), // 路由模式
  routes // 路由规则
})

export default router
// src\router\modules\order.ts

import { RouteRecordRaw, RouterView } from 'vue-router'

const routes: RouteRecordRaw = {
  path: '/order',
  name: 'order',
  component: RouterView,
  children: [
    {
      path: 'list',
      name: 'order_list',
      component: () => import('@/views/order/list/index.vue')
    },
    {
      path: 'offline',
      name: 'order-offline',
      component: () => import('@/views/order/offline/index.vue')
    }
  ]
}

export default routes
十六、页面加载进度条
知识点:
● 路由拦截器
● 加载进度条
安装 nprogress
npm i nprogress

# 如果是 TS 需要补充安装它的类型补充包
npm i -D @types/nprogress
配置
// src\router\index.ts
import nprogress from 'nprogress'
import 'nprogress/nprogress.css'

// 进度条的配置
nprogress.configure({})

// VueRouter 4 中可以不写 next 了,默认就是通过状态
router.beforeEach((to, from) => {
  nprogress.start()
})

router.afterEach(() => {
  nprogress.done()
})
十七、页面标题处理
● https://github.com/nuxt/vue-meta
● https://github.com/nuxt/vue-meta/tree/next
npm install vue-meta@next --save
十八、面包屑导航
<template>
  <el-breadcrumb separator-class="el-icon-arrow-right">
    <el-breadcrumb-item
      v-for="item in routes"
      :key="item.path"
    >
      {{ item.meta.title }}
    </el-breadcrumb-item>
  </el-breadcrumb>
</template>

<script lang="ts" setup>
import { computed } from '@vue/runtime-core'
import { useRouter } from 'vue-router'

const router = useRouter()

const routes = computed(() => {
  return router.currentRoute.value.matched.filter(item => item.meta.title)
})
</script>

<style lang="scss" scoped></style>
十九、全屏切换
<template>
  <i
    class="el-icon-full-screen"
    @click="toggleFullScreen"
  />
</template>

<script lang="ts" setup>
const toggleFullScreen = () => {
  if (!document.fullscreenElement) {
    document.documentElement.requestFullscreen()
  } else {
    if (document.exitFullscreen) {
      document.exitFullscreen()
    }
  }
}
</script>

<style lang="scss" scoped></style>
二十、侧边栏展开/收起
<template>
  <i
    :class="collapseIcon"
    @click="handleCollapse"
  />
</template>

<script lang="ts" setup>
import { useStore } from '@/store'
import { computed } from 'vue'

const store = useStore()

const collapseIcon = computed(() => {
  return !store.state.isCollapse ? 'el-icon-s-fold' : 'el-icon-s-unfold'
})

const handleCollapse = () => {
  store.commit('setIsCollapse', !store.state.isCollapse)
}
</script>

<style lang="scss" scoped></style>
二十一、用户登录和身份认证
1、登录页面布局
<template>
  <div class="login-container">
    <el-form
      class="login-form"
      :rules="rules"
      ref="form"
      :model="user"
      size="medium"
      @submit.prevent="handleSubmit"
    >
      <div class="login-form__header">
        <img
          class="login-logo"
          src="@/assets/login_logo.png"
          alt="拉勾心选"
        >
      </div>
      <el-form-item prop="account">
        <el-input
          v-model="user.account"
          placeholder="请输入用户名"
        >
          <template #prefix>
            <i class="el-input__icon el-icon-user" />
          </template>
        </el-input>
      </el-form-item>
      <el-form-item prop="pwd">
        <el-input
          v-model="user.pwd"
          type="password"
          placeholder="请输入密码"
        >
          <template #prefix>
            <i class="el-input__icon el-icon-lock" />
          </template>
        </el-input>
      </el-form-item>
      <el-form-item prop="imgcode">
        <div class="imgcode-wrap">
          <el-input
            v-model="user.imgcode"
            placeholder="请输入验证码"
          >
            <template #prefix>
              <i class="el-input__icon el-icon-key" />
            </template>
          </el-input>
          <img
            class="imgcode"
            alt="验证码"
            src="https://shop.fed.lagou.com/api/admin/captcha_pro"
          >
        </div>
      </el-form-item>
      <el-form-item>
        <el-button
          class="submit-button"
          type="primary"
          :loading="loading"
          native-type="submit"
        >
          登录
        </el-button>
      </el-form-item>
    </el-form>
  </div>
</template>

<script lang="ts" setup>
import { reactive, ref } from 'vue'

const user = reactive({
  account: 'admin',
  pwd: '123456',
  imgcode: ''
})
const loading = ref(false)
const rules = ref({
  account: [
    { required: true, message: '请输入账号', trigger: 'change' }
  ],
  pwd: [
    { required: true, message: '请输入密码', trigger: 'change' }
  ],
  imgcode: [
    { required: true, message: '请输入验证码', trigger: 'change' }
  ]
})

const handleSubmit = async () => {
  console.log('handleSubmit')
}

</script>

<style lang="scss" scoped>
.login-container {
  min-width: 400px;
  height: 100vh;
  display: flex;
  justify-content: center;
  align-items: center;
  background-color: #2d3a4b;
}

.login-form {
  padding: 30px;
  border-radius: 6px;
  background: #fff;
  min-width: 350px;
  .login-form__header {
    display: flex;
    justify-content: center;
    align-items: center;
    padding-bottom: 30px;
  }

  .el-form-item:last-child {
    margin-bottom: 0;
  }

  .login__form-title {
    display: flex;
    justify-content: center;
    color: #fff;
  }

  .submit-button {
    width: 100%;
  }

  .login-logo {
    width: 271px;
    height: 74px;
  }
  .imgcode-wrap {
    display: flex;
    align-items: center;
    .imgcode {
      height: 37px;
    }
  }
}
</style>
2、处理图片验证码
const captchaSrc = ref('')

onMounted(() => {
  loadCaptcha()
})

const loadCaptcha = async () => {
  const data = await getCaptcha()
  captchaSrc.value = URL.createObjectURL(data)
}
export const getCaptcha = () => {
  return request<Blob>({
    method: 'GET',
    url: '/captcha_pro',
    params: {
      stamp: Date.now()
    },
    responseType: 'blob' // 请求获取图片数据
  })
}
3、处理登录逻辑
const handleSubmit = async () => {
  // 表单验证
  const valid = await form.value?.validate()
  if (!valid) {
    return false
  }

  // 验证通过,展示 loading
  loading.value = true

  // 请求登录
  const data = await login(user).finally(() => {
    loading.value = false
  })

  // 存储登录用户信息
  store.commit('setUser', {
    ...data.user_info,
    token: data.token
  })

  // 跳转回原来页面
  let redirect = route.query.redirect || '/'
  if (typeof redirect !== 'string') {
    redirect = '/'
  }
  router.replace(redirect)  // 路由跳转不想被记录
}
4、统一处理接口请求失败
request.interceptors.response.use(
  response => {
    const { status } = response.data

    // 请求成功
    if (!status || status === 200) {
      return response
    }

    // 处理 Token 过期

    // 其它错误给出提示即可,比如 400 参数错误之类的
    ElMessage({
      type: 'error',
      message: response.data.msg,
      duration: 5 * 1000
    })
    return Promise.reject(response)
  },
  err => {
    ElMessage({
      type: 'error',
      message: err.message,
      duration: 5 * 1000
    })
    return Promise.reject(err)
  }
)
5、封装 element-plus 类型
// src\types\element-plus.ts

import { ElForm } from 'element-plus'
import { FormItemRule } from 'element-plus/packages/form/src/form.type'

export type IElForm = InstanceType<typeof ElForm>

export type IFormRule = Record<string, FormItemRule[]>
// src\utils\storage.ts
export const getItem = <T>(key: string) => {
  const data = window.localStorage.getItem(key)
  if (!data) return null
  try {
    return JSON.parse(data) as T
  } catch (err) {
    return null
  }
}

export const setItem = (key: string, value: object | string | null) => {
  if (typeof value === 'object') {
    value = JSON.stringify(value)
  }
  window.localStorage.setItem(key, value)
}

export const removeItem = (key: string) => {
  window.localStorage.removeItem(key)
}
6、统一设置用户 Token
request.interceptors.request.use(
  config => {
    // 容错:防止请求地址中有空格
    config.url = config.url?.trim()

    // 统一设置用户 token
    const { user } = store.state
    if (user && user.token) {
      config.headers.Authorization = `Bearer ${user.token}`
    }
    return config
  },
  error => {
    return Promise.reject(error)
  }
)
7、未登录不允许访问
router.beforeEach((to, from) => {
  nprogress.start() // 开始加载进度条
  if (to.meta.requiresAuth && !store.state.user) {
    // 此路由需要授权,请检查是否已登录
    // 如果没有,则重定向到登录页面
    return {
      path: '/login',
      // 保存我们所在的位置,以便以后再来
      query: { redirect: to.fullPath }
    }
  }
})
8、统一处理 Token 失效
// 控制登录过期的锁
let isRefreshing = false
request.interceptors.response.use(
  response => {
    const { status } = response.data

    // 请求成功
    if (status === 200 || response.config.responseType === 'blob') {
      return response
    }

    // 登录过期
    if (status === 410000) {
      if (isRefreshing) return Promise.reject(response)
      isRefreshing = true
      ElMessageBox.confirm('您的登录已过期,您可以取消停留在此页面,或确认重新登录', '登录过期', {
        confirmButtonText: '确认',
        cancelButtonText: '取消'
      }).then(
        () => {
          // 清除登录状态并跳转到登录页
          store.commit('setUser', null)
          router.push({
            name: 'login',
            query: {
              redirect: router.currentRoute.value.fullPath
            }
          })
        }
      ).finally(() => {
        isRefreshing = false
      })

      return Promise.reject(response)
    }

    // 其它错误给出提示即可,比如 400 参数错误之类的
    ElMessage({
      type: 'error',
      message: response.data.msg,
      duration: 5 * 1000
    })
    return Promise.reject(response)
  },
  err => {
    ElMessage({
      type: 'error',
      message: err.message,
      duration: 5 * 1000
    })
    return Promise.reject(err)
  }
)
二十二、权限管理
1、管理员
<el-form
         ref="form"
         :model="formData"
         :rules="formRules"
         label-width="100px"
         v-loading="formLoading"
         >
  <el-form-item
                label="管理员账号"
                prop="account"
                >
    <el-input
              v-model="formData.account"
              placeholder="请输入管理员账号"
              />
  </el-form-item>
  <el-form-item
                label="管理员密码"
                prop="pwd"
                >
    <el-input
              v-model="formData.pwd"
              placeholder="请输入管理员密码"
              />
  </el-form-item>
  <el-form-item
                label="确认密码"
                prop="conf_pwd"
                >
    <el-input
              v-model="formData.conf_pwd"
              placeholder="请输入确认密码"
              />
  </el-form-item>
  <el-form-item
                label="管理员姓名"
                prop="real_name"
                >
    <el-input
              v-model="formData.real_name"
              placeholder="请输入管理员姓名"
              />
  </el-form-item>
  <el-form-item
                label="管理员身份"
                prop="roles"
                >
    <el-select
               v-model="formData.roles"
               multiple
               placeholder="请选择管理员身份"
               >
      <el-option
                 v-for="item in []"
                 :key="item.value"
                 :label="item.label"
                 :value="item.value"
                 />
    </el-select>
  </el-form-item>
  <el-form-item label="状态">
    <el-radio-group v-model="formData.status">
      <el-radio
                :label="1"
                >
        开启
      </el-radio>
      <el-radio
                :label="0"
                >
        关闭
      </el-radio>
    </el-radio-group>
  </el-form-item>
</el-form>
<script lang="ts" setup>
import { ref } from 'vue'
import type { IElForm, IFormRule } from '@/types/element-plus'

const form = ref<IElForm | null>(null)
const formData = ref({
  account: '',
  pwd: '',
  conf_pwd: '',
  roles: [] as number[],
  status: 0 as 0 | 1,
  real_name: ''
})

const formRules: IFormRule = {
  account: [
    { required: true, message: '请输入管理员账号', trigger: 'blur' }
  ],
  pwd: [
    { required: true, message: '请输入管理员密码', trigger: 'blur' }
  ],
  conf_pwd: [
    { required: true, message: '请输入确认密码', trigger: 'blur' }
  ],
  roles: [
    { required: true, message: '请选择管理员角色', trigger: 'blur' }
  ],
  real_name: [
    { required: true, message: '请输入管理员姓名', trigger: 'blur' }
  ]
}

</script>
element 组件库的表格树有性能问题,这里推荐另一个第三方表格组件。
● https://github.com/x-extends/vxe-table
二十三、Excel 导出
npm install xlsx
import XLSX from 'xlsx'
性能优化 import异步加载,没必要一开始就加载xlsx资源
const handleExportExcel = async () => {
  if (!selectionItems.value.length) {
    return ElMessage.warning('请选择商品')
  }
  exportExcelLoading.value = true
  try {
    const { jsonToExcel } = await import('@/utils/export-to-excel')
    jsonToExcel({
      data: selectionItems.value,
      header: {
        id: '编号',
        store_name: '商品名称',
        price: '价格'
      },
      fileName: '测试.xlsx',
      bookType: 'xlsx'
    })
  } catch (err) {
    console.error(err)
  }
  exportExcelLoading.value = false
}
二十四、富文本编辑器
<template>
  <div id="editor" />
</template>

<script lang="ts" setup>
import { onMounted, watch, ref } from '@vue/runtime-core'
import E from 'wangeditor'

const props = defineProps({
  modelValue: {
    type: String,
    default: ''
  }
})

interface EmitsType {
  (e: 'update:model-value', value: string): void
}

const emit = defineEmits<EmitsType>()

const editor = ref<InstanceType<typeof E> | null>(null)

const unWatchModelValue = watch(() => props.modelValue, () => {
  // 操作 DOM 的方式修改内容
  editor.value?.txt.html(props.modelValue)
  unWatchModelValue() // 取消监视
})

onMounted(() => {
  initEditor()
})

const initEditor = () => {
  editor.value = new E('#editor')

  // 配置 onchange 回调函数
  editor.value.config.onchange = function (newHtml: string) {
    emit('update:model-value', newHtml)
  }

  editor.value.create()
  // editor.value.txt.html(props.modelValue) // 注意:必须在 create 之后
}
</script>

<style lang="scss" scoped></style>
二十五、拖拽
<style lang="scss" scoped>
:deep(.el-tag) {
  margin-right: 5px;
}
</style>
<template>
  <div ref="draggableContainer">
    <slot />
  </div>
</template>

<script lang="ts" setup>
import { onMounted, ref } from '@vue/runtime-core'
import type { PropType } from 'vue'
import Sortable from 'sortablejs'

const draggableContainer = ref<HTMLDivElement | null>(null)

const props = defineProps({
  modelValue: {
    type: Array as PropType<any[]>,
    default: () => []
  },
  // 参考:https://github.com/SortableJS/Sortable#options
  options: {
    type: Object as PropType<Sortable.Options>,
    default: () => {}
  }
})

interface EmitsType {
  (e: 'update:model-value', value: any[]): void
}

const emit = defineEmits<EmitsType>()

onMounted(() => {
  initDraggable()
})

const initDraggable = () => {
  if (!draggableContainer.value) {
    console.error('容器不能为空')
    return
  }
  const sortable = Sortable.create(draggableContainer.value, {
    animation: 300,
    onUpdate (e) {
      if (e.oldIndex !== undefined && e.newIndex !== undefined) {
        // 删除拖拽的元素
        const list = props.modelValue.slice(0)
        const item = list.splice(e.oldIndex, 1)[0]
        // 把删除的元素放到新的位置
        list.splice(e.newIndex, 0, item)
        emit('update:model-value', list)
        // console.log(e, props.modelValue)
      }
    },
    ...props.options
  })
  console.log(sortable)
}
</script>

<style lang="scss" scoped>
:deep(.el-tag) {
  margin-right: 5px;
}
</style>


 浙公网安备 33010602011771号