1.原因
新项目需要使用gitlab管理代码,在clone项目的时候一直提示输入密码,输入密码显示权限拒绝请重新输入。反复查看原因仍然无法解决,最后决定服务器重新搭建gitlab服务。
2.流程
2.1 服务器信息
[root@localhost ~]# uname -a
Linux localhost.localdomain 3.10.0-1127.el7.x86_64 #1 SMP Tue Mar 31 23:36:51 UTC 2020 x86_64 x86_64 x86_64 GNU/Linux
[root@localhost ~]# cat /etc/system-release
CentOS Linux release 7.8.2003 (Core)
2.2 安装软件
# 安装依赖
sudo yum install -y curl policycoreutils-python openssh-server postfix

# 启动SSH和postfix
sudo systemctl enable sshd
sudo systemctl start sshd
sudo systemctl enable postfix
sudo systemctl start postfix

# 开放端口(防火墙未开忽略)
sudo firewall-cmd --add-service=ssh --permanent
sudo firewall-cmd --add-service=http --permanent
sudo firewall-cmd --reload
# 安装gitlab
curl https://packages.gitlab.com/install/repositories/gitlab/gitlab-ce/script.rpm.sh | sudo bash
sudo yum install -y gitlab-ce
最后一步安装失败多次,最后改用阿里云的镜像下载顺利通过
# 修改阿里云镜像
1、备份
mv /etc/yum.repos.d/CentOS-Base.repo /etc/yum.repos.d/CentOS-Base.repo.backup
or

cp /etc/yum.repos.d/CentOS-Base.repo /etc/yum.repos.d/CentOS-Base.repo.bak
2、下载新的CentOS-Base.repo 到/etc/yum.repos.d/
CentOS 5
wget -O /etc/yum.repos.d/CentOS-Base.repo http://mirrors.aliyun.com/repo/Centos-5.repo
或者
curl -o /etc/yum.repos.d/CentOS-Base.repo http://mirrors.aliyun.com/repo/Centos-5.repo
CentOS 6
wget -O /etc/yum.repos.d/CentOS-Base.repo http://mirrors.aliyun.com/repo/Centos-6.repo
或者
curl -o /etc/yum.repos.d/CentOS-Base.repo http://mirrors.aliyun.com/repo/Centos-6.repo
CentOS 7
wget -O /etc/yum.repos.d/CentOS-Base.repo http://mirrors.aliyun.com/repo/Centos-7.repo
或者
curl -o /etc/yum.repos.d/CentOS-Base.repo http://mirrors.aliyun.com/repo/Centos-7.repo
CentOS 8
curl -o /etc/yum.repos.d/CentOS-Base.repo http://mirrors.aliyun.com/repo/Centos-8.repo
3.添加EPEL源
EPEL(http://fedoraproject.org/wiki/EPEL)是由 Fedora 社区打造,为 RHEL 及衍生发行版如 CentOS、Scientific Linux 等提供高质量软件包的项目。装上 EPEL后,可以像在 Fedora 上一样,可以通过 yum install package-name,安装更多软件。
wget -P /etc/yum.repos.d/ http://mirrors.aliyun.com/repo/epel-7.repo
4.清理缓存并生成新的缓存
yum clean all
yum makecache
2.3配置
[root@node102 ~]# ll /etc/gitlab/
total 96
-rw------- 1 root root 97727 Nov 26 23:05 gitlab.rb
[root@node102 ~]#
[root@node102 ~]# cat /etc/gitlab/gitlab.rb |grep -v "#" |grep -Ev "^$"
external_url 'http://gitlab.example.com'
[root@node102 ~]#
[root@node102 ~]# vim /etc/gitlab/gitlab.rb
[root@node102 ~]#
[root@node102 ~]# cat /etc/gitlab/gitlab.rb |grep -v "#" |grep -Ev "^$"
external_url 'http://192.168.16.102'
unicorn['listen'] = '192.168.16.102'
unicorn['port'] = 8081
[root@node102 ~]#
[root@test102 ~]# gitlab-ctl diff-config
diff --git a/etc/gitlab/gitlab.rb b/opt/gitlab/etc/gitlab.rb.template
index 3e27e40..31c0b45 100644
--- a/etc/gitlab/gitlab.rb
+++ b/opt/gitlab/etc/gitlab.rb.template
@@ -20,7 +20,7 @@
 ##! URL on which GitLab will be reachable.
 ##! For more details on configuring external_url see:
 ##! https://docs.gitlab.com/omnibus/settings/configuration.html#configuring-the-external-url-for-gitlab
-external_url 'http://192.168.16.102'
+external_url 'GENERATED_EXTERNAL_URL'

 ## Roles for multi-instance GitLab
 ##! The default is to have no roles enabled, which results in GitLab running as an all-in-one instance.
@@ -740,8 +740,8 @@ external_url 'http://192.168.16.102'
 # unicorn['worker_processes'] = 2

 ### Advanced settings
-unicorn['listen'] = '192.168.16.102'
-unicorn['port'] = 8081
+# unicorn['listen'] = 'localhost'
+# unicorn['port'] = 8080
 # unicorn['socket'] = '/var/opt/gitlab/gitlab-rails/sockets/gitlab.socket'
 # unicorn['pidfile'] = '/opt/gitlab/var/unicorn/unicorn.pid'
 # unicorn['tcp_nopush'] = true
[root@test102 ~]#
[root@node102 ~]#  firewall-cmd --zone=public --permanent --add-port=8081/tcp
success
[root@node102 ~]# firewall-cmd --reload
success
[root@node102 ~]#
[root@node102 ~]# firewall-cmd --list-all
public (active)
  target: default
  icmp-block-inversion: no
  interfaces: enp0s3 enp0s8
  sources:
  services: ssh dhcpv6-client http
  ports: 8081/tcp
  protocols:
  masquerade: no
  forward-ports:
  source-ports:
  icmp-blocks:
  rich rules:

[root@node102 ~]#
[root@node102 ~]# gitlab-ctl reconfigure
Starting Chef Client, version 14.13.11
resolving cookbooks for run list: ["gitlab"]
Synchronizing Cookbooks:
  - gitlab (0.0.1)
  - package (0.1.0)
  - postgresql (0.1.0)
  - redis (0.1.0)
  - monitoring (0.1.0)
  - registry (0.1.0)
  - mattermost (0.1.0)
  - consul (0.1.0)
  - gitaly (0.1.0)
  - nginx (0.1.0)
  - praefect (0.1.0)
  - letsencrypt (0.1.0)
  - runit (4.3.0)
  - acme (4.0.0)
  - crond (0.1.0)
Installing Cookbook Gems:
Compiling Cookbooks...
Recipe: gitlab::default
......
......
......
Recipe: <Dynamically Defined Resource>
  * service[alertmanager] action restart
    - restart service service[alertmanager]
  * service[postgres-exporter] action restart
    - restart service service[postgres-exporter]
  * service[grafana] action restart
    - restart service service[grafana]
Running handlers:
Running handlers complete
Chef Client finished, 543/1455 resources updated in 04 minutes 09 seconds
gitlab Reconfigured!
[root@node102 ~]#
[root@node102 ~]# gitlab-ctl status
run: alertmanager: (pid 6469) 45s; run: log: (pid 6123) 128s
run: gitaly: (pid 6335) 50s; run: log: (pid 5516) 263s
run: gitlab-exporter: (pid 6380) 48s; run: log: (pid 5972) 146s
run: gitlab-workhorse: (pid 6358) 49s; run: log: (pid 5882) 174s
run: grafana: (pid 6529) 44s; run: log: (pid 6273) 74s
run: logrotate: (pid 5920) 159s; run: log: (pid 5929) 158s
run: nginx: (pid 5893) 171s; run: log: (pid 5905) 167s
run: node-exporter: (pid 6367) 49s; run: log: (pid 5960) 152s
run: postgres-exporter: (pid 6488) 45s; run: log: (pid 6150) 121s
run: postgresql: (pid 5632) 255s; run: log: (pid 5644) 254s
run: prometheus: (pid 6406) 47s; run: log: (pid 6080) 132s
run: redis: (pid 5471) 272s; run: log: (pid 5479) 271s
run: redis-exporter: (pid 6384) 48s; run: log: (pid 6003) 140s
run: sidekiq: (pid 5842) 183s; run: log: (pid 5853) 180s
run: unicorn: (pid 5803) 189s; run: log: (pid 5835) 186s
[root@node102 ~]#
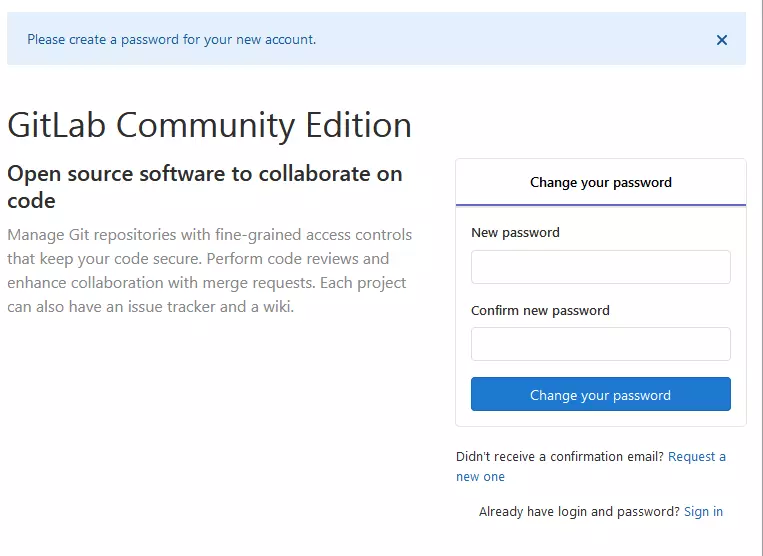
2.4 登陆
http://192.168.16.102 注意:这个地址是“external_url 'http://192.168.16.102'” 首次登录显示为密码设置界面,设置管理员密码,管理员账号默认username是root 设置完成之后,刷新即可使用root账号登录,登陆后会进入登陆页面
3.gitlab操作
gitlab 基本操作创建用户创建分组分配权限,项目的创建,分支的合并等不细说。
4.备忘
默认存储目录为/var/opt/gitlab/git-data/repositories
如果要更新或增加存储仓库目录,可以修改/etc/gitlab/gitlab.rb配置文件中git_data_dirs部分的内容,然后执行“gitlab-ctl reconfigure”命令使之生效。

gitlab-ctl 常用操作
sudo gitlab-ctl upgrade  # 组件更新(可选)
sudo gitlab-ctl stop  # 停止服务
sudo rsync -av <old-dir>  <new-dir>/  # 目录同步(注意斜杠的作用)
ls <new-dir>  # 检查文件及目录层级
sudo gitlab-ctl start  # 启动服务
sudo gitlab-ctl reconfigure  # 重配置

gitlab-ctl reconfigure    # 重载配置
gitlab-ctl check-config    # 检查配置并启动
gitlab-ctl diff-config    # 将用户配置与包可用配置进行比较
gitlab-ctl status    # 查看所有启动组件的进程和状态
gitlab-ctl service-list    # 查看所有服务
gitlab-ctl stop    # 停止GitLab服务
gitlab-ctl start    # 启动GitLab服务
gitlab-ctl restart    # 重启GitLab服务
gitlab-ctl once    # 如果GitLab服务已停止则启动服务,如果GitLab服务已启动则重启GitLab服务
修改root密码
https://docs.gitlab.com/ce/security/reset_root_password.html
