实现我博客旁边的线条效果 html canvas-nest.js 源码
本文为作者原创,允许转载,不过请在文章开头明显处注明链接和出处!!! 谢谢配合~
作者:stars-one
链接:https://www.cnblogs.com/stars-one/p/7264753.html
本篇大约有3668个字,阅读预计需要4.58分钟
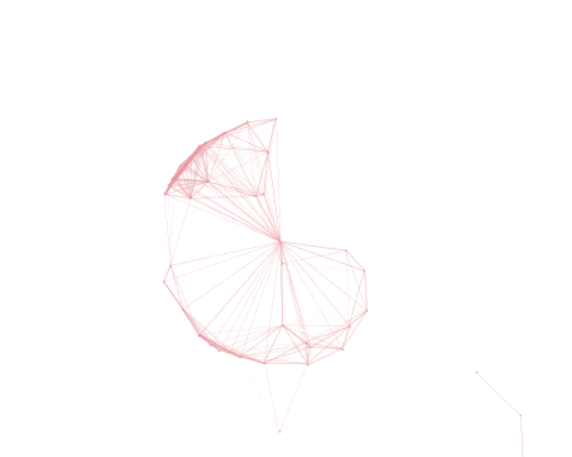
canvas-nest.js 这个js文件可以用来实现炫酷的线条与鼠标进行交互的功能,具体效果如图所示

js具体源码如下:
/**
     * Copyright (c) 2016 hustcc
     * License: MIT
     * Version: %%GULP_INJECT_VERSION%%
     * GitHub: https://github.com/hustcc/canvas-nest.js
    **/
    ! function() {
      //封装方法,压缩之后减少文件大小
      function get_attribute(node, attr, default_value) {
        return node.getAttribute(attr) || default_value;
      }
      //封装方法,压缩之后减少文件大小
      function get_by_tagname(name) {
        return document.getElementsByTagName(name);
      }
      //获取配置参数
      function get_config_option() {
        var scripts = get_by_tagname("script"),
          script_len = scripts.length,
          script = scripts[script_len - 1]; //当前加载的script
        return {
          l: script_len, //长度,用于生成id用
          z: get_attribute(script, "zIndex", -1), //z-index
          o: get_attribute(script, "opacity", 0.5), //opacity
          c: get_attribute(script, "color", "0,0,0"), //color
          n: get_attribute(script, "count", 99) //count
        };
      }
      //设置canvas的高宽
      function set_canvas_size() {
        canvas_width = the_canvas.width = window.innerWidth || document.documentElement.clientWidth || document.body.clientWidth,
        canvas_height = the_canvas.height = window.innerHeight || document.documentElement.clientHeight || document.body.clientHeight;
      }

      //绘制过程
      function draw_canvas() {
        context.clearRect(0, 0, canvas_width, canvas_height);
        //随机的线条和当前位置联合数组
        var e, i, d, x_dist, y_dist, dist; //临时节点
        //遍历处理每一个点
        random_points.forEach(function(r, idx) {
          r.x += r.xa,
          r.y += r.ya, //移动
          r.xa *= r.x > canvas_width || r.x < 0 ? -1 : 1,
          r.ya *= r.y > canvas_height || r.y < 0 ? -1 : 1, //碰到边界,反向反弹
          context.fillRect(r.x - 0.5, r.y - 0.5, 1, 1); //绘制一个宽高为1的点
          //从下一个点开始
          for (i = idx + 1; i < all_array.length; i++) {
            e = all_array[i];
            // 当前点存在
            if (null !== e.x && null !== e.y) {
              x_dist = r.x - e.x; //x轴距离 l
              y_dist = r.y - e.y; //y轴距离 n
              dist = x_dist * x_dist + y_dist * y_dist; //总距离, m

              dist < e.max && (e === current_point && dist >= e.max / 2 && (r.x -= 0.03 * x_dist, r.y -= 0.03 * y_dist), //靠近的时候加速
                d = (e.max - dist) / e.max,
                context.beginPath(),
                context.lineWidth = d / 2,
                context.strokeStyle = "rgba(" + config.c + "," + (d + 0.2) + ")",
                context.moveTo(r.x, r.y),
                context.lineTo(e.x, e.y),
                context.stroke());
            }
          }
        }), frame_func(draw_canvas);
      }
      //创建画布,并添加到body中
      var the_canvas = document.createElement("canvas"), //画布
        config = get_config_option(), //配置
        canvas_id = "c_n" + config.l, //canvas id
        context = the_canvas.getContext("2d"), canvas_width, canvas_height,
        frame_func = window.requestAnimationFrame || window.webkitRequestAnimationFrame || window.mozRequestAnimationFrame || window.oRequestAnimationFrame || window.msRequestAnimationFrame || function(func) {
          window.setTimeout(func, 1000 / 45);
        }, random = Math.random,
        current_point = {
          x: null, //当前鼠标x
          y: null, //当前鼠标y
          max: 20000 // 圈半径的平方
        },
        all_array;
      the_canvas.id = canvas_id;
      the_canvas.style.cssText = "position:fixed;top:0;left:0;z-index:" + config.z + ";opacity:" + config.o;
      get_by_tagname("body")[0].appendChild(the_canvas);

      //初始化画布大小
      set_canvas_size();
      window.onresize = set_canvas_size;
      //当时鼠标位置存储,离开的时候,释放当前位置信息
      window.onmousemove = function(e) {
        e = e || window.event;
        current_point.x = e.clientX;
        current_point.y = e.clientY;
      }, window.onmouseout = function() {
        current_point.x = null;
        current_point.y = null;
      };
      //随机生成config.n条线位置信息
      for (var random_points = [], i = 0; config.n > i; i++) {
        var x = random() * canvas_width, //随机位置
          y = random() * canvas_height,
          xa = 2 * random() - 1, //随机运动方向
          ya = 2 * random() - 1;
        // 随机点
        random_points.push({
          x: x,
          y: y,
          xa: xa,
          ya: ya,
          max: 6000 //沾附距离
        });
      }
      all_array = random_points.concat([current_point]);
      //0.1秒后绘制
      setTimeout(function() {
        draw_canvas();
      }, 100);
    }();
在html网页中body的标签中添加script标签,如下所示
<script type="text/javascript" color="208,55,66" opacity="0.5"count="99"src="test.js"></script> |
color 颜色自定义,opactity 是透明度,一般来说0.5-1就可以了,count的是数量,不要太大,太大可能会使得用户的浏览器卡顿,src后为该js文件的所在路径。
PS:
我直接用test命令了那个js文件


【推荐】国内首个AI IDE,深度理解中文开发场景,立即下载体验Trae
【推荐】编程新体验,更懂你的AI,立即体验豆包MarsCode编程助手
【推荐】抖音旗下AI助手豆包,你的智能百科全书,全免费不限次数
【推荐】轻量又高性能的 SSH 工具 IShell:AI 加持,快人一步
· .NET Core 中如何实现缓存的预热?
· 从 HTTP 原因短语缺失研究 HTTP/2 和 HTTP/3 的设计差异
· AI与.NET技术实操系列:向量存储与相似性搜索在 .NET 中的实现
· 基于Microsoft.Extensions.AI核心库实现RAG应用
· Linux系列:如何用heaptrack跟踪.NET程序的非托管内存泄露
· TypeScript + Deepseek 打造卜卦网站:技术与玄学的结合
· 阿里巴巴 QwQ-32B真的超越了 DeepSeek R-1吗?
· 【译】Visual Studio 中新的强大生产力特性
· 10年+ .NET Coder 心语 ── 封装的思维:从隐藏、稳定开始理解其本质意义
· 【设计模式】告别冗长if-else语句:使用策略模式优化代码结构