Learning OpenCV Lecture 1 (Using OpenCV in VS2010)
1、Create a new Win32 Console Application


2、Open the Property Manager by View->Property Manage
r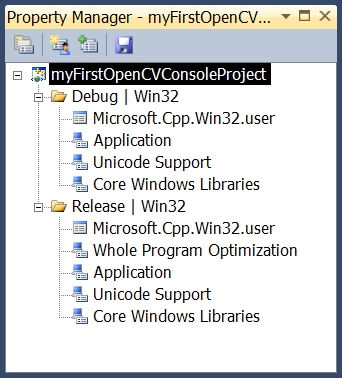

In Visual C++ 2010, a property sheet is an XML file that describes your project settings. We will now create a new one by right-clicking on the Debug | Win32 node of the project, and by selecting the Add New Project Property Sheet option (as seen in the following screenshot):

3、The new property sheet is then added once we click on Add. We now need to edit it. Simply double-click on the property sheet's name and select VC++ Directories, as seen here:

Edit the Include Directories textfield and add the path to the include files of your OpenCV library:

Do the same thing with the Library Directories. This time you add the path to your OpenCV library files:

4、Go to the Input item of the Linker node, as seen in the following screenshot: Edit

Edit the Additional Dependencies textfield and add the following list of library modules:

Note that we specified the libraries with names ending with the letter "d". These are the binaries for the Debug mode. You will need to create another (almost identical) property sheet for the Release mode. You follow the same procedure, but you add it under the Release | Win32 node. This time, the library names are specified without appending a "d" at the end.
5、Add a new .cpp file

Once you have recopied the code in the preceding figure (it will be explained later), you can compile it and run it using the Start green arrow in the Toolbar at the top of your screen. You will see your image displayed for five seconds. An example is seen here:


 浙公网安备 33010602011771号