Exchange 2013和2019共存部署实验系列(二)Active Directory和域准备、组件
一、活动目录:
实验域名:st.tech
域控制器部署(略)
Tip:提前规划好主机名,IP
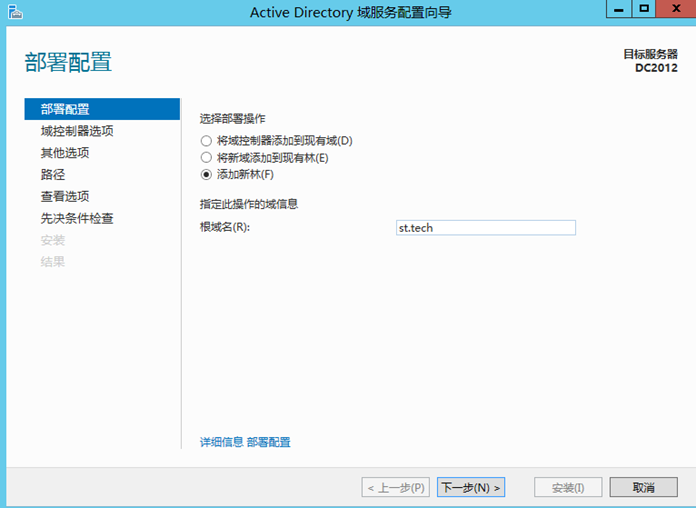
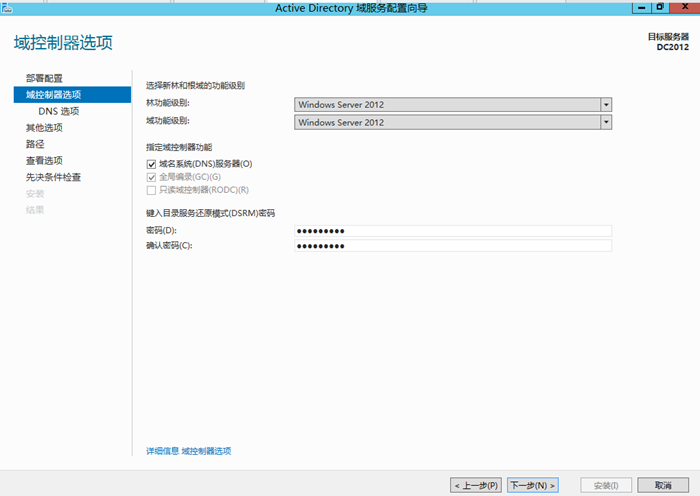
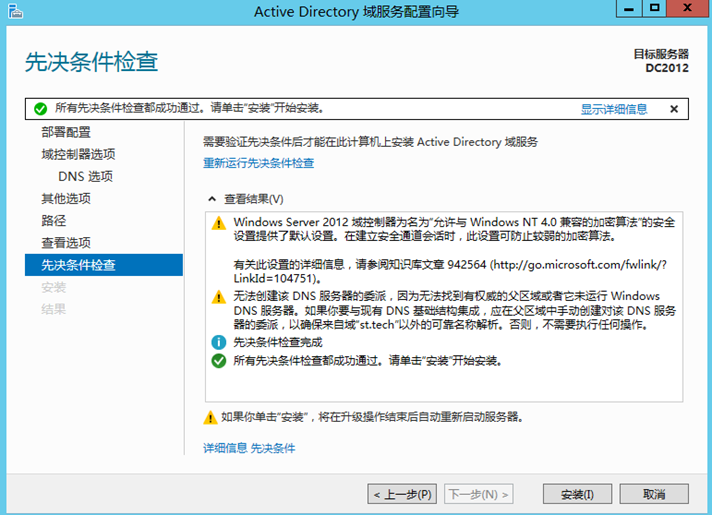
两个警告,第一个可以配置一下,不配置也无妨;第二个DNS会在接下来自动安装,可以忽略这两个警告
二、配置安装帐号并加入域:
这里选择默认域管理员帐号administrator,或在生产环境中要使用其它域帐号来安装,请确保该域帐号已加入组Administrators、Domain Admins、Enterprise Admins、Schema Admins 中。
另外,把准备好的四台服务器配置好静态IP并加入域中,以及用域管理员帐号登陆。
三、准备先决条件:
1、架构扩展:
在AD域控上,载入Exchange Server 2013 的安装镜像ISO,以管理员身份运行PowerShell,路径切换到ISO镜像盘符,在这个盘符下执行命令行:
扩展 Active Directory架构:(添加和更新类、属性及其他项目)
.\Setup /PrepareSchema /IAcceptExchangeServerLicenseTerms

准备组织:(创建容器、对象及其他项目,即Exchange组织)
.\Setup /PrepareAD /OrganizationName:st /IAcceptExchangeServerLicenseTerms
Setup /PrepareAD /OrganizationName:"<organization name>" /IAcceptExchangeServerLicenseTerms
注:/OrganizationName,指定要使用的 Exchange 组织名称。如果从未在组织中运行 PrepareAD,则此参数是必需的。

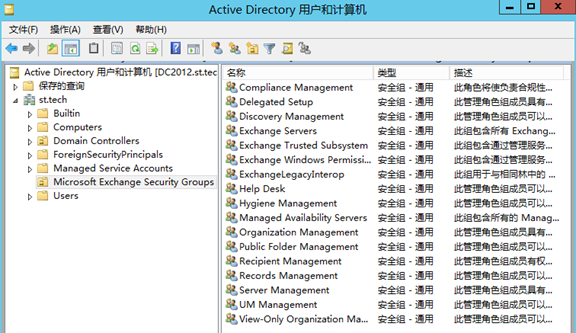
准备域:(创建其他容器和安全组,并设置权限)
.\setup /PrepareDomain:st.tech /IAcceptExchangeServerLicenseTerms
官网原文:
The final step to get Active Directory ready for Exchange is to prepare each of the Active Directory domains where Exchange will be installed or where mail-enabled users will be located. This step creates additional containers and security groups, and sets permissions so that Exchange can access them.
另外,如果您的 Active Directory 林中具有多个域,您将有多种选择来进行准备。选择与您希望执行的操作相符的选项。如果您只有一个域,您可以跳过此步骤,因为步骤准备组织中的 PrepareAD 命令已为您准备域。

验证是否扩展成功(本实验使用Exchange 2013 SP1 ISO)
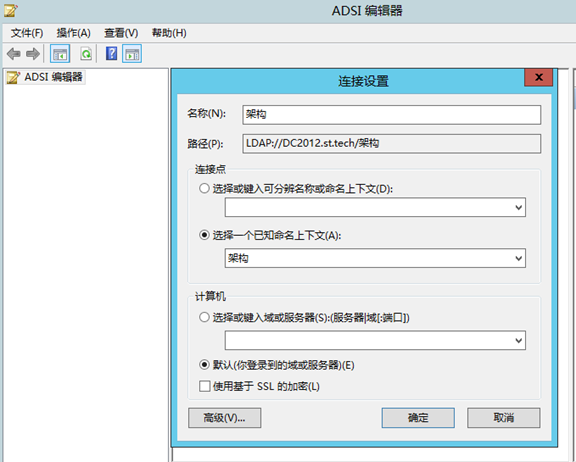
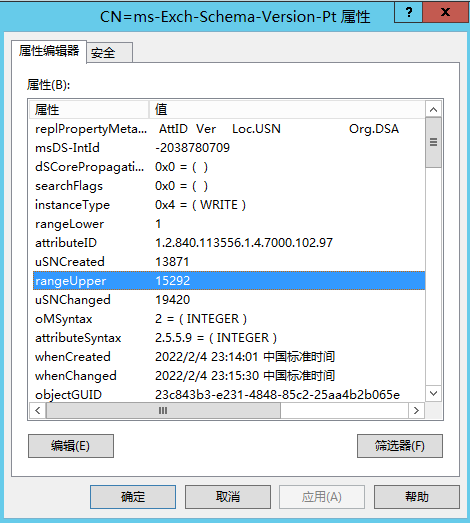
在"架构"命名上下文中,验证 ms-Exch-Schema-Verision-Pt 上的 rangeUpper 属性是否设置为 Exchange 2013 Active Directory 版本表中为 Exchange 2013 版本显示的值。
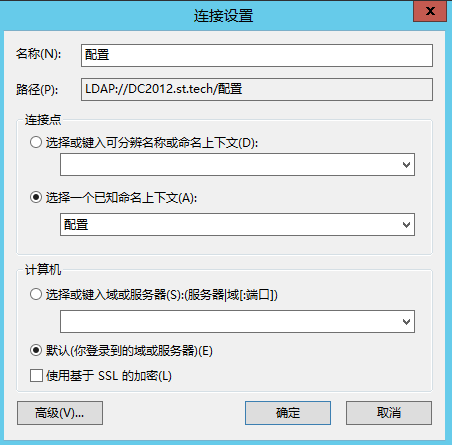
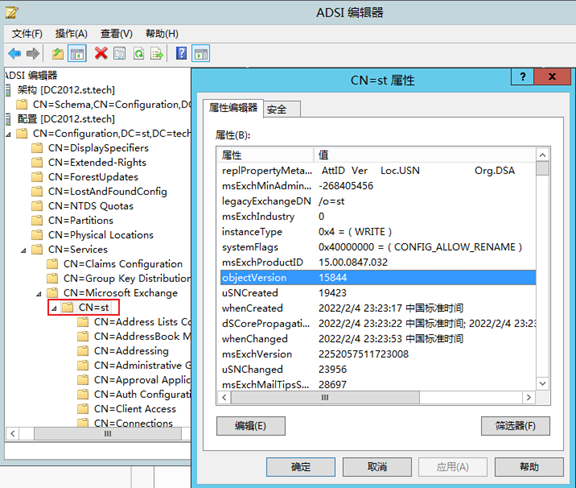
在"配置"命名上下文中,验证 CN=<your organization> ,CN=Microsoft Exchange,CN=Services,CN=Configuration,DC= <domain> 容器中的 objectVersion 属性是否设置为 Exchange 2013 Active Directory 版本表中为 Exchange 2013 版本显示的值。
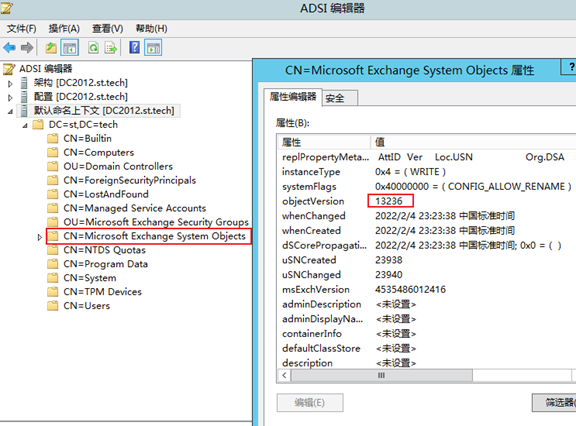
在"默认"命名上下文中,验证 DC= 根域下的 Microsoft Exchange 系统对象容器中的 objectVersion 属性是否设置为 < Exchange 2013 Active Directory 版本表中为 Exchange 2013 版本显示的值。
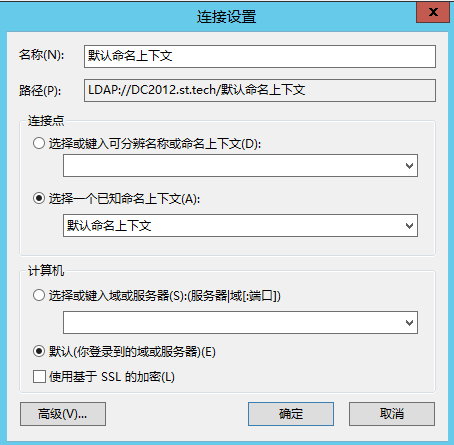
打开ADSI编辑器,连接到…
Exchange 2013 Active Directory 版本
|
Exchange 2013 版本 |
rangeUpper |
objectVersion (默认) |
objectVersion (配置) |
|
Exchange 2013 CU23 KB5004778 |
15312 |
13237 |
16133 |
|
Exchange 2013 CU23 |
15312 |
13237 |
16133 |
|
Exchange 2013 CU22 |
15312 |
13236 |
16131 |
|
Exchange 2013 CU10-CU21 |
15312 |
13236 |
16130 |
|
Exchange 2013 CU9 |
15312 |
13236 |
15965 |
|
Exchange 2013 CU8 |
15312 |
13236 |
15965 |
|
Exchange 2013 CU7 |
15312 |
13236 |
15965 |
|
Exchange 2013 CU6 |
15303 |
13236 |
15965 |
|
Exchange 2013 CU5 |
15300 |
13236 |
15870 |
|
Exchange 2013 SP1 |
15292 |
13236 |
15844 |
|
Exchange 2013 CU3 |
15283 |
13236 |
15763 |
|
Exchange 2013 CU2 |
15281 |
13236 |
15688 |
|
Exchange 2013 CU1 |
15254 |
13236 |
15614 |
|
Exchange 2013 RTM |
15137 |
13236 |
15449 |
来自 <https://docs.microsoft.com/zh-cn/exchange/prepare-active-directory-and-domains-exchange-2013-help>
2、安装Windows组件
在AD服务器上安装以下软件:
a)安装远程工具管理包
Install-windowsfeature RSAT-ADDS
在四台待装的Exchange服务器上以管理员身份运行PowerShell,执行以下命令:
Install-WindowsFeature AS-HTTP-Activation, Desktop-Experience, NET-Framework-45-Features, RPC-over-HTTP-proxy, RSAT-Clustering, RSAT-Clustering-CmdInterface, RSAT-Clustering-Mgmt, RSAT-Clustering-PowerShell, Web-Mgmt-Console, WAS-Process-Model, Web-Asp-Net45, Web-Basic-Auth, Web-Client-Auth, Web-Digest-Auth, Web-Dir-Browsing, Web-Dyn-Compression, Web-Http-Errors, Web-Http-Logging, Web-Http-Redirect, Web-Http-Tracing, Web-ISAPI-Ext, Web-ISAPI-Filter, Web-Lgcy-Mgmt-Console, Web-Metabase, Web-Mgmt-Console, Web-Mgmt-Service, Web-Net-Ext45, Web-Request-Monitor, Web-Server, Web-Stat-Compression, Web-Static-Content, Web-Windows-Auth, Web-WMI, Windows-Identity-Foundation, RSAT-ADDS –Restart
3、安装必备组件:
在四台待装的Exchange服务器上按顺序安装以下组件:
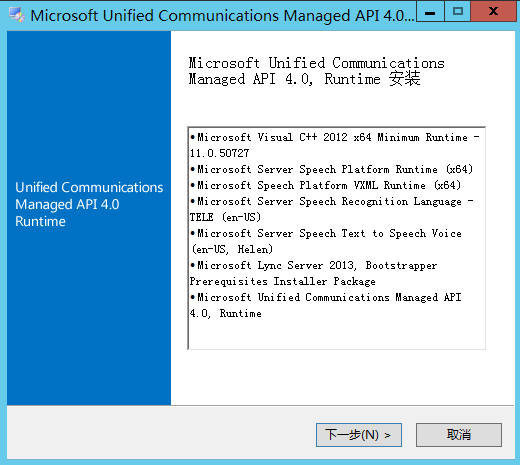
a) Microsoft Unified Communications Managed API 4.0, Core Runtime 64-bit
https://www.microsoft.com/zh-cn/download/details.aspx?id=34992
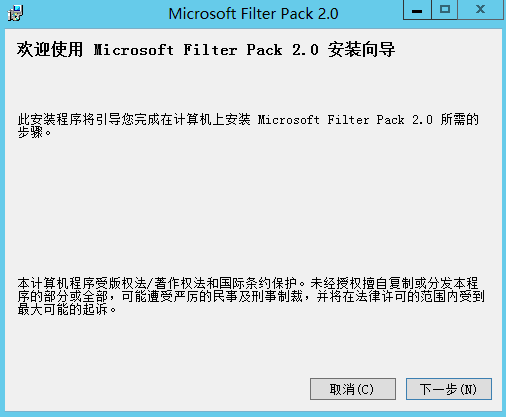
b) Microsoft Office 2010 Filter Pack 64 位
https://www.microsoft.com/zh-CN/download/details.aspx?id=17062


 浙公网安备 33010602011771号