PyMySQL
(1)简介
(2)使用
- 要使用 PyMySQL,首先需要安装它。可以使用 pip 工具来安装 PyMySQL。在终端或命令提示符中执行以下命令:
(1)返回的数据是查询到的结果的条数 execute(sql)
| import pymysql |
| |
| conn = pymysql.connect(host='localhost', |
| user='root', |
| password='123456', |
| database='123', |
| charset='utf8mb4', |
| cursorclass=pymysql.cursors.DictCursor) |
| |
| cursor = conn.cursor() |
| sql = 'select * from user where password = 123;' |
| |
| res = cursor.execute(sql) |
| print(res) |
(2)查看执行sql语句后返回的所有结果 fetchall()
| import pymysql |
| |
| conn = pymysql.connect(host='localhost', |
| user='root', |
| password='123456', |
| database='123', |
| charset='utf8mb4', |
| cursorclass=pymysql.cursors.DictCursor) |
| |
| cursor = conn.cursor() |
| sql = 'select * from user where password = 123;' |
| res = cursor.execute(sql) |
| |
| res = cursor.fetchall() |
| print(res) |
| |
| |
(3)查看一条结果 fetchone()
| import pymysql |
| |
| conn = pymysql.connect(host='localhost', |
| user='root', |
| password='123456', |
| database='123', |
| charset='utf8mb4') |
| |
| cursor = conn.cursor(cursor=pymysql.cursors.DictCursor) |
| sql = 'select * from user where password = 123;' |
| res = cursor.execute(sql) |
| res = cursor.fetchone() |
| print(res) |
| |
(4)查看指定数量结果 fetchamany(size=)
| import pymysql |
| |
| conn = pymysql.connect(host='localhost', |
| user='root', |
| password='123456', |
| database='123', |
| charset='utf8mb4', |
| cursorclass=pymysql.cursors.DictCursor) |
| |
| cursor = conn.cursor() |
| sql = 'select * from user where password = 123;' |
| res = cursor.execute(sql) |
| res = cursor.fetchmany(size=1) |
| print(res) |
| |
(5)插入数据
- 连接到 MySQL 数据库。
- 创建一个游标对象。
- 使用游标对象执行 SQL 插入语句 INSERT INTO VALUES
- 提交事务(如果启用了自动提交)或手动提交事务(如果未启用自动提交)。
- 关闭游标和数据库连接。
| import pymysql |
| |
| |
| conn = pymysql.connect(host='localhost', |
| user='root', |
| password='123456', |
| database='123', |
| charset='utf8mb4', |
| cursorclass=pymysql.cursors.DictCursor) |
| |
| try: |
| with conn.cursor() as cursor: |
| |
| sql = "INSERT INTO user (email, password) VALUES (%s, %s)" |
| cursor.execute(sql, ('heart@ssrofficial.com', '123456789')) |
| |
| |
| conn.commit() |
| |
| print("Data inserted successfully!") |
| finally: |
| |
| conn.close() |
(6)更新数据
- 连接到 MySQL 数据库。
- 创建一个游标对象。
- 使用游标对象执行 SQL 更新语句 UPDATE SET
- 提交事务(如果启用了自动提交)或手动提交事务(如果未启用自动提交)。
- 关闭游标和数据库连接。
| import pymysql |
| |
| |
| conn = pymysql.connect(host='localhost', |
| user='root', |
| password='123456', |
| database='123', |
| charset='utf8mb4', |
| cursorclass=pymysql.cursors.DictCursor) |
| |
| try: |
| with conn.cursor() as cursor: |
| |
| sql = "UPDATE user SET password=%s WHERE email=%s" |
| cursor.execute(sql, ('123', 'heart@ssrofficial.com')) |
| |
| |
| conn.commit() |
| |
| print("Data updated successfully!") |
| finally: |
| |
| conn.close() |
(7)补充
| print(cursor.fetchone()) |
| print(cursor.fetchone()) |
| cursor.scroll(1,'relative') |
| print(cursor.fetchall()) |
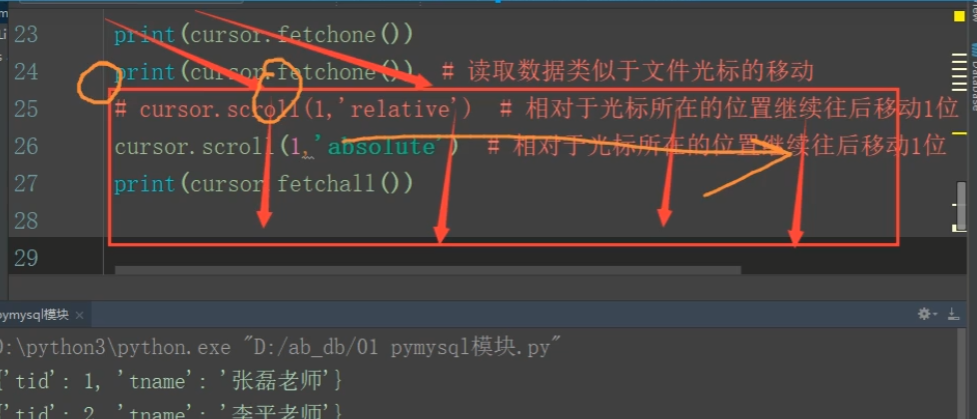
| print(cursor.fetchone()) |
| print(cursor.fetchone()) |
| cursor.scroll(1,'absolute') |
| print(cursor.fetchall()) |

SQL注入
(1)简介
- SQL注入(SQL Injection)是一种常见的网络安全漏洞,它利用应用程序对用户输入数据的处理不当,从而使攻击者能够向应用程序的数据库中插入恶意的SQL代码。这种攻击可能会导致数据库暴露、数据泄露、数据篡改、服务器拒绝服务等严重后果。
| select * from user where name='heart' |
| |
| select * from user where name='xxx' or 1=1 |
| |
| # 日常生活中很多软件在注册的时候都不能含有特殊符号 |
| # 因为怕你构造出特定的语句入侵数据库 造成数据泄露/删库 不安全 |
(2)解决办法
- 不要手动拼接数据,先用%s占位,之后将需要拼接的数据直接交给execute方法即可
| conn = pymysql.connect(host = 'localhost', |
| user = 'root', |
| password = '123456', |
| database = '123', |
| charset = 'utf8mb4', |
| ) |
| cursor = conn.cursor(cursor=pymysql.cursors.DictCursor) |
| |
| username =input(f'请输入用户名:>>>') |
| password =input(f'请输入密码:>>>') |
| |
| sql ='select * from user where name=%s and password=%s' |
| rows=cursor.execute(sql,(username,password)) |
| if rows: |
| print(f'登陆成功!') |
| else: |
| print(f'用户名密码错误!') |
(3)补充
| conn = pymysql.connect(host = 'localhost', |
| user = 'root', |
| password = '123456', |
| database = '123', |
| charset = 'utf8mb4', |
| autocommit = True |
| ) |
| cursor = conn.cursor(cursor=pymysql.cursors.DictCursor) |
| |
| # 增 |
| sql = 'insert into user(name,password) values(%s,%s)' |
| rows = cursor.execute(sql,('heart',123)) |
| conn.commit() # 确认 |
| |
| # 改 |
| sql = 'update user set name="god" where id = 1' |
| rows = cursor.execute(sql) |
| |
| # 删 |
| sql = 'delete from user where id = 1' |
| rows = cursor.execute(sql) |
| |
| # 查 |
| sql = 'select * from user' |
| cursor.execute(sql) |
| |
| # 增删改查中 |
| # 增删改中它们的操作设计到数据的修改 |
| # 需要二次确认 |
| |
| conn.commit() # 确认 |
| |
| # 一次性增加多条数据 |
| sql = 'insert into user(name,password) values(%s,%s)' |
| row = cursor.execute(sql,[('xxx',123),('aaa',123),('zzz',123)]) |
| conn.commit() # 确认 |


【推荐】国内首个AI IDE,深度理解中文开发场景,立即下载体验Trae
【推荐】编程新体验,更懂你的AI,立即体验豆包MarsCode编程助手
【推荐】抖音旗下AI助手豆包,你的智能百科全书,全免费不限次数
【推荐】轻量又高性能的 SSH 工具 IShell:AI 加持,快人一步
· 无需6万激活码!GitHub神秘组织3小时极速复刻Manus,手把手教你使用OpenManus搭建本
· Manus爆火,是硬核还是营销?
· 终于写完轮子一部分:tcp代理 了,记录一下
· 别再用vector<bool>了!Google高级工程师:这可能是STL最大的设计失误
· 单元测试从入门到精通