
langchain Chatchat 学习实践(一)——Windows CPU部署记录
1、下载langchain Chatchat
git clone https://github.com/chatchat-space/Langchain-Chatchat.git
(可选)如果下载不下来,可能使用了代理,需要设置代理地址:
git config --global http.proxy "localhost:你的代理端口"
之后可以取消代理设置:
git config --global --unset http.proxy
2、安装anaconda,
添加path环境变量
D:\ProgramData\anaconda3
D:\ProgramData\anaconda3\Scripts
D:\ProgramData\anaconda3\Library\bin
3、安装VS Code(配置好python插件)
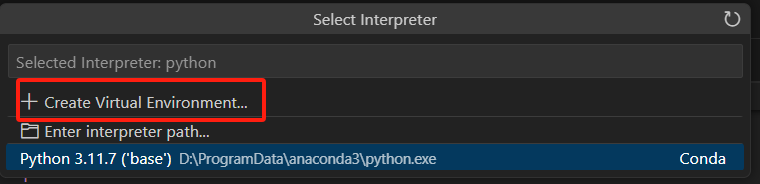
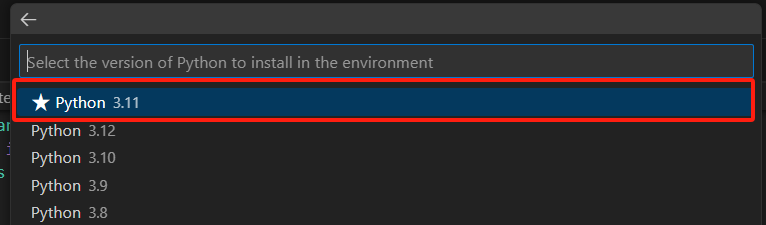
4、使用 VS Code打开项目,创建anaconda虚拟环境:

5、安装依赖,可以切换国内源
pip install -r requirements.txt -i https://pypi.tuna.tsinghua.edu.cn/simple/
pip install -r requirements_api.txt -i https://pypi.tuna.tsinghua.edu.cn/simple/
pip install -r requirements_webui.txt -i https://pypi.tuna.tsinghua.edu.cn/simple/
6、下载模型
git lfs install
从modescope下载LLM模型和向量模型,速度快
git clone https://www.modelscope.cn/ZhipuAI/chatglm3-6b.git
git clone https://www.modelscope.cn/AI-ModelScope/bge-large-zh.git
7、执行配置文件拷贝程序
python copy_config_example.py
修改文件配置为本地模型路径,设置CPU运行方式
8、初始化数据库
python init_database.py --recreate-vs
正常情况下会出现如下不正常情况:
ModuleNotFoundError: No module named 'pwd'
解决方法:
pip install langchain-community==0.0.19
(关于这一点官方git并没有进行版本依赖更新,或者说明如何处置。当前版本已经无人维护状态,他们正把精力投入到下一个大版本中)
9、启动
python startup.py -a
正常情况下会出现如下不正常情况:
卡在启动过程不动了
原因是主机性能不足以支撑chatglm6b
解决方法:使用qwen0.5B的模型,或使用带显卡的主机,或使用在线模型。若使用在线模型,须安装对应的SDK,如qwen:pip install dashscope
10、访问UI页面,进行测试


【推荐】国内首个AI IDE,深度理解中文开发场景,立即下载体验Trae
【推荐】编程新体验,更懂你的AI,立即体验豆包MarsCode编程助手
【推荐】抖音旗下AI助手豆包,你的智能百科全书,全免费不限次数
【推荐】轻量又高性能的 SSH 工具 IShell:AI 加持,快人一步
· 周边上新:园子的第一款马克杯温暖上架
· Open-Sora 2.0 重磅开源!
· .NET周刊【3月第1期 2025-03-02】
· 分享 3 个 .NET 开源的文件压缩处理库,助力快速实现文件压缩解压功能!
· [AI/GPT/综述] AI Agent的设计模式综述
2014-03-16 惊心动魄的一上午,感谢eclipse 的文件恢复功能