Ubuntu18.04 安装MySQL5.7
一、安装MySQL
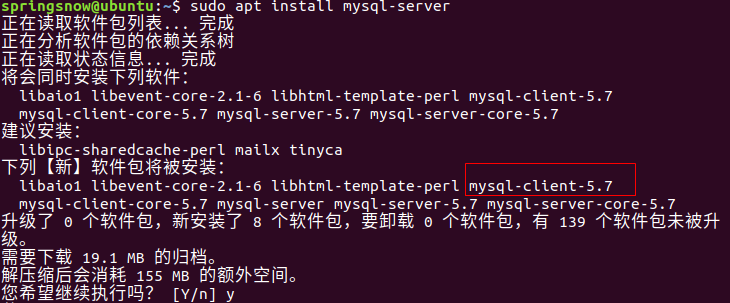
在Ubuntu中,默认情况下,只有最新版本的MySQL包含在APT软件包存储库中,要安装它,只需更新服务器上的包索引并安装默认包apt-get。
sudo apt-get update
1、安装mysql服务:
sudo apt install mysql-server-5.7
2、检查状态:
需要先安装net-tools
sudo apt install net-tools
sudo netstat -tap | grep mysql
3、注意查看mysql版本使用:
mysql -V
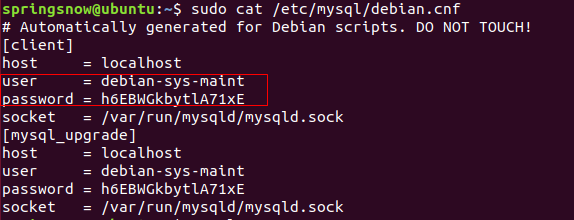
4、查看MySQL5.7默认账号和密码:
sudo cat /etc/mysql/debian.cnf
二、配置MySQL
sudo mysql_secure_installation
#1
VALIDATE PASSWORD PLUGIN can be used to test passwords...
Press y|Y for Yes, any other key for No: N (我的选项)

#2
 Please set the password for root here...
 New password: (输入密码)
Re-enter new password: (重复输入)

#3
 By default, a MySQL installation has an anonymous user,
 allowing anyone to log into MySQL without having to have
 a user account created for them...
 Remove anonymous users? (Press y|Y for Yes, any other key for No) : N (我的选项)

#4
 Normally, root should only be allowed to connect from
 'localhost'. This ensures that someone cannot guess at
 the root password from the network...
 Disallow root login remotely? (Press y|Y for Yes, any other key for No) : N (我的选项)

#5
 By default, MySQL comes with a database named 'test' that
 anyone can access...
 Remove test database and access to it? (Press y|Y for Yes, any other key for No) : N (我的选项)

#6
 Reloading the privilege tables will ensure that all changes
 made so far will take effect immediately.
 Reload privilege tables now? (Press y|Y for Yes, any other key for No) : Y (我的选项)
三、查mysql服务状态
systemctl status mysql.service
显示如下结果说明mysql服务是正常的:
四、修改root账户秘密认证方式:
连接到Mysql:
sudo mysql -uroot -p
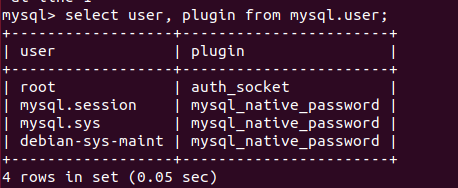
1、查看用户:
mysql> select user, plugin from mysql.user;
2、重置Root密码,修改认证方式:
mysql> update mysql.user set authentication_string=PASSWORD('123456'), plugin='mysql_native_password' where user='root';
mysql>flush privileges;
mysql> exit
五、配置远程访问mysql:
1、修改配置文件,注释掉bind-address = 127.0.0.1
sudo vi /etc/mysql/mysql.conf.d/mysqld.cnf
2、保存退出,然后进入mysql服务
mysql -uroot -p
3、执行授权命令:
mysql>grant all ON *.* to root@'%' identified by '123456' with grant option;
 Query OK, 0 rows affected, 1 warning (0.00 sec)
mysql> flush privileges;
 Query OK, 0 rows affected (0.00 sec)
mysql> exit
 Bye
其中root@%,localhost就是本地访问,配置成%就是所有主机都可连接;第二个'123456'为你给新增权限用户设置的密码。
4、重启
sudo /etc/init.d/mysql restart
六、删除MySQL
想安装MySQL 8.0或者重装MySQL 5.7的前提条件,可以先删除已有的。
1.删除 mysql:
sudo apt autoremove --purge mysql-server-*
sudo apt remove mysql-server
sudo apt autoremove mysql-server
sudo apt remove mysql-common
2.清理残留数据
dpkg -l |grep ^rc|awk '{print $2}' |sudo xargs dpkg -P七、安装mysql可视化工具mysql-workbench
也可以更新软件包索引并直接安装 MySQL Workbench 软件包:
sudo apt update启动 MySQL Workbench。
您可以通过键入 mysql-workbench 或单击 MySQL Workbench 图标 (Activities -> MySQL Workbench) 从命令行启动它。
当您第一次启动 MySQL Workbench 时,应出现如下窗口:
连接配置界面
要添加新连接,请单击 “MySQL Connections” 旁边带圆圈的加号⊕。
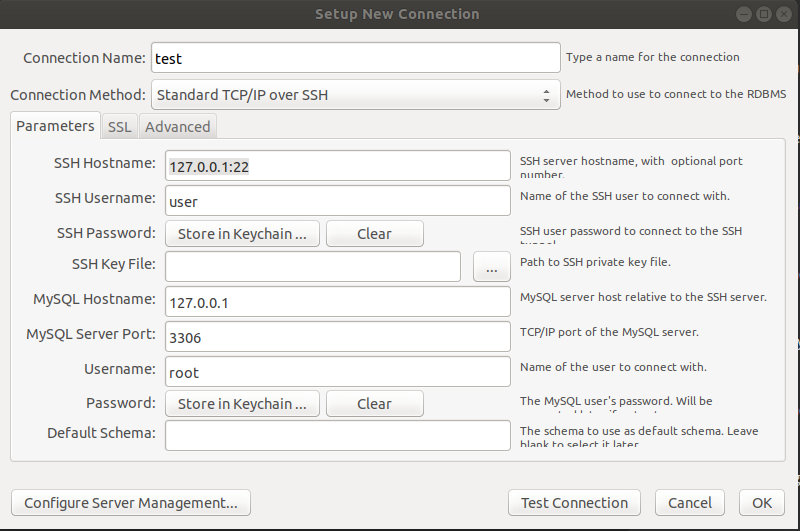
将打开一个新窗口 “Setup New Connection form”。在此示例中,我们将通过 SSH 连接到远程服务器。在“Connection name”字段中输入有意义的名称,然后 Standard TCP/IP over SSH 从“连接方法”下拉列表中进行选择。
- 在 “SSH Hostname”中,输入服务器的主机名或 IP 地址,然后输入 SSH 端口。
- 输入您的远程 “SSH Username”。对于身份验证,您可以使用用户密码或 SSH 密钥。
- 保留 “MySQL Hostname”字段的默认值 (127.0.0.1) 。
- 在“Username”和“Password”字段中输入远程数据库登录凭据。
完成后,单击“测试连接”按钮。
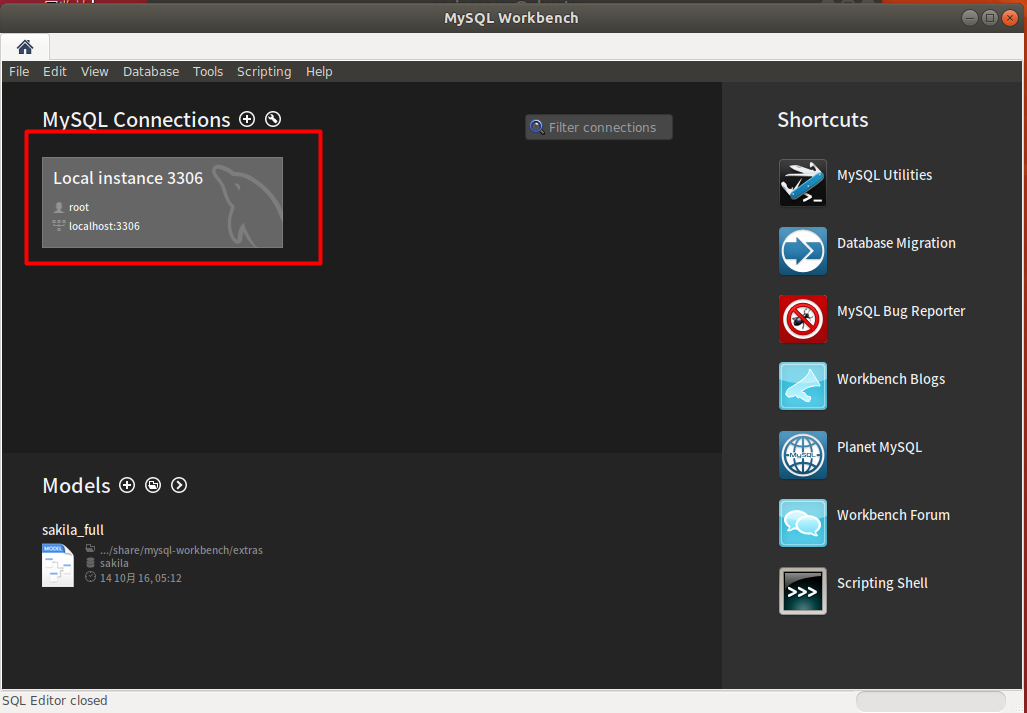
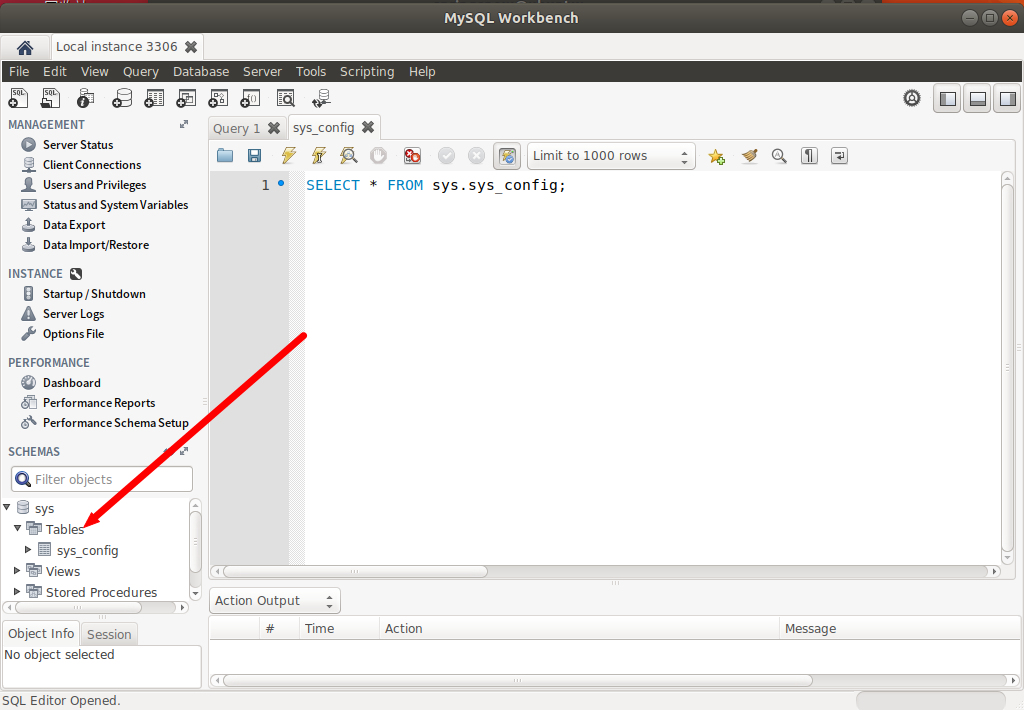
这里直接点击已有的连接:
配置完成后,在主界面选择数据库进行连接:
posted on 2020-01-17 16:00 springsnow 阅读(5224) 评论(0) 编辑 收藏 举报
