
二、集成MyBatis
1. 创建新模块
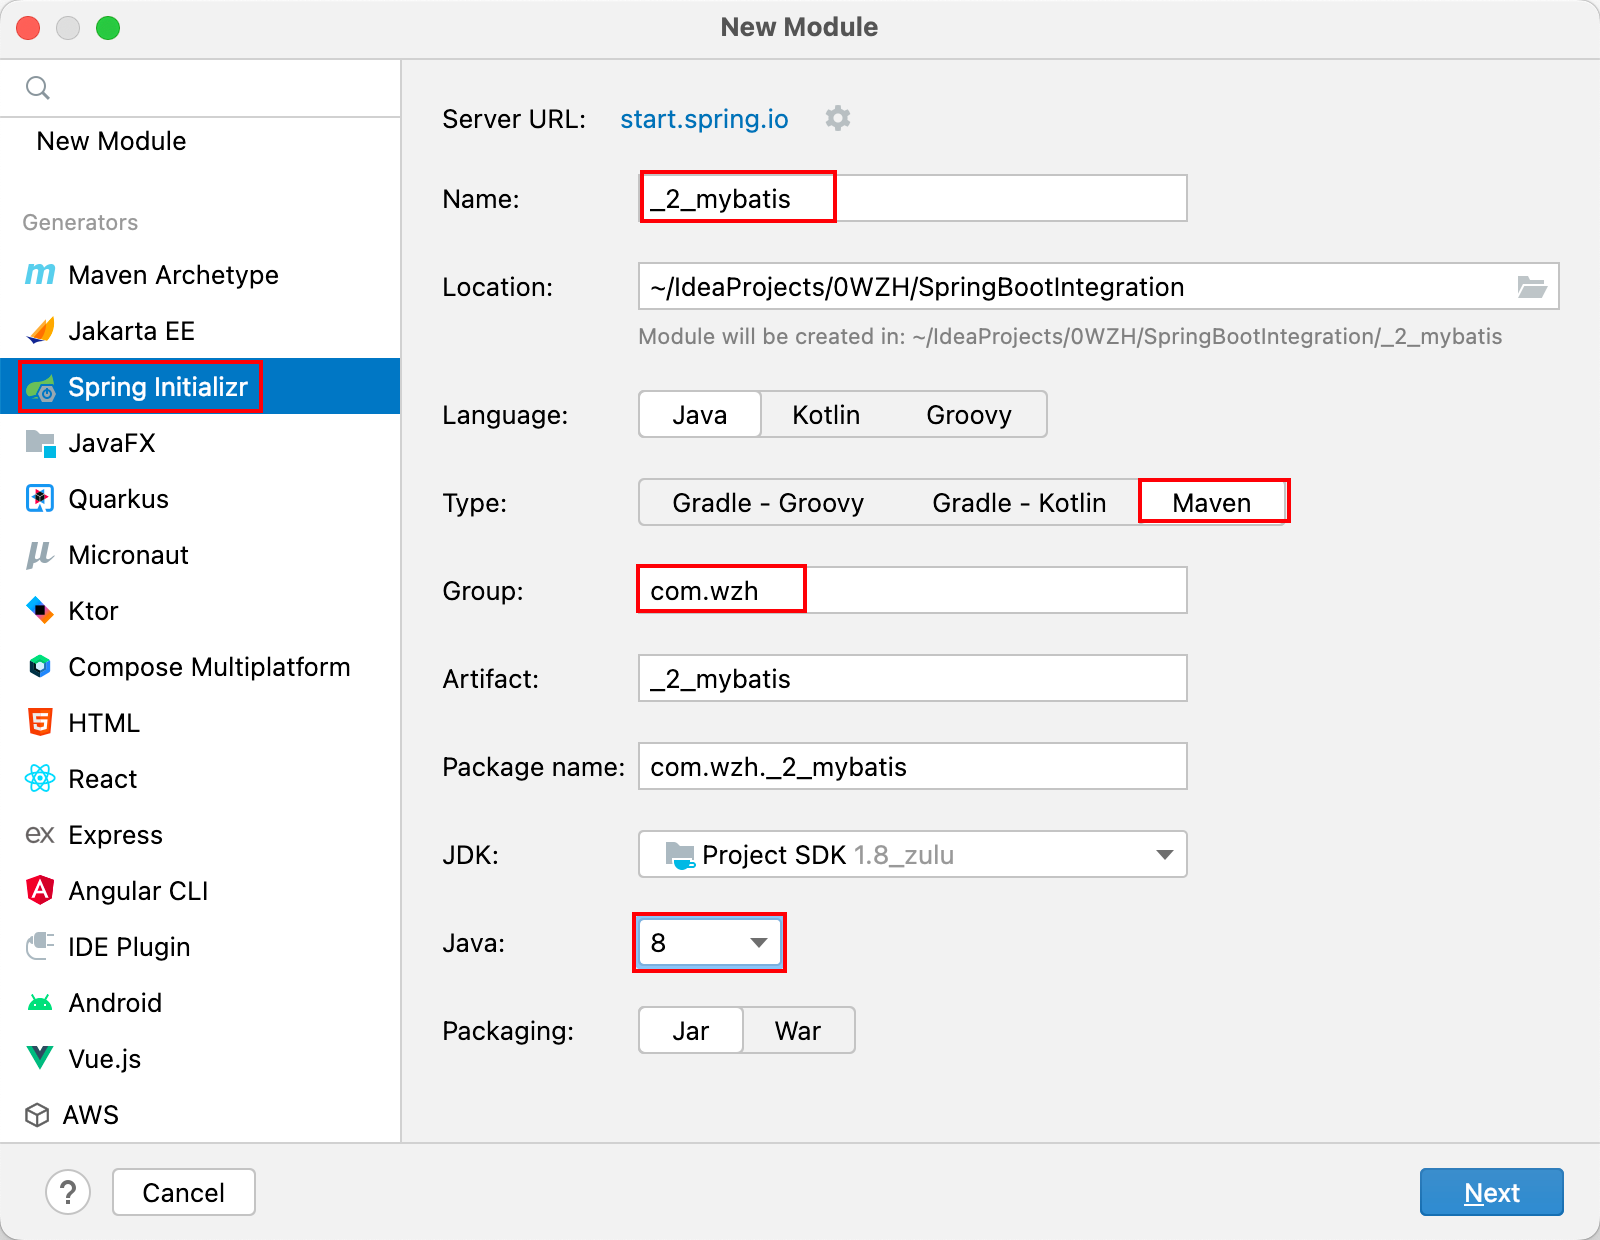
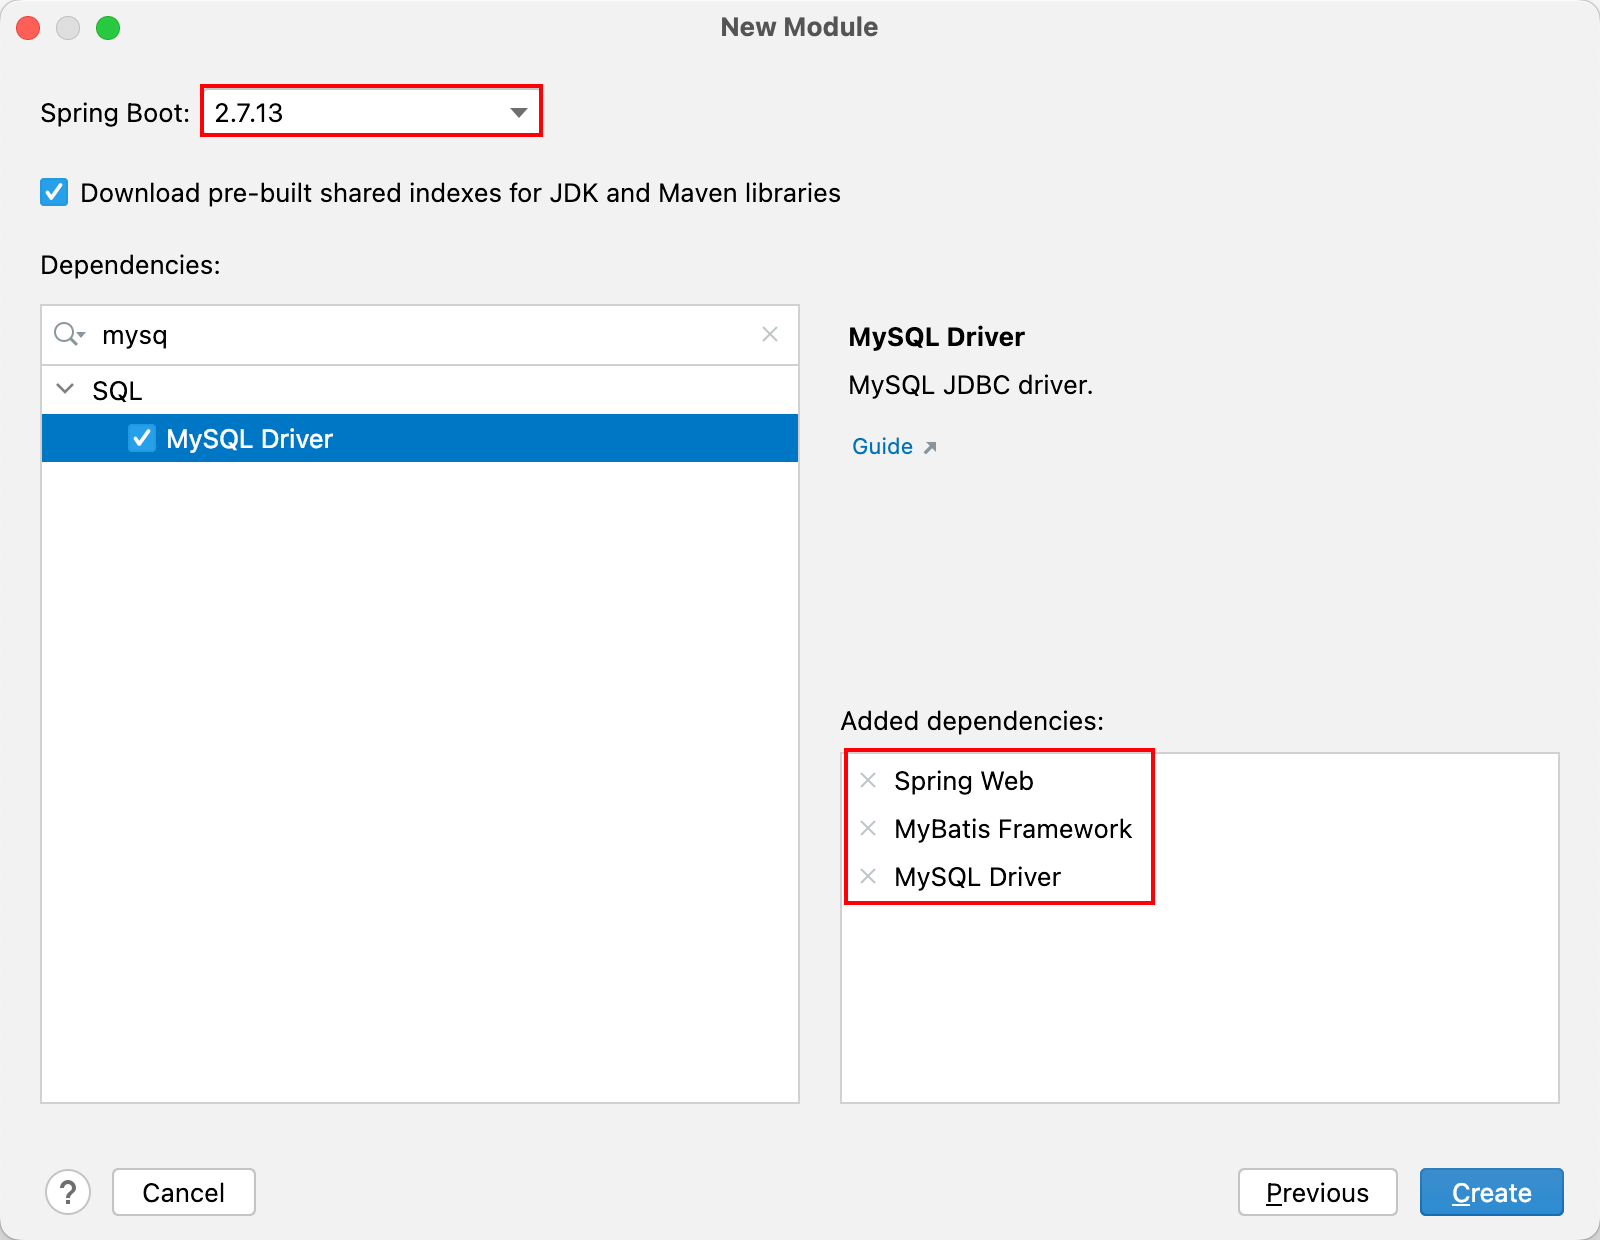
添加依赖
1.1. pom.xml文件
<?xml version="1.0" encoding="UTF-8"?>
<project xmlns="http://maven.apache.org/POM/4.0.0" xmlns:xsi="http://www.w3.org/2001/XMLSchema-instance"
	xsi:schemaLocation="http://maven.apache.org/POM/4.0.0 https://maven.apache.org/xsd/maven-4.0.0.xsd">
	<modelVersion>4.0.0</modelVersion>
	<parent>
		<groupId>org.springframework.boot</groupId>
		<artifactId>spring-boot-starter-parent</artifactId>
		<version>2.7.13</version>
		<relativePath/> <!-- lookup parent from repository -->
	</parent>
	<groupId>com.wzh</groupId>
	<artifactId>_2_mybatis</artifactId>
	<version>0.0.1-SNAPSHOT</version>
	<name>_2_mybatis</name>
	<description>_2_mybatis</description>
	<properties>
		<java.version>1.8</java.version>
	</properties>
	<dependencies>
		<dependency>
			<groupId>org.springframework.boot</groupId>
			<artifactId>spring-boot-starter-web</artifactId>
		</dependency>
		<dependency>
			<groupId>org.mybatis.spring.boot</groupId>
			<artifactId>mybatis-spring-boot-starter</artifactId>
			<version>2.3.1</version>
		</dependency>
		<!--lombok-->
		<dependency>
			<groupId>org.projectlombok</groupId>
			<artifactId>lombok</artifactId>
		</dependency>
		<dependency>
			<groupId>com.mysql</groupId>
			<artifactId>mysql-connector-j</artifactId>
			<scope>runtime</scope>
		</dependency>
		<dependency>
			<groupId>org.springframework.boot</groupId>
			<artifactId>spring-boot-starter-test</artifactId>
			<scope>test</scope>
		</dependency>
		<dependency>
			<groupId>org.mybatis.spring.boot</groupId>
			<artifactId>mybatis-spring-boot-starter-test</artifactId>
			<version>2.3.1</version>
			<scope>test</scope>
		</dependency>
	</dependencies>

	<build>
		<resources>
			<!--编译时,扫描src/main/java下所有xx.xml文件-->
			<resource>
				<directory>src/main/java</directory>
				<includes>
					<include>**/*.xml</include>
				</includes>
			</resource>
		</resources>
		<plugins>
			<plugin>
				<groupId>org.springframework.boot</groupId>
				<artifactId>spring-boot-maven-plugin</artifactId>
			</plugin>
		</plugins>
	</build>

</project>
⚠️注意:build时需要将mapper文件夹下的xml文件构建进去
1.2. 环境准备
1.2.1. 数据库
创建student表
create table student
(
    id   int auto_increment comment '唯一标识id'
        primary key,
    name varchar(30) not null comment '姓名',
    age  int         not null comment '年龄'
)
    collate = utf8mb3_bin;
1.2.2. 数据库连接配置
spring:
  datasource:
    driver-class-name: com.mysql.cj.jdbc.Driver
    url: jdbc:mysql://localhost:3306/springboot
    username: root
    password: root
1.2.3. 创建vo
package com.wzh._2_mybatis.vo;

import lombok.Data;

@Data
public class StudentVo {
    private Integer id;
    private String name;
    private Integer age;
}
2. 创建mybatis相关类
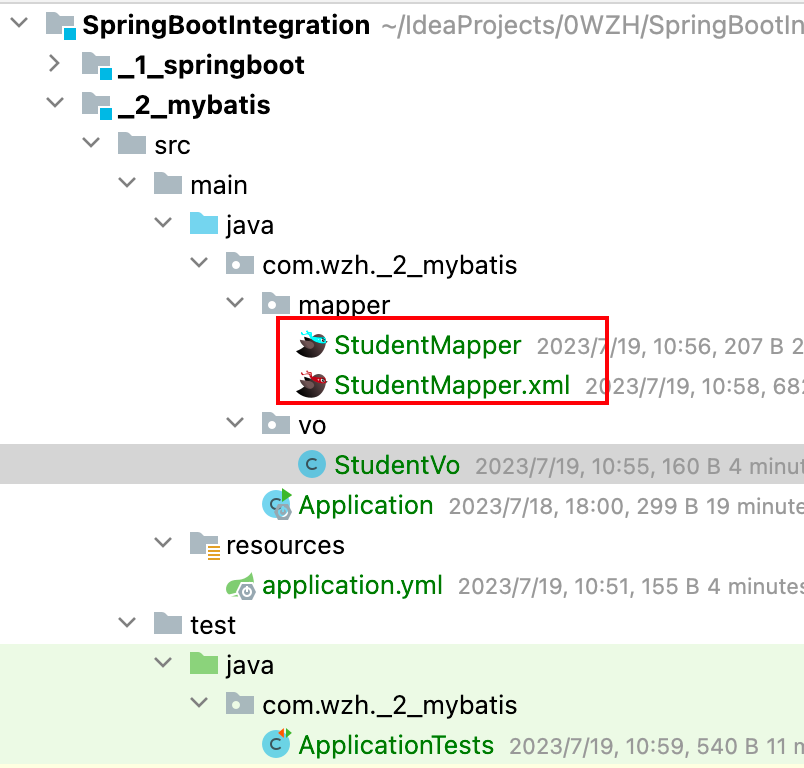
2.1. 方式一(不推荐)
2.1.1. 项目结构
2.1.2. StudentMapper类
package com.wzh._2_mybatis.mapper;

import com.wzh._2_mybatis.vo.StudentVo;
import org.apache.ibatis.annotations.Mapper;

/**
 * @Mapper注解告知mybatis框架创建此接口的动态代理类,并交由spring容器管理
 * 相当于@MpperScan + @Repository
 */
@Mapper
public interface StudentMapper {
    StudentVo getStudentById(Integer id);
}
2.1.3. StudentMapper.xml文件
<?xml version="1.0" encoding="UTF-8"?>
<!DOCTYPE mapper PUBLIC "-//mybatis.org//DTD Mapper 3.0//EN" "http://mybatis.org/dtd/mybatis-3-mapper.dtd">
<mapper namespace="com.wzh._2_mybatis.mapper.StudentMapper">
    <resultMap type="com.wzh._2_mybatis.vo.StudentVo" id="StudentMap">
        <result property="id" column="id" jdbcType="INTEGER"/>
        <result property="name" column="name" jdbcType="VARCHAR"/>
        <result property="age" column="age" jdbcType="INTEGER"/>
    </resultMap>

    <!--查询单个-->
    <select id="getStudentById" resultMap="StudentMap">
        select
            id, name, age
        from student
        where id = #{id}
    </select>
</mapper>
2.1.4. ⚠️注意
- pom文件中添加build标签,包含xml文件
- StudentMapper.java与StudentMapper.xml文件必须在同一个包中且名称相同
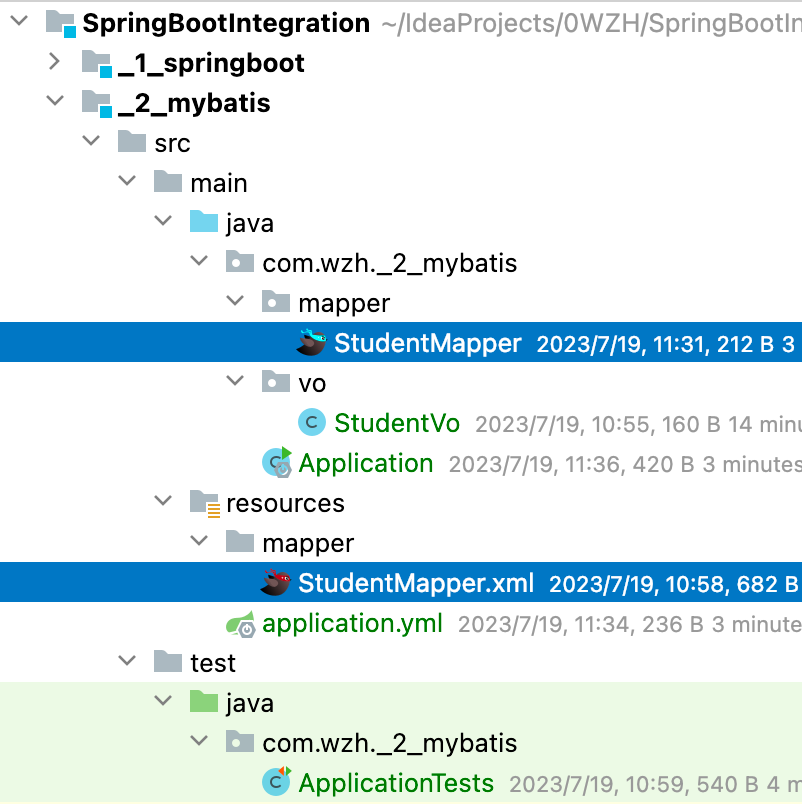
2.2. 方式二(推荐)
2.2.1. 项目结构
2.2.2. 配置文件
# 指定mapper.xml文件位置
mybatis:
  mapper-locations: mapper/*Mapper.xml
2.2.3. 启动类
package com.wzh._2_mybatis;

import org.mybatis.spring.annotation.MapperScan;
import org.springframework.boot.SpringApplication;
import org.springframework.boot.autoconfigure.SpringBootApplication;

@SpringBootApplication
@MapperScan("com.wzh._2_mybatis.mapper") // 指定Mapper接口包位置
public class Application {

    public static void main(String[] args) {
        SpringApplication.run(Application.class, args);
    }

}
2.2.4. StudentMapper类
package com.wzh._2_mybatis.mapper;

import com.wzh._2_mybatis.vo.StudentVo;

//@Mapper 有@MapperScan注解来指定Mapper接口位置
public interface StudentMapper {
    StudentVo getStudentById(Integer id);
}
2.2.5. ⚠️注意
- pom文件中无需添加build标签
- 由配置文件中指定mapper.xml文件位置
- 启动类上添加@MapperScan注解指定Mapper接口包位置
- StudentMapper接口上无需添加注解
- StudentMapper.java与StudentMapper.xml文件名称必须相同
3. 测试
3.1. 创建测试类
package com.wzh._2_mybatis;

import com.wzh._2_mybatis.mapper.StudentMapper;
import com.wzh._2_mybatis.vo.StudentVo;
import org.junit.jupiter.api.Test;
import org.springframework.beans.factory.annotation.Autowired;
import org.springframework.boot.test.context.SpringBootTest;

@SpringBootTest
class ApplicationTests {
    @Autowired
    private StudentMapper studentMapper;

    @Test
    void test_getStudentById() {
        StudentVo student = studentMapper.getStudentById(1);
        System.out.println("student = " + student);
    }

}
3.2. 测试结果

以上

 浙公网安备 33010602011771号