NAS as VM in PVE and iGPU/Ethernet passthrough
For testing synology DSM NAS system on n100 as a VM
CPU N100
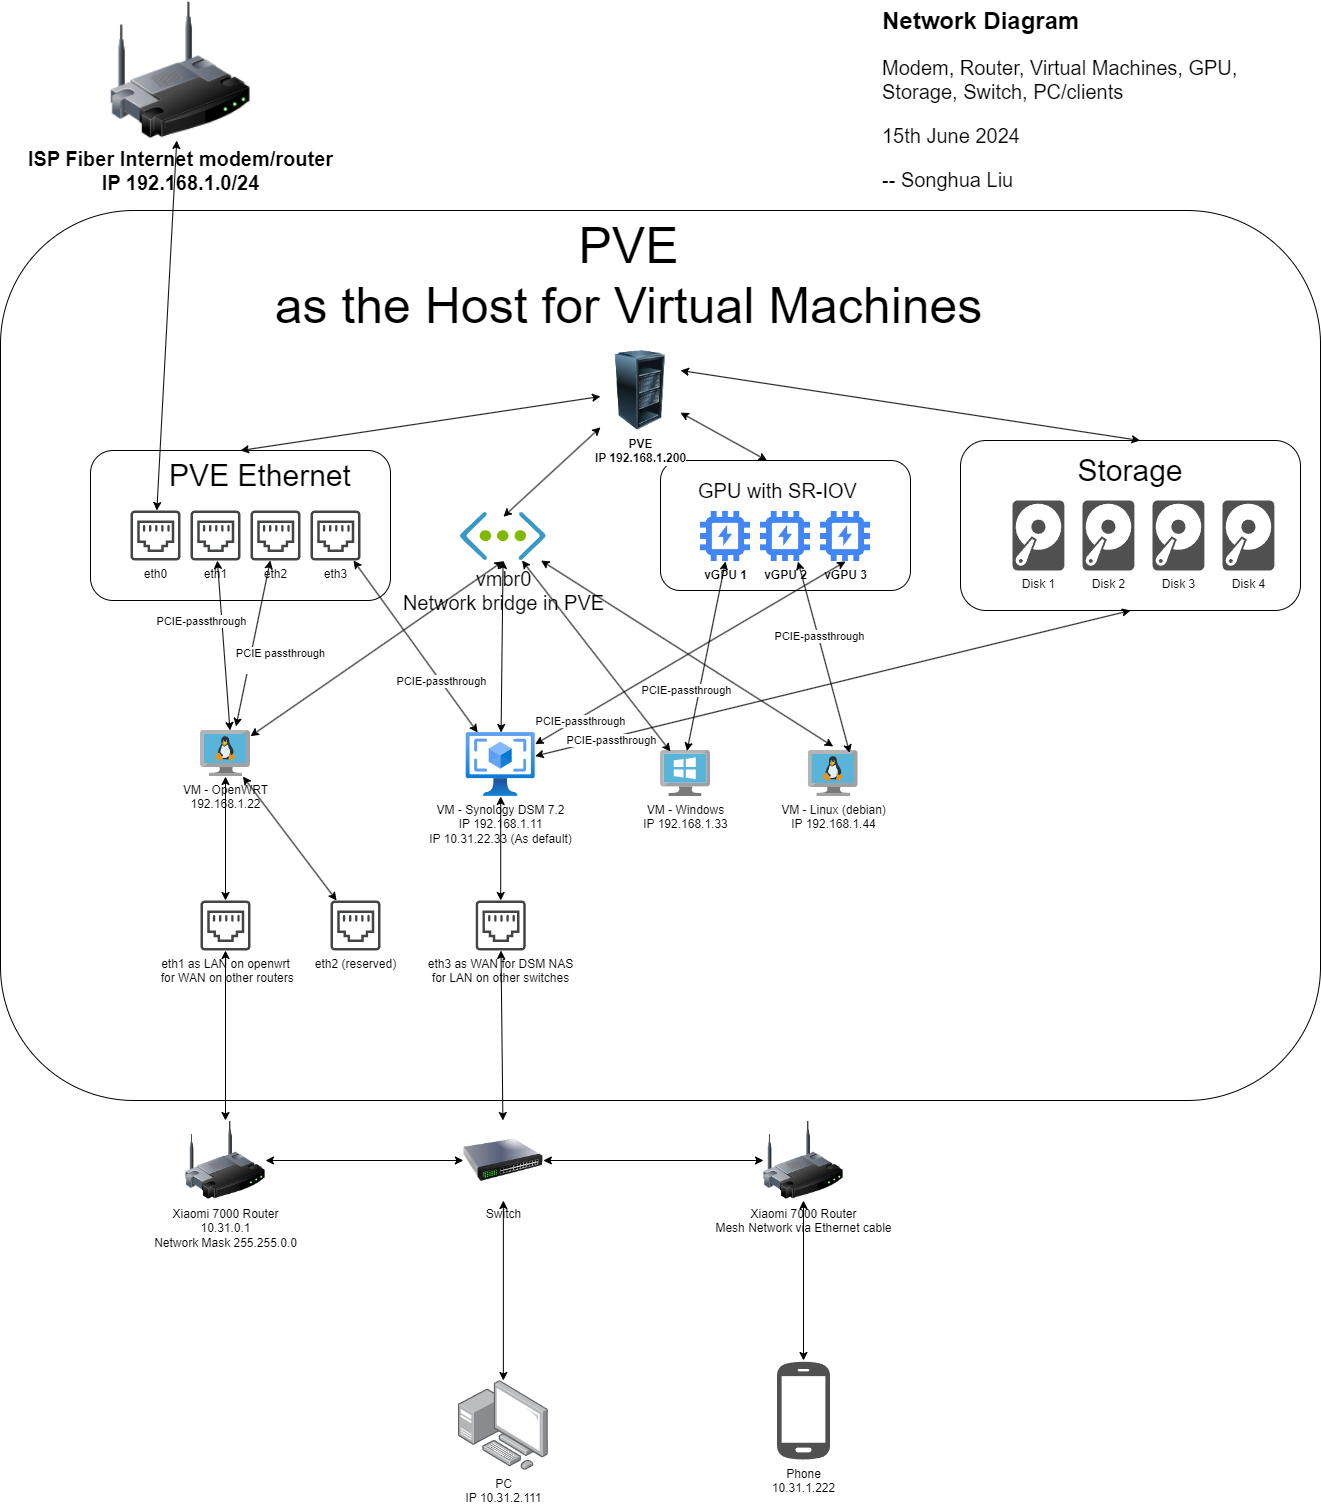
GPU Intel HD (12th gen) (pcie passthrough via SR-IOV. ( Read my another blog to know more about SR-IOV, here: https://www.cnblogs.com/spaceship9/p/17992419 and here: https://www.cnblogs.com/spaceship9/p/17410689.html)
Ethernet i226 x 1 (pcie passthrough) for connecting to Router Xiaomi 7000
vmbr0 (network bridge in PVE) for getting to the upstream router of Xiaomi 7000. (if you mess around with the pcie ethernet passthrough and fail, you still can access the VM from a vmbr0 IP derived from a upstream router).
please read here as the reference (in Chinese):
https://www.mspace.cc/archives/1002
https://www.bilibili.com/read/cv32768765/
the image for hosting DSM: https://github.com/RROrg/rr
Methodology
(1) download a vm image which runs as the host machine of Synology DSM
(2) create a VM in PVE and import the vm image to the vm disk (Must need 2 drives. 1 drive is for the OS, another is for storage), and operate PCIE passthrough (such as i226 ethernet, intel integrated GPU. These usually comes within the vm image)
(3) boot from the image and build the bootloader for preparing installing DSM later
(4) get into the DSM web page and manually upload the correct(usually offical) DSM image to it and install
(5) get into DSM web page http://[ip]:5000 or https://[ip]:5001 by default. And finish all your setups
Tips
(1) Increase ethernet speed
My i226 ethernet had the 1000 mbps full duplex speed negociation with the Xiaomi 7000 router by default. So I did this to make it to be 2500Mbps. OR JUST CHANGE A CABLE!
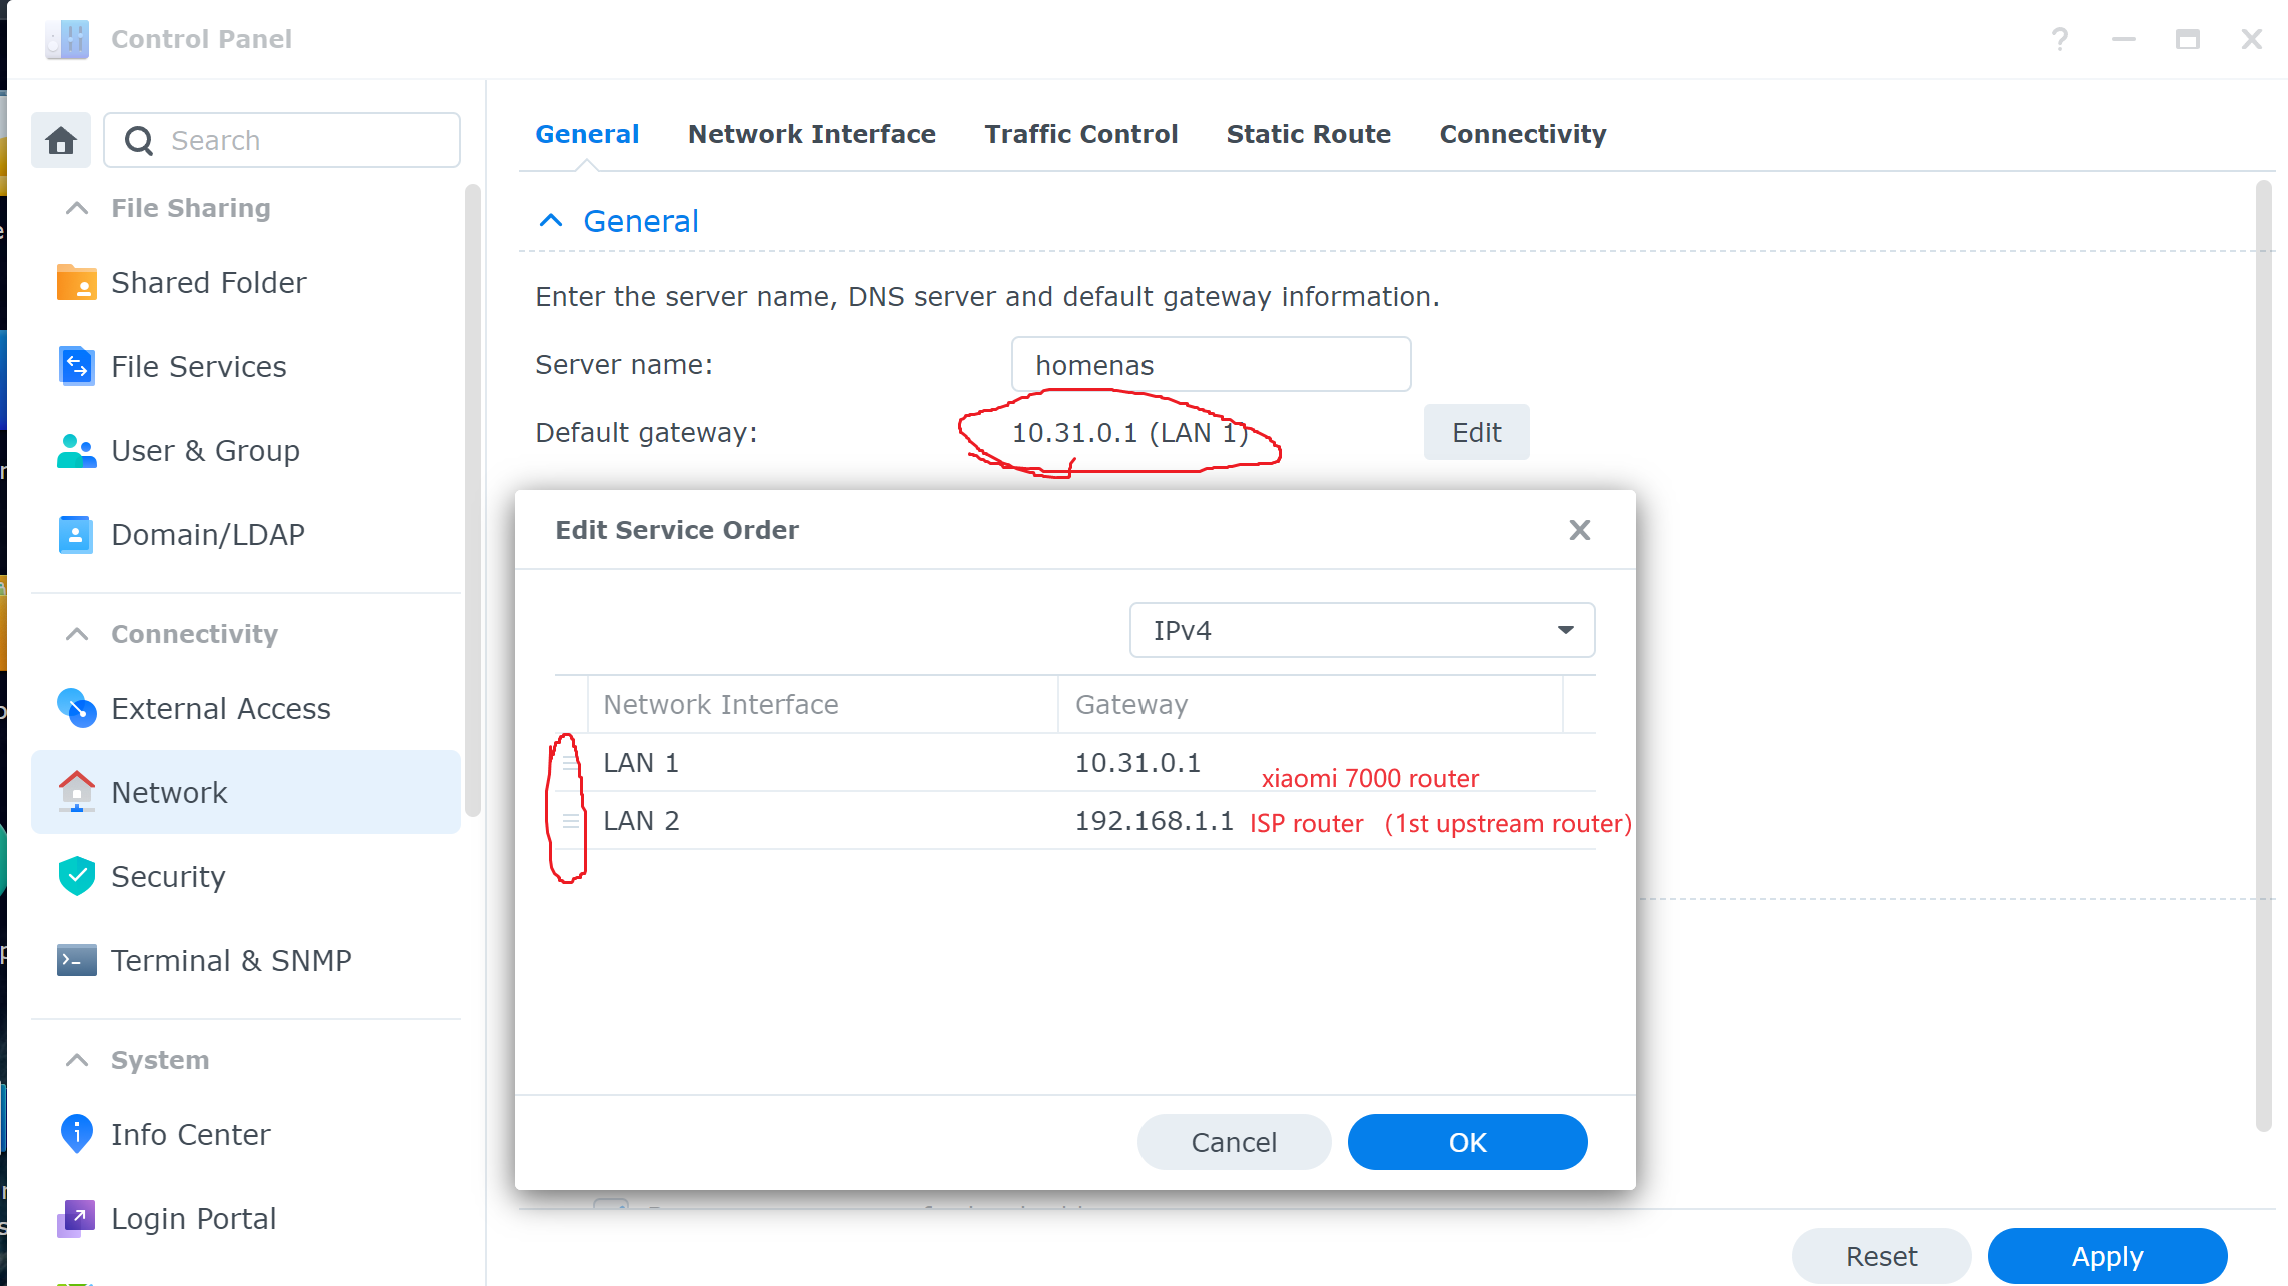
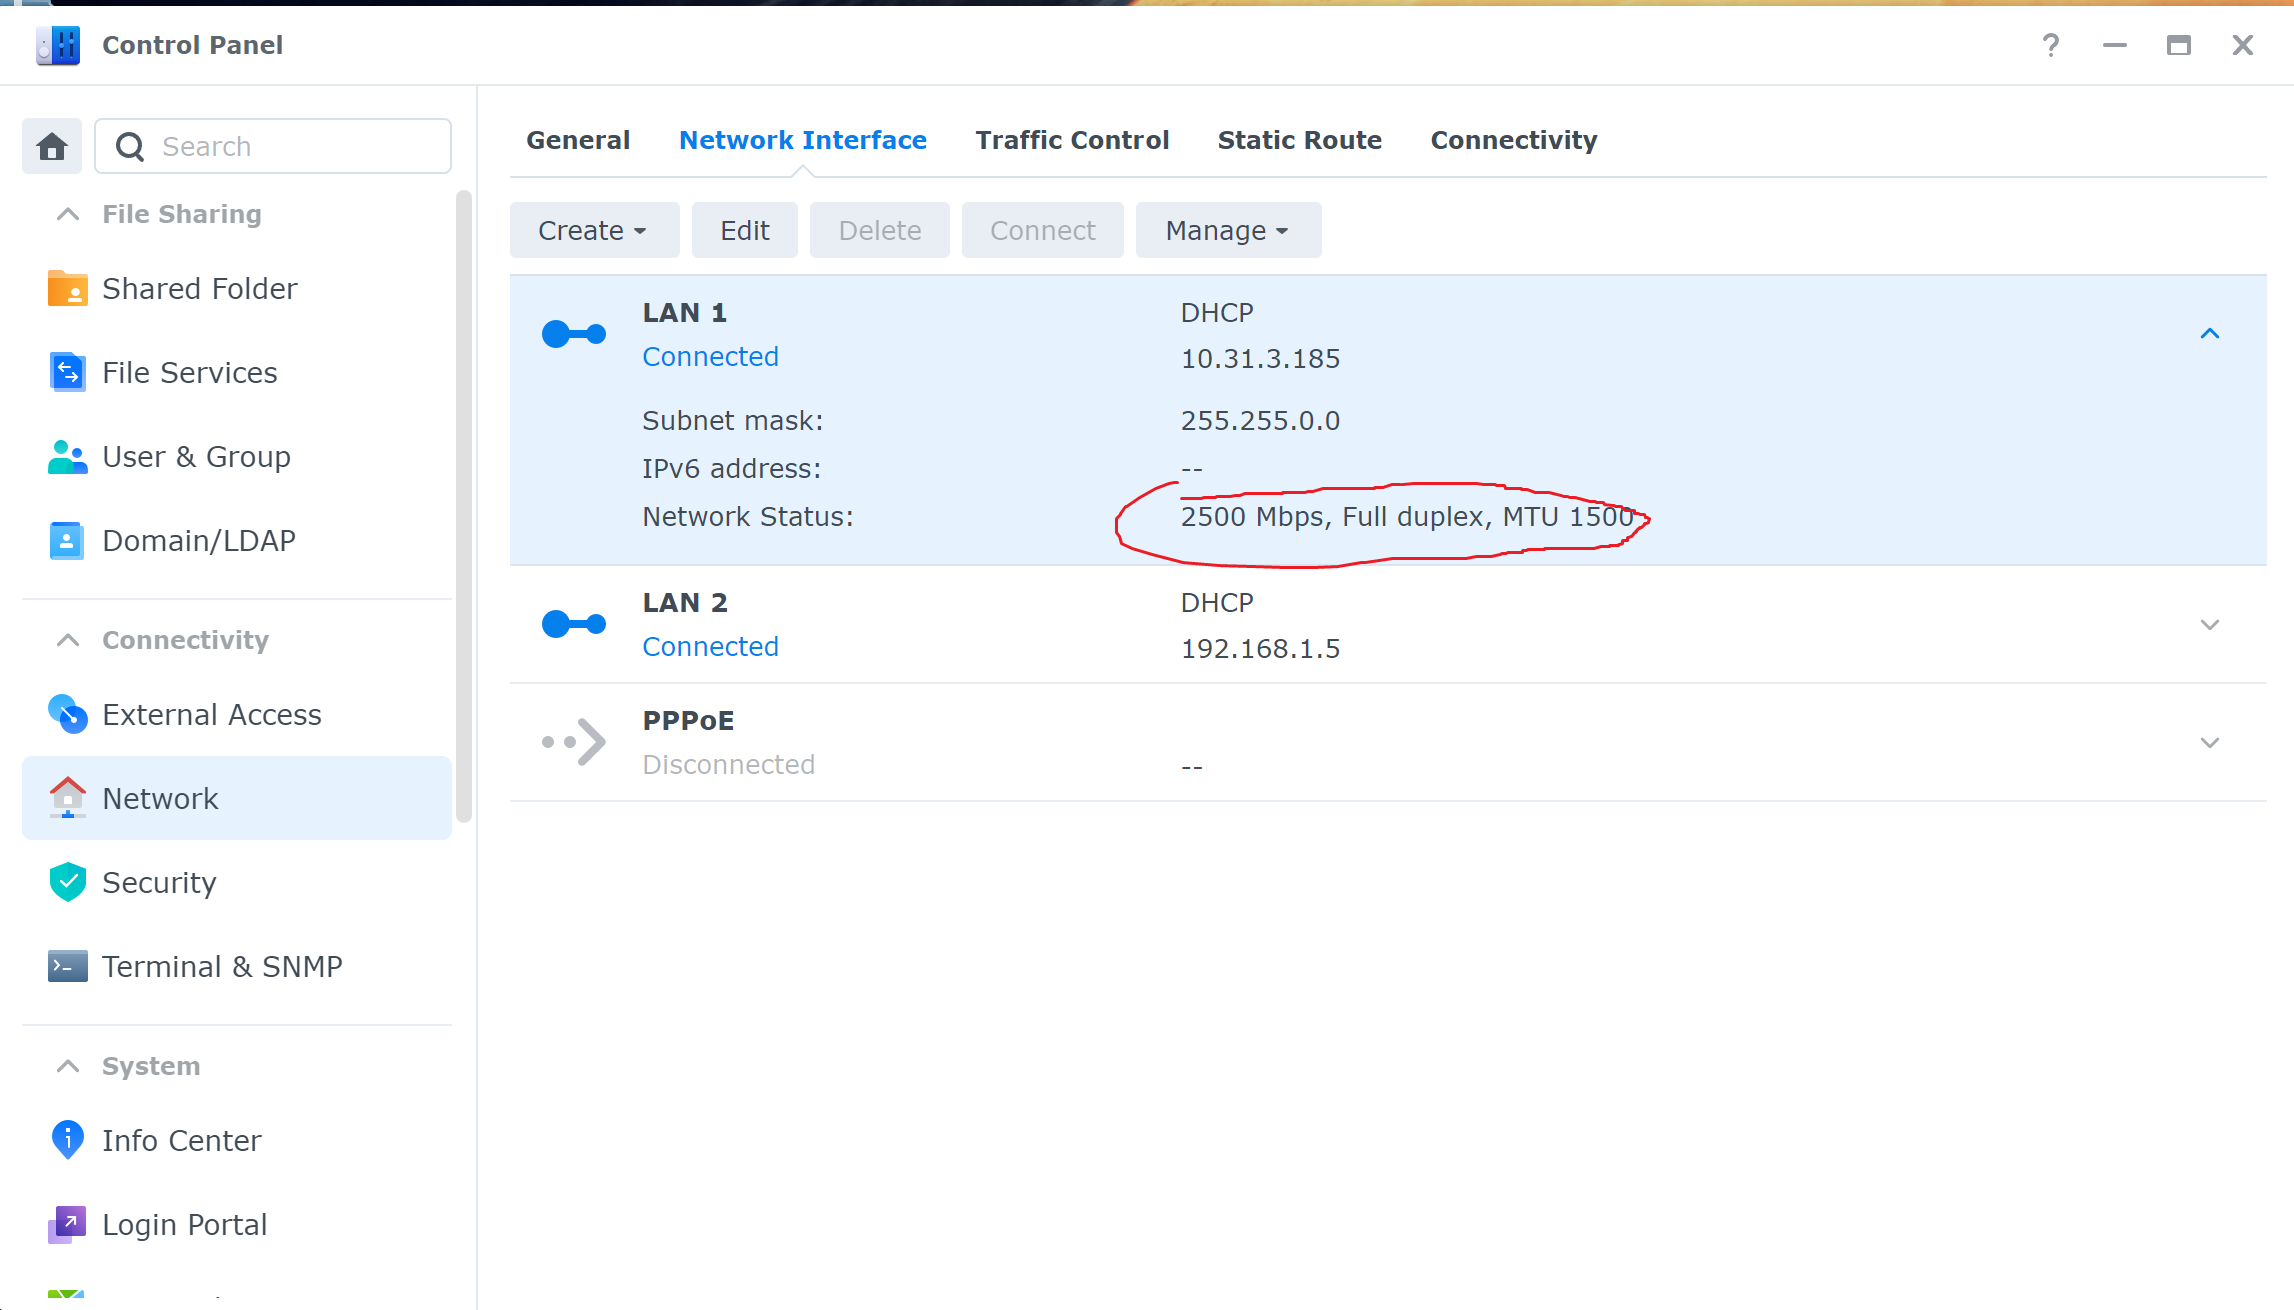
Useful tutorial: https://www.cnblogs.com/wxp100/p/15707068.html
1) enable ssh service on dsm
go control-panel -> terminal & snmp -> terminal -> enable ssh
2) log in ssh and operate commands as root with account password
ssh [your_user_name]@[ip] -p22
sudo -i
# find all your ethernet cards
ip addr
# then check the speed of your card, eth0 e.g.
ethtool eth0
3) set the negotiation speed
Manually
sudo ethtool -s eth0 autoneg on speed 2500 duplex full
Or do it permanently everytime the OS boots up
vi /etc/sysconfig/network-scripts/ifcfg-eth0
add this to automatically get 2500mbps full duplex next time
ETHTOOL_OPTS="speed 2500 duples full autoneg off"
You can check the speed of eth0 by doing this
ethtool eth0
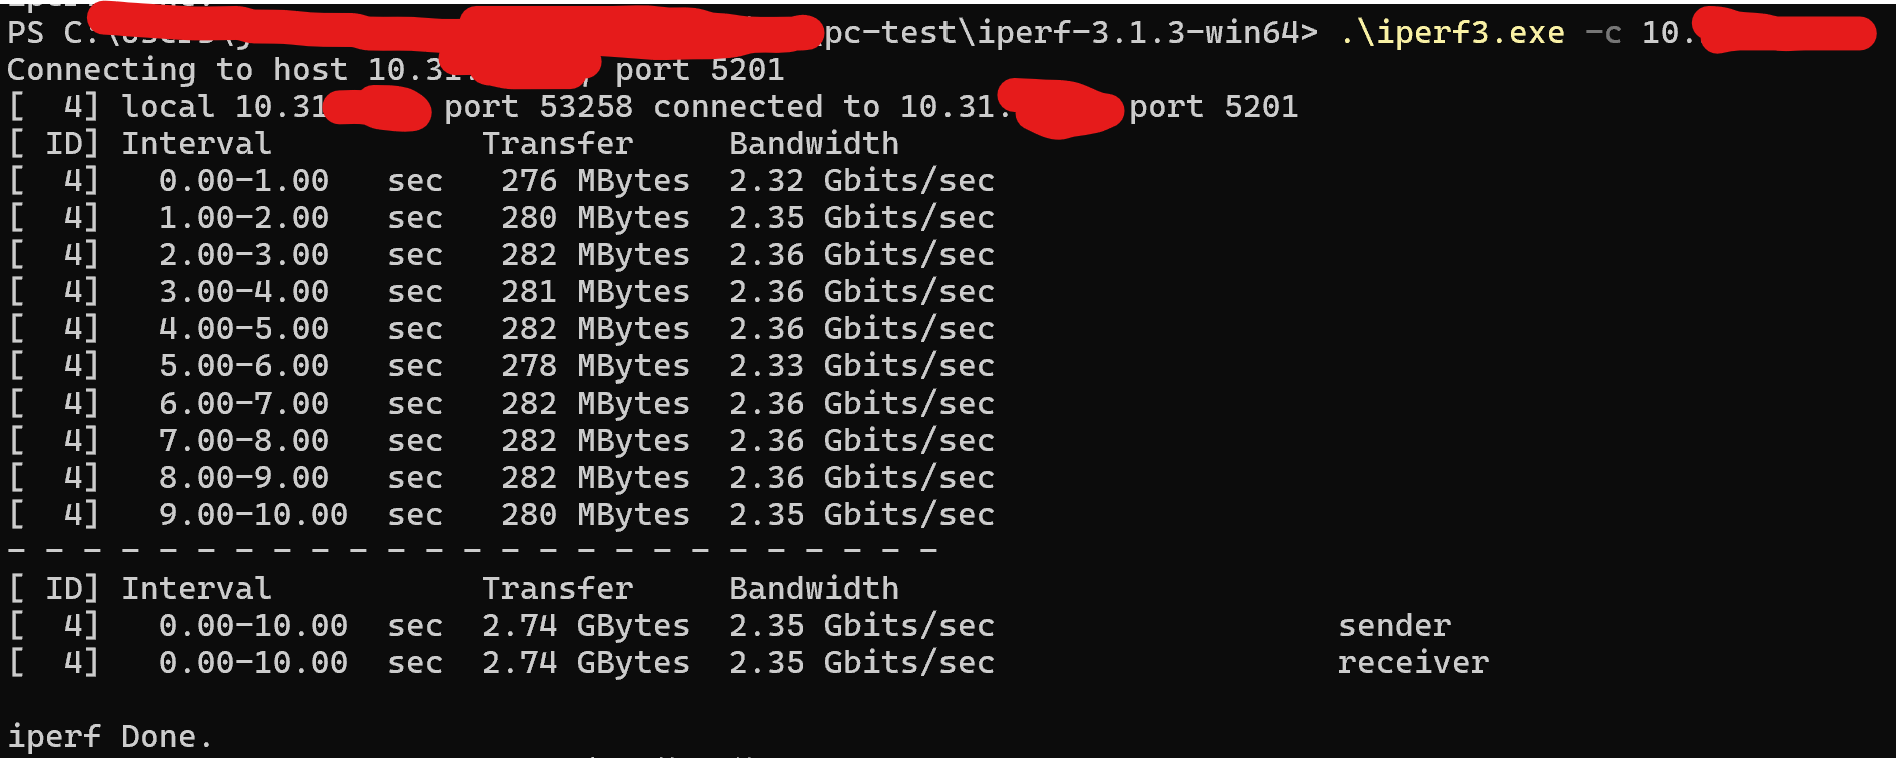
(2) Testing the NAS speed using iperf3
I created a docker instance using a docker image from here: https://hub.docker.com/r/networkstatic/iperf3
My Internet can access docker hub.
(1) network of the docker instance should be host
(2) the entry point should be -s which works with command "iperf3" (iperf3 -s means starts the server)
Test from a PC client
(3) Testing the jellyfin hardware decoding and encoding in real-time
Be sure you have enabled SR-IOV on the PVE and have done the passthrough PCIE iGPU to the VM
Get docker image from docker hub in DSM: nyanmisaka/jellyfin
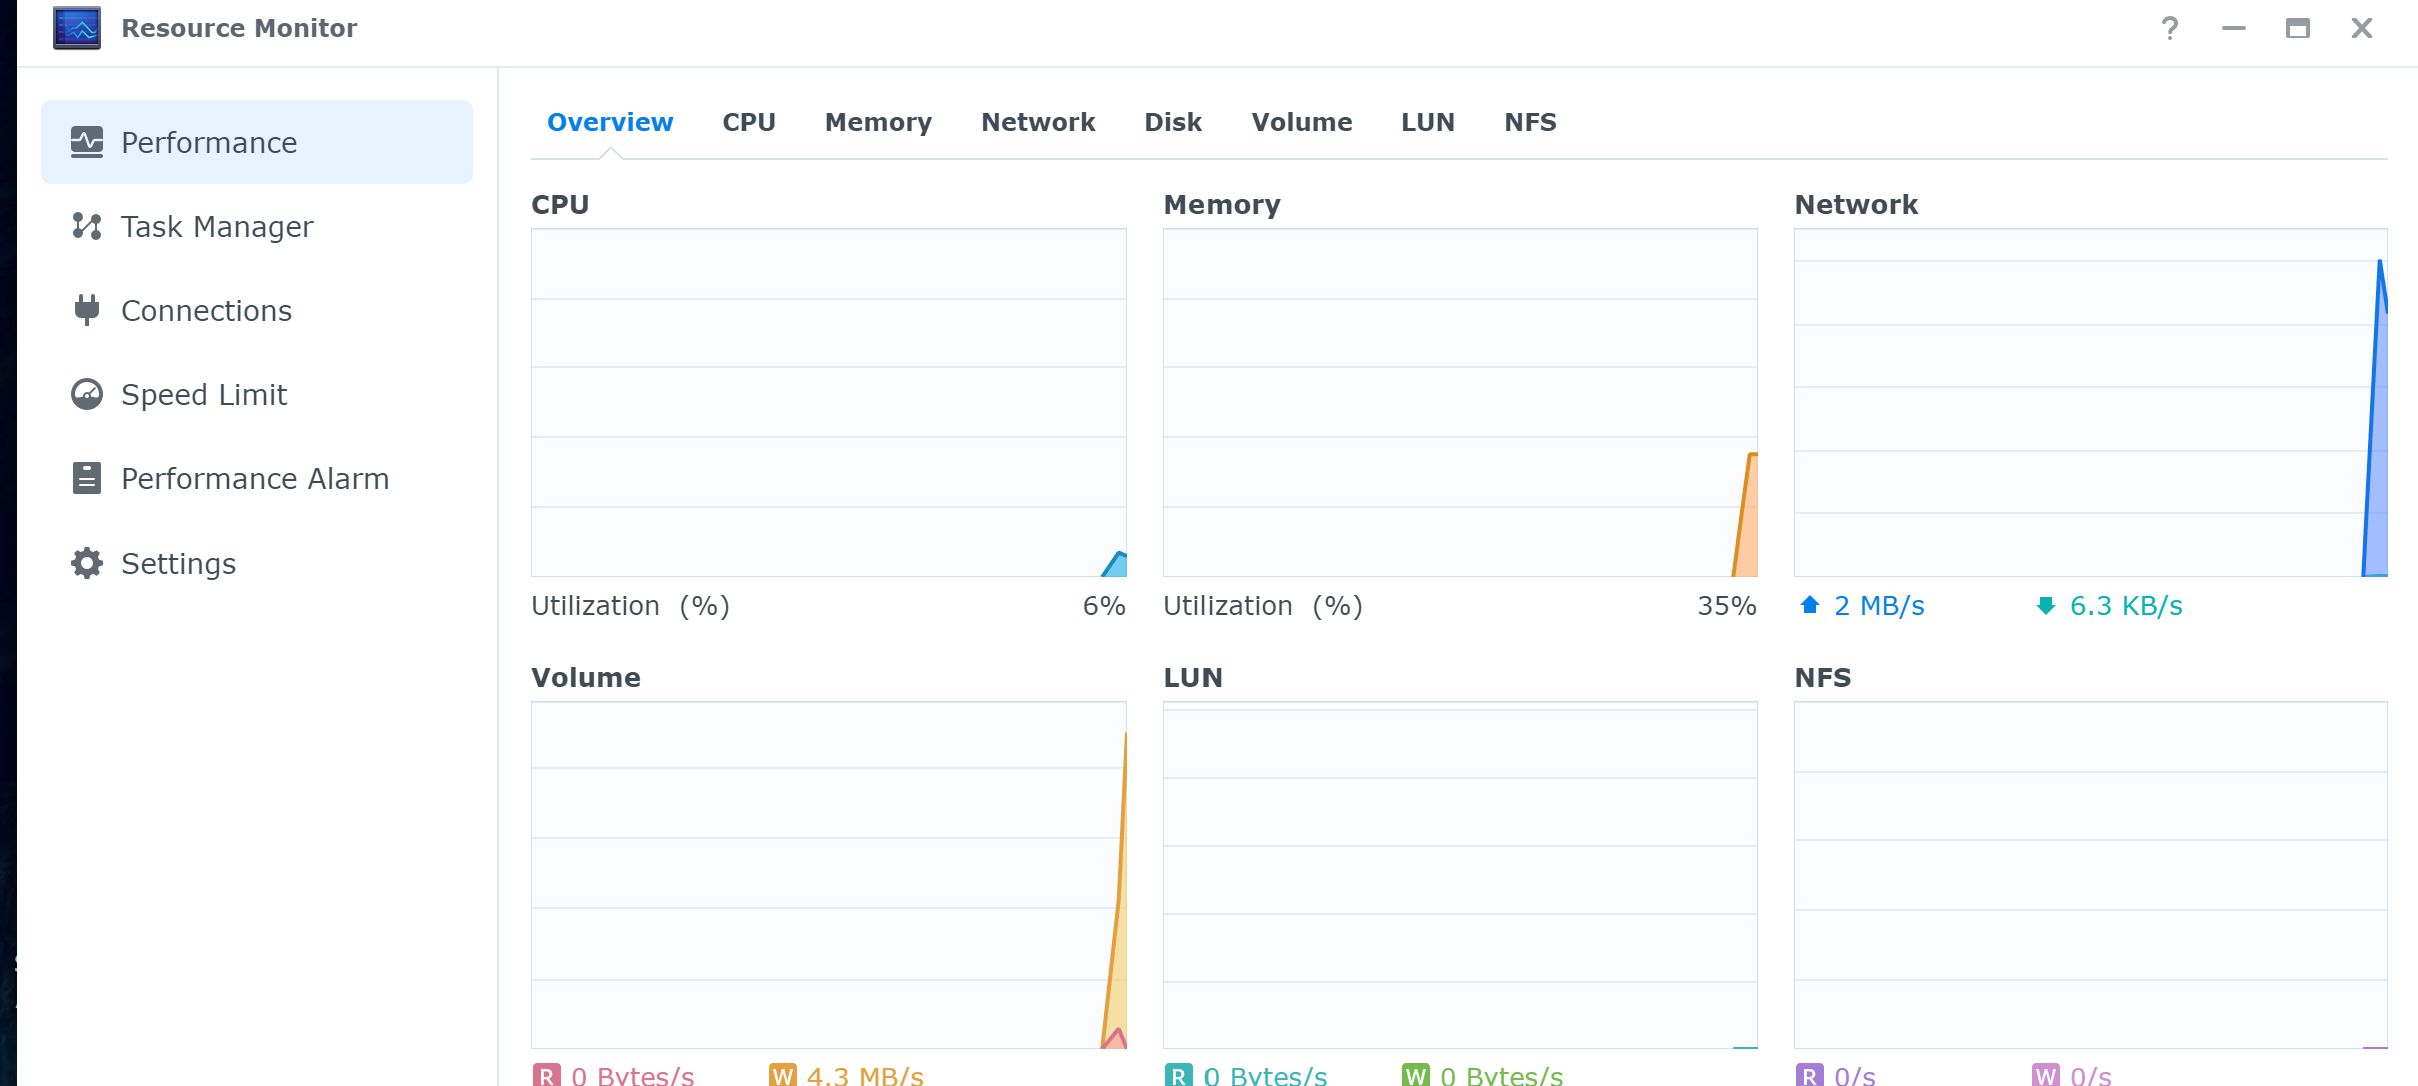
Test: Transcoding AV1(8K 60FPS) to H264 1080P 60FPS at 20mbps
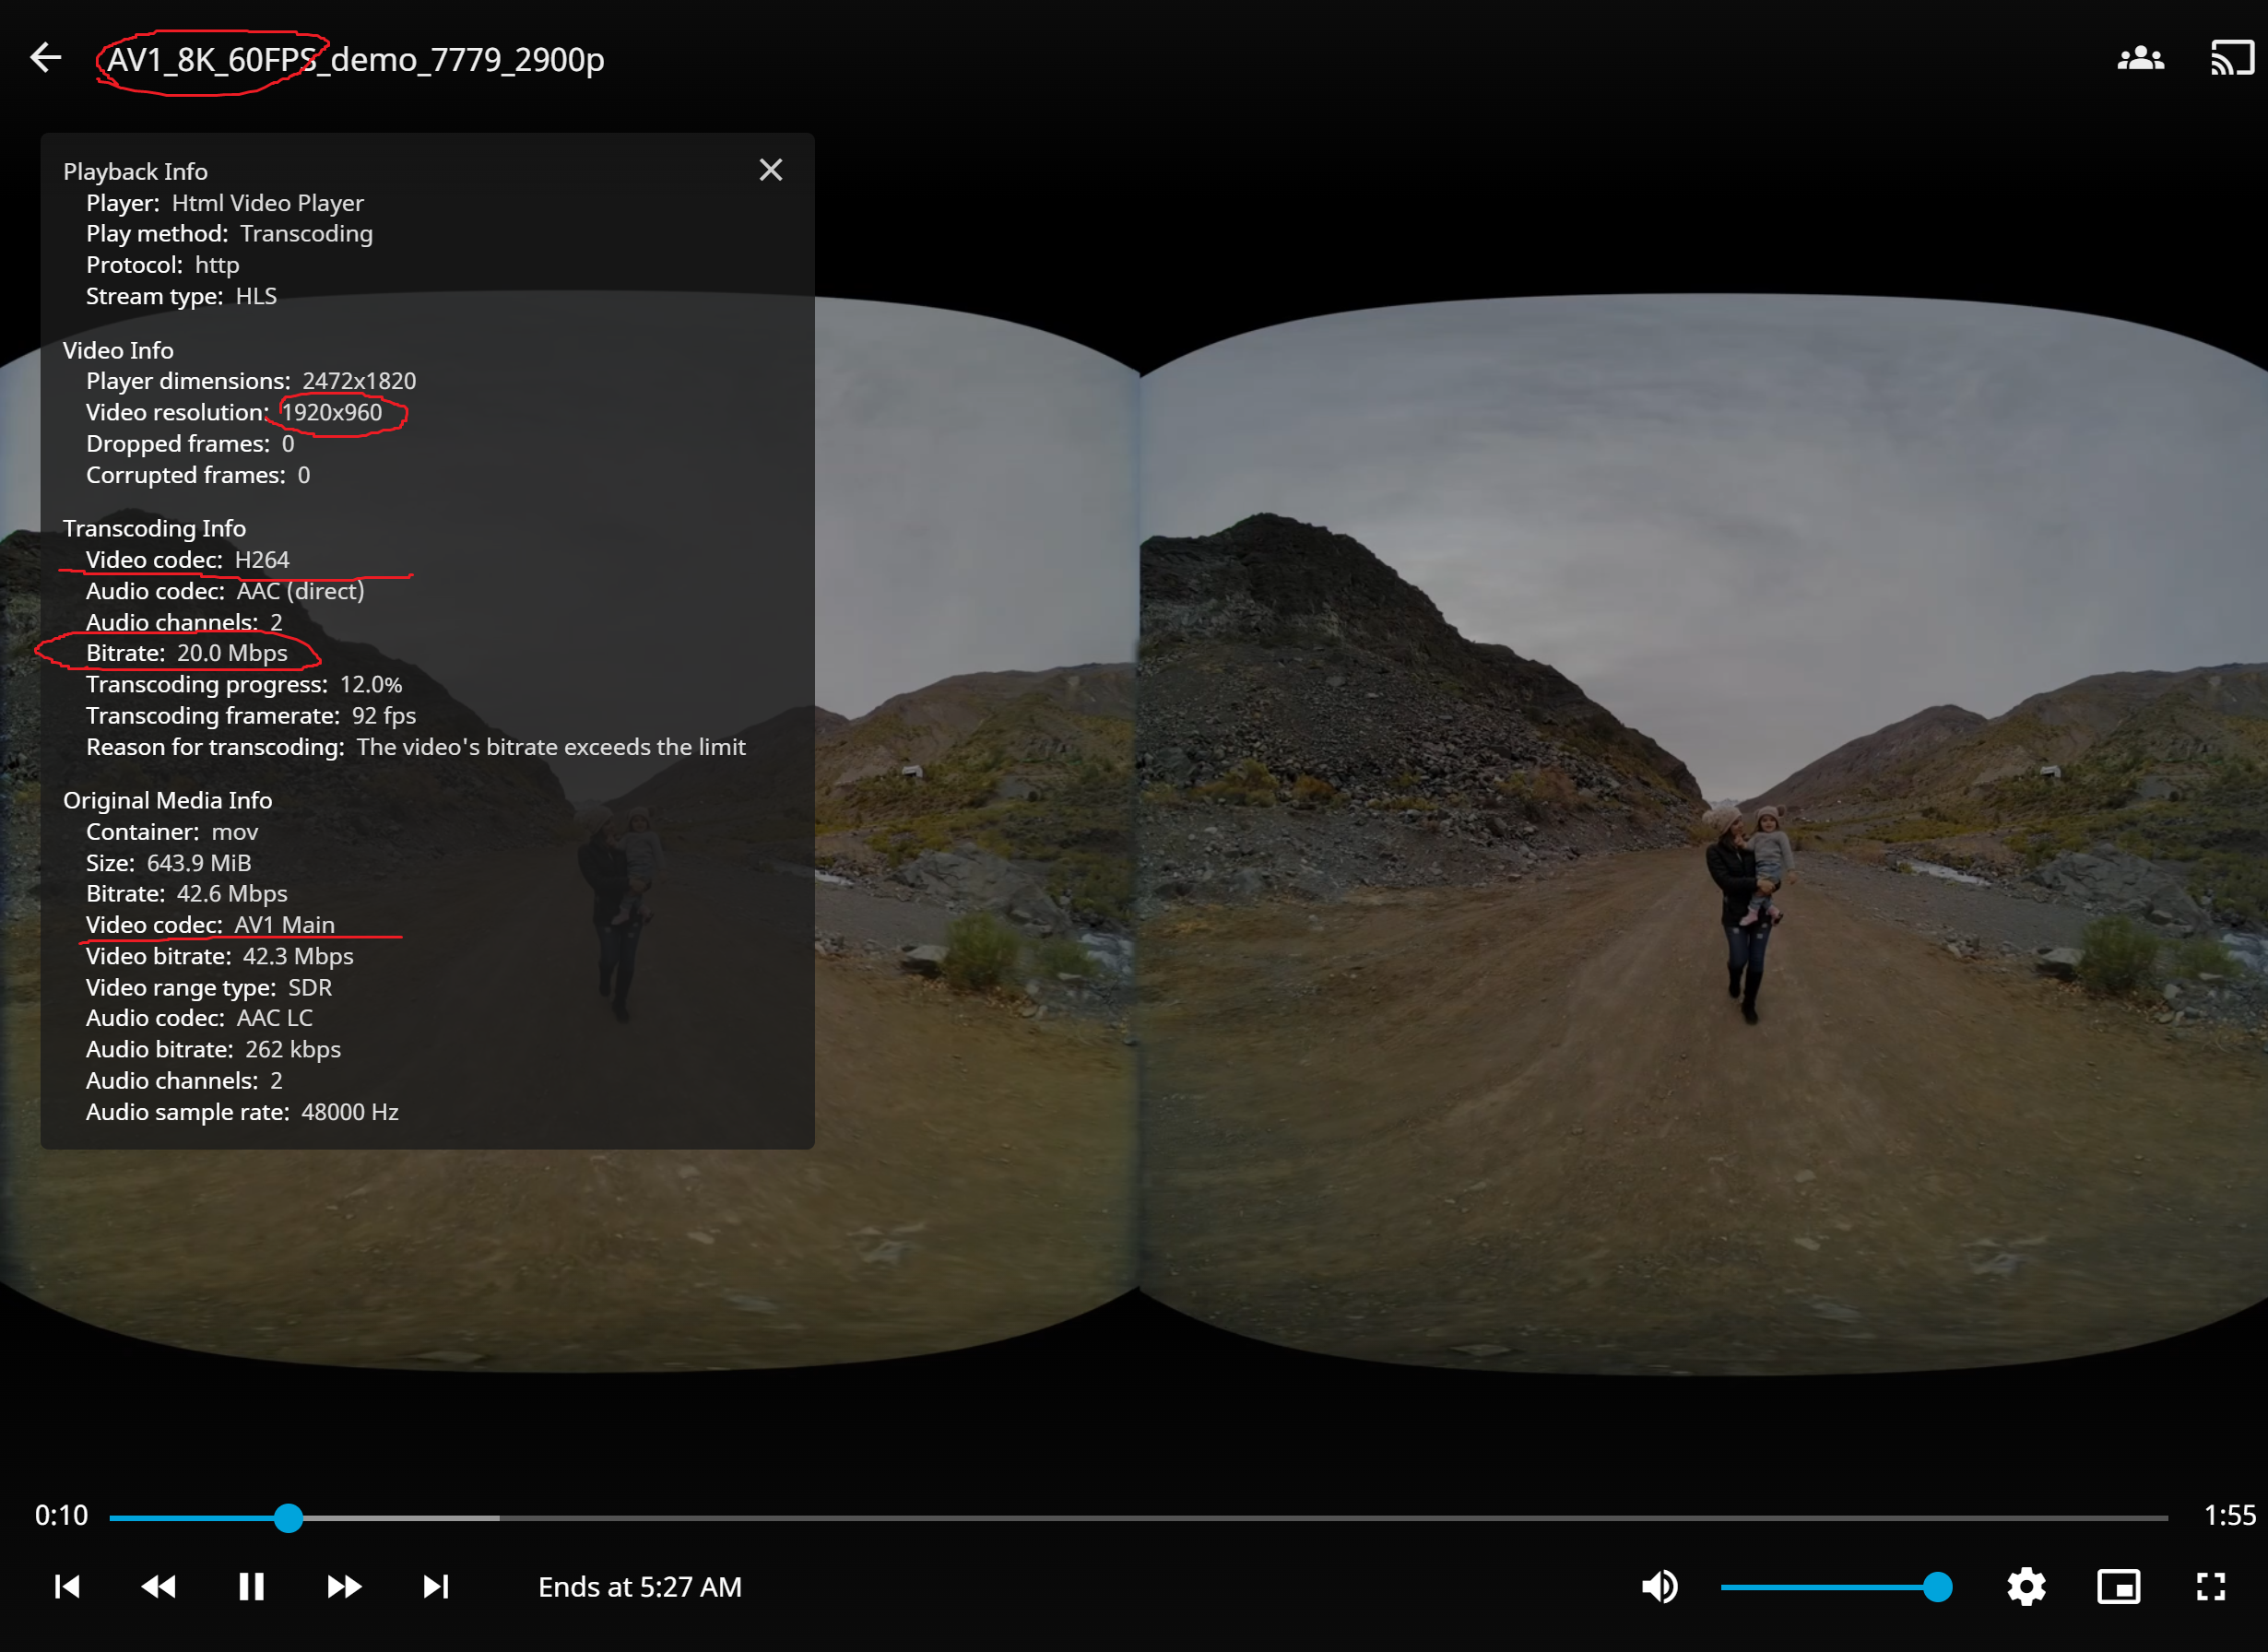
CPU and RAM info when decoding AV1(8K 60FPS) to H264 1080P 60FPS at 20mbps
(4) For getting rid of some "offical" backdoors (test only)
read here: https://www.gebi1.com/thread-303765-1-1.html
The Network Diagram


 浙公网安备 33010602011771号