微服务集成Spring Cloud Alibaba Seata(一)Seata服务搭建
1、Seata介绍
Seata是阿里开源的一款分布式事务解决方案,致力于提供高性能和简单易用的分布式事务服务。数据库事务我们都知道,事务都是遵循ACID原则。而通过使用Seata可以实现在两个服务模块通过RPC调用时触发事务,如果有异常会实现业务数据回滚,保证数据的一致性。
GitHub地址:https://github.com/seata/seata
由于在北京时间2023年10月29日,该分布式事务开源项目 Seata 正式通过 Apache 基金会的投票决议,以全票通过的优秀表现正式成为 Apache 孵化器项目!详细信息可查看:https://developer.aliyun.com/article/1379627 ,所以现在官网最新地址为:
最新官网地址:
https://seata.apache.org/zh-cn/
https://seata.apache.org/zh-cn/docs/overview/what-is-seata
GitHub地址:
https://github.com/apache/incubator-seata
Apache孵化器地址:
https://incubator.apache.org/clutch/seata.html
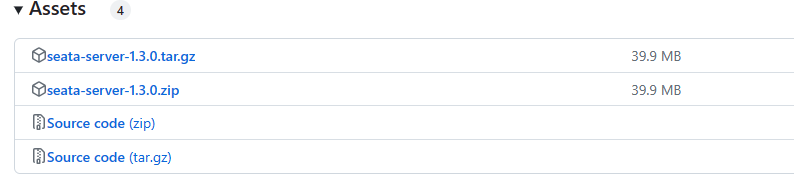
2、Seata下载1.3.0
根据使用的Spring Cloud Alibaba版本下载推荐的Seata版本
https://github.com/apache/incubator-seata/releases
3、Seata服务配置
3.1、修改配置文件存储模式为使用DB高可用模式
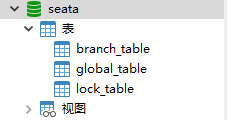
Seata默认使用 file 模式,使用file模式启动完成可以看到持久化的本地文件root.data,除了file模式外还支持DB、redis, Seata的高可用依赖于注册中心、配置中心和数据库来实现。所以这里我们配置为DB模式。首先下载对应版本的Mysql数据库:https://github.com/apache/incubator-seata/blob/v1.3.0/script/server/db/mysql.sql 下载成功后,把数据库表信息导入MySQL数据库。导入成功后会生成3张表:
进入seata目录修改seata/conf下面的file.conf文件store.mode属性为db,如果没有file.conf文件,把file.conf.example文件拷贝一份进行重新命名。

配置成功后。文件下面有个db属性,在db属性里面配置数据库连接信息:
db {
    ## the implement of javax.sql.DataSource, such as DruidDataSource(druid)/BasicDataSource(dbcp)/HikariDataSource(hikari) etc.
    datasource = "druid"
    ## mysql/oracle/postgresql/h2/oceanbase etc.
    dbType = "mysql"
    driverClassName = "com.mysql.cj.jdbc.Driver"
    url = "jdbc:mysql://127.0.0.1:3306/seata"
    user = "root"
    password = "1234qwer"
    minConn = 5
    maxConn = 30
    globalTable = "global_table"
    branchTable = "branch_table"
    lockTable = "lock_table"
    queryLimit = 100
    maxWait = 5000
  }
3.2、修改seata配置中心和注册中心实现高可用
进入seata目录的seata/conf里面,先将registry.conf文件拷贝一份registry.conf.init以防万一改错了,接下来编辑registry.conf。首先把注册中心改为nacos。设置registry属性类型为nacos,然后在nacos属性中配置nacos连接信息
registry {
  # file 、nacos 、eureka、redis、zk、consul、etcd3、sofa
  type = "nacos"

  nacos {
    application = "seata-server"
    serverAddr = "127.0.0.1:8848"
    group = "SEATA_GROUP"
    namespace = "233b70c2-d6a8-482b-8a8d-e000b7a5c3a2"
    cluster = "default"
    username = "nacos"
    password = "1234qwer"
  }
在将配置中心也设置为nacos,config属性类型为nacos
config {
  # file、nacos 、apollo、zk、consul、etcd3
  type = "nacos"

  nacos {
    serverAddr = "127.0.0.1:8848"
    namespace = "233b70c2-d6a8-482b-8a8d-e000b7a5c3a2"
    group = "SEATA_GROUP"
    username = "nacos"
    password = "1234qwer"
  }
}
部署文档:
https://seata.io/zh-cn/docs/v1.3/ops/deploy-guide-beginner
https://seata.apache.org/zh-cn/docs/v1.3/ops/deploy-guide-beginner/
Seata高可用部署:
https://seata.io/zh-cn/docs/v1.3/ops/deploy-ha
https://seata.apache.org/zh-cn/docs/v1.3/ops/deploy-ha/
4、上传配置文件到nacos
4.1 创建config.txt
在seata目录里面创建一个config.txt文件在改文件中添加配置信息,配置信息可以参考 https://github.com/apache/incubator-seata/blob/v1.3.0/script/config-center/config.txt 也可以直接下载改文件。主要修改下面的信息:
//my_test_tx_group是可以自定义的修改成功后后面客户端集成要与服务器端一致,也可以不修改。
service.vgroupMapping.my_test_tx_group=default

//把file改为db
store.mode= db

//修改数据库连接信息
store.db.datasource=druid
store.db.dbType=mysql
store.db.driverClassName=com.mysql.cj.jdbc.Driver
store.db.url=jdbc:mysql://127.0.0.1:3306/seata?useUnicode=true
store.db.user=root
store.db.password=1234qwer
4.2 创建nacos-config.sh
在seata目录里面创建一个nacos-config.sh启动脚本文件,添加文件内容可以参考 https://github.com/apache/incubator-seata/blob/v1.3.0/script/config-center/nacos/nacos-config.sh 也可以直接下载。修改nacos连接信息
if [[ -z ${host} ]]; then
    host=127.0.0.1
fi
if [[ -z ${port} ]]; then
    port=8848
fi
if [[ -z ${group} ]]; then
    group="SEATA_GROUP"
fi
if [[ -z ${tenant} ]]; then
    tenant="96a4551b-b576-4047-88e9-c17ed48342ae"
fi
if [[ -z ${username} ]]; then
    username="nacos"
fi
if [[ -z ${password} ]]; then
    password="1234qwer"
fi
host: nacos连接地址
port: nacos连接端口号
group:分组
tenant:命名空间namespace
username:用户名
password:密码
修改成功后执行该脚本,把config.txt文件内容导入nacos。
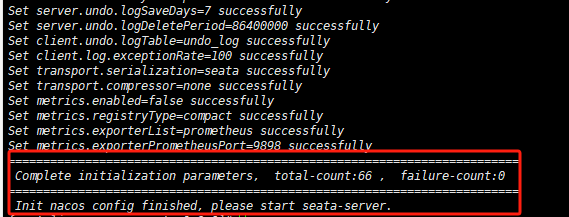
输出以上内容,说明脚本执行成功。查看nacos配置中心:
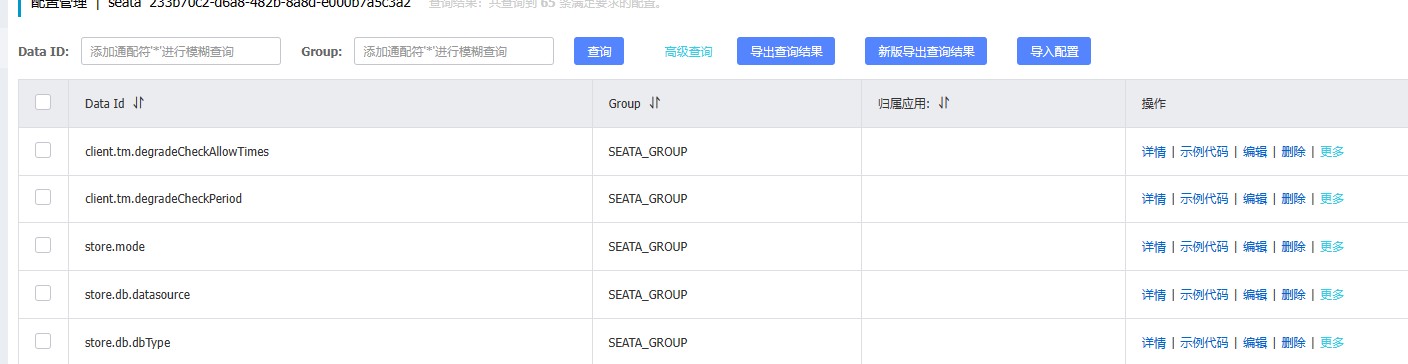
配置已经成功导入到nacos
5、启动Seata
启动命令进入seata/bin文件路径下执行 seata-server.sh 脚本启动。
./seata-server.sh > /dev/null 2>&1 &
使用 ps -ef|grep seata 目录查看是否启动成功。

查看nacos注册中心,看看服务是否存在。

发现该服务在注册中心已经注册成功了,说明seata服务搭建成功。客户端连接端口号为:IP:8091

 浙公网安备 33010602011771号