

Windows Virtual Desktop(WVD) 部署虚拟桌面
DEPLOYMENT of Windows Virtual Desktop (WVDs)
-
目标结构和组成
-
在Azure上部署一个virtual的AD Service,模拟on-premise的local AD, 这是我们建立的AD root。然后在这个virtual machine上面部署domain controller做auth的控制
-
在Azure上部署一个virtualNet, 网关,建立VPN的point2site模式,实现本地到virtual net的连接。然后将AD Server所在的virtual machine, WVDs, attach到这个NET上面,实现本地到云端机器的访问。
-
配置Domain Controller
-
在DC的virtual machine上面安装AD Connector, 负责将AAD和AD连接起来并完成信息同步。
-
建立HostPool以及虚拟机,连接到vnet上面,并且做domain join
-
在AD上面建立OU/Users,对这些users赋予访问虚拟机的权限,等这个信息sync到AAD上面去
-
通过webclient,使用上述users可以访问到已经分配到的Virtual Desktop 资源。
大概包括了这几个步骤
-
详细的内容在参考文档里写的比较清楚了,英文可以的推荐阅读原文,我做简述并且列一些关键点
具体部署
账号以及基本用户设置
-
首先假设你已经有了Azure账号,并且已经已经解决了钱的问题。
-
登录Azure Portal里面,在 HOME/Azure Active Directory里面找到用户的tenantID(GUID), 到Windows Virtual Desktop Consent Page (https://rdweb.wvd.microsoft.com/)网页下注册一下,Server App和 Client App都注册下,一路确定就好。找不到可以去参考文档里看看。

-
去AAD下面创建一个用户,给Global Administrator权限,然后去Enterprise applications-All application-Windows Virtual Desktop里面add user给这个用户tenant creator权限。
-
记住账号。
使用命令行创建一些账户
-
首先解决一些module的安装问题
Set-executionpolicy -executionpolicy unrestricted Install-Module -Name Microsoft.RDInfra.RDPowerShell -Force Import-Module -Name Microsoft.RDInfra.RDPowerShell Install-Module -Name Az -AllowClobber -Force Import-Module -Name Az -
连接到自己的Azure账户上面,使用上面的tanent creator登录
Add-RdsAccount -DeploymentUrl "https://rdbroker.wvd.microsoft.com" -
新建Tenant,具体的tenantId应该已经知道了,subscriptionID在自己的订阅账户里面,点进去就能找到,记住这个tenant。
New-RdsTenant -Name CompanyWVDtenant -AadTenantId a1b2c3abaa-6f7a-bc3d4-b95c-a1b2c3d4 -AzureSubscriptionId a1b2c3d4-5bef-1234-abcd-a1b2c3abaa -
RDS Owner, “Default Tenant Group” 不要动
New-RdsRoleAssignment -RoleDefinitionName "RDS Owner" -UserPrincipalName wvdTenantCreator@yourCompany.upn -TenantGroupName "Default Tenant Group" -TenantName CompanyWVDtenant
Create HostPool
New-RdsHostPool -TenantName CompanyWVDtenant -name “WVD-Host-Pool01"
New-RdsHostPool -TenantName CompanyWVDtenant -name “WVD-Host-Pool02"
New-RdsAppGroup -TenantName CompanyWVDtenant -HostPoolName WVD-Host-Pool01 -AppGroupName “Desktop Application Group”
New-RdsAppGroup -TenantName CompanyWVDtenant -HostPoolName WVD-Host-Pool02 -AppGroupName “Remote Application Group”
建立一个Windows Virtual Desktop(WVD)作为Domain Controller(DC)
- 在Azure找到添加WVD的入口,新建虚拟机,应该比较明显。
- Resource Group如果没有的话可以新建,就是一个资源组的名字,记住。
- image类型,选择Image Windows Server ** Datacenter
- 选择配置,量力而行(选便宜一点的,默认的感觉有点贵)
- Public inbound port 选None, 后面会指定
- 最好Create一个新的disk放一些数据,不过我理解不建也没关系,demo的话
- Host Caching 选 None
设置Virtual Network
-
设置一个虚拟局域网用户资源通信,建立一个gateway,步骤比较多,可以参考上面的文档来做。
-
Create一个Virtual Network资源
-
Public IP选择 None
-
其他的该取名字取名字
-
创建好以后对这个资源进行配置
-
特别是在这个network的IP Configurations中的ipconfig里,把动态地址改成静态地址,static

无耻盗图, 侵删, 下同
-
设置virtual network的DNS Server,选择custom, 添加两个地址,一个是DC机器的局域网内地址,另一个填8.8.8.8,这是与外部Google Public DNS Server连接
-
修改address space

-
subnet-GatewaySubnet里面建立一个10.0.1.0/24的subnet
建立VPN
-
Create Virtual Network Gateway

-
为Gateway做配置,在point-to-site configuration -> configure now -> 添加一个address pool,文章中使用的是172.16.0.0/24,可以选择自己之前没有用过的地址。
-
在本地运行脚本创建证书
#Root cert: $cert = New-SelfSignedCertificate -Type Custom -KeySpec Signature ` -Subject "CN=P2SRootCert" -KeyExportPolicy Exportable ` -HashAlgorithm sha256 -KeyLength 2048 ` -CertStoreLocation "Cert:\CurrentUser\My" -KeyUsageProperty Sign -KeyUsage CertSign #client cert: New-SelfSignedCertificate -Type Custom -DnsName P2SChildCert -KeySpec Signature ` -Subject "CN=P2SChildCert" -KeyExportPolicy Exportable ` -HashAlgorithm sha256 -KeyLength 2048 ` -CertStoreLocation "Cert:\CurrentUser\My" ` -Signer $cert -TextExtension @("2.5.29.37={text}1.3.6.1.5.5.7.3.2") -
具体的还有几个小步骤,可以上参考文档看,其实就是要把创建的证书的公钥拿出来上传到Point-to-site configuration上面去。

-
下载这个页面里面的VPN CLient,安装,这样你就可以在本地通过VPN连到你上面的局域网里面,完成后可以在本地利用VPN登上你的DC 虚拟机尝试下。
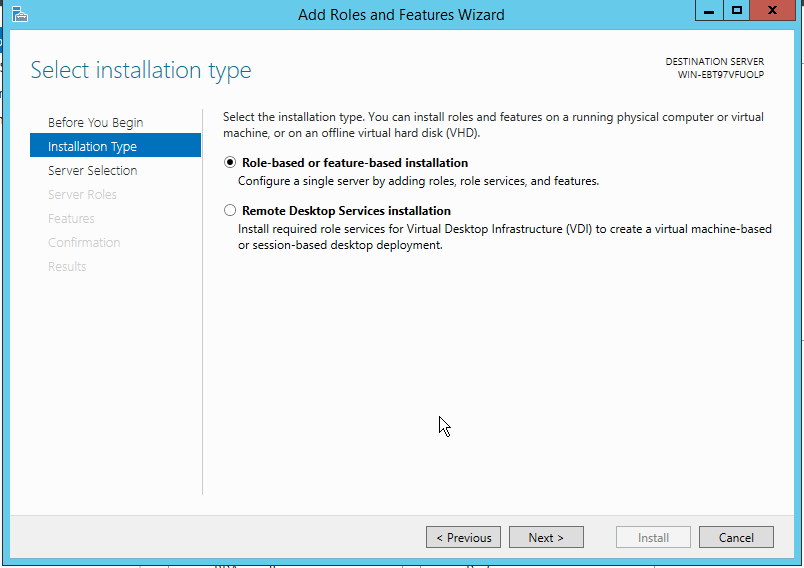
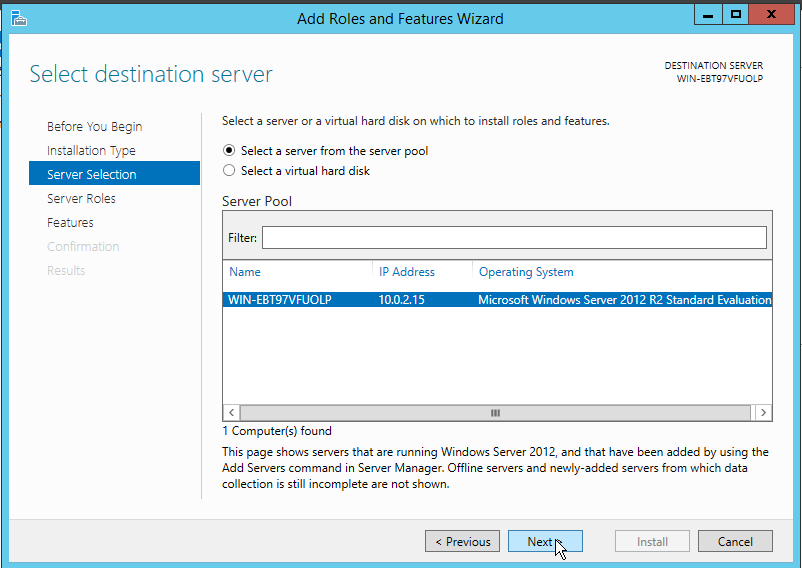
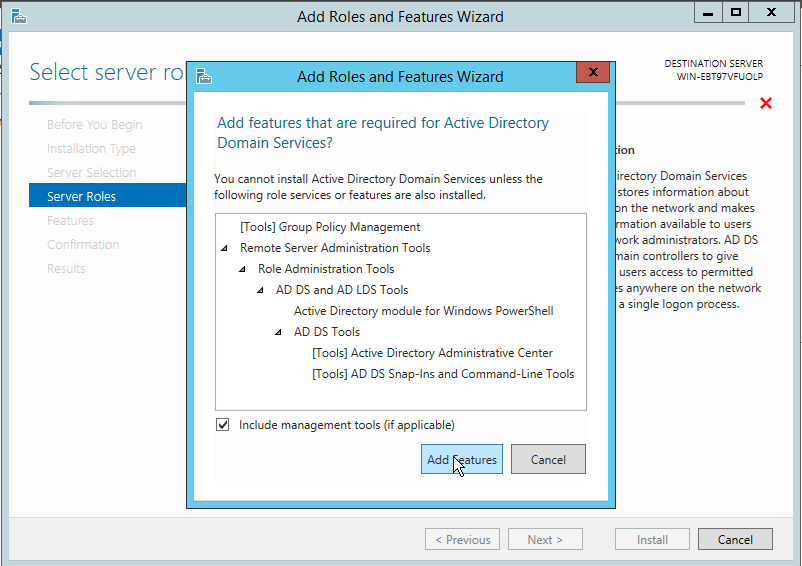
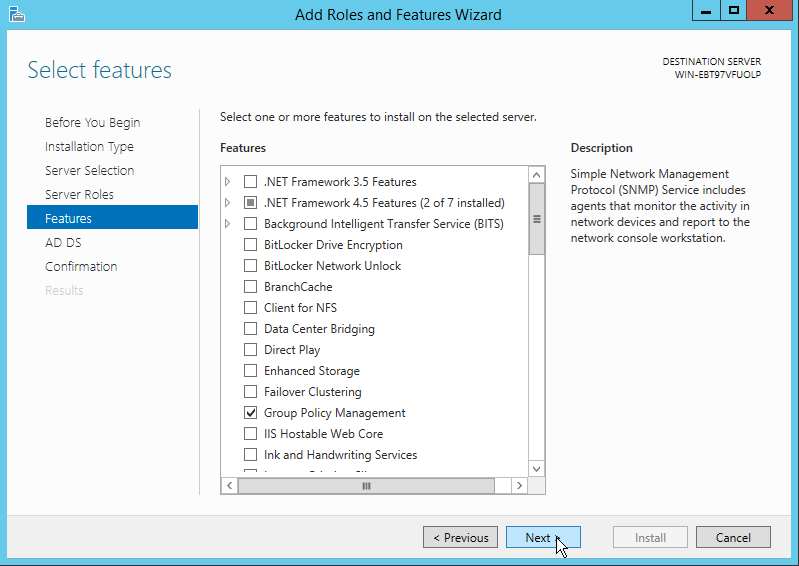
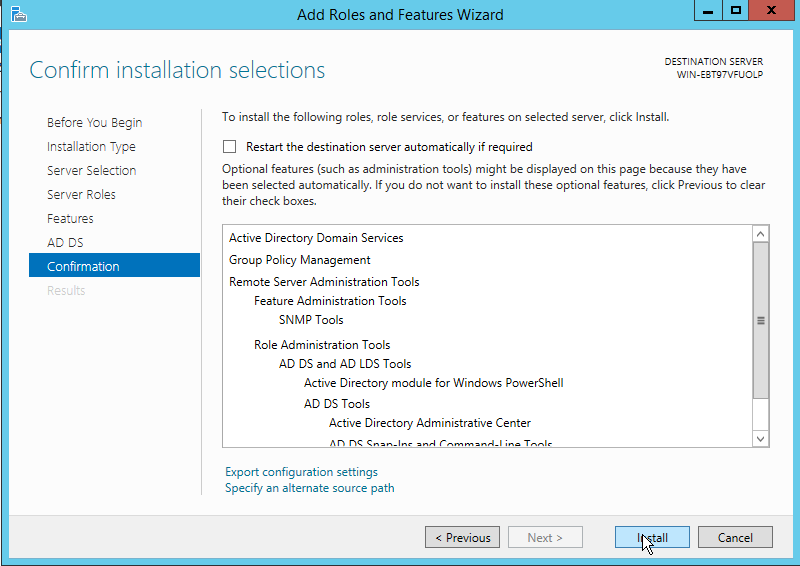
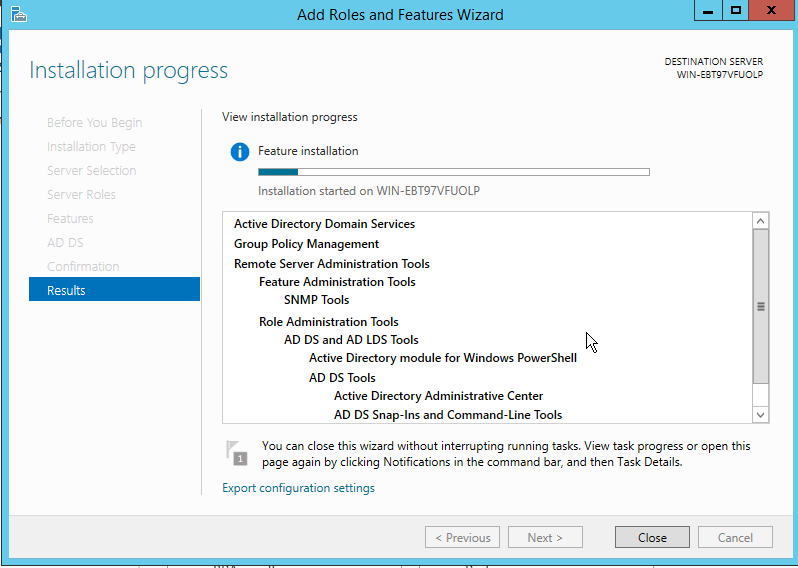
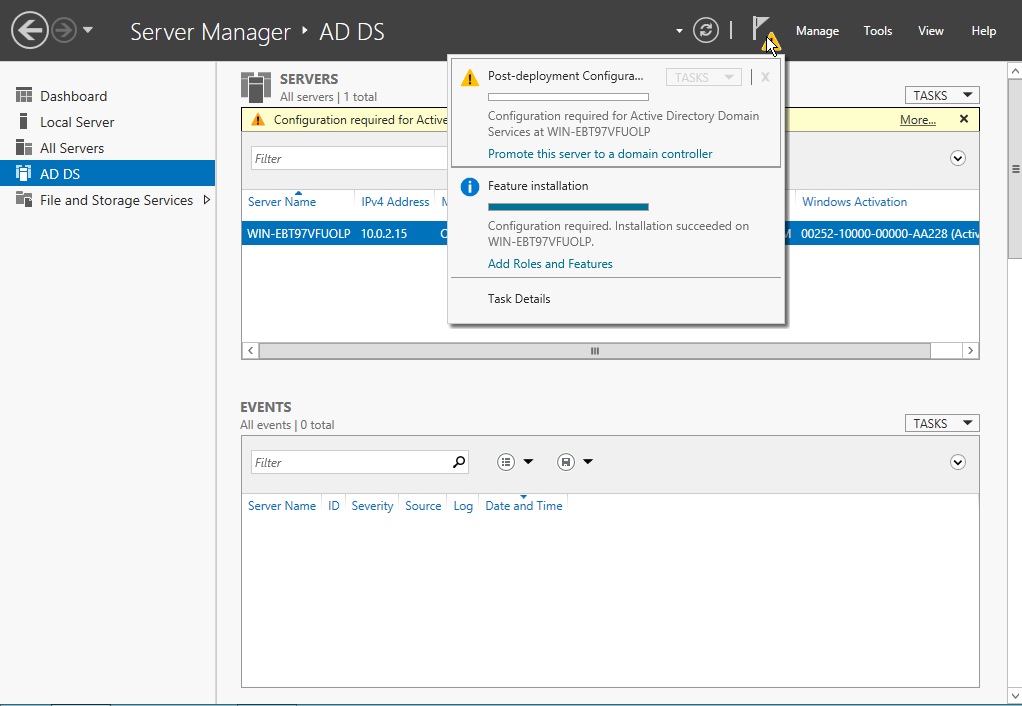
配置AD Server
-
首先把这个vm上的AD Server打开,直接贴图了。


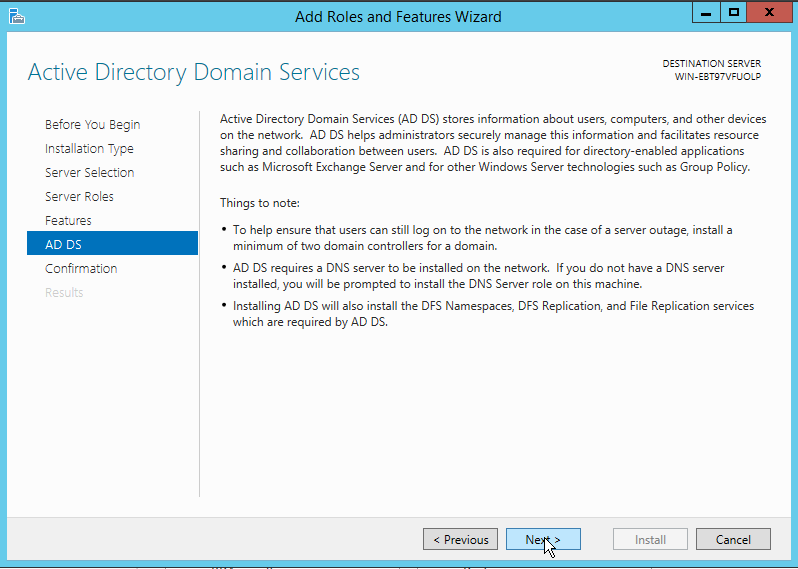
-
部署完以后选择 Promote this server to a domain controller
-
对它做具体的配置,选择 Add a new forest, 并且选择你的domain name,比如adds.com。后面应该都默认的。
安装 AD Connector
-
首先在你虚拟AD上可以建一些OU 和user 这样在connect AAD 并且sync以后,你可以在AAD下面看到这些设置,来检验是不是成功。
-
建议勾选掉用户第一次登录必须修改密码的选项,挺好找的,否则有点麻烦后面验证的时候。

-
[下载connector](Download directly at Microsoft from here: https://www.microsoft.com/en-us/download/confirmation.aspx?id=47594)
-
安装
- Express Settings ->Customize
- install
- Connect your directories -> Add Directory
- Azure AD sign-in configuration -> user principal name 选择mail
- Domain and OU filtering -> Sync selected domains and OUs ->选择你自己要同步的OU
- 一路往下点就可以
配置HostPool 安装WVDs
-
[template install]([https://portal.azure.com/#create/Microsoft.Template/uri/https%3A%2F%2Fraw.githubusercontent.com%2FAzure%2FRDS-Templates%2Fmaster%2Fwvd-templates%2FCreate and provision WVD host pool%2FmainTemplate.json](https://portal.azure.com/#create/Microsoft.Template/uri/https%3A%2F%2Fraw.githubusercontent.com%2FAzure%2FRDS-Templates%2Fmaster%2Fwvd-templates%2FCreate and provision WVD host pool%2FmainTemplate.json)) 或者 在Azure搜索HostPool建立WVDs
-
如果选择第一种template方式建立的话可以参考这个配置

-
里面这个domain就是在DC配置的时候自己选的域名
-
Existing Domain UPN选你这个DC服务器上admin的用户,注意这个和你最开始用的tenant name不一样的
-
hostpool使用你之前用命令行建立好的HostPool
-
配置好以后生成就好,然后你应该能在Azure页面看到WVDs,然后可以查看到它使用的IP,这样可以用remote连上去。
-
如果还有问题的话,可以尝试把tenant还有另外你要使用资源用户的密码重置下,这个又是一个long story了,可以看看这个。
分配用户资源
- 本地连上azure,
Add-RdsAccount -DeploymentUrl "https://rdbroker.wvd.microsoft.com"
-
check
Get-RdsSessionHost CompanyWVDtenant WVD-Host-Pool01
-
Assign Users
Add-RdsAppGroupUser -TenantName CompanyWVDtenant -HostPoolName WVD-Host-Pool01 -AppGroupName “Desktop Application Group” -UserPrincipalName username@YourCompany.COM -
这样你指定的用户就可以访问对应Group里面的资源了。
登录Virtual Desktop 大功告成
-
webclient使用刚才这个用户的用户名密码登陆上去

-
看到这个就算是成功了。
