c#写windows服务
序言
前段时间做一个数据迁移项目,刚开始用B/S架构做的项目,但B/S要寄存在IIs中,而IIs又不稳定因素,如果重启IIs就要打开页面才能运行项目。有不便之处,就改用Windows服务实现。这篇就总结下,windows服务的编写,调试,安装卸载。
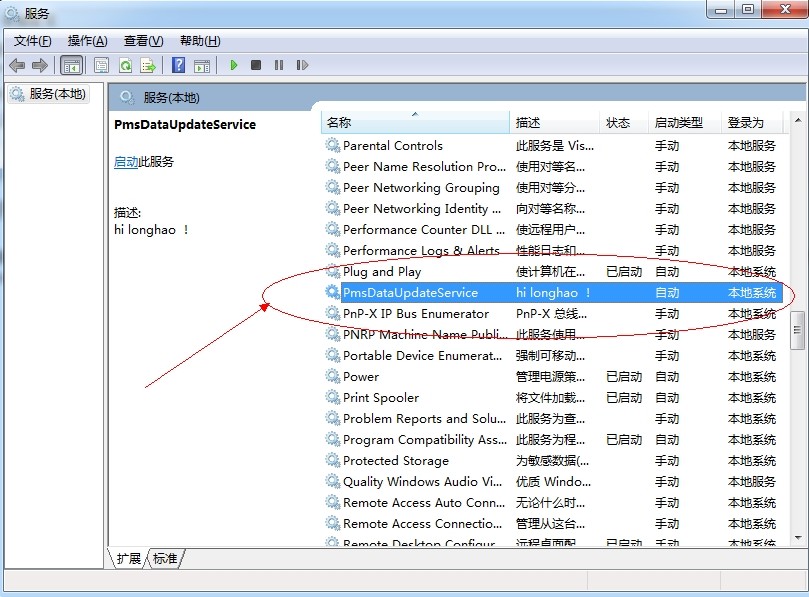
Windows服务介绍
Microsoft Windows 服务能够创建在它们自己的 Windows 会话中可长时间运行的可执行应用程序。这些服务可以在计算机启动时自动启动,可以暂停和重新启动而且不显示任何用户界面。这使服务非常适合在服务器上使用,或任何时候,为了不影响在同一台计算机上工作的其他用户,需要长时间运行功能时使用。还可以在不同于登录用户的特定用户帐户或默认计算机帐户的安全上下文中运行服务。本文就向大家介绍如何运用Visual C#来一步一步创建一个文件监视的Windows服务程序,然后介绍如何安装、测试和调试该Windows服务程序。
创建Windows服务

创建好项目之后 --- >> 双击 Service1.cs ---- >> 出现一个设计界面 ---->> 右键界面 --- >> 弹出对话框选择添加安装程序
上面一系列操作完成后,就可以对windows服务名称描述以及启动方式等进行修改。
[RunInstaller(true)]

    public class Installer1 : System.Configuration.Install.Installer
    {

        /// <summary>
        /// 必需的设计器变量。
        /// </summary>
        private System.ComponentModel.Container components = null;
        private System.ServiceProcess.ServiceProcessInstaller spInstaller;
        private System.ServiceProcess.ServiceInstaller sInstaller;


        public Installer1()
        {
            // 该调用是设计器所必需的。
            InitializeComponent();
            // TODO: 在 InitComponent 调用后添加任何初始化
        }


        #region Component Designer generated code
        /// <summary>
        /// 设计器支持所需的方法 - 不要使用代码编辑器修改
        /// 此方法的内容。
        /// </summary>
        private void InitializeComponent()
        {
            components = new System.ComponentModel.Container();
            // 创建ServiceProcessInstaller对象和ServiceInstaller对象
            this.spInstaller = new System.ServiceProcess.ServiceProcessInstaller();
            this.sInstaller = new System.ServiceProcess.ServiceInstaller();

            // 设定ServiceProcessInstaller对象的帐号、用户名和密码等信息
            this.spInstaller.Account = System.ServiceProcess.ServiceAccount.LocalSystem;
            this.spInstaller.Username = null;
            this.spInstaller.Password = null;


            // 设定服务名称
            this.sInstaller.ServiceName = "PmsDataUpdateService";
            //服务描述
            this.sInstaller.Description = "hi longhao !";

            // 设定服务的启动方式
            this.sInstaller.StartType = System.ServiceProcess.ServiceStartMode.Automatic;

            this.Installers.AddRange(
                new System.Configuration.Install.Installer[] { this.spInstaller, this.sInstaller });
        }

        #endregion

    }
修改好后回头,写入自己想要的操作。Service1.cs出现设计界面,双击设计界面进入cs代码页。可以重写这些方法。
  protected override void OnStart(string[] args)
       {
           //服务开启执行代码
       }
       protected override void OnStop()
       {
           //服务结束执行代码
       }
       protected override void OnPause()
       {
           //服务暂停执行代码
           base.OnPause();
       }
       protected override void OnContinue()
       {
           //服务恢复执行代码
           base.OnContinue();
       }
       protected override void OnShutdown()
       {
           //系统即将关闭执行代码
           base.OnShutdown();
       }
除此之外还有一个Program.cs文件:打开看下。
使得一个Windows服务程序能够正常运行,我们需要像创建一般应用程序那样为它创建一个程序的入口点。在Windows服务程序中,我们也是在Main()函数中完成这个操作的。首先我们在Main()函数中创建一个Windows服务的实例,该实例应该是ServiceBase类的某个子类的对象,然后我们调用由基类ServiceBase类定义的一个Run()方法。然而Run()方法并不就开始了Windows服务程序,我们必须通过前面提到的服务控制管理器调用特定的控制功能来完成Windows服务程序的启动,也就是要等到该对象的OnStart()方法被调用时服务才真正开始运行。如果你想在一个Windows服务程序中同时启动多个服务,那么只要在Main()函数中定义多个ServiceBae类的子类的实例对象就可以了,方法就是创建一个ServiceBase类的数组对象,使得其中的每个对象对应于某个我们已预先定义好的服务。
 /// <summary>
        /// 应用程序的主入口点。
        /// </summary>
        static void Main()
        {
            ServiceBase[] ServicesToRun;
            ServicesToRun = new ServiceBase[]
            {
                new Service1(),
                new Service2()
            };
            ServiceBase.Run(ServicesToRun);
        }
如果你在你需要的函数里面写过你需要的方法后,点运行则不可运行。
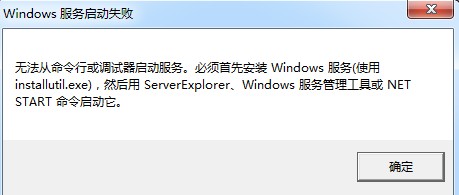
安装卸载windows服务
1、安装需要用 ,这个小玩意可以在网上下载到的。
2、把他放到你编写好的服务程序/bin/Debug文件夹下。
3、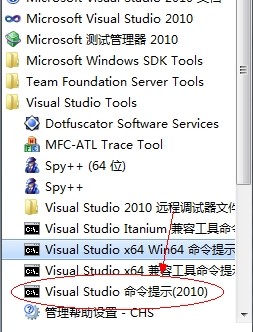 打开
打开
4、用命令读到你服务.exe文件夹下。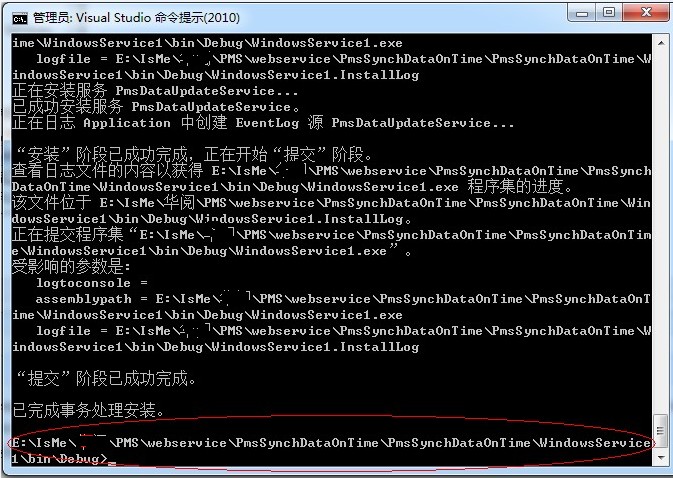
5、运行 installutil.exe
6、安装服务命令: installutil yourservices.exe
7、卸载服务命令: installutil /u yourservices.exe
注意的是:安装跟卸载需要保证程序是一样的,没有变更过的,要不会提示卸载不干净。也就是在已安装过服务的时候,不要在vs中修改你的程序。
调试windows服务
保证你的服务已安装成功,且处于启动模式。
点调试--->> 附加到进程

即可。
注意的是:

打开任务管理器: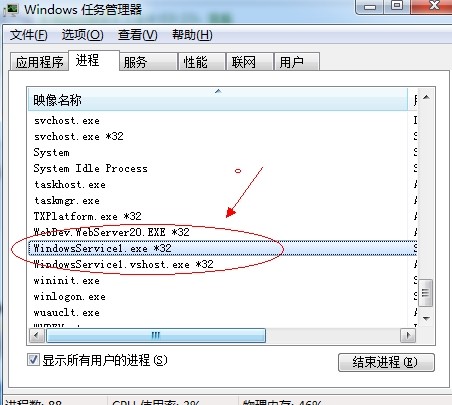 结束进程。
结束进程。


 浙公网安备 33010602011771号