17 常用软件的安装Mysql、FTP、Tomcat、Nginx、ntp时间校准
MySQL8.0版本在CentOS系统安装
安装mysql
1. 配置yum仓库
# 更新密钥
rpm --import https://repo.mysql.com/RPM-GPG-KEY-mysql-2023

# 安装Mysql8.x版本 yum库
rpm -Uvh https://dev.mysql.com/get/mysql80-community-release-el7-3.noarch.rpm
2. 使用yum安装MySQL
yum -y install mysql-community-server
3. 安装完成后,启动MySQL并配置开机自启动
// 设置开机自启
systemctl enable mysqld

// 启动
systemctl start mysqld
4. 检查 MySQL 的运行状态
systemctl status mysqld
5. 查看 MySQL 的版本号
mysql --version
配置mysql
1. 获取MySQL的初始密码
通过grep命令,在/var/log/mysqld.log文件中,过滤 temporary password关键字,得到初始密码
grep 'temporary password' /var/log/mysqld.log

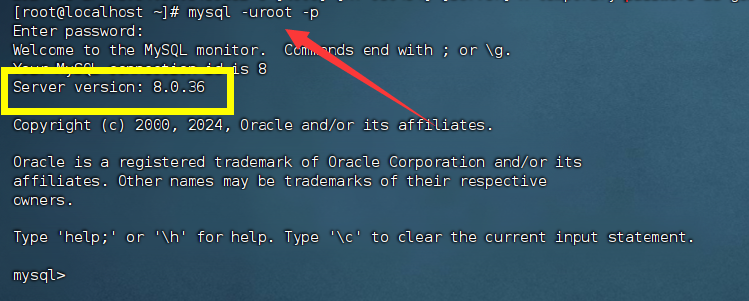
2. 登录MySQL数据库系统
// -u,登陆的用户,MySQL数据库的管理员用户同Linux一样,是root
// -p,表示使用密码登陆

// 执行完毕后输入刚刚得到的初始密码,即可进入MySQL数据库

mysql -uroot -p
3. 修改root密码
密码需要符合:大于8位,有大写字母,有特殊符号,不能是连续的简单语句如123,abc
ALTER USER 'root'@'localhost' IDENTIFIED WITH mysql_native_password BY '密码';
4. 配置root的简单密码
我们可以给root设置简单密码,如123456
请注意,此配置仅仅是用于测试环境或学习环境的MySQL,如果是正式使用,请勿设置简单密码
- 密码安全级别低
set global validate_password.policy=0;
- 长度最低4位即可
set global validate_password.length=4;
- 重新修改登录密码
ALTER USER 'root'@'localhost' IDENTIFIED WITH mysql_native_password BY '密码';
5. 允许root远程登录,并设置远程登录密码
默认情况下,root用户是不允许远程登录的,只允许在MySQL所在的Linux服务器登陆MySQL系统
允许root远程登录会带来安全风险
第一次设置root远程登录,并配置远程密码
密码需要符合:大于8位,有大写字母,有特殊符号,不能是连续的简单语句如123,abc
create user 'root'@'%' IDENTIFIED WITH
mysql_native_password BY '密码!';
后续修改密码使用如下SQL命令
ALTER USER 'root'@'localhost' IDENTIFIED WITH mysql_native_password BY '密码
6. 退出MySQL控制台页面
// 退出命令
exit

// 或者快捷键
ctrl + d
7. 检查端口
MySQL默认绑定了3306端口,可以通过端口占用检查MySQL的网络状态
netstat -anp | grep 3306
Tomcat安装部署
Tomcat 是由 Apache 开发的一个 Servlet 容器,实现了对 Servlet 和 JSP 的支持,并提供了作为Web服务器的一些特有功能,如Tomcat管理和控制平台、安全域管理和Tomcat阀等。
简单来说,Tomcat是一个WEB应用程序的托管平台,可以让用户编写的WEB应用程序,被Tomcat所托管,并提供网站服务
即让用户开发的WEB应用程序,变成可以被访问的网页
安装JDK环境
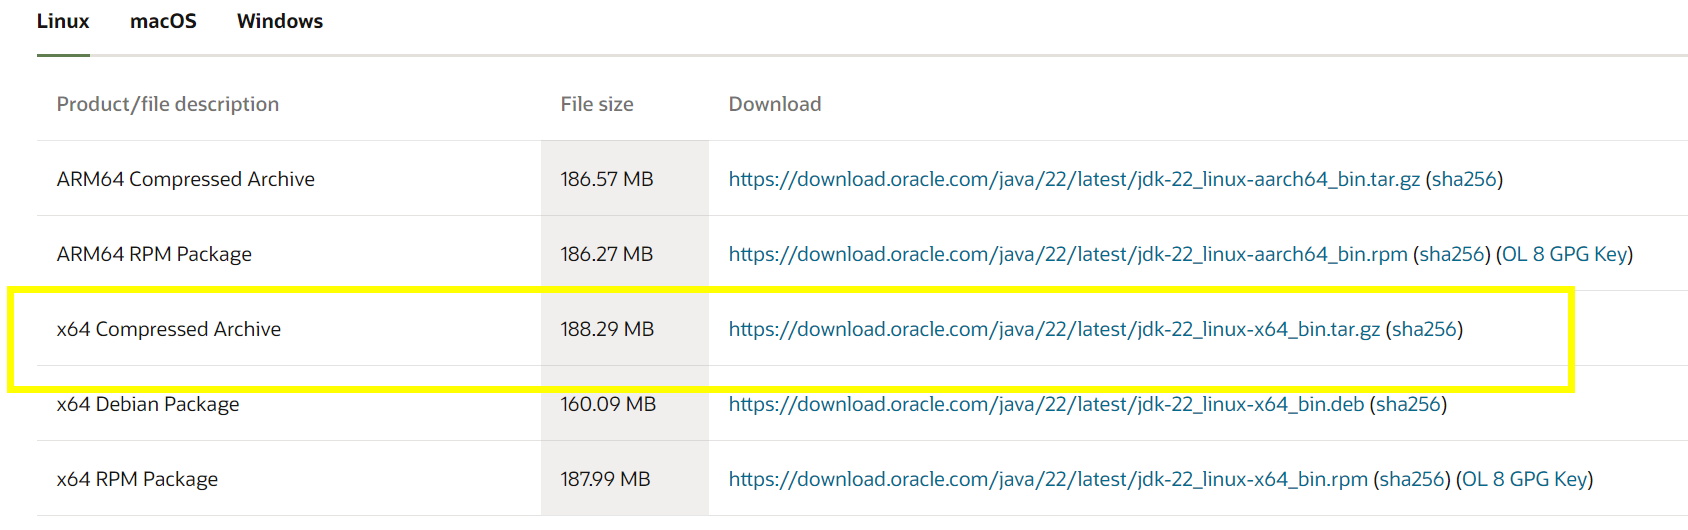
1. 下载JDK软件
打开下面的链接地址,下载sdk包,选中黄色框框的版本
https://www.oracle.com/java/technologies/downloads/
2. 登陆Linux系统,切换到root用户
3. 通过FinalShell,上传下载好的JDK安装包到 / 目录,并重命名 jdk-22.gz
4. 创建文件夹,用来部署JDK
将JDK和Tomcat都安装部署到:/export/server 内
mkdir -p /export/server
5. 解压缩JDK安装文件
tar -zxvf /jdk-22.gz -C /export/server
6. 配置JDK的软链接
ln -s /export/server/jdk-22 /export/server/jdk
7. 配置JAVA_HOME环境变量,以及将$JAVA_HOME/bin文件夹加入PATH环境变量中
// 编辑/etc/profile文件
export JAVA_HOME=/export/server/jdk
export PATH=$PATH:$JAVA_HOME/bin
8. 立即生效环境变量
source /etc/profile
9. 配置java执行程序的软链接
// 删除系统自带的java程序
rm -f /usr/bin/java

软链接我们自己安装的java程序
ln -s /export/server/jdk/bin/java /usr/bin/java
10 执行验证
java -version
javac -version

解压并部署Tomcat-默认端口8080
Tomcat建议使用非Root用户安装并启动,可以创建一个用户:tomcat用以部署
1. 放行tomcat需要使用的8080端口的外部访问权限
CentOS系统默认开启了防火墙,阻止外部网络流量访问系统内部,所以,如果想要Tomcat可以正常使用,需要对Tomcat默认使用的8080端口进行放行
放行有2种操作方式:
- 关闭防火墙
- 配置防火墙规则,放行端口
1. 方式一:关闭防火墙--root权限
// 关闭防火墙
systemctl stop firewalld

// 停止防火墙开机自启
systemctl disable firewalld
2. 方式二:放行8080端口的外部访问--root权限
firewall-cmd - add-port=8080/tcp - permanent
# - add-port=8080/tcp表示放行8080端口的tcp访问
# permanent表示永久生效


# 重新载入防火墙规则使其生效
firewall-cmd - reload
3. 下载Tomcat安装包--root
到官网 https://tomcat.apache.org/ 下载到本地
然后通过 FinalShell 将安装包上传到 /packages 目录
# 使用root用户操作
// 或者时候用命令 下载
wget https://dlcdn.apache.org/tomcat/tomcat-10/v10.0.27/bin/apache-tomcat-10.0.27.tar.gz
4. 解压Tomcat安装包--root权限
使用root用户操作,否则无权限解压到/export/server内,除非修改此文件夹权限
unzip /packages/apache-tomcat-10.1.20.zip -d /export/server
5. 创建Tomcat软链接--root权限
ln -s /export/server/apache-tomcat-10.1.20 /export/server/tomcat
6. 修改tomcat安装目录权限--root权限
// 对软链接和tomcat安装文件夹进行修改,
// 使用通配符*进行匹配
chown -R tomcat:tomcat /export/server * tomcat*
7. 切换到songxia用户
// songxia 用户,可以专职管理 Tomcat的安装和部署
su - songxia
8. 启动tomcat
// 启动
/export/server/tomcat/bin/startup.sh start


/export/server/tomcat/bin/startup.sh stop
如果报错:/export/server/tomcat/bin/startup.sh 权限不够
可以修改 指定文件的权限
chmod u+x /export/server/tomcat/bin/startup.sh
9. tomcat启动在8080端口,可以检查是否正常启动成功
netstat -anp | grep 8080

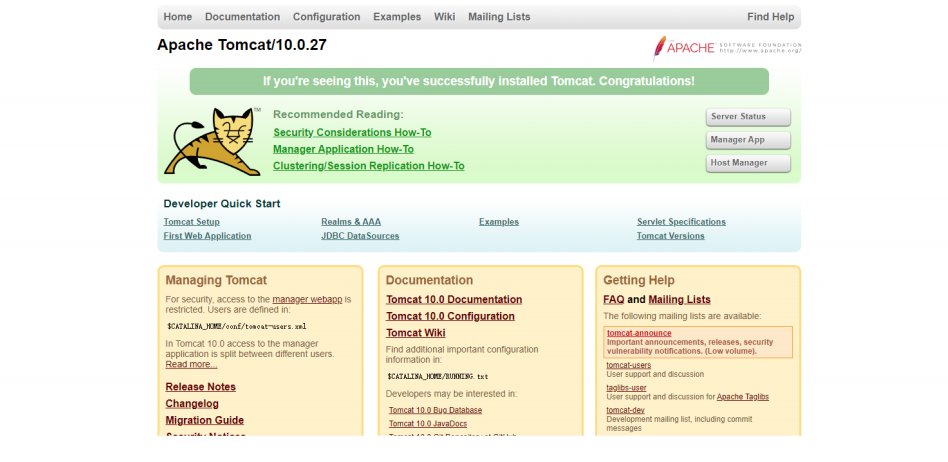
10 打开浏览器,输入网址,至此,Tomcat的部署完成
http://192.168.XXX.XXX:8080
或者 使用主机名(需配置好本地的主机名映射)
http://主机名:8080
部署web网站
1. 确认 tomcat 的服务状态
systemctl status tomcat
2. 开启服务
/export/server/tomcat/bin/startup.sh start

# 如果是windows系统中,启动文件是 startup.bat

3. 将项目包上传
tomcat 项目的启动文件一般是放置在 tomcat 安装目录下面的 webapps 文件中
cd /export/server/tomcat/webapps/你的项目文件
4. 访问项目
http://192.168.XXX.XXX:8080
或者 使用主机名(需配置好本地的主机名映射)
http://主机名:8080

FTP服务器
参考链接:
https://cloud.tencent.com/developer/article/2351869
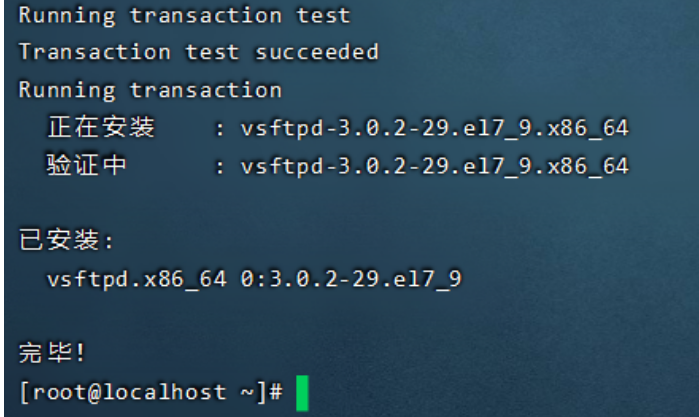
1. 安装
安装FTP服务 vsftpd
yum install -y vsftpd
开启、查看状态
// 查看状态
systemctl status vsftpd

// 开启服务
systemctl start vsftpd

// 开启 开机自启动
systemctl enable vsftpd

// 重启服务
systemctl restart vsftpd
service vsftpd start
2. 配置 vsftp.conf 配置文件
- 编辑
vim /etc/vsftpd/vsftpd.conf文件如下:
# Example config file /etc/vsftpd/vsftpd.conf
#
# The default compiled in settings are fairly paranoid. This sample file
# loosens things up a bit, to make the ftp daemon more usable.
# Please see vsftpd.conf.5 for all compiled in defaults.
#
# READ THIS: This example file is NOT an exhaustive list of vsftpd options.
# Please read the vsftpd.conf.5 manual page to get a full idea of vsftpd's
# capabilities.
# Allow anonymous FTP? (Beware - allowed by default if you comment this out)
# 配置1=========:不允许匿名用户登录
 anonymous_enable=NO

# Uncomment this to allow local users to log in.
# When SELinux is enforcing check for SE bool ftp_home_dir
local_enable=YES
# Uncomment this to enable any form of FTP write command.
write_enable=YES
# Default umask for local users is 077. You may wish to change this to 022,
# if your users expect that (022 is used by most other ftpd's)
local_umask=022
# Uncomment this to allow the anonymous FTP user to upload files. This only
# has an effect if the above global write enable is activated. Also, you will
# obviously need to create a directory writable by the FTP user.
# When SELinux is enforcing check for SE bool allow_ftpd_anon_write, allow_ftpd_full_access
#anon_upload_enable=YES
#
# Uncomment this if you want the anonymous FTP user to be able to create
# new directories.
#anon_mkdir_write_enable=YES
#
# Activate directory messages - messages given to remote users when they
# go into a certain directory.
dirmessage_enable=YES
#
# Activate logging of uploads/downloads.
xferlog_enable=YES
#
# Make sure PORT transfer connections originate from port 20 (ftp-data).
connect_from_port_20=YES
#
# If you want, you can arrange for uploaded anonymous files to be owned by
# a different user. Note! Using "root" for uploaded files is not
# recommended!
#chown_uploads=YES
#chown_username=whoever
#
# You may override where the log file goes if you like. The default is shown
# below.
#xferlog_file=/var/log/xferlog
#
# If you want, you can have your log file in standard ftpd xferlog format.
# Note that the default log file location is /var/log/xferlog in this case.
xferlog_std_format=YES
#
# You may change the default value for timing out an idle session.
#idle_session_timeout=600
#
# You may change the default value for timing out a data connection.
#data_connection_timeout=120
#
# It is recommended that you define on your system a unique user which the
# ftp server can use as a totally isolated and unprivileged user.
#nopriv_user=ftpsecure
#
# Enable this and the server will recognise asynchronous ABOR requests. Not
# recommended for security (the code is non-trivial). Not enabling it,
# however, may confuse older FTP clients.
#async_abor_enable=YES
#
# By default the server will pretend to allow ASCII mode but in fact ignore
# the request. Turn on the below options to have the server actually do ASCII
# mangling on files when in ASCII mode. The vsftpd.conf(5) man page explains
# the behaviour when these options are disabled.
# Beware that on some FTP servers, ASCII support allows a denial of service
# attack (DoS) via the command "SIZE /big/file" in ASCII mode. vsftpd
# predicted this attack and has always been safe, reporting the size of the
# raw file.
# ASCII mangling is a horrible feature of the protocol.
# 配置2=========:允许ascii文件上传
ascii_upload_enable=YES

# 配置3=========:允许ascii文件下载
ascii_download_enable=YES
#
# You may fully customise the login banner string:
# 配置4=========:
ftpd_banner=Welcome to blah FTP service.
#
# You may specify a file of disallowed anonymous e-mail addresses. Apparently
# useful for combatting certain DoS attacks.
#deny_email_enable=YES
# (default follows)
#banned_email_file=/etc/vsftpd/banned_emails
#
# You may specify an explicit list of local users to chroot() to their home
# directory. If chroot_local_user is YES, then this list becomes a list of
# users to NOT chroot().
# (Warning! chroot'ing can be very dangerous. If using chroot, make sure that
# the user does not have write access to the top level directory within the
# chroot)

#  配置5=========:将用户限制在为其配置的主目录
chroot_local_user=YES
chroot_list_enable=YES
chroot_list_file=/etc/vsftpd/chroot_list # chroot_list里面的用户,可以一直返回上一级


#userlist_file=/etc/vsftpd/chroot_list


#
# You may activate the "-R" option to the builtin ls. This is disabled by
# default to avoid remote users being able to cause excessive I/O on large
# sites. However, some broken FTP clients such as "ncftp" and "mirror" assume
# the presence of the "-R" option, so there is a strong case for enabling it.
#ls_recurse_enable=YES
#
# When "listen" directive is enabled, vsftpd runs in standalone mode and
# listens on IPv4 sockets. This directive cannot be used in conjunction
# with the listen_ipv6 directive.
listen=NO
#
# This directive enables listening on IPv6 sockets. By default, listening
# on the IPv6 "any" address (::) will accept connections from both IPv6
# and IPv4 clients. It is not necessary to listen on *both* IPv4 and IPv6
# sockets. If you want that (perhaps because you want to listen on specific
# addresses) then you must run two copies of vsftpd with two configuration
# files.
# Make sure, that one of the listen options is commented !!
#  FTP 服务器监听的 IP 地址,默认为 NO,表示监听所有接口
listen_ipv6=YES
# 配置7=========: 默认打开路径
local_root=/www/htmls

# 配置6=========:添加下列内容到vsftpd.conf末尾
# 是否拒绝用户列表文件中列出的用户登录,默认为 Y;
userlist_deny=YES # 是否启用 "禁止登陆用户名单"
# userlist_enable=YES

pam_service_name=vsftpd
tcp_wrappers=YES
use_localtime=YES
# 设置FTP服务的监听端口
listen_port=21
idle_session_timeout=300

# 设置启用虚拟用户功能
guest_enable=YES

# 制定虚拟用户配置文件放置文件夹(需要自己创建)
# user_config_dir=/etc/vsftpd/vuser_conf
# 允许写
allow_writeable_chroot=YES
data_connection_timeout=1
virtual_use_local_privs=YES
pasv_min_port=40000
pasv_max_port=40010
accept_timeout=5
connect_timeout=60
- 编辑完毕后,按键
esc进入底部命令模式 - 按键
:wq保存文件
3. 配置FTP用户和密码
1. 新增用户
adduser ftpusername
2. 设置密码
passwd ftpusername
3. 设置用户权限和文件权限--可选
chown -R ftpusername:ftpusername /home/ftpusername
chmod -R u=rwx,g=rwx,o=x  /home/ftpusername
4. 在chroot_list里面添加的用户,可以一直返回上级--可选
编辑文件 /etc/vsftpd/chroot_list,加入用户 ftpusername
// 编辑文件
vim /etc/vsftpd/chroot_list

// 查看文件内容
cat /etc/vsftpd/chroot_list
5. 编辑用户密码信息文件
在文件 /etc/vsftpd/vuser_passwd 里面设置用户密码
// 编辑文件
vim /etc/vsftpd/vuser_passwd
// 在文件中写入:
账户:ftpusername
密码:ftpusername

// 查看文件内容
cat /etc/vsftpd/vuser_passwd
6.生成虚拟用户数据文件
db_load -T -t hash -f /etc/vsftpd/vuser_passwd /etc/vsftpd/vuser_passwd.db
7. 将该目录的权限改成600--执行一次即可
chmod 600 /etc/vsftpd/vuser_passwd.db
8. 编辑pam认证文件
# 查看系统位数
getconf LONG_BIT

# 备份pam认证文件
mv  /etc/pam.d/vsftpd  /etc/pam.d/vsftpd.bak

# 新建pam认证文件
vim /etc/pam.d/vsftpd

# 系统为32位:
auth required pam_userdb.so db=/etc/vsftpd/vuser_passwd account
required pam_userdb.so db=/etc/vsftpd/vuser_passwd


# 系统为64位:--- 我的系统是64为,所以选择下面的
auth required /lib64/security/pam_userdb.so db=/etc/vsftpd/vuser_passwd
account required /lib64/security/pam_userdb.so db=/etc/vsftpd/vuser_passwd
9. 重启ftp服务
systemctl restart vsftpd
service vsftpd start
10. 在客户端验证FTP服务是否设置成功
登陆用户名和密码 ,如果可以登录成功,就表示FTP配置成功了
ftp 124.221.22.XXX
或者使用下面的命令,可以检验配置是否成功
journalctl -xe
Nginx安装部署-默认端口80
Nginx 是一个高性能的HTTP和反向代理web服务器,同时也提供了IMAP/POP3/SMTP服务
同Tomcat一样,Nginx可以托管用户编写的WEB应用程序成为可访问的网页服务,同时也可以作为流量代理服务器,控制流量的中转
Nginx需要配置额外的yum仓库,才可以使用yum安装
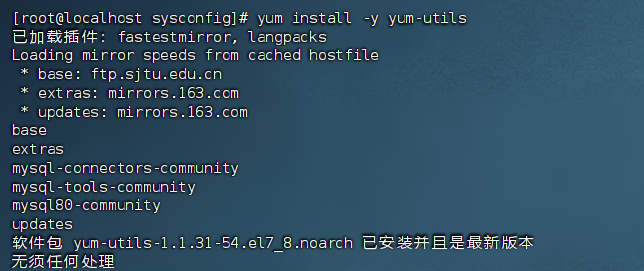
1. 安装yum依赖程序
yum install -y yum-utils
2. 手动添加nginx的yum仓库
yum程序使用的仓库配置文件,存放在:/etc/yum.repos.d 内
写入如下配置:
# 创建文件使用vim编辑
vim /etc/yum.repos.d/nginx.repo

# 文件内容
[nginx-stable]
name=nginx stable repo
baseurl=http://nginx.org/packages/centos/$releasever/$basearch/
gpgcheck=1
enabled=1
gpgkey=https://nginx.org/keys/nginx_signing.key
module_hotfixes=true

[nginx-mainline]
name=nginx mainline repo
baseurl=http://nginx.org/packages/mainline/centos/$releasever/$basearch/
gpgcheck=1
enabled=0
gpgkey=https://nginx.org/keys/nginx_signing.key
module_hotfixes=true
3. 通过yum安装最新稳定版的nginx
yum install -y nginx
4. 启动
# 查看版本
nginx -v


# nginx自动注册了systemctl系统服务
systemctl start nginx		# 启动
systemctl stop nginx		# 停止
systemctl status nginx		# 运行状态
systemctl enable nginx		# 开机自启
systemctl disable nginx		# 关闭开机自启
5. 配置防火墙放行
nginx默认绑定80端口,需要关闭防火墙或放行80端口
方式1(推荐),关闭防火墙
systemctl status firewalld		# 查看防火墙的状态
systemctl stop firewalld		# 关闭
systemctl disable firewalld		# 关闭开机自启
方式2,放行80端口
firewall-cmd --add-port=80/tcp --permanent		# 放行tcp规则下的80端口,永久生效
firewall-cmd --reload				        # 重新加载防火墙规则
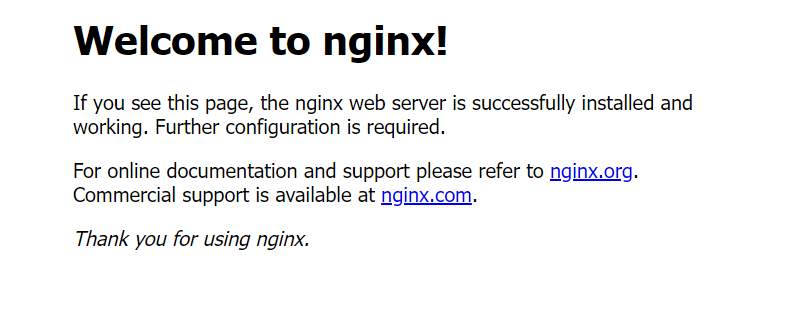
6.启动后浏览器输入Linux服务器的IP地址或主机名即可访问
# 80端口是访问网站的默认端口,所以后面无需跟随端口号
http://192.168.XXX.XXX

或者
http://主机名
部署web网站
1. 确认 nginx 的服务状态
systemctl status nginx
2. 开启服务
systemctl start nginx # 启动
3. 配置文件在/etc/nginx/nginx.conf
user root;  // Nginx进程所使用的用户
worker_processes  auto; // Nginx运行的work进程数量
error_log  /var/log/nginx/error.log notice; // Nginx错误日志存放路径
pid        /var/run/nginx.pid; // Nginx服务运行后的pid进程号

// events事件模块
events {
    worker_connections  1024;
}
http {


    include       /etc/nginx/mime.types;
    default_type  application/octet-stream;

    log_format  main  '$remote_addr - $remote_user [$time_local] "$request" '
                      '$status $body_bytes_sent "$http_referer" '
                      '"$http_user_agent" "$http_x_forwarded_for"';

    access_log  /var/log/nginx/access.log  main;

    sendfile        on;
    #tcp_nopush     on;

    keepalive_timeout  65;

    #gzip  on;
    include /etc/nginx/conf.d/*.conf;
	//  使用Server配置网站, 每个Server{}代表一个网站(简称虚拟主机),可以写在这里,也可以单独配置在/conf.d
}
server配置:使用Server配置网站, 每个Server{}代表一个网站(简称虚拟主机)
vim /etc/nginx/conf.d/default.conf 配置文件
server {
    listen       80; # 监听端口, 浏览器默认80端口,更改后用户也得手动更改
    server_name  192.168.XXX.XXX;  # 提供服务的域名或主机名www.baidu.com,如不匹配域名输入 _ 下划线

    #access_log  /var/log/nginx/host.access.log  main;

    # 控制网站访问路径
    location / {
        root   /www; # 存放网站代码路径
        index  index.html index.htm; # 服务器返回的默认页面文件
    }

    #error_page  404              /404.html;

    # redirect server error pages to the static page /50x.html
    # 指定错误代码, 统一定义错误页面, 错误代码重定向到新的Locaiton
    error_page   500 502 503 504  /50x.html;
    location = /50x.html {
        root   /wwww;
    }

    # proxy the PHP scripts to Apache listening on 127.0.0.1:80
    #
    #location ~ \.php$ {
    #    proxy_pass   http://127.0.0.1;
    #}

    # pass the PHP scripts to FastCGI server listening on 127.0.0.1:9000
    #
    #location ~ \.php$ {
    #    root           html;
    #    fastcgi_pass   127.0.0.1:9000;
    #    fastcgi_index  index.php;
    #    fastcgi_param  SCRIPT_FILENAME  /scripts$fastcgi_script_name;
    #    include        fastcgi_params;
    #}

    # deny access to .htaccess files, if Apache's document root
    # concurs with nginx's one
    #
    #location ~ /\.ht {
    #    deny  all;
    #}
}
4. 将项目包上传
**项目的启动文件一般是放置在 /etc/nginx/conf.d/default.conf 配置文件指定的目中 **
cd /www/你的项目文件
5. 访问项目
因为Nginx默认端口是 80,所以浏览器访问的时候,可以不加端口号
http://192.168.XXX.XXX
或者 使用主机名(需配置好本地的主机名映射)
http://主机名
ntp自动校准系统时间
- 安装
ntp程序
yum install -y ntp
- 启动程序
当ntpd启动后会定期的帮助我们联网校准系统的时间
systemctl start ntpd
- 开机自启
systemctl enable ntpd

手动校准时间的方法
注意:前提是使用 root 权限
ntpdate -u ntp.aliyun.com

 浙公网安备 33010602011771号