
ogre3D学习基础18 -- 材质的使用与脚本的简单书写
这一节以基础16为基础,练习材质的使用。
第一,看看框架

 1 //material
 2
 3 #include "ExampleApplication.h"
 4
 5 class TutorialApplication : public ExampleApplication
 6 {
 7 protected:
 8 public:
 9     TutorialApplication()
10     {
11     }
12
13     ~TutorialApplication()
14     {
15     }
16 protected:
17     void createScene(void)
18     {
19
20     }
21 };
22
23
24 #include "windows.h"
25
26 INT WINAPI WinMain( HINSTANCE hInst, HINSTANCE, LPSTR strCmdLine, INT )
27 {
28     // Create application object
29     TutorialApplication app;
30     app.go();
31     return 0;
32 }
第二,在createScene()里添加手动创建的对象manual
Ogre::ManualObject *manual = mSceneMgr->createManualObject("Quad");//创建手绘对象
manual->begin("MyMaterial",RenderOperation::OT_TRIANGLE_LIST);//这里使用的材质是material
第三,绘制图形,正方形,并结束绘制。
   manual->position(5.0,0.0,0.0);
    manual->textureCoord(0,2);
    manual->position(-5.0,10.0,0.0);
    manual->textureCoord(2,0);
    manual->position(-5.0,0.0,0.0);
    manual->textureCoord(2,2);
    manual->position(5.0,10.0,0.0);
    manual->textureCoord(0,0);

    manual->index(0);//三角形一
    manual->index(1);
    manual->index(2);

    manual->index(0);//三角形二
    manual->index(3);
    manual->index(1);

    manual->end();
    manual->convertToMesh("Quad");

    Ogre::Entity *ent = mSceneMgr->createEntity("Quad");
    Ogre::SceneNode *node = mSceneMgr->getRootSceneNode()->createChildSceneNode("Node1");
    node->attachObject(ent);
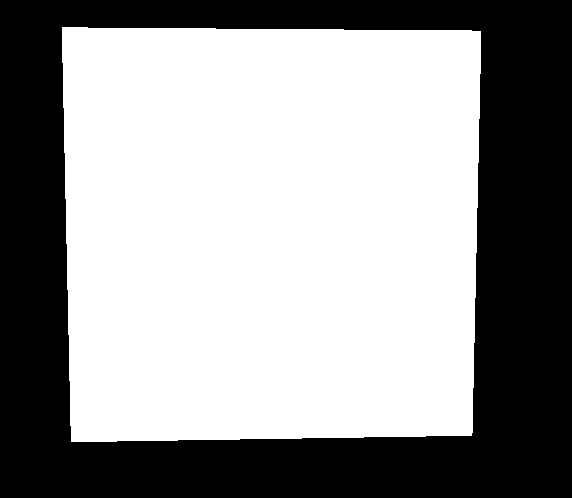
最后运行效果是一个方形白色方块。
好,现在我们添加材质
在路径..\media\materials\scripts下新建一个material格式的文件,添加代码如下:
material MyMaterial1
{
technique
{
pass
{
texture_unit
{
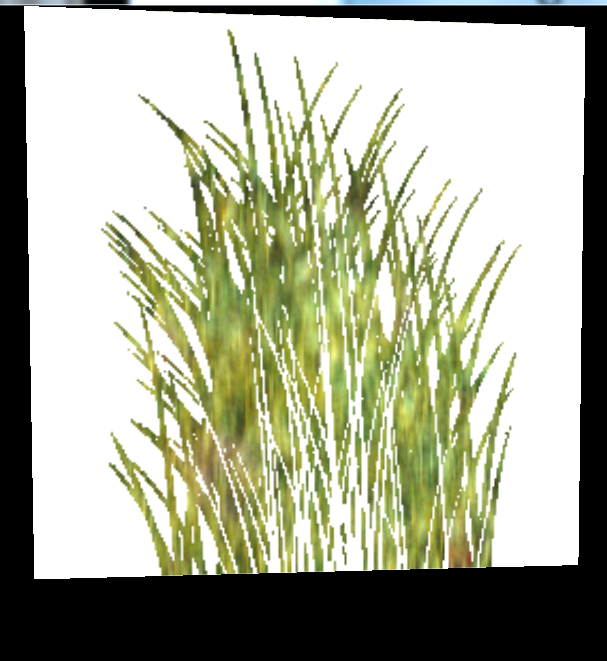
texture gras_02.png
}
}
}
}
将程序中manual->begin("MyMaterial",RenderOperation::OT_TRIANGLE_LIST);中的MyMaterial替换为MyMaterial1,效果如下:

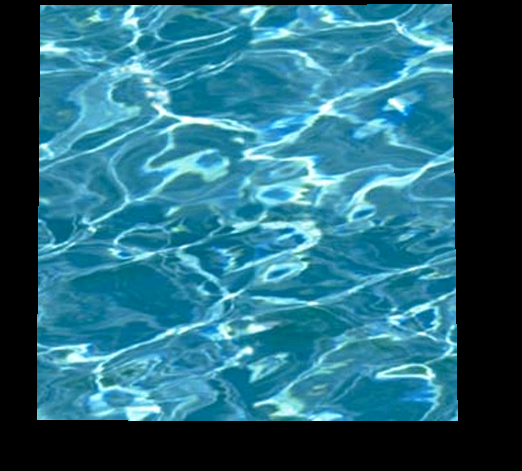
现在将material改为matreial2,代码如下:
material MyMaterial2
{
    technique
    {
        pass
        {
            texture_unit
            {
                texture water02.jpg
            }
        }
    }
}
下面来改变一下
manual->position(5.0, 0.0, 0.0);
manual->textureCoord(0,2);//变为2
manual->position(-5.0, 10.0, 0.0);
manual->textureCoord(2,0);//变为2
manual->position(-5.0, 0.0, 0.0);
manual->textureCoord(2,2);//
manual->position(5.0, 10.0, 0.0);
manual->textureCoord(0,0);//
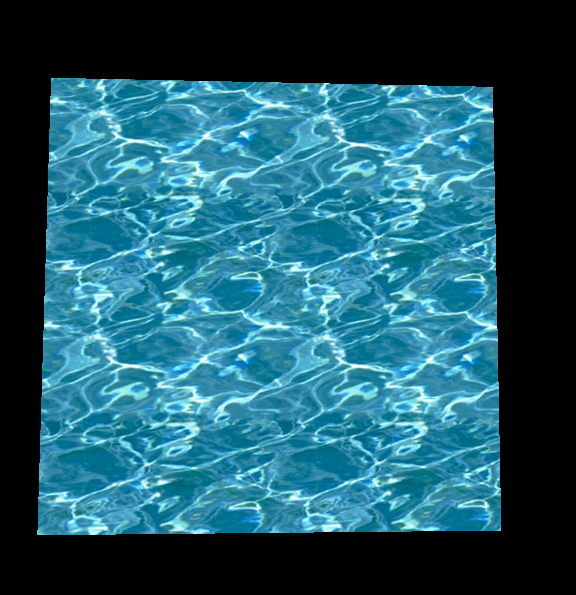
看一下效果
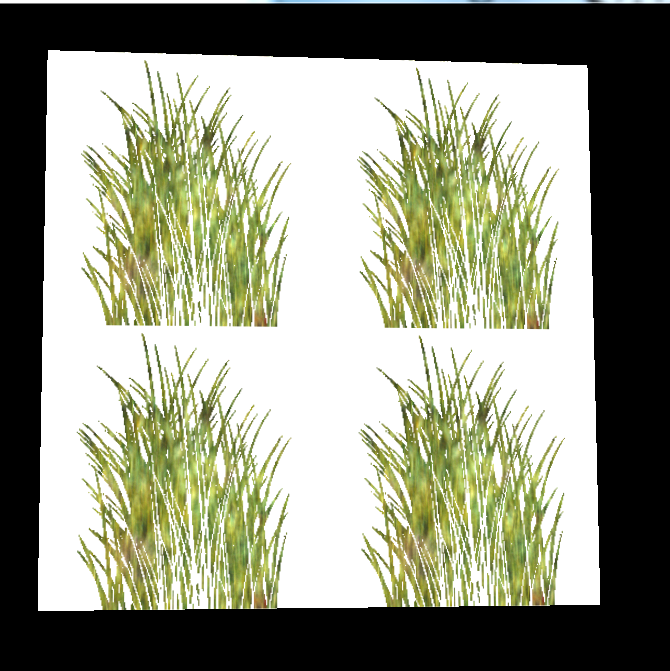
这样显示是系统默认的显示的方式,为 wrapping mode,内部解释为将大于2的部分复制显示,like this:
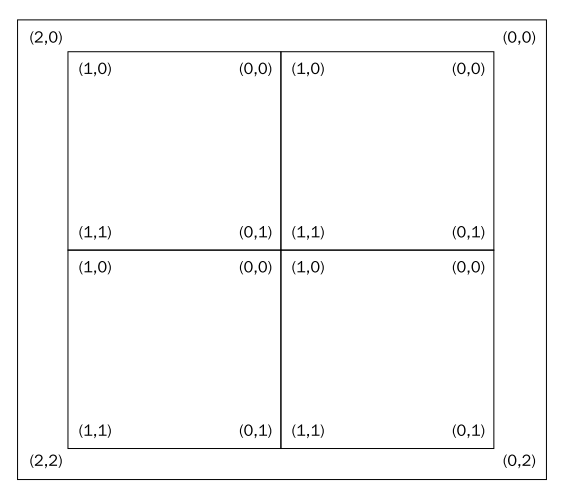
主要是纹理问题,我们换个图片就会发现,这样的好处,你能发现区别吗,这个纹理根部看不出来是四个图片拼接而成。
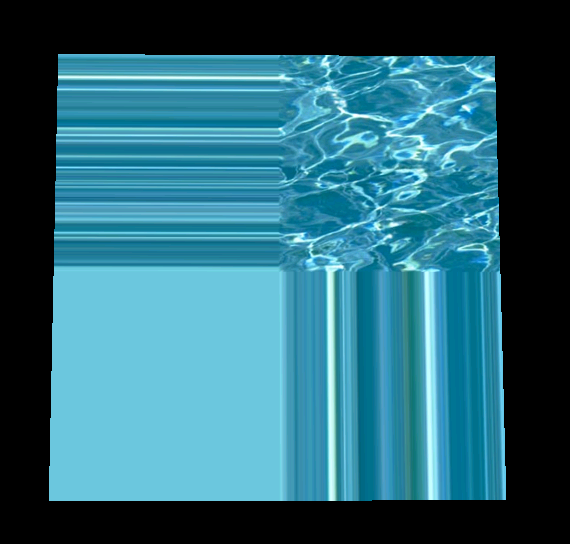
第二种纹理显示模式,称之为clamping mode,需要在脚本里添加一句话,如下:
material MyMaterial2
{
    technique
    {
        pass
        {
            texture_unit
            {
                texture water02.jpg
                tex_address_mode clamp//这句话设置显示mode
            }
        }
    }
}
效果很明显,四个方块,以第一个为基础,向外辐射:
第三种类似镜子的纹理显示模式,改变脚本为
material MyMaterial1
{
    technique
    {
        pass
        {
            texture_unit
            {
                texture gras_02.png
                tex_address_mode mirror//
            }
        }
    }
}
效果为:
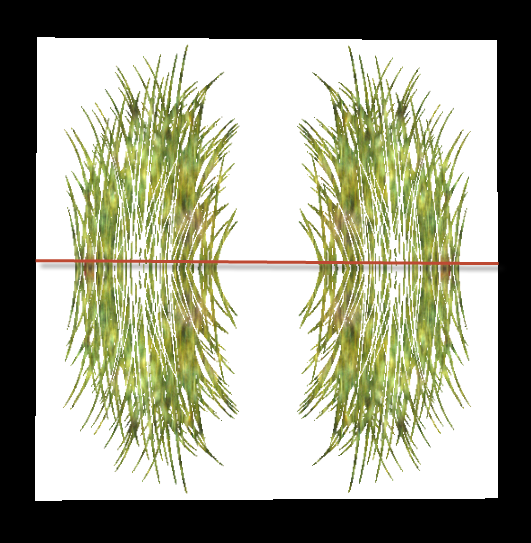
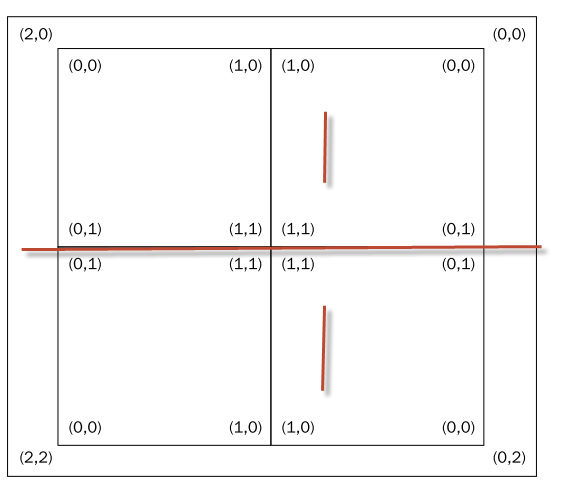
镜子模式的图形分析如下:
第四中纹理显示模式称之为border mode ,边框模式,这种模式看不出其他的明显区别,因为边框填充为黑色的
本文来自博客园,作者:struggle_time,转载请注明原文链接:https://www.cnblogs.com/songliquan/p/3372365.html


【推荐】国内首个AI IDE,深度理解中文开发场景,立即下载体验Trae
【推荐】编程新体验,更懂你的AI,立即体验豆包MarsCode编程助手
【推荐】抖音旗下AI助手豆包,你的智能百科全书,全免费不限次数
【推荐】轻量又高性能的 SSH 工具 IShell:AI 加持,快人一步
· go语言实现终端里的倒计时
· 如何编写易于单元测试的代码
· 10年+ .NET Coder 心语,封装的思维:从隐藏、稳定开始理解其本质意义
· .NET Core 中如何实现缓存的预热?
· 从 HTTP 原因短语缺失研究 HTTP/2 和 HTTP/3 的设计差异
· 周边上新:园子的第一款马克杯温暖上架
· Open-Sora 2.0 重磅开源!
· 分享 3 个 .NET 开源的文件压缩处理库,助力快速实现文件压缩解压功能!
· Ollama——大语言模型本地部署的极速利器
· DeepSeek如何颠覆传统软件测试?测试工程师会被淘汰吗?