读取resource下sql脚本并执行
1、添加依赖
 <dependency>
    <groupId>commons-fileupload</groupId>
    <artifactId>commons-fileupload</artifactId>
    <version>1.3.2</version>
</dependency>
<dependency>
    <groupId>cglib</groupId>
    <artifactId>cglib</artifactId>
    <version>3.2.10</version>
</dependency>
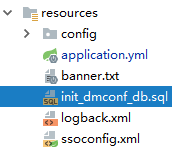
2、将文件(init_dmconf_db.sql)放到resources目录下
3、增加工具类FileDownloadUtils和InitSqlUtil
1)FileDownloadUtils读取resources目录下的文件返回file


package com.dm.botconf.util;

import org.apache.commons.io.FileUtils;
import org.springframework.core.io.ClassPathResource;
import org.springframework.core.io.Resource;

import java.io.File;
import java.io.IOException;
import java.io.InputStream;

public class FileDownloadUtils {
    /**
     * @param fileName-文件在资源目录下的相对路径,路径必须不以“/”开头。如“static/a.txt”
     * @description: 从jar包内部的资源目录下下载文件
     */
    public static File download(String fileName) {
        InputStream input = null;
        try {
            Resource resource = new ClassPathResource(fileName);
            input = resource.getInputStream();
            File targetFile = new File(resource.getFilename());
            FileUtils.copyInputStreamToFile(input, targetFile);
            return targetFile;
        } catch (IOException e) {
            e.printStackTrace();
        } finally {
            try {
                if (input != null) {
                    input.close();
                }
            } catch (IOException e) {
                e.printStackTrace();
            }
        }
        return null;
    }
}
2)InitSqlUtil利用mysql命令执行sql脚本
package com.dm.botconf.util;

import com.lenovo.bot.data.platform.model.DB;
import org.apache.tools.ant.Project;
import org.apache.tools.ant.taskdefs.SQLExec;

import java.io.File;

public class InitSqlUtil {
    /**
     * 执行sql
     */
    public static void exeSQLSript(DB data, File file) {
        SQLExec sqlExec = new SQLExec();
        String mysqlDriver = "com.mysql.cj.jdbc.Driver";
        String url = "jdbc:mysql://" + data.getHost() + ":" + data.getPort() + "/" + data.getSchema() + "?useUnicode=true&characterEncoding=utf8&allowMultiQueries=true&useSSL=false&serverTimezone=GMT";
        sqlExec.setDriver(mysqlDriver);
        sqlExec.setUrl(url);
        sqlExec.setUserid(data.getUsername());
        sqlExec.setPassword(data.getPassword());
        sqlExec.setSrc(file);
        sqlExec.setPrint(true);
        sqlExec.setProject(new Project());
        sqlExec.execute();
    }
}
4、通过读取resources目录下的脚本,进行sql执行,init数据库
if (db != null) {
    //执行建表语句建表
    File file = FileDownloadUtils.download("init_dmconf_db.sql");
    InitSqlUtil.exeSQLSript(db, file);

    log.info("...创建数据库---TTTTTTTTTTTTTT-:success");
 /*   if (db.getTableNum() != null && db.getTableNum() == 0) {
        //1)执行建表语句建表
        boolean recover = MySQLDBUtil.recover(db.getHost(), String.valueOf(db.getPort()), db.getUsername(),
                db.getPassword(), dmconfInitDBSqlDir, dmconfInitDBSqlName,
                db.getSchema());
        log.info("...动态数据源...创建数据库:【{}】...", recover ? "success" : "failure");
    }*/
    //2)返回数据源
    return DataSourceBuilder.create()
            .url("jdbc:mysql://" + db.getHost() + ":" + db.getPort() + "/" + db.getSchema() + "?" + db.getOptions())
            .driverClassName("com.mysql.cj.jdbc.Driver")
            .username(db.getUsername())
            .password(db.getPassword())
            .build();
}
