Mybatis源码(一)
一、配置解析过程
Mybatis配置解析的过程分为两种文件。一个是mybatis-config.xml全局文件。另外一个就是所有的Mapper.xml文件,也包含在Mapper接口类上的定义的注解。
如何解析的?
SqlSessionFactory sqlSessionFactory = new SqlSessionFactoryBuild().build(inputStream);
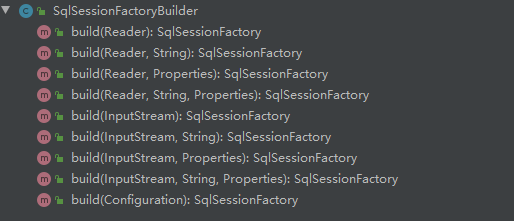
使用SqlSessionFactoryBuilder,这是使用建造者模式(建造者模式用来创建复杂对象,不需要关注内部细节,是一种封装的体现)。Mybatis中海油很多地方使用到了建造者模式(以Builder结尾的类还有9个)。
SqlSessionFactoryBuilder中用来创建SqlSessionFactory对象的方法是build()。build方法有9个重载,可以使用不同的方式来创建SqlSessionFactory对象(默认单例)。
XMLConfigBuilder
这里创建了一个XMLConfigBuild对象(用来存放所有配置信息的Configuration对象也是这个时候创建的)。
XMLConfigBuilder parser = new XMLConfigBuilder(inputStream, environment, properties);
创建Configuration的地方:
private XMLConfigBuilder(XPathParser parser, String environment, Properties props) {
    super(new Configuration());
    ErrorContext.instance().resource("SQL Mapper Configuration");
    this.configuration.setVariables(props);
    this.parsed = false;
    this.environment = environment;
    this.parser = parser;
  }
XMLConfigBuilder是抽象类BaseBuilder的一个子类,专门用来解析全文配置文件,针对不同的构造目标还有其他的子类,比如:
XMLMapperBuilder:解析Mapper映射器
XMLStatementBuilder:解析增删改查标签
XMLScriptBuilder:解析动态SQL

根据解析的文件流,后面的两个参数都是null,创建一个parser。
return build(parser.parser());
这里有两步,第一步调用parser的parser()方法,他会返回一个Configuration类。
配置文件里面的所有信息都会放在Configuration里面。
parse()方法
首先会检查全局配置文件是不是已经解析过了,也就是说在应用的生命周期里面,config配置文件只需要解析一次,生成的Configuration对象也会存在应用的整个生命周期中。
  public Configuration parse() {
    if (parsed) {
      throw new BuilderException("Each XMLConfigBuilder can only be used once.");
    }
    parsed = true;
    // XPathParser,dom 和 SAX 都有用到 >>
    parseConfiguration(parser.evalNode("/configuration"));
    return configuration;
  }
parseConfiguration方法
解析XML有很多方法,Mybatis对dom和SAX做了封装,方便使用。
下面的方法,对应着config文件里面的所有一级标签。
  private void parseConfiguration(XNode root) {
    try {
      //issue #117 read properties first
      // 对于全局配置文件各种标签的解析
      propertiesElement(root.evalNode("properties"));
      // 解析 settings 标签
      Properties settings = settingsAsProperties(root.evalNode("settings"));
      loadCustomVfs(settings);
      loadCustomLogImpl(settings);
      // 类型别名
      typeAliasesElement(root.evalNode("typeAliases"));
      // 插件
      pluginElement(root.evalNode("plugins"));
      // 用于创建对象
      objectFactoryElement(root.evalNode("objectFactory"));
      // 用于对对象进行加工
      objectWrapperFactoryElement(root.evalNode("objectWrapperFactory"));
      // 反射工具箱
      reflectorFactoryElement(root.evalNode("reflectorFactory"));
      // settings 子标签赋值,默认值就是在这里提供的 >>
      settingsElement(settings);
      // read it after objectFactory and objectWrapperFactory issue #631
      // 创建了数据源 >>
      environmentsElement(root.evalNode("environments"));
      //数据源类型
      databaseIdProviderElement(root.evalNode("databaseIdProvider"));
      //类型处理器 对数据的类型处理 自定义typeHandler
      typeHandlerElement(root.evalNode("typeHandlers"));
      // 解析引用的Mapper映射器
      mapperElement(root.evalNode("mappers"));
    } catch (Exception e) {
      throw new BuilderException("Error parsing SQL Mapper Configuration. Cause: " + e, e);
    }
  }
QA:Mybatis全局配置文件中的标签顺序可以颠倒吗?settings放在plugin之后?
会报错,所以顺序必须一致。

propertiesElement()方法
第一个是解析
这里面又有两种类型。一种是放在resource目录下的,是相对路径,一种是写的绝对路径(url)。
解析的最终结果就是我们会把所有的配置信息放到名为defaults的Properties对象里面(Hashtable对象,KV存储),最后把XPathParser和Configuration的Properties属性都设置成我们填充后的Properties对象。
 private void propertiesElement(XNode context) throws Exception {
    if (context != null) {
      // 创建了一个 Properties 对象,后面可以用到
      Properties defaults = context.getChildrenAsProperties();
      String resource = context.getStringAttribute("resource");
      String url = context.getStringAttribute("url");
      if (resource != null && url != null) {
        throw new BuilderException("The properties element cannot specify both a URL and a resource based property file reference.
 Please specify one or the other.");
      }
      if (resource != null) {
        defaults.putAll(Resources.getResourceAsProperties(resource));
      } else if (url != null) {
        defaults.putAll(Resources.getUrlAsProperties(url));
      }
      Properties vars = configuration.getVariables();
      if (vars != null) {
        defaults.putAll(vars);
      }
      parser.setVariables(defaults);
      configuration.setVariables(defaults);
    }
  }
settingsAsProperties()方法
第二个,我们把
String resource = context.getStringAttribute("resource");
在早期的版本里面解析和设置都是在后面一起的,这里先解析成Properties对象是后面需要使用到。
loadCustomVfs(settings);
loadCustomVfs是获取Vitual File System 的自定义实现类,比如要读取本地文件,或者FTP远程文件的时候,就可以用到自定义的VFS类。
根据
  @SuppressWarnings("unchecked")
          Class<? extends VFS> vfsImpl = (Class<? extends VFS>)Resources.classForName(clazz);
          configuration.setVfsImpl(vfsImpl);
最后赋值到Configuration中。
loadCustomLogImpl(settings)
loadCustomLogImpl是根据
  private void loadCustomLogImpl(Properties props) {
    Class<? extends Log> logImpl = resolveClass(props.getProperty("logImpl"));
    configuration.setLogImpl(logImpl);
  }
这里生成一个Log接口的实现类,并且赋值到Configuration中。
typeAliasesElement()方法
这一步解析的是类型别名。
有两种定义方式,一种是直接定义一个类的别名(例如com.domain.User定义成user),另一种就是指定一个package,那么这个包下面所有的类的名字就会成为这个类前路径的别名。
类的别名和类的关系,我们放在一个TypeAliasRegistry对象里面。
Class<?> clazz = Resources.classForName(type);
if (alias == null) {
    typeAliasRegistry.registerAlias(clazz);
} else {
    typeAliasRegistry.registerAlias(alias, clazz);
}
pluginElement()方法
解析
因为所有的插件都要实现Interceptor接口,所以这一步做的事情就是把插件解析成Interceptor类,设置属性,然后添加到Configuration的InterceptorChain属性里面,是一个List。
private void pluginElement(XNode parent) throws Exception {
    if (parent != null) {
        for (XNode child : parent.getChildren()) {
            String interceptor = child.getStringAttribute("interceptor");
            Properties properties = child.getChildrenAsProperties();
            Interceptor interceptorInstance = (Interceptor) resolveClass(interceptor).getDeclaredConstructor().newInstance();
            interceptorInstance.setProperties(properties);
            configuration.addInterceptor(interceptorInstance);
        }
    }
}

public void addInterceptor(Interceptor interceptor) {
    interceptorChain.addInterceptor(interceptor);
}

public class InterceptorChain {

    private final List<Interceptor> interceptors = new ArrayList<>();

    ....
}
插件的工作流程分成三步,第一步解析,第二部包装(代理),第三步运行时拦截。这里完成第一步的工作。
objectFactoryElement()、objectWrapperFactoryElement()、reflectorFactoryElement()
ObjectFactory用来创建返回的对象。
OnjectWrapperFactory用来对对象做特殊的处理。
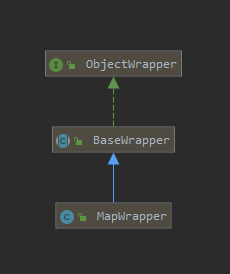
如果select查询没有设置别名,这里可以实现自定义MapWrapper,把下划线命名变成驼峰命名的方式,最后查询返回的是一个Map结构。
public class MyMapWrapper extends MapWrapper{

    public MyMapWrapper(MetaObject metaObject, Map<String, Object> map) {
        super(metaObject, map);
    }

    @Override
    public String findProperty(String name, boolean useCamelCaseMapping) {
        // 此处需要在 settings 里面配置 mapUnderscoreToCamelCase 为 true
        if (useCamelCaseMapping
            && ((name.charAt(0) >= 'A' && name.charAt(0) <= 'Z')
                || name.contains("_"))) {
            return underlineToCamelCase(name);
        }
        return name;
    }

    // 将下划线进行驼峰转换
    public String underlineToCamelCase(String inputString) {
        StringBuilder sb = new StringBuilder();
        boolean nextUpperCase = false;
        for (int i = 0; i < inputString.length(); i++) {
            char c = inputString.charAt(i);
            if (c == '_') {
                if (sb.length() > 0) {
                    nextUpperCase = true;
                }
            } else {
                if (nextUpperCase) {
                    sb.append(Character.toUpperCase(c));
                    nextUpperCase = false;
                } else {
                    sb.append(Character.toLowerCase(c));
                }
            }
        }
        return sb.toString();
    }
}
RefletorFactory是反射的工具箱,对反射的操作进行了封装。
上面四个对象,都是用resolveClass创建的。
Interceptor interceptorInstance = (Interceptor) resolveClass(interceptor).getDeclaredConstructor().newInstance();
ObjectFactory factory = (ObjectFactory) resolveClass(type).getDeclaredConstructor().newInstance();
ObjectWrapperFactory factory = (ObjectWrapperFactory) resolveClass(type).getDeclaredConstructor().newInstance();
ReflectorFactory factory = (ReflectorFactory) resolveClass(type).getDeclaredConstructor().newInstance();
settingsElement()方法
这哭就是对
setting二级标签中共有26个配置,比如二级缓存、懒加载、本地缓存范围等等。
所有的默认值,都是在这里赋值的。如果不知道默认值是什么可以在这里找到。
最后所有的值都会赋值到Configuration的属性里面去。
private void settingsElement(Properties props) {
    configuration.setAutoMappingBehavior(AutoMappingBehavior.valueOf(props.getProperty("autoMappingBehavior", "PARTIAL")));
 configuration.setAutoMappingUnknownColumnBehavior(AutoMappingUnknownColumnBehavior.valueOf(props.getProperty(
"autoMappingUnknownColumnBehavior", "NONE")));
    configuration.setCacheEnabled(booleanValueOf(props.getProperty("cacheEnabled"), true));
    configuration.setProxyFactory((ProxyFactory) createInstance(props.getProperty("proxyFactory")));
 configuration.setLazyLoadingEnabled(booleanValueOf(props.getProperty("lazyLoadingEnabled"), false));
     ....
 }
environmentsElement()方法
解析
private void environmentsElement(XNode context) throws Exception {
    if (context != null) {
      if (environment == null) {
        environment = context.getStringAttribute("default");
      }
      for (XNode child : context.getChildren()) {
        String id = child.getStringAttribute("id");
        if (isSpecifiedEnvironment(id)) {
          // 事务工厂
          TransactionFactory txFactory = transactionManagerElement(child.evalNode("transactionManager"));
          // 数据源工厂(例如 DruidDataSourceFactory )
          DataSourceFactory dsFactory = dataSourceElement(child.evalNode("dataSource"));
          // 数据源
          DataSource dataSource = dsFactory.getDataSource();
          // 包含了 事务工厂和数据源的 Environment
          Environment.Builder environmentBuilder = new Environment.Builder(id)
              .transactionFactory(txFactory)
              .dataSource(dataSource);
          // 放入 Configuration
          configuration.setEnvironment(environmentBuilder.build());
        }
      }
    }
  }
databaseIdProviderElement()方法
解析databaseIdProvider标签,生成databaseIdProvider对象(用来支持不同的数据库)。
typeHandlerElement跟TypeAlias一样,TypeHandler有两种配置方式,一种是单独配置一个类,一种是指定一个package。最后得到的是JavaType和JdbcType,
以及用来做相互映射的TypeHandler之间的映射关系,存放在typeHandlerRegistry对象里面。
typeHandlerRegistry.register(javaTypeClass, jdbcType, typeHandlerClass);
QA:这三个对象(Java类型,JDBC类型,Handler)的关系怎么映射的?
//Map里面在放一个Map
private void register(Type javaType, JdbcType jdbcType, TypeHandler<?> handler) {
    if (javaType != null) {
        Map<JdbcType, TypeHandler<?>> map = typeHandlerMap.get(javaType);
        if (map == null || map == NULL_TYPE_HANDLER_MAP) {
            map = new HashMap<>();
        }
        map.put(jdbcType, handler);
        typeHandlerMap.put(javaType, map);
    }
    allTypeHandlersMap.put(handler.getClass(), handler);
}
mapperElement()标签
对
根据全局配置文件中不同的注册方式,用不同的方式扫描,最终都是做了两件事情,对于语句的注册和接口的注册。
| 扫描类型 | 含义 |
|---|---|
| resource | 相对路径 |
| url | 绝对路径 |
| package | 包 |
| class | 单个接口 |
private void mapperElement(XNode parent) throws Exception {
    if (parent != null) {
        for (XNode child : parent.getChildren()) {
            // 不同的定义方式的扫描,最终都是调用 addMapper()方法(添加到 MapperRegistry)。这个方法和 getMapper() 对应
            // package	包
            if ("package".equals(child.getName())) {
                String mapperPackage = child.getStringAttribute("name");
                configuration.addMappers(mapperPackage);
            } else {
                String resource = child.getStringAttribute("resource");
                String url = child.getStringAttribute("url");
                String mapperClass = child.getStringAttribute("class");
                if (resource != null && url == null && mapperClass == null) {
                    // resource	相对路径
                    ErrorContext.instance().resource(resource);
                    InputStream inputStream = Resources.getResourceAsStream(resource);
                    XMLMapperBuilder mapperParser = new XMLMapperBuilder(inputStream, configuration, resource, configuration.getSqlFragments());
                    // 解析 Mapper.xml,总体上做了两件事情 >>
                    mapperParser.parse();
                } else if (resource == null && url != null && mapperClass == null) {
                    // url	绝对路径
                    ErrorContext.instance().resource(url);
                    InputStream inputStream = Resources.getUrlAsStream(url);
                    XMLMapperBuilder mapperParser = new XMLMapperBuilder(inputStream, configuration, url, configuration.getSqlFragments());
                    mapperParser.parse();
                } else if (resource == null && url == null && mapperClass != null) {
                    // class 	单个接口
                    Class<?> mapperInterface = Resources.classForName(mapperClass);
                    configuration.addMapper(mapperInterface);
                } else {
                    throw new BuilderException("A mapper element may only specify a url, resource or class, but not more than one.");
                }
            }
        }
    }
}
先从Mapper.xml的mapperParser.parse();方法入手。
public void parse() {
    // 总体上做了两件事情,对于语句的注册和接口的注册
    if (!configuration.isResourceLoaded(resource)) {
        // 1、具体增删改查标签的解析。
        // 一个标签一个MappedStatement。 >>
        configurationElement(parser.evalNode("/mapper"));
        configuration.addLoadedResource(resource);
        // 2、把namespace(接口类型)和工厂类绑定起来,放到一个map。
        // 一个namespace 一个 MapperProxyFactory >>
        bindMapperForNamespace();
    }

    parsePendingResultMaps();
    parsePendingCacheRefs();
    parsePendingStatements();
}
configurationElement()解析所有的子标签,最终获得MapperStatment对象。
bindMapperForNamespace()把namespace(接口类型)和工厂类MapperProxyFactory绑定起来。
1)configurationElement
configurationElement是对Mapper.xml中所有具体标签的解析,包括namespace、cache、parameterMap、resultMap、sql和select|insert|update|delete。
private void configurationElement(XNode context) {
    try {
        String namespace = context.getStringAttribute("namespace");
        if (namespace == null || namespace.equals("")) {
            throw new BuilderException("Mapper's namespace cannot be empty");
        }
        builderAssistant.setCurrentNamespace(namespace);
        // 添加缓存对象
        cacheRefElement(context.evalNode("cache-ref"));
        // 解析 cache 属性,添加缓存对象
        cacheElement(context.evalNode("cache"));
        // 创建 ParameterMapping 对象
        parameterMapElement(context.evalNodes("/mapper/parameterMap"));
        // 创建 List<ResultMapping>
        resultMapElements(context.evalNodes("/mapper/resultMap"));
        // 解析可以复用的SQL
        sqlElement(context.evalNodes("/mapper/sql"));
        // 解析增删改查标签,得到 MappedStatement >>
        buildStatementFromContext(context.evalNodes("select|insert|update|delete"));
    } catch (Exception e) {
        throw new BuilderException("Error parsing Mapper XML. The XML location is '" + resource + "'. Cause: " + e, e);
    }
}
在buildStatementFromContext()方法中,创建了用来解析增删改查标签的XMLStatementBuilder,并且把创建的MappedStatement添加到mappedStatement中。
MapperBuilderAssistant类addMappedStatement()方法
MappedStatement statement = statementBuilder.build();
// 最关键的一步,在 Configuration 添加了 MappedStatement >>
configuration.addMappedStatement(statement);
2)bindMapperForNamespace
主要是调用了addMapper()
configuration.addMapper(boundType);
addMapper()方法中,把接口类型注册到MapperRegistry中:实际上是为了接口创建一个对应的MapperProxyFactory(用于为这个type提供工厂类,创建MapperProxy)。
knownMappers.put(type, new MapperProxyFactory<>(type));
注册了接口之后,开始解析接口类和所有方法上的注解,例如@CacheNamespace、@Select。
此处创建了一个MapperAnnotationBuilder专门来解析注释。
 MapperAnnotationBuilder parser = new MapperAnnotationBuilder(config, type);
parser.parse();
parse()方法中的parseCache()和parseCacheRef()方法其实是对@CacheNamespace和@CacheNamespaceRef这两个注解的处理。
public void parse() {
    String resource = type.toString();
    if (!configuration.isResourceLoaded(resource)) {
        // 先判断 Mapper.xml 有没有解析,没有的话先解析 Mapper.xml(例如定义 package 方式)
        loadXmlResource();
        configuration.addLoadedResource(resource);
        assistant.setCurrentNamespace(type.getName());
        // 处理 @CacheNamespace
        parseCache();
        // 处理 @CacheNamespaceRef
        parseCacheRef();
        // 获取所有方法
        Method[] methods = type.getMethods();
        for (Method method : methods) {
            try {
                // issue #237
                if (!method.isBridge()) {
                    // 解析方法上的注解,添加到 MappedStatement 集合中 >>
                    parseStatement(method);
                }
            } catch (IncompleteElementException e) {
                configuration.addIncompleteMethod(new MethodResolver(this, method));
            }
        }
    }
    parsePendingMethods();
}
parseStatement()方法里面各种getAnnotation(),都是相对应的注解的解析。比如@Options,@SelectKey,@ResultMap等等。
最后同样会创建MappedStatement对象,添加到MapperRegistry中,也就是说在XML中配置,和使用注解配置,最后起到一样的效果。
  // 最后 增删改查标签 也要添加到 MappedStatement 集合中
      assistant.addMappedStatement(
          mappedStatementId,
          sqlSource,
          statementType,
          sqlCommandType,
          fetchSize,
          timeout,
          // ParameterMapID
          null,
          parameterTypeClass,
          resultMapId,
          getReturnType(method),
          resultSetType,
          flushCache,
          useCache,
          // TODO gcode issue #577
          false,
          keyGenerator,
          keyProperty,
          keyColumn,
          // DatabaseID
          null,
          languageDriver,
          // ResultSets
          options != null ? nullOrEmpty(options.resultSets()) : null);
3)build
Mapper.xml解析完之后,调用另一个build()方法,返回SqlSessionFactory的默认实现类DefaultSqlSessionFactory。
public SqlSessionFactory build(Configuration config) {
    return new DefaultSqlSessionFactory(config);
}
总结
这一块主要是完成了config配置文件、Mapper文件、Mapper接口中注解的解析。
我们得到了一个最重要的对象Configuration,这里面存放了所有的配置信息,他在属性里面还有各种各样的容器。
最后返回一个DefaultSqlSessionFactory,里面持有了Configuration的实例。
流程图
image

 浙公网安备 33010602011771号