

Linux内核裁剪移植
前奏
rambo@debian:~$ cat /etc/issue Debian GNU/Linux 12 \n \l rambo@debian:~$ free -h total used free shared buff/cache available Mem: 15Gi 1.2Gi 14Gi 14Mi 584Mi 14Gi Swap: 975Mi 0B 975Mi rambo@debian:~$ df -h |grep -v tmpfs Filesystem Size Used Avail Use% Mounted on udev 7.8G 0 7.8G 0% /dev /dev/sda1 15G 5.6G 8.6G 40% / /dev/sda8 57G 38M 54G 1% /home /dev/sda7 964M 80K 898M 1% /tmp /dev/sda5 5.2G 448M 4.5G 9% /var rambo@debian:~$ hostname -I 172.16.186.141 内核源码下载: 方案1:https://www.kernel.org/pub 然后点击 linux => kernel => vX.Y (XY即版本号) => 然后找你想要的版本 方案2:https://www.kernel.org/ 打开后直接下载即可 方案3(国内地址):https://mirror.bjtu.edu.cn/kernel/linux/kernel/v6.x/linux-6.5.tar.xz
内核移植步骤
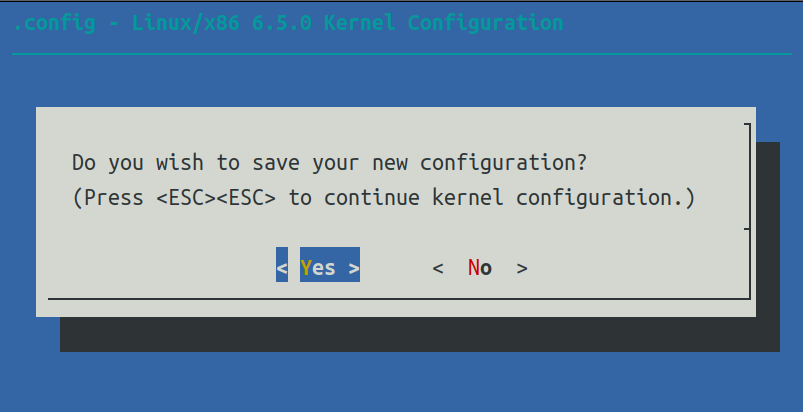
rambo@debian:~$ mkdir work && cd work rambo@debian:~/work$ sudo apt install -y make gcc pkg-config pkg-config flex bison libelf-dev libssl-dev libelf-dev dwarves fakeroot | 创建假根环境。 build-essential | 安装 C、C++、gcc 和 g++ 等开发工具。 ncurses-dev | 为基于文本的终端提供 API xz-utils | 提供快速的文件压缩和解压缩。 libssl-dev | 支持SSL和TSL,加密数据并使互联网连接安全。 bc (Basic Calculator) | 支持语句的交互执行。 flex (Fast Lexical Analyzer Generator) | 生成将字符转换为标记的词法分析器。 libelf-dev | 发布用于管理 ELF 文件(可执行文件、核心转储和目标代码)的共享库 bison | 将语法说明转换为 C 程序。 rambo@debian:~/work$ wget https://mirror.bjtu.edu.cn/kernel/linux/kernel/v6.x/linux-6.5.tar.gz rambo@debian:~/work$ tar -zxvf linux-6.5.tar.gz rambo@debian:~/work$ cd linux-6.5/ 内核源代码目录结构: arch:内核支持代码各种cpu架构。 block:块驱动程序 crypto:加密压缩CRC加密算法 documention:内核文档 driver:设备驱动程序 fs:各种文件系统实现代码,每个子目录一种文件系统 include:内核需要的头文件 lib:库文件 mm:内存管理与CPU无关 net:网络协议栈 # 内核裁剪: 1、清除临时文件 make clean 删除大多数的编译生成文件,但是会保留内核的配置文件.config,还有足够的编译支持来建立扩展模块 make distclean mrproper删除的文件,加上编辑备份文件和一些补丁文件 make mrproper 删除所有的编译生成文件,还有内核配置文件,再加上各种备份文件 2、生成配置文件 make defconfig: 默认配置 make config:基于文本模式,挨个配置选择y/n make allyesconfig: 创建能选yes就选yes的配置 make allnoconfig: 创建能选no就选no的配置 make menuconfig: 基于ncurser的图形化界面配置,复选框都会有默认选项 make oldconfig: 使用已有的配置文件 make xconfig: 需要安装图形化系统 得到系统源文件下的config 文件 rambo@debian:~/work/linux-6.5$ make clean && make distclean rambo@debian:~/work/linux-6.5$ make menuconfig Generalsetup常规设置 Kernel features设置内核参数 Power managerment options电源管理 Bus support总线支持 binary emulations二进制仿真 virtualization虚拟化 Enable Load module support可加载模块支持 Enable Block layer块设备 Executable file formats可执行文件格式 Memory Management options内存管理选项 Networking support网络协议 Device drivers设备驱动程序 File system文件系统 Security option安全选项部分 Cryptographic加密选项部分 Library routines库 Kernel hacking在调试内核时的候选项 ====================================== System type系统类型 Boot options启动参数 Floating point emulation浮点运算仿真 User space binary formats可执行文件格式 Profiling support系统活动分析 ====================================== 该文档所关闭的选项 [] Virtualization [] Enable the block layer 关闭不必要的选项后按2次Esc,选定Yes,如下图
rambo@debian:~/work/linux-6.5$ ls arch/x86/boot/ Makefile cmdline.c cpuflags.h install.sh mtools.conf.in string.c video-bios.c a20.c compressed ctype.h io.h pm.c string.h video-mode.c apm.c copy.S early_serial_console.c main.c pmjump.S tools video-vesa.c bioscall.S cpu.c edd.c memory.c printf.c tty.c video-vga.c bitops.h cpucheck.c genimage.sh mkcpustr.c regs.c version.c video.c boot.h cpuflags.c header.S msr.h setup.ld vesa.h video.h rambo@debian:~/work/linux-6.5$ cp .config{,-bak} # 该文件是内核源码的默认配置文件 rambo@debian:~/work/linux-6.5$ make bzImage -j8 .... .... CC arch/x86/boot/compressed/pgtable_64.o CC arch/x86/boot/compressed/sev.o CC arch/x86/boot/compressed/acpi.o CC arch/x86/boot/compressed/mem.o CC arch/x86/boot/compressed/efi.o AS arch/x86/boot/compressed/efi_mixed.o CC arch/x86/boot/compressed/misc.o XZKERN arch/x86/boot/compressed/vmlinux.bin.xz MKPIGGY arch/x86/boot/compressed/piggy.S AS arch/x86/boot/compressed/piggy.o LD arch/x86/boot/compressed/vmlinux ZOFFSET arch/x86/boot/zoffset.h OBJCOPY arch/x86/boot/vmlinux.bin AS arch/x86/boot/header.o LD arch/x86/boot/setup.elf OBJCOPY arch/x86/boot/setup.bin BUILD arch/x86/boot/bzImage Kernel: arch/x86/boot/bzImage is ready (#2) rambo@debian:~/work/linux-6.5$ ls -alh arch/x86/boot/bzImage -rw-r--r-- 1 rambo rambo 8.3M Sep 23 21:26 arch/x86/boot/bzImage ==================================================== make iImage: 是vmlinux经过objcopy gzip压缩后的文件, objcopy实现由vmlinux的elf文件拷贝成纯二进制数据文件。 make bzImage: bz表示"big zImage",不是用bzip2压缩的。两者的不同之处在于,zImage解压缩内核到低端内存(第一个640K),bzImage解压缩内核到高端内存(1M以上)。如果内核比较小,那么采用zImage或bzImage都行,如果比较大应该用bzImage。 如果编译过程中出现宏定义错误,可以进入到相关的报错目录下将宏定义添加到EXTRA_CFLAGS后面。 initrd 是"initial ramdisk"的简写。一般被用来临时的引导硬件到实际内核vmlinuz能够接管并继续引导的状态。一般情况下都在生成 vmlinux 后,再对内核进行压缩成为 zImage,压缩的目录是 kernel/arch/arm/boot。 ramdisk是一种内存虚拟磁盘技术,实质上并不是一种文件系统,它使用的文件系统时ext2文件系统。 ramdisk:makeitrd initrd_2.6.29 2.6.29 ====================================================
制作可引导的Linux ISO文件
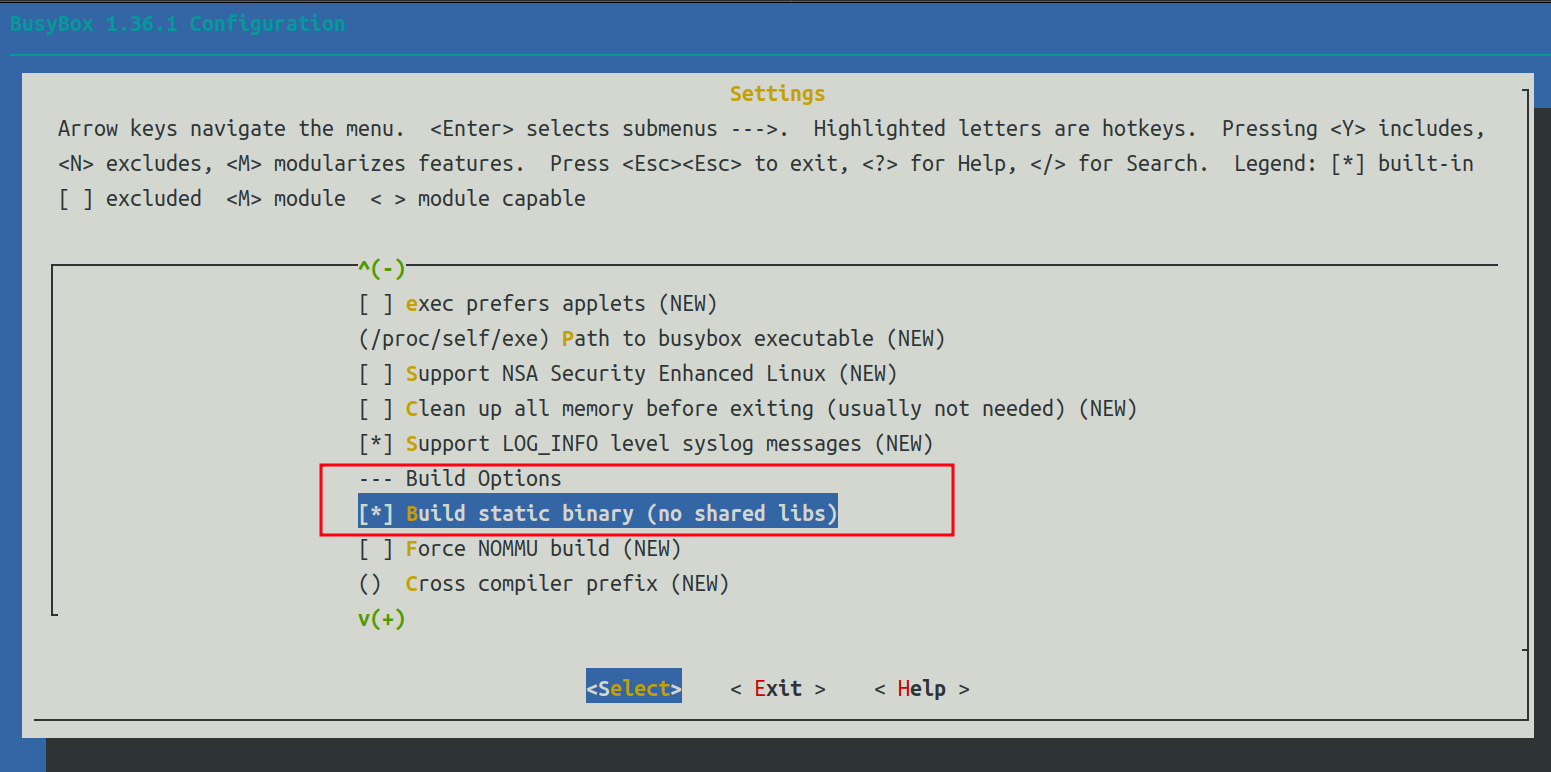
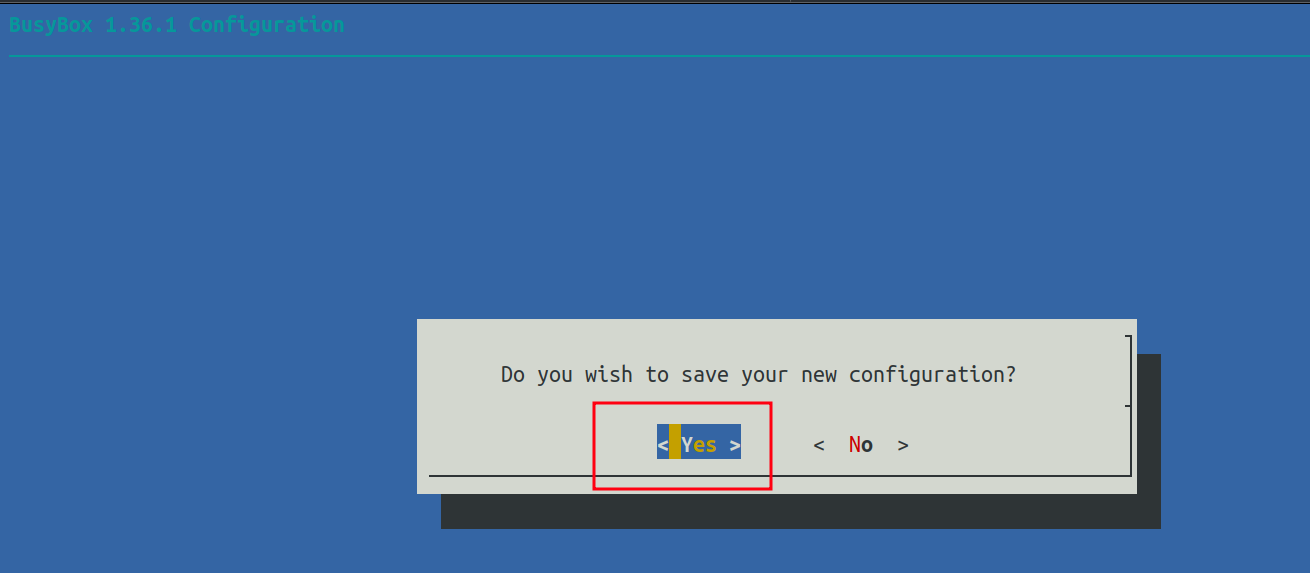
上面生成的bzImage文件正是我们需要制作可引导的iso文件的一个组件 接下来说说如何制作rootfs 和 如何将initrd.img,bzImage和grub等文件制作成为可引导的iso文件。 Busybox 不是发行版,上面没有包管理器。默认情况下它也没有共享库(*),因此必须静态链接所有内容,这基本上意味着重新编译您想要放入其中的所有内容。 (*) 也许您的 Busybox 特定衍生品上有共享库,但您没有它们的标头,因此您也无法真正使用它们。 1、使用busybox来制作rootfs rambo@debian:~/work/linux-6.5$ cd .. rambo@debian:~/work$ wget https://busybox.net/downloads/busybox-1.36.1.tar.bz2 rambo@debian:~/work$ tar -jxvf busybox-1.36.1.tar.bz2 rambo@debian:~/work$ cd busybox-1.36.1/ rambo@debian:~/work/busybox-1.36.1$ make menuconfig 选择Settings—>Build Options—>,选择[] Build static binary(no shared libs) ,按空格选中,按2次ESC退出
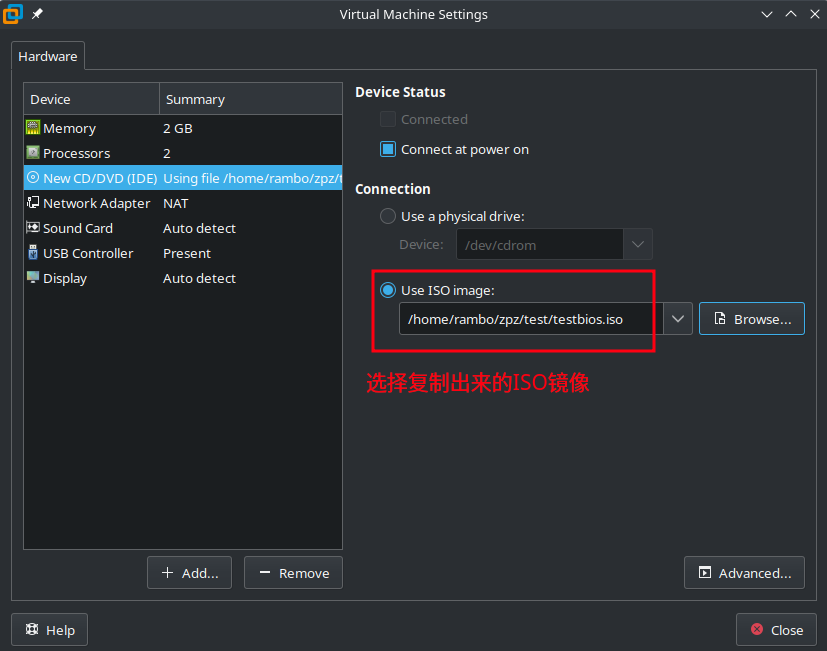
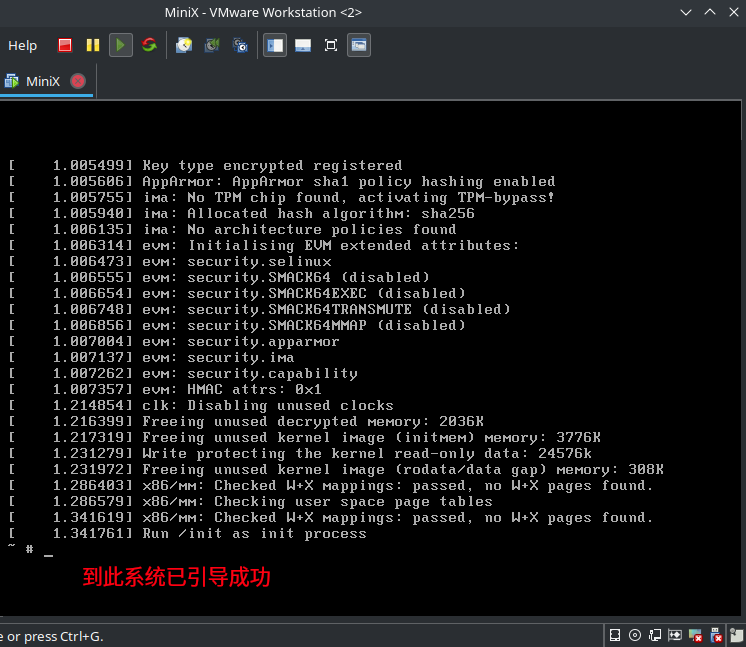
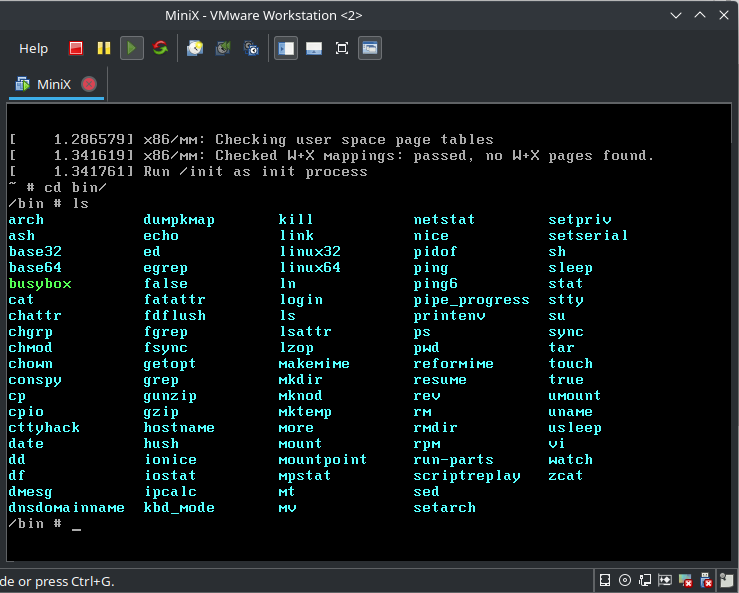
rambo@debian:~/work/busybox-1.36.1$ make 报错: warning: Falling back to a fallback locale ("en_US.UTF-8"). 初步分析:或许是我装Debian时用的是中文语言环境导致 解决: rambo@debian:~/work/busybox-1.36.1$ sudo apt install -y locales-all rambo@debian:~/work/busybox-1.36.1$ dpkg-reconfigure locales 选择All locales--->Ok--->en_US.UTF-8--->Ok rambo@debian:~/work/busybox-1.36.1$ make busybox install .... .... ./_install//usr/sbin/ubiattach -> ../../bin/busybox ./_install//usr/sbin/ubidetach -> ../../bin/busybox ./_install//usr/sbin/ubimkvol -> ../../bin/busybox ./_install//usr/sbin/ubirename -> ../../bin/busybox ./_install//usr/sbin/ubirmvol -> ../../bin/busybox ./_install//usr/sbin/ubirsvol -> ../../bin/busybox ./_install//usr/sbin/ubiupdatevol -> ../../bin/busybox ./_install//usr/sbin/udhcpd -> ../../bin/busybox -------------------------------------------------- You will probably need to make your busybox binary setuid root to ensure all configured applets will work properly. -------------------------------------------------- 在生成的.config配置文件中需要设置CONFIG_STATIC=y,如果没有该项则需要新添加 编译完成后会在当前目录下新增一个_install文件夹,里面就是编译好的busybox rambo@debian:~/work/busybox-1.36.1$ ls _install/ bin linuxrc sbin usr rambo@debian:~/work/busybox-1.36.1$ ls _install/bin/ arch chmod df fatattr hostname linux32 mkdir mv ps run-parts stat uname ash chown dmesg fdflush hush linux64 mknod netstat pwd scriptreplay stty usleep base32 conspy dnsdomainname fgrep ionice ln mktemp nice reformime sed su vi base64 cp dumpkmap fsync iostat login more pidof resume setarch sync watch busybox cpio echo getopt ipcalc ls mount ping rev setpriv tar zcat cat cttyhack ed grep kbd_mode lsattr mountpoint ping6 rm setserial touch chattr date egrep gunzip kill lzop mpstat pipe_progress rmdir sh true chgrp dd false gzip link makemime mt printenv rpm sleep umount # 删除_install目录下的linuxrc文件 rambo@debian:~/work/busybox-1.36.1$ rm -rf _install/linuxrc rambo@debian:~/work/busybox-1.36.1$ cd ../ rambo@debian:~/work$ mkdir rootfs && cd rootfs rambo@debian:~/work/rootfs$ cp -r ../busybox-1.36.1/_install/* . rambo@debian:~/work/rootfs$ mkdir dev proc sys rambo@debian:~/work/rootfs$ vim init #!/bin/sh dmesg -n 1 mount -t devtmpfs none /dev mount -t proc none /proc mount -t sysfs none /sys setsid cttyhack /bin/sh rambo@debian:~/work/rootf$ chmod 777 -R ../rootfs/ # 打包系统文件 rambo@debian:~/work/rootfs$ find . | cpio -R root:root -H newc -o | gzip > ../rootfs.gz rambo@debian:~/work/rootfs$ ls -alh ../rootfs.gz -rw-r--r-- 1 rambo rambo 1.2M 9月23日 23:00 ../rootfs.gz # 创建BIOS引导 这里使用syslinux来创建bios引导的一个ISO镜像 rambo@debian:~/work/rootfs$ cd ../ rambo@debian:~/work$ wget https://mirrors.edge.kernel.org/pub/linux/utils/boot/syslinux/syslinux-6.03.tar.gz rambo@debian:~/work$ tar -zxvf syslinux-6.03.tar.gz # 准备制作镜像文件所需的文件 新建一个名为isobios的目录,将解压后的syslinux目录下面的bios/core/isolinux.bin,bios/com32/elflink/ldlinux/ldlinux.c32复制到isobios目录中 rambo@debian:~/work$ mkdir isobios && cd isobios rambo@debian:~/work/isobios$ cp ../rootfs.gz . rambo@debian:~/work/isobios$ cp ../linux-6.5/arch/x86/boot/bzImage kernel.gz rambo@debian:~/work/isobios$ cp ../syslinux-6.03/bios/core/isolinux.bin . rambo@debian:~/work/isobios$ cp ../syslinux-6.03/bios/com32/elflink/ldlinux/ldlinux.c32 . # 新创建启动引导配置文件isolinux.cfg rambo@debian:~/work/isobios$ vim isolinux.cfg default kernel.gz initrd=rootfs.gz # 生成ISO镜像 在isobios目录中执行以下命令: rambo@debian:~/work/isobios$ sudo apt install -y xorriso rambo@debian:~/work/isobios$ xorriso -as mkisofs -o ../testbios.iso \ -b isolinux.bin -c boot.cat \ -no-emul-boot -boot-load-size 4 -boot-info-table ./ 释义: -o 生成镜像文件名称 -b 开机映像文件 -c 开机文件名称 回显如下: xorriso 1.5.4 : RockRidge filesystem manipulator, libburnia project. Drive current: -outdev 'stdio:../testbios.iso' Media current: stdio file, overwriteable Media status : is blank Media summary: 0 sessions, 0 data blocks, 0 data, 48.9g free Added to ISO image: directory '/'='/home/rambo/work/isobios' xorriso : UPDATE : 5 files added in 1 seconds xorriso : UPDATE : 5 files added in 1 seconds ISO image produced: 5104 sectors Written to medium : 5104 sectors at LBA 0 Writing to 'stdio:../testbios.iso' completed successfully. rambo@debian:~/work/isobios$ ls -alh ../testbios.iso -rw-r--r-- 1 rambo rambo 10M 9月23日 23:22 ../testbios.iso 至此这个精简的镜像就制作好了,把上面制作好的ISO文件复制到宿主机,然后验证这个小"发行版"能不能跑起来了,下面创建虚拟机时只截取重要步骤,请注意!!!

对新机器配置网络
ifconfig eth0 192.168.2.110 netmask 255.255.255.0 route add default gw 192.168.2.1 接下来虚拟机里外互相ping,看联通情况,这里我不能用ifconfig配置IP,还没找到问题在哪里


【推荐】国内首个AI IDE,深度理解中文开发场景,立即下载体验Trae
【推荐】编程新体验,更懂你的AI,立即体验豆包MarsCode编程助手
【推荐】抖音旗下AI助手豆包,你的智能百科全书,全免费不限次数
【推荐】轻量又高性能的 SSH 工具 IShell:AI 加持,快人一步
· winform 绘制太阳,地球,月球 运作规律
· AI与.NET技术实操系列(五):向量存储与相似性搜索在 .NET 中的实现
· 超详细:普通电脑也行Windows部署deepseek R1训练数据并当服务器共享给他人
· 上周热点回顾(3.3-3.9)
· AI 智能体引爆开源社区「GitHub 热点速览」
2022-09-24 Ubuntu20/mint20安装vnc