Centos7.4 yum 安装MariaDB
#系统及版本选择:https://downloads.mariadb.org/mariadb/repositories/#mirror=tuna
vim /etc/yum.repos.d/MariaDB.repo
[mariadb]
name = MariaDB
baseurl = http://yum.mariadb.org/10.2.4/centos7-amd64
gpgkey=https://yum.mariadb.org/RPM-GPG-KEY-MariaDB
gpgcheck=1
yum -y install MariaDB-server MariaDB-client
systemctl start mariadb {restart | stop} #启动服务
systemctl enable mariadb #设置开机启动
用mysql -uroot命令登录到MariaDB,此时root账户的密码为空。
进行MariaDB的相关简单配置,使用mysql_secure_installation命令进行配置。
mysql_secure_installation
首先是设置密码,会提示先输入密码
Enter current password for root (enter for none): <–初次运行直接回车
设置密码
Set root password? [Y/n] <– 是否设置root用户密码,输入 y 并回车或直接回车
New password: <– 设置root用户的密码
Re-enter new password: <– 再输入一次你设置的密码
其他配置
Remove anonymous users? [Y/n] <– 是否删除匿名用户,回车
Disallow root login remotely? [Y/n] <–是否禁止root远程登录,回车,
Remove test database and access to it? [Y/n] <– 是否删除test数据库,回车
Reload privilege tables now? [Y/n] <– 是否重新加载权限表,回车
初始化MariaDB完成,接下来测试登录
mysql -uroot -p<password>
配置MariaDB的字符集
查看/etc/my.cnf文件内容,其中包含一句!includedir /etc/my.cnf.d 说明在该配置文件中引入/etc/my.cnf.d 目录下的配置文件。
编辑server.cnf文件,在[mysqld]标签下添加
vim /etc/my.cnf.d/server.cnf
[mysqld]
init_connect='SET collation_connection = utf8_unicode_ci'
init_connect='SET NAMES utf8'
character-set-server=utf8
collation-server=utf8_unicode_ci
skip-character-set-client-handshake
注:如果/etc/my.cnf.d 目录下无server.cnf文件,则直接在/etc/my.cnf文件的[mysqld]标签下添加以上内容。
vim /etc/my.cnf.d/mysql-clients.cnf
在[mysql]段中添加
default-character-set=utf8
systemctl restart mariadb
mysql -uroot -p<password>
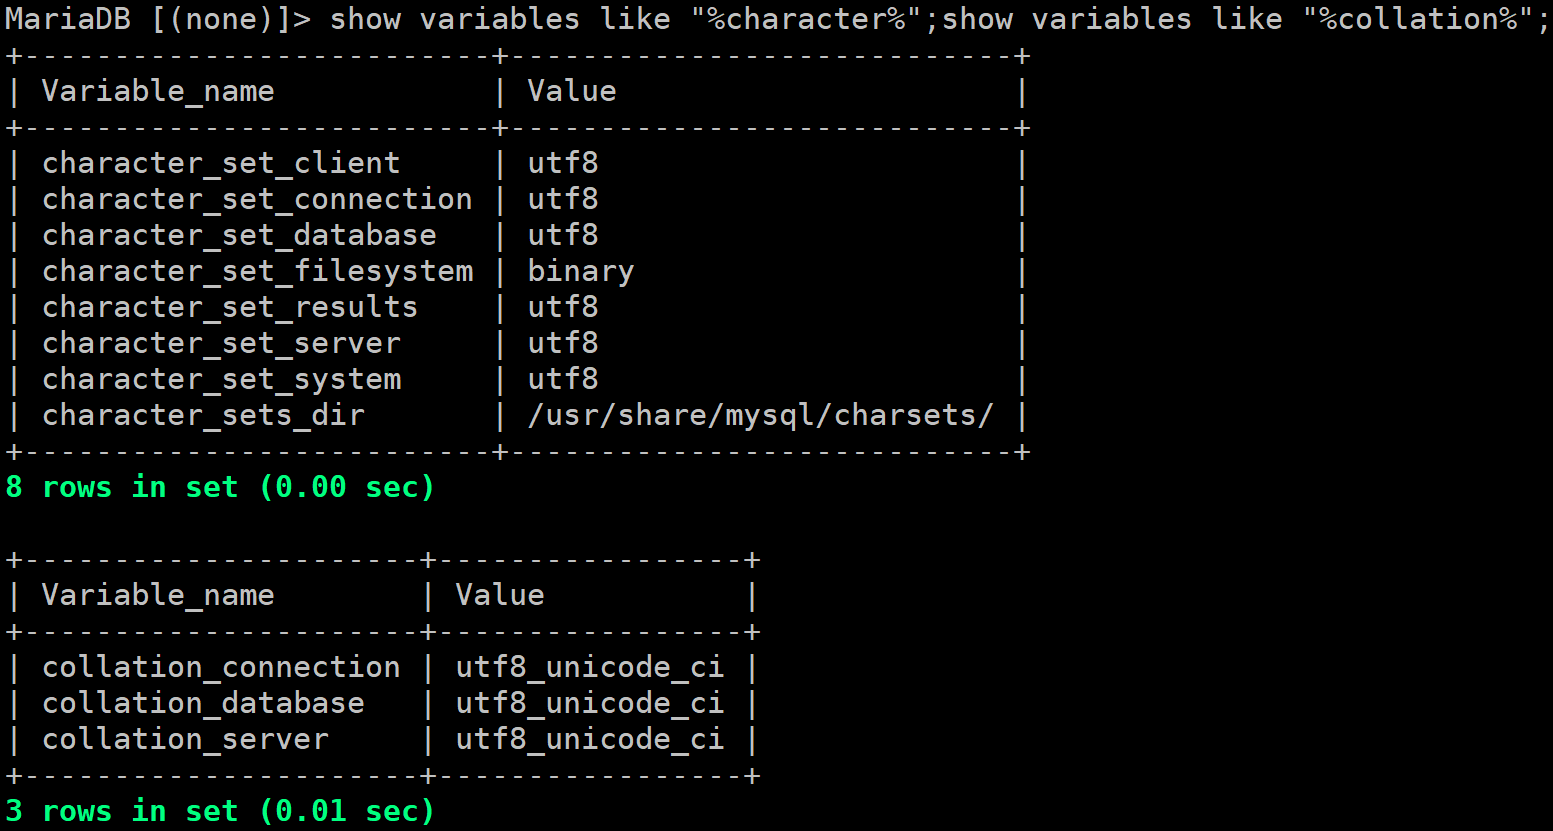
show variables like "%character%";show variables like "%collation%";

直接创建用户并授权的命令
grant all on *.* to username@localhost indentified by 'password';
授予外网登陆权限
mysql>grant all privileges on *.* to username@'%' identified by 'password';
授予权限并且可以授权
mysql>grant all privileges on *.* to username@'hostname' identified by 'password' with grant option;

查询各Schema和Table占用的空间:
use information_schema;
select table_schema,round(sum(DATA_LENGTH/1024/1024),2) as datasize from tables group by table_schema;

其中只授予部分权限把 其中 all privileges或者all改为select,insert,update,delete,create,drop,index,alter,grant,references,reload,shutdown,process,file其中一部分。
Linux系统教程:如何检查MariaDB服务端版本 http://www.linuxidc.com/Linux/2015-08/122382.htm
MariaDB Proxy读写分离的实现 http://www.linuxidc.com/Linux/2014-05/101306.htm
Linux下编译安装配置MariaDB数据库的方法 http://www.linuxidc.com/Linux/2014-11/109049.htm
CentOS系统使用yum安装MariaDB数据库 http://www.linuxidc.com/Linux/2014-11/109048.htm
安装MariaDB与MySQL并存 http://www.linuxidc.com/Linux/2014-11/109047.htm
忘记root用户名和密码
首先用 killall -TERM mysqld 向mysqld server 发送kill命令关掉mysqld server(不是 kill -9),你必须是UNIX的root用户或者是你所运行的SERVER上的同等用户,才能执行这个操作
然后 /usr/bin/mysqld_safe --skip-grant-tables --skip-networking &
登录; mysql -p或者使用mysql无密码登录
>use mysql
>update user set password=password("new_pass") where user="root";
>flush privileges;
>exit;
修改完成之后重启数据库,即可用修改好 root 密码登录


【推荐】国内首个AI IDE,深度理解中文开发场景,立即下载体验Trae
【推荐】编程新体验,更懂你的AI,立即体验豆包MarsCode编程助手
【推荐】抖音旗下AI助手豆包,你的智能百科全书,全免费不限次数
【推荐】轻量又高性能的 SSH 工具 IShell:AI 加持,快人一步
· 从 HTTP 原因短语缺失研究 HTTP/2 和 HTTP/3 的设计差异
· AI与.NET技术实操系列:向量存储与相似性搜索在 .NET 中的实现
· 基于Microsoft.Extensions.AI核心库实现RAG应用
· Linux系列:如何用heaptrack跟踪.NET程序的非托管内存泄露
· 开发者必知的日志记录最佳实践
· winform 绘制太阳,地球,月球 运作规律
· AI与.NET技术实操系列(五):向量存储与相似性搜索在 .NET 中的实现
· 超详细:普通电脑也行Windows部署deepseek R1训练数据并当服务器共享给他人
· 上周热点回顾(3.3-3.9)
· AI 智能体引爆开源社区「GitHub 热点速览」
2018-05-01 python3.6小程序