记录---纯前端也能实现 OCR?
🧑💻 写在开头
点赞 + 收藏 === 学会🤣🤣🤣
前言
前端时间有一个 OCR 的需求,原本考虑调用现成的 OCR 接口,但由于只是做一个我个人使用的工具,花钱购买 OCR 接口显得有些奢侈。于是就想着找找是否有现成的库可以自己部署或直接使用,结果发现了一个可以在纯前端实现 OCR 的库——Tesseract.js。
Tesseract.js
Tesseract.js 是一个基于 Google Tesseract OCR 引擎的 JavaScript 库,利用 WebAssembly 技术将的 OCR 引擎带到了浏览器中。它完全运行在客户端,无需依赖服务器,适合处理中小型图片的文字识别。
主要特点
- 多语言支持:支持多种语言文字识别,包括中文、英文、日文等。
- 跨平台:支持浏览器和 Node.js 环境,灵活应用于不同场景。
- 开箱即用:无需额外依赖后端服务,直接在前端实现 OCR 功能。
- 自定义训练数据:支持加载自定义训练数据,提升特定场景下的识别准确率。
安装
通过 npm 安装
1 | npm install tesseract.js |
通过 CDN 引入
1 | <script src="https://unpkg.com/tesseract.js@latest/dist/tesseract.min.js"></script> |
基本使用
以下示例展示了如何使用 Tesseract.js 从图片中提取文字:
1 2 3 4 5 6 7 8 9 10 11 | import Tesseract from 'tesseract.js';Tesseract.recognize( 'image.png', // 图片路径 'chi_sim', // 识别语言(简体中文) { logger: info => console.log(info), // 实时输出进度日志 }).then(({ data: { text } }) => { console.log('识别结果:', text);}); |
示例图片

运行结果

可以看到,虽然识别结果不完全准确,但整体准确率较高,能够满足大部分需求。
更多用法
1. 多语言识别
Tesseract.js 支持多语言识别,可以通过字符串或数组指定语言代码:
1 2 3 4 5 6 7 8 9 | // 通过字符串的方式指定多语言Tesseract.recognize('image.png', 'eng+chi_sim').then(({ data: { text } }) => { console.log('识别结果:', text);});// 通过数组的方式指定多语言Tesseract.recognize('image.png', ['eng','chi_sim']).then(({ data: { text } }) => { console.log('识别结果:', text);}); |
eng+chi_sim 表示同时识别英文和简体中文。Tesseract.js 内部会将字符串通过 split 方法分割成数组:1 | const currentLangs = typeof langs === 'string' ? langs.split('+') : langs; |
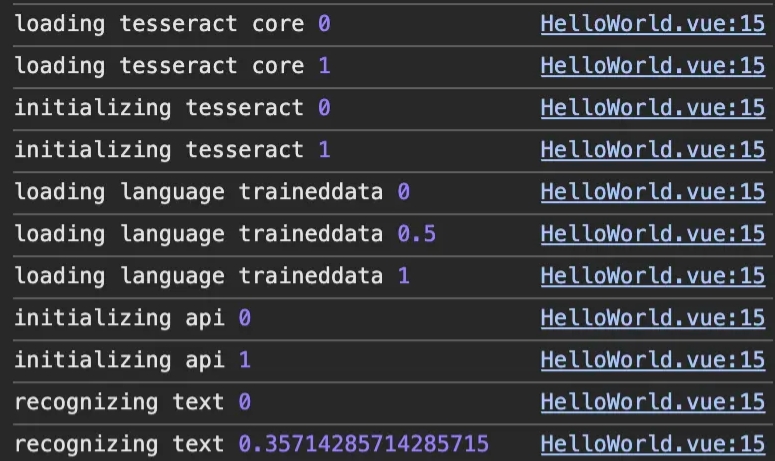
2. 处理进度日志
可以通过 logger 回调函数查看任务进度:
1 2 3 | Tesseract.recognize('image.png', 'eng', { logger: info => console.log(info.status, info.progress),}); |
输出示例:
3. 自定义训练数据
如果需要识别特殊字符,可以加载自定义训练数据:
1 2 3 4 5 | const worker = await createWorker('语言文件名', OEM.DEFAULT, { logger: info => console.log(info.status, info.progress), gzip: false, // 是否对来自远程的训练数据进行 gzip 压缩 langPath: '/path/to/lang-data' // 自定义训练数据路径}); |
[!warning] 注意:
- 第一个参数为加载自定义训练数据的文件名,不带后缀。
- 加载自定义训练数据的文件后缀名必须为
.traineddata。- 如果文件名不是
.traineddata.gzip,则需要设置gzip为false。
举例:
1 2 3 4 5 | const worker = await createWorker('my-data', OEM.DEFAULT, { logger: info => console.log(info.status, info.progress), gzip: false, langPath: 'http://localhost:5173/lang',}); |
加载效果:

4. 通过前端上传图片
通常,图片是通过前端让用户上传后进行解析的。以下是一个简单的 Vue 3 示例:
1 2 3 4 5 6 7 8 9 10 11 12 13 14 15 16 | <script setup>import { createWorker } from 'tesseract.js';async function handleUpload(evt) { const files = evt.target.files; const worker = await createWorker("chi_sim"); for (let i = 0; i < files.length; i++) { const ret = await worker.recognize(files[i]); console.log(ret.data.text); } }</script><template> <input type="file" @change="handleUpload" /></template> |
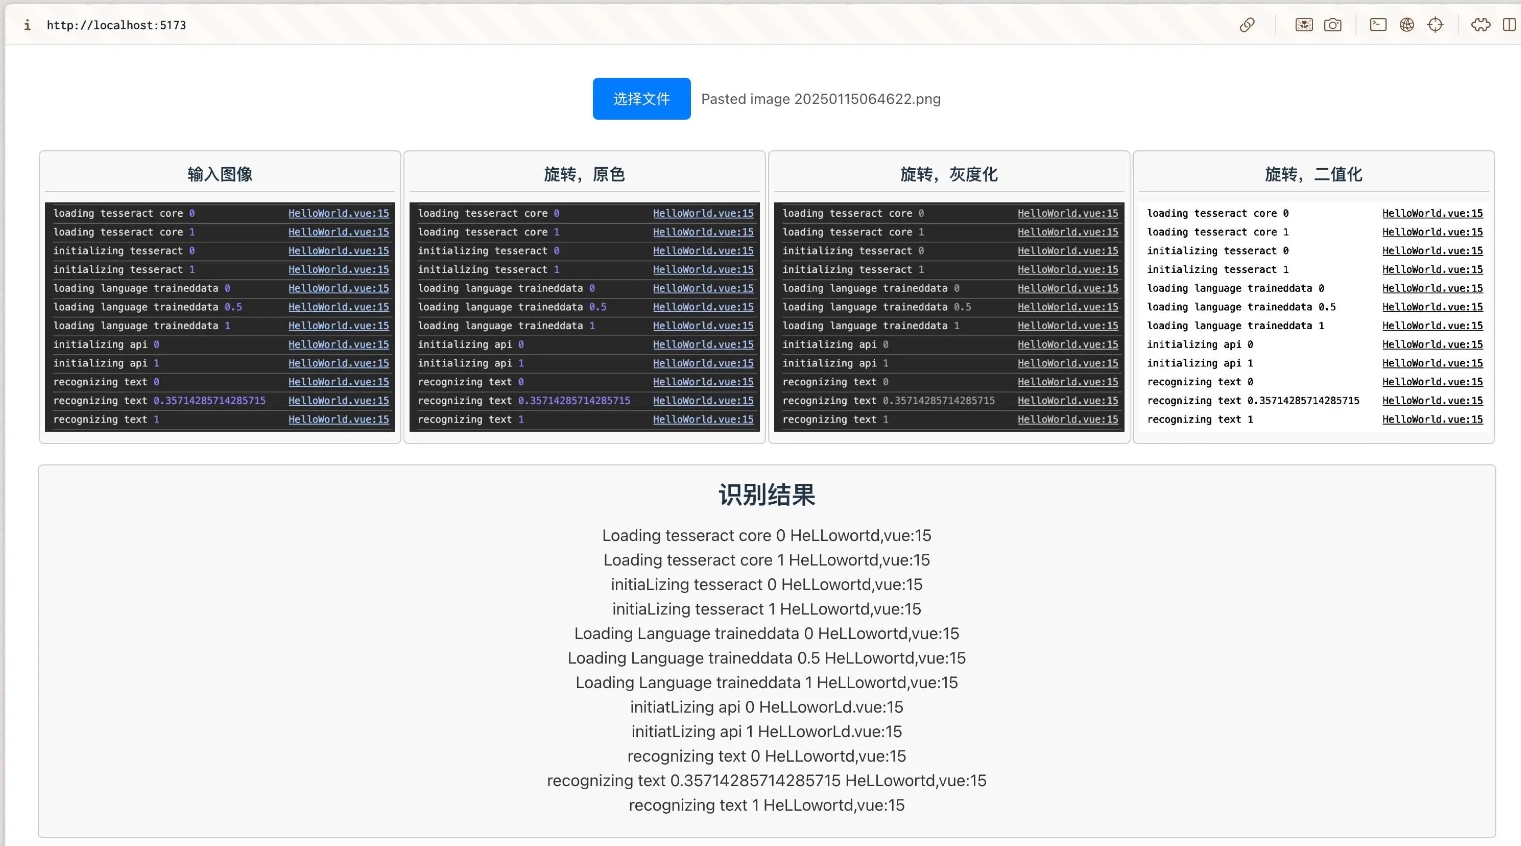
完整示例
下面提供一个简单的 OCR 示例,展示了如何在前端实现图片上传、文字识别以及图像处理。
代码
1 2 3 4 5 6 7 8 9 10 11 12 13 14 15 16 17 18 19 20 21 22 23 24 25 26 27 28 29 30 31 32 33 34 35 36 37 38 39 40 41 42 43 44 45 46 47 48 49 50 51 52 53 54 55 56 57 58 59 60 61 62 63 64 65 66 67 68 69 70 71 72 73 74 75 76 77 78 79 80 81 82 83 84 85 86 87 88 89 90 91 92 93 94 95 96 97 98 99 100 101 102 103 104 105 106 107 108 109 110 111 112 113 114 115 116 117 118 119 120 121 122 123 124 125 126 127 128 129 130 131 132 133 134 135 136 137 138 139 140 141 142 143 144 145 146 147 148 149 150 151 152 153 154 | <!-- * @Author: zi.yang * @Date: 2024-12-10 09:15:22 * @LastEditors: zi.yang * @LastEditTime: 2025-01-14 08:06:25 * @Description: 使用 tesseract.js 实现 OCR * @FilePath: /vue-app/src/components/HelloWorld.vue--><script setup lang="ts">import { ref } from 'vue';import { createWorker, OEM } from 'tesseract.js';const uploadFileName = ref<string>("");const imgText = ref<string>("");const imgInput = ref<string>("");const imgOriginal = ref<string>("");const imgGrey = ref<string>("");const imgBinary = ref<string>("");async function handleUpload(evt: any) { const file = evt.target.files?.[0]; if (!file) return; uploadFileName.value = file.name; imgInput.value = URL.createObjectURL(file); const worker = await createWorker("chi_sim", OEM.DEFAULT, { logger: info => console.log(info.status, info.progress), }); const ret = await worker.recognize(file, { rotateAuto: true }, { imageColor: true, imageGrey: true, imageBinary: true }); imgText.value = ret.data.text || ''; imgOriginal.value = ret.data.imageColor || ''; imgGrey.value = ret.data.imageGrey || ''; imgBinary.value = ret.data.imageBinary || '';}// 占位符 svgconst svgIcon = encodeURIComponent('<svg t="1736901745913" class="icon" viewBox="0 0 1024 1024" version="1.1" xmlns="http://www.w3.org/2000/svg" p-id="4323" width="140" height="140"><path d="M804.9 243.4c8.1 0 17.1 10.5 17.1 24.5v390.9c0 14-9.1 24.5-17.3 24.5H219.3c-8 0-17.3-10.7-17.3-24.5V267.9c0-14 9.1-24.5 17.3-24.5h585.6m0-80H219.3c-53.5 0-97.3 47-97.3 104.5v390.9c0 57.3 43.8 104.5 97.3 104.5h585.4c53.5 0 97.3-47 97.3-104.5V267.9c0-57.5-43.7-104.5-97.1-104.5z" fill="#5E9EFC" p-id="4324"></path><path d="M678.9 294.5c28 0 50.6 22.7 50.6 50.6 0 28-22.7 50.6-50.6 50.6s-50.6-22.7-50.6-50.6c0-28 22.7-50.6 50.6-50.6z m-376 317.6l101.4-215.7c6-12.8 24.2-12.8 30.2 0l101.4 215.7c5.2 11-2.8 23.8-15.1 23.8H318c-12.2 0-20.3-12.7-15.1-23.8z" fill="#5E9EFC" p-id="4325"></path><path d="M492.4 617L573 445.7c4.8-10.1 19.2-10.1 24 0L677.6 617c4.1 8.8-2.3 18.9-12 18.9H504.4c-9.7 0-16.1-10.1-12-18.9z" fill="#5E9EFC" opacity=".5" p-id="4326"></path></svg>');const placeholder = 'data:image/svg+xml,' + svgIcon;</script><template> <div class="custom-file-upload"> <label for="file-upload" class="custom-label">选择文件</label> <span id="file-name" class="file-name">{{ uploadFileName || '未选择文件' }}</span> <input id="file-upload" type="file" @change="handleUpload" /> </div> <div class="row"> <div class="column"> <p>输入图像</p> <img alt="原图" :src="imgInput || placeholder"> </div> <div class="column"> <p>旋转,原色</p> <img alt="原色" :src="imgOriginal || placeholder"> </div> <div class="column"> <p>旋转,灰度化</p> <img alt="灰度化" :src="imgGrey || placeholder"> </div> <div class="column"> <p>旋转,二值化</p> <img alt="二进制" :src="imgBinary || placeholder"> </div> </div> <div class="result"> <h2>识别结果</h2> <p>{{ imgText || '暂无结果' }}</p> </div></template><style scoped>/* 隐藏原生文件上传按钮 */input[type="file"] { display: none;}/* 自定义样式 */.custom-file-upload { display: inline-block; cursor: pointer; margin-bottom: 30px;}.custom-label { padding: 10px 20px; color: #fff; background-color: #007bff; border-radius: 5px; display: inline-block; font-size: 14px; cursor: pointer;}.custom-label:hover { background-color: #0056b3;}.file-name { margin-left: 10px; font-size: 14px; color: #555;}.row { display: flex; width: 100%; justify-content: space-around;}.column { width: 24%; padding: 5px; border: 1px solid #ccc; border-radius: 5px; background-color: #f9f9f9; text-align: center; min-height: 100px;}.column > p { margin: 0 0 10px 0; padding: 5px; border-bottom: 1px solid #ccc; font-weight: 600;}.column > img { width: 100%;}.result { margin-top: 20px; padding: 10px; border: 1px solid #ccc; border-radius: 5px; background-color: #f9f9f9;}.result > h2 { margin: 0;}.result > p { white-space: pre-wrap; word-wrap: break-word; word-break: break-all; font-size: 16px; line-height: 1.5; color: #333; margin: 10px 0;}</style> |
实现效果
资源加载失败
Tesseract.js 在运行时需要动态加载三个关键文件:Web Worker、wasm 和 训练数据。由于默认使用的是 jsDelivr CDN,国内用户可能会遇到网络加载问题。为了解决这个问题,可以通过指定 unpkg CDN 来加速资源加载:
1 2 3 4 5 | const worker = await createWorker('chi_sim', OEM.DEFAULT, { langPath: 'https://unpkg.com/@tesseract.js-data/chi_sim/4.0.0_best_int', workerPath: 'https://unpkg.com/tesseract.js/dist/worker.min.js', corePath: 'https://unpkg.com/tesseract.js-core/tesseract-core-simd-lstm.wasm.js',}); |
如果需要离线使用,可以将这些资源下载到本地,并将路径指向本地文件即可。
结语
Tesseract.js 是目前前端领域较为成熟的 OCR 库,适合在无需后端支持的场景下快速实现文字识别功能。通过合理的图片预处理和优化,可以满足大部分中小型应用的需求。
相关链接
- Tesseract.js 文档: tesseract-ocr.github.io/
- Tesseract.js Demo: tesseract.projectnaptha.com/
本文转载于:https://juejin.cn/post/7459791088791797786
如果对您有所帮助,欢迎您点个关注,我会定时更新技术文档,大家一起讨论学习,一起进步。


【推荐】国内首个AI IDE,深度理解中文开发场景,立即下载体验Trae
【推荐】编程新体验,更懂你的AI,立即体验豆包MarsCode编程助手
【推荐】抖音旗下AI助手豆包,你的智能百科全书,全免费不限次数
【推荐】轻量又高性能的 SSH 工具 IShell:AI 加持,快人一步
· 震惊!C++程序真的从main开始吗?99%的程序员都答错了
· 【硬核科普】Trae如何「偷看」你的代码?零基础破解AI编程运行原理
· 单元测试从入门到精通
· 上周热点回顾(3.3-3.9)
· winform 绘制太阳,地球,月球 运作规律
2023-03-03 记录--手摸手带你撸一个拖拽效果