记录--前端怎么实现点九图?看这里
这里给大家分享我在网上总结出来的一些知识,希望对大家有所帮助

前言
页面开发过程中经常会遇到用不规则图片当背景图,这个就会导致当容器宽度大于或小于图片宽度的时候图片会变形,这就需要用到“点9图”
点9图,是Android开发中用到的一种特殊格式的图片,文件以“.9.png”命名,这种图片能告诉开发,图像哪一部分可以被拉伸,哪一部分不能被拉伸保持原有比例。这样能保证不规则图片不会因为拉伸变形。通常用于对话框和聊天气泡背景图片以及数据统计背景框
题目
不规则图形如下:
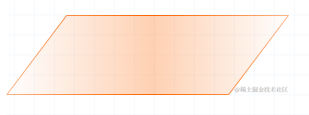
实现容器背景根据内容撑开宽度且不变形?(图片大小为284 x 80)
回答:前端也能通过border-image实现类似于点九图的效果,请看下文
点九图属性
主要就是border-image这个属性,默认值是border-image: none 100% / 1 0 stretch,拆分出来是
1 2 3 4 5 | border-image-source: none;border-image-slice: 100%;border-image-width: 1;border-image-outset: 0;border-image-repeat: stretch; |
备注(配置更全):border-image: url("image.png") 0 170 0 170 fill / 1px 170px stretch
border-image-source
1 2 3 | border-image-source:none; // 默认值border-image-source:url('./test.png'); // 设置图片border-image-source:linear-gradient(to right, red, yellow); // 设置渐变色 |
规定了边框的粗细、形态、颜色及引入图片的地址。
border-image-slice
1 | bordre-image-slice [<number> | <percentage>]{1,4} && fill? |

1、3、6、8就是固定不被拉伸的区域,2、4、5、7就是拉伸区域,9为填充区域(设置了fill会将其作为背景图像显示出来)
表示到图像边缘的偏移量,在位图中的单位为像素点,在矢量图中则是坐标。对于矢量图, 值与元素大小相关,而非矢量图的原始大小。因此,使用矢量图时,使用百分比值()更可取 以原始图像大小的百分比表示的边缘偏移量:水平偏移使用图像的宽度,垂直偏移则使用图像的高度 保留图像的中心区域并将其作为背景图像显示出来,但其会堆叠在 background之上。它的宽度和高度分别对应顶部和左侧图像切片的宽度和高度。
border-image-width
1 | border-image-width: [ <length> | <percentage> | <number> | auto ]{1,4} |
控制边框图片大小,如果边框图片大小小于边框区域,则图片会被拉伸,如果大于边框区域,则图片会被裁剪 length 带 px, em, in … 单位的尺寸值 percentage 百分比 number 不带单位的数字;它表示 border-width 的倍数 auto 使用 auto, border-image-width 将会使用 border-image-slice 的值
border-image-outset
1 | border-image-outset: [ <length> | <number> ]{1,4} |
图片相对边框区域的偏离
border-image-repeat
1 | border-image-repeat: [ stretch | repeat | round | space ]{1,2} |
指定 border-image 的平铺方式,作用是指定 border-image的平铺方式。语法上最多可接收两个参数,第一个参数指定水平方向边框的平铺方式,第二个参数指定垂直方向边框的平铺方式,九宫格的中间区域受这两参数的共同影响
例子
- 实现开篇的题目
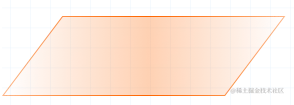
1 2 3 4 5 6 7 8 9 10 11 12 13 14 15 16 17 18 19 20 21 22 23 24 25 26 | <!DOCTYPE html><html lang="en"> <head> <meta charset="UTF-8" /> <meta name="viewport" content="width=device-width, initial-scale=1.0" /> <title>Document</title> <style> .box { position: absolute; top: 100px; left: 100px; padding: 0 30px; height: 40px; border-image-source: url(./jd_top_btn_selected.png); border-image-slice: 40 100 40 100; border-image-width: 40px 100px 40px 100px; border-image-repeat: no-repeat; } </style> </head> <body> <div class="box">测试点九图</div> </body></html>// 因为平行四边形的纵轴必须是连续的,所以slice的上下都是为40(四边形的总高度是80),左右就按正常比例获取,我取的100(也可以其他值),注意使用过程中宽度至少大于40才不会断层 |
- 经典题
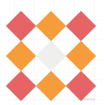
背景图不变形且中间灰色块平铺填充中间区域?(图片大小90 x 90)
1 2 3 4 5 6 7 8 9 10 11 12 13 14 15 16 17 18 19 | <!DOCTYPE html><html lang="en"> <head> <meta charset="UTF-8" /> <meta name="viewport" content="width=device-width, initial-scale=1.0" /> <title>Document</title> <style> .box { border: 20px solid; border-image-source: url(./border-diamonds.png); border-image-slice: 30 fill; // fill是灰色块填充的关键,30是图片里面每个块的宽高 border-image-repeat: round; // 设置image的平铺方式 } </style> </head> <body> <div class="box">测试点九图</div> </body></html> |
- 经典题2

背景图不变形?(图片大小81 x 81)
1 2 3 4 5 6 7 8 9 10 11 12 13 14 15 16 17 18 19 20 21 22 23 24 | <!DOCTYPE html><html lang="en"> <head> <meta charset="UTF-8" /> <meta name="viewport" content="width=device-width, initial-scale=1.0" /> <title>Document</title> <style> .box { position: absolute; top: 100px; left: 100px; height: 100px; border-image-source: url(./22.png); border-image-slice: 27 27 27 27 fill; // 这里可以不要fill,因为本身这个图片中间区域就是透明的,设置和没设置效果一样 border-image-width: 27px 27px 27px 27px; border-image-outset: 27px 27px 27px 27px; // 向外偏移了 border-image-repeat: repeat; } </style> </head> <body> <div class="box">测试点九图</div> </body></html> |
本文转载于:
https://juejin.cn/post/7290940908623495227
如果对您有所帮助,欢迎您点个关注,我会定时更新技术文档,大家一起讨论学习,一起进步。


【推荐】国内首个AI IDE,深度理解中文开发场景,立即下载体验Trae
【推荐】编程新体验,更懂你的AI,立即体验豆包MarsCode编程助手
【推荐】抖音旗下AI助手豆包,你的智能百科全书,全免费不限次数
【推荐】轻量又高性能的 SSH 工具 IShell:AI 加持,快人一步
· TypeScript + Deepseek 打造卜卦网站:技术与玄学的结合
· Manus的开源复刻OpenManus初探
· AI 智能体引爆开源社区「GitHub 热点速览」
· 从HTTP原因短语缺失研究HTTP/2和HTTP/3的设计差异
· 三行代码完成国际化适配,妙~啊~
2022-10-28 如何在uniapp中优雅地使用WebView