TP6框架--EasyAdmin学习笔记:实现数据库增删查改
这是我写的学习EasyAdmin的第三章,这一章我给大家分享下如何进行数据库的增删查改
上一章链接:点击这里前往
上一章我们说到,我仿照官方案例,定义了一条路由goodsone和创建了对应数据库,我们可以看到view复制goodsone的文件夹中又这么几个文件
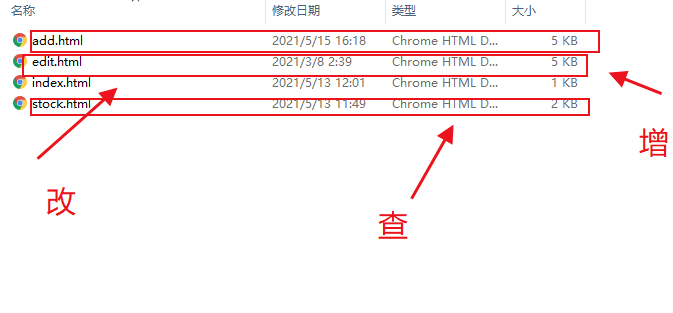
这些文件中,index.html是我们看到的列表页面,因为easyadmin前端采用的是layui,所有我们看到的内容是这样的
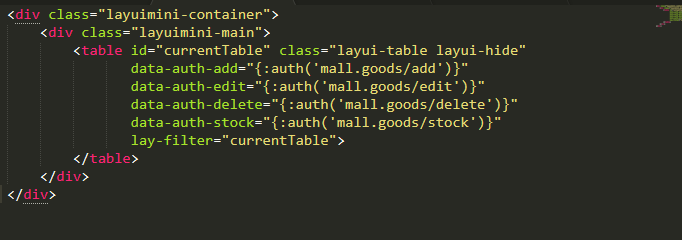
我们可以看到很明显的layui痕迹,这里中增删改查已经又框架默认方法,路由的格式如上图设置即可
页面效果如下:

这里没有layui知识的小伙伴会有一个疑问,页面中的数据和按钮是怎么出来的,上章定义路由的过程中,每一个路由都需要一个对应的js文件,这里的表单和按钮就是在哪里设置的,内容如下:
1 2 3 4 5 6 7 8 9 10 11 12 13 14 15 16 17 18 19 20 21 22 23 24 25 26 27 28 29 30 31 32 33 34 35 36 37 38 39 40 41 42 43 44 45 46 47 48 49 50 51 52 53 54 55 56 57 58 59 60 61 62 63 64 65 66 67 68 69 70 71 72 73 74 75 76 77 78 79 80 81 82 83 84 85 | define(["jquery", "easy-admin"], function ($, ea) { var init = { table_elem: '#currentTable', table_render_id: 'currentTableRenderId', index_url: 'mall.goodsone/index', add_url: 'mall.goodsone/add', edit_url: 'mall.goodsone/edit', delete_url: 'mall.goodsone/delete', export_url: 'mall.goodsone/export', modify_url: 'mall.goodsone/modify', stock_url: 'mall.goodsone/stock', }; var Controller = { index: function () { ea.table.render({ init: init, toolbar: ['refresh', [{ text: '添加', url: init.add_url, method: 'open', auth: 'add', class: 'layui-btn layui-btn-normal layui-btn-sm', icon: 'fa fa-plus ', extend: 'data-full="true"', }], 'delete', 'export'], cols: [[ {type: "checkbox"}, {field: 'id', width: 80, title: 'ID'}, {field: 'sort', width: 80, title: '排序', edit: 'text'}, {field: 'cate.title', minWidth: 80, title: '商品分类'}, {field: 'title', minWidth: 80, title: '商品名称'}, {field: 'logo', minWidth: 80, title: '分类图片', search: false, templet: ea.table.image}, {field: 'market_price', width: 100, title: '市场价', templet: ea.table.price}, {field: 'discount_price', width: 100, title: '折扣价', templet: ea.table.price}, {field: 'total_stock', width: 100, title: '库存统计'}, {field: 'stock', width: 100, title: '剩余库存'}, {field: 'virtual_sales', width: 100, title: '虚拟销量'}, {field: 'sales', width: 80, title: '销量'}, {field: 'status', title: '状态', width: 85, search: 'select',selectList: {0: '禁用', 1: '启用'}, templet: ea.table.switch}, {field: 'create_time', minWidth: 80, title: '创建时间'}, { width: 250, title: '操作', templet: ea.table.tool, operat: [ [{ text: '编辑', url: init.edit_url, method: 'open', auth: 'edit', class: 'layui-btn layui-btn-xs layui-btn-success', extend: 'data-full="true"', }, // { // text: '入库', // url: init.stock_url, // method: 'open', // auth: 'stock', // class: 'layui-btn layui-btn-xs layui-btn-normal', // } ], 'delete'] } ]], }); ea.listen(); }, add: function () { ea.listen(); }, edit: function () { ea.listen(); }, stock: function () { ea.listen(); }, }; return Controller;}); |
上方的代码大家可以清晰的看到各个增删查改的路由,直接照抄即可,layui大佬可以直接根据项目来修改,而对应的路由代码是放在controller层,代码如下大家而可以参考:
1 2 3 4 5 6 7 8 9 10 11 12 13 14 15 16 17 18 19 20 21 22 23 24 25 26 27 28 29 30 31 32 33 34 35 36 37 38 39 40 41 42 43 44 45 46 47 48 49 50 51 52 53 54 55 56 57 58 59 60 61 62 63 64 | <?php namespace app\admin\controller\mall; use app\admin\model\MallGoodsOne;use app\admin\traits\Curd;use app\common\controller\AdminController;use EasyAdmin\annotation\ControllerAnnotation;use EasyAdmin\annotation\NodeAnotation;use think\Facade\Db;use think\App; /** * Class Goods * @package app\admin\controller\mall * @ControllerAnnotation(title="商城商品管理") */class GoodsOne extends AdminController{ use Curd; protected $relationSearch = true; public function __construct(App $app) { parent::__construct($app); $this->model = new MallGoodsOne(); } /** * @NodeAnotation(title="列表") */ public function index() { //var_dump($this->request->isAjax());exit(); if ($this->request->isAjax()) { if (input('selectFields')) { return $this->selectList(); } list($page, $limit, $where) = $this->buildTableParames(); $count = $this->model ->withJoin('cate', 'LEFT') ->where($where) ->count(); $list = $this->model ->withJoin('cate', 'LEFT') ->where($where) ->page($page, $limit) ->order($this->sort) ->select(); $data = [ 'code' => 0, 'msg' => '', 'count' => $count, 'data' => $list, ]; return json($data); } return $this->fetch(); }} |
如果本文对你有所帮助,麻烦你点个赞,下一章讲下如何在EasyAdmin中用php来实现excel导入表中。


【推荐】编程新体验,更懂你的AI,立即体验豆包MarsCode编程助手
【推荐】凌霞软件回馈社区,博客园 & 1Panel & Halo 联合会员上线
【推荐】抖音旗下AI助手豆包,你的智能百科全书,全免费不限次数
【推荐】博客园社区专享云产品让利特惠,阿里云新客6.5折上折
【推荐】轻量又高性能的 SSH 工具 IShell:AI 加持,快人一步
· [.NET]调用本地 Deepseek 模型
· 一个费力不讨好的项目,让我损失了近一半的绩效!
· .NET Core 托管堆内存泄露/CPU异常的常见思路
· PostgreSQL 和 SQL Server 在统计信息维护中的关键差异
· C++代码改造为UTF-8编码问题的总结
· 【.NET】调用本地 Deepseek 模型
· CSnakes vs Python.NET:高效嵌入与灵活互通的跨语言方案对比
· DeepSeek “源神”启动!「GitHub 热点速览」
· 我与微信审核的“相爱相杀”看个人小程序副业
· Plotly.NET 一个为 .NET 打造的强大开源交互式图表库