第六篇 - 将spring boot项目和vue项目关联起来
前两节分别创建了spring boot项目和vue项目,现在将前后端关联起来
一、调整后端API
参考链接:https://wenku.csdn.net/answer/d49ae1ebbbaa7fe6f09e2f637a9379d6
将springboot项目的server.port=8081,vue项目的端口是8080
修改UserController.java
package com.example.demo.controller;

import com.example.demo.entity.User;
import com.example.demo.service.impl.UserServiceImpl;
import org.springframework.beans.factory.annotation.Autowired;
import org.springframework.web.bind.annotation.CrossOrigin;
import org.springframework.web.bind.annotation.GetMapping;
import org.springframework.web.bind.annotation.RequestMapping;
import org.springframework.web.bind.annotation.RestController;

import java.util.List;

@RestController
@RequestMapping("/api")
@CrossOrigin(origins = "http://localhost:8080")
public class UserController {
    @Autowired
    private UserServiceImpl userServer;

    @GetMapping("/users")
    public List<User> getUserList()
    {
        return userServer.getUserList();
    }
}
二、调整前端引用
修改HelloWorld.vue的Login函数检验前后端是否打通。

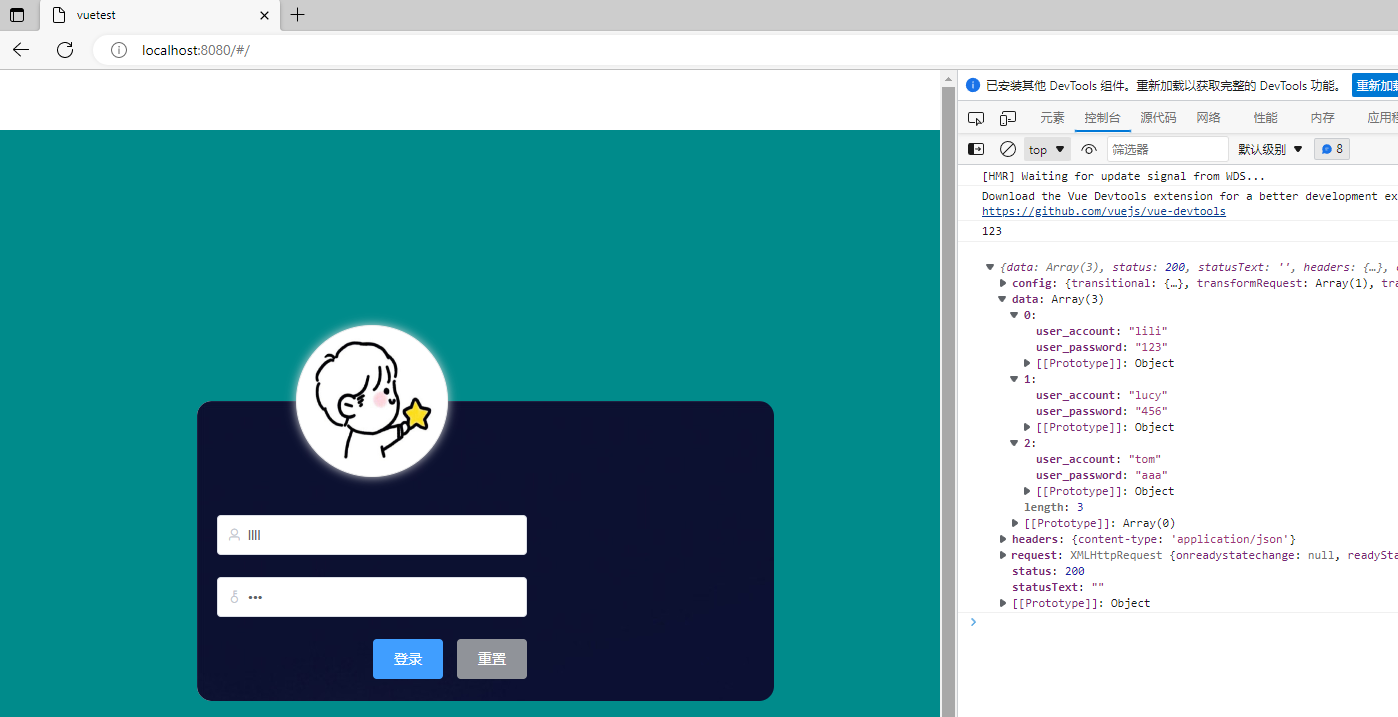
可以看到点击登录按钮时,控制台中的确打印出后台传来的用户列表。
三、实现登录验证
修改main.js
// The Vue build version to load with the `import` command
// (runtime-only or standalone) has been set in webpack.base.conf with an alias.
import Vue from 'vue'
import ElementUI from 'element-ui'
import 'element-ui/lib/theme-chalk/index.css'
import App from './App'
import router from './router'
import './assets/css/global.css'
import axios from 'axios'

Vue.use(ElementUI)
Vue.config.productionTip = false
Vue.prototype.$axios = axios

/* eslint-disable no-new */
new Vue({
  el: '#app',
  router,
  components: { App },
  template: '<App/>'
})
修改HelloWorld.vue的Login函数
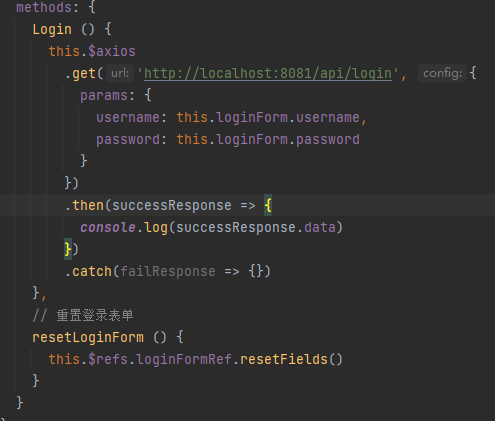
修改spring boot项目的UserController.java
package com.example.demo.controller;

import com.example.demo.entity.User;
import com.example.demo.service.impl.UserServiceImpl;
import org.springframework.beans.factory.annotation.Autowired;
import org.springframework.web.bind.annotation.*;

import javax.servlet.http.HttpServletRequest;
import javax.xml.transform.Result;
import java.io.Console;
import java.util.List;
import java.util.Map;

@RestController
@RequestMapping("/api")
@CrossOrigin(origins = "http://localhost:8080")
public class UserController {
    @Autowired
    private UserServiceImpl userServer;

    @GetMapping("/users")
    public List<User> getUserList()
    {
        return userServer.getUserList();
    }

    @PostMapping("/login")
    @ResponseBody
    public String loginStatus(HttpServletRequest req)
    {
        String username = req.getParameter("username");
        String password = req.getParameter("password");
        System.out.println(username);
        System.out.println(password);
        return "登录成功";
    }
}
运行Spring boot项目,运行Vue项目
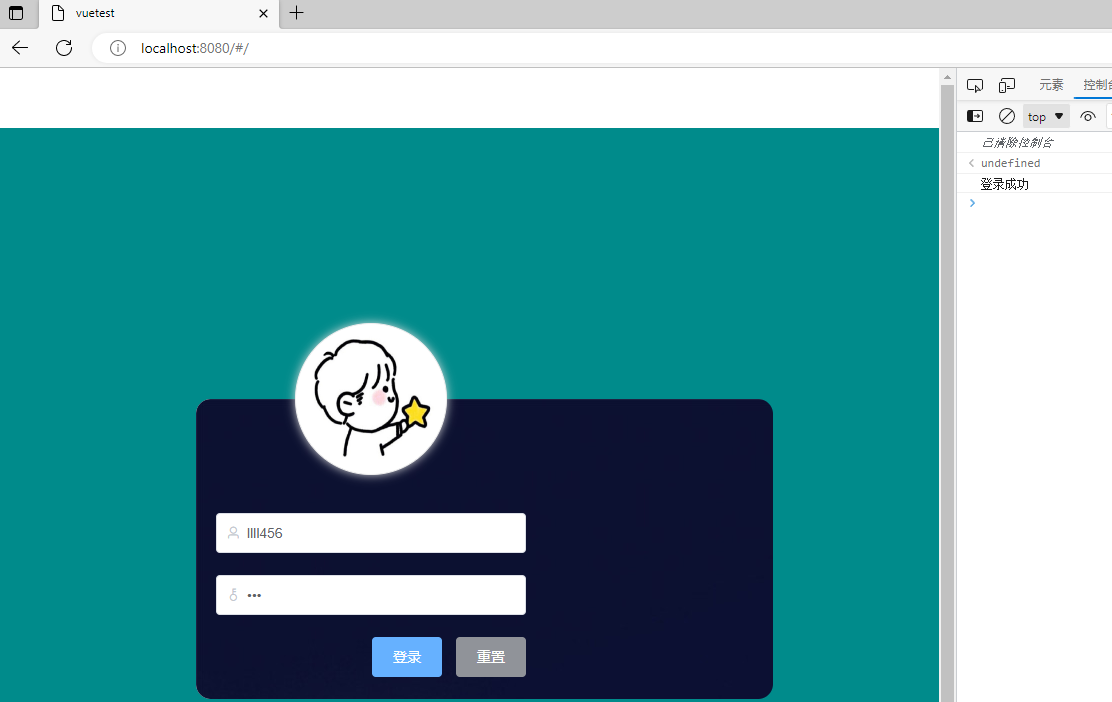
可以看到点击登录按钮后,控制台打印出“登录成功”字样,springboot这边输出用户名密码

接下来,完全实现数据库的验证,只有账号和密码都正确才登录成功,其他的登录失败。
修改UserController.java
package com.example.demo.controller;

import com.example.demo.entity.User;
import com.example.demo.service.impl.UserServiceImpl;
import org.springframework.beans.factory.annotation.Autowired;
import org.springframework.web.bind.annotation.*;

import javax.servlet.http.HttpServletRequest;
import javax.xml.transform.Result;
import java.io.Console;
import java.util.List;
import java.util.Map;

@RestController
@RequestMapping("/api")
@CrossOrigin(origins = "http://localhost:8080")
public class UserController {
    @Autowired
    private UserServiceImpl userServer;

    @GetMapping("/users")
    public List<User> getUserList()
    {
        return userServer.getUserList();
    }

    @GetMapping("/login")
    @ResponseBody
    public String loginStatus(HttpServletRequest req)
    {
        String username = req.getParameter("username");
        String password = req.getParameter("password");
        System.out.println(username);
        System.out.println(password);
        List<User> userlist = userServer.getUserList();
        for (User us: userlist){
            if (us.user_account.equals(username) && us.user_password.equals(password)){
                return "登录成功";
            }
        }
        return "登录失败";
    }
}
再次运行Spring Boot项目,观察是否可以验证成功。
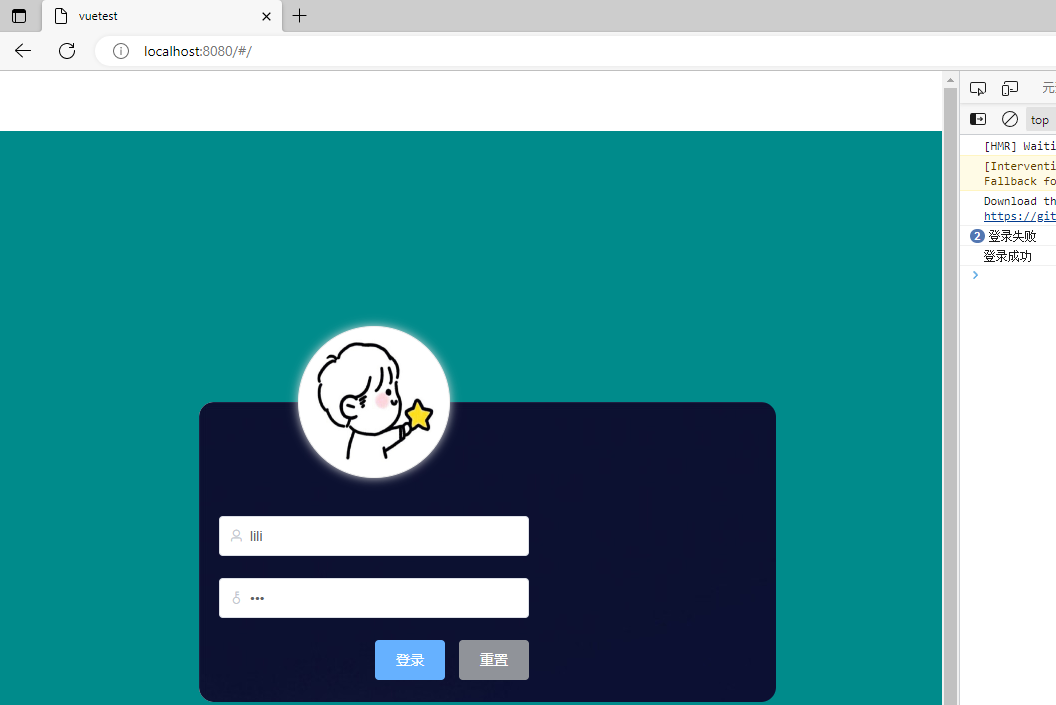
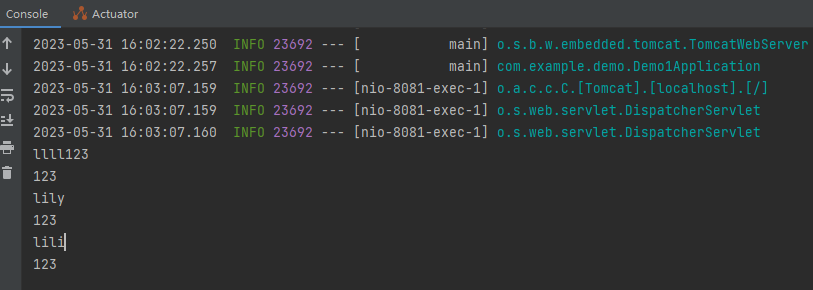
可以看出,只有当输入正确的用户名密码lili-123时才登录成功,因此,springboot和vue的连接宣布成功。


