第八篇--编写Windows服务
编写service服务参考网址:https://blog.csdn.net/nodeathphoenix/article/details/24181509
vc获得显示器状态(捕获息屏、亮屏网址):https://blog.csdn.net/rocklee/article/details/76636253
Service_test.cpp


// Service_test.cpp : This file contains the 'main' function. Program execution begins and ends there.
//

#include "pch.h"
#include <Windows.h>
#include <iostream>
using namespace std;

//#include <Windows.h>//Win32函数
//#include <stdio.h>//磁盘文件写入
//#pragma comment(lib, "Advapi32")

/**SLEEP_TIME指定两次连续查询可用内存之间的毫秒间隔。在第二步中编写服务工作循环的时候要使用该常量
    LOGFILE指定日志文件的路径
    */
//#define SLEEP_TIME 5000
//#define LOGFILE "F:\\vc_work\\20190530\\Service_test\\memstatus.txt"
//
////声明全局变量
//SERVICE_STATUS ServiceStatus;
//SERVICE_STATUS_HANDLE hStatus;

//前向定义函数
//void ServiceMain(int argc, char** argv);
//void ControlHandler(DWORD request);
//int InitService();
//int WriteToLog(const char* str);
//void LightingBar_control();


//#include <iostream>
//using namespace std;


HWND mhMsgRec;

LRESULT CALLBACK WindowProc(
    _In_  HWND hwnd,
    _In_  UINT uMsg,
    _In_  WPARAM wParam,
    _In_  LPARAM lParam
);
HWND createMsgWin() {
    HINSTANCE lvhInstance;
    lvhInstance = GetModuleHandle(NULL);  //获取一个应用程序或动态链接库的模块句柄
    WNDCLASS lvwcCls;
    lvwcCls.cbClsExtra = 0;
    lvwcCls.cbWndExtra = 0;
    lvwcCls.hCursor = LoadCursor(lvhInstance, IDC_ARROW);  //鼠标风格
    lvwcCls.hIcon = LoadIcon(lvhInstance, IDI_APPLICATION);    //图标风格
    lvwcCls.lpszMenuName = NULL; //菜单名
    lvwcCls.style = CS_HREDRAW | CS_VREDRAW; //窗口的风格
    lvwcCls.hbrBackground = (HBRUSH)COLOR_WINDOW;    //背景色
    lvwcCls.lpfnWndProc = WindowProc;    //【关键】采用自定义消息处理函数,也可以用默认的DefWindowProc
    lvwcCls.lpszClassName = L"RenderWindow";  //【关键】该窗口类的名称
    lvwcCls.hInstance = lvhInstance;   //【关键】表示创建该窗口的程序的运行实体代号

    RegisterClass(&lvwcCls);

    HWND lvhwndWin = CreateWindow(
        L"RenderWindow",           //【关键】上面注册的类名lpszClassName,要完全一致
        L"Zombie",  //窗口标题文字
        WS_OVERLAPPEDWINDOW, //窗口外观样式
        0,             //窗口相对于父级的X坐标
        0,             //窗口相对于父级的Y坐标
        30,                //窗口的宽度
        20,                //窗口的高度
        NULL,               //没有父窗口,为NULL
        NULL,               //没有菜单,为NULL
        lvhInstance,          //当前应用程序的实例句柄
        NULL);              //没有附加数据,为NULL

                            //去标题栏

    //ShowWindow(lvhwndWin, SW_SHOW); //显示窗体
    //ShowWindow(HButton, SW_SHOW); //显示窗体
    //UpdateWindow(lvhwndWin); //绘制窗体;
    //UpdateWindow(HButton); //绘制窗体;

    return lvhwndWin;
}

LRESULT CALLBACK WindowProc(
    _In_  HWND hwnd,
    _In_  UINT uMsg,
    _In_  WPARAM wParam,
    _In_  LPARAM lParam
)
{
    //cout << "MSG:" << uMsg << ",wParam:" << wParam << ",lParam:" << lParam << endl;
    switch (uMsg)
    {

    case WM_POWERBROADCAST:
    {
        if (wParam == PBT_POWERSETTINGCHANGE) {
            POWERBROADCAST_SETTING* lvpsSetting = (POWERBROADCAST_SETTING*)lParam;
            byte lvStatus = *(lvpsSetting->Data);
            if (lvStatus != 0) {
                cout << "Monitor is turn on" << endl;
            }
            else {
                cout << "Monitor is turn off" << endl;
            }
            //cout << (int)lvStatus << endl;

        }
        break;
    }
    }
    return DefWindowProc(hwnd, uMsg, wParam, lParam);
}


BOOL WINAPI ConsoleHandler(DWORD pvdwMsgType)
{
    if (pvdwMsgType == CTRL_C_EVENT)
    {
        PostMessage(mhMsgRec, WM_DESTROY, 0, 0);
        return TRUE;
    }
    else if (pvdwMsgType == CTRL_CLOSE_EVENT)
    {
        PostMessage(mhMsgRec, WM_DESTROY, 0, 0);
        return TRUE;
    }
    return FALSE;
}

int main()
{
    mhMsgRec = createMsgWin();//这个函数也是dll里的,得到控制台的句柄

    HPOWERNOTIFY lvhpNotify = RegisterPowerSettingNotification(mhMsgRec, &GUID_CONSOLE_DISPLAY_STATE, DEVICE_NOTIFY_WINDOW_HANDLE);

    SetConsoleCtrlHandler(ConsoleHandler, TRUE);
    bool lvbRet;
    MSG lvMSG;
    while ((lvbRet = GetMessage(&lvMSG, NULL, 0, 0)) != 0)
    {
        TranslateMessage(&lvMSG);
        DispatchMessage(&lvMSG);
        if (lvMSG.message == WM_DESTROY) {
            break;
        }
    }
    UnregisterPowerSettingNotification(lvhpNotify);
    CloseWindow(mhMsgRec);
    return 0;
}


//创建分派表并控制分派机
//int main()
//{
    //*lpServiceName: 指向表示服务名称字符串的指针;当定义了多个服务时,那么这个域必须指定
    //  lpServiceProc: 指向服务主函数的指针(服务入口点)
    //  分派表的最后一项必须是服务名和服务主函数域的 NULL 指针,文本例子程序中只宿主一个服务,所以服务名的定义是可选的*/
    //SERVICE_TABLE_ENTRY ServiceTable[2];
    //ServiceTable[0].lpServiceName = (LPWSTR)(L"MemoryStatus");
    //ServiceTable[0].lpServiceProc = (LPSERVICE_MAIN_FUNCTION)ServiceMain;

    //ServiceTable[1].lpServiceName = NULL;
    //ServiceTable[1].lpServiceProc = NULL;

    //StartServiceCtrlDispatcher(ServiceTable);
//}

//注册控制处理器函数
//void ServiceMain(int argc, char** argv)
//{
//    int error;
//
//    //指示服务类型,创建Win32服务。赋值SERVICE_WIN32
//    ServiceStatus.dwServiceType = SERVICE_WIN32;
//    //指定服务的当前状态,因为服务的初始化在这里没有完成,所以状态为SERVICE_START_PENDING;
//    ServiceStatus.dwCurrentState = SERVICE_START_PENDING;
//    //这个域通知 SCM 服务接受哪个域。本文例子是允许 STOP 和 SHUTDOWN 请求。处理控制请求将在第三步讨论;
//    ServiceStatus.dwControlsAccepted = SERVICE_ACCEPT_STOP | SERVICE_ACCEPT_SHUTDOWN;
//    //dwWin32ExitCode 和 dwServiceSpecificExitCode 这两个域在你终止服务并报告退出细节时很有用。初始化服务时并不退出,因此,它们的值为 0
//    ServiceStatus.dwWin32ExitCode = 0;
//    ServiceStatus.dwServiceSpecificExitCode = 0;
//    //dwCheckPoint 和 dwWaitHint :这两个域表示初始化某个服务进程时要30 秒以上。本文例子服务的初始化过程很短,所以这两个域的值都为 0
//    ServiceStatus.dwCheckPoint = 0;
//    ServiceStatus.dwWaitHint = 0;
//
//    hStatus = RegisterServiceCtrlHandlerEx(
//        L"LightingBar",
//        (LPHANDLER_FUNCTION_EX)ControlHandler, NULL);
//    if (hStatus == (SERVICE_STATUS_HANDLE)0)
//    {
//        // Registering Control Handler failed
//        return;
//    }
//
//    /*
//    The current monitor's display state has changed.
//    0x0 - The display is off.
//    0x1 - The display is on.
//    0x2 - The display is dimmed.
//    */
//    HPOWERNOTIFY hPowerNotify;
//    hPowerNotify = RegisterPowerSettingNotification(hStatus, &GUID_CONSOLE_DISPLAY_STATE, DEVICE_NOTIFY_SERVICE_HANDLE);
//
//    //UnregisterPowerSettingNotification(hPowerNotify);
//
//
//    // Initialize Service
//    error = InitService();
//    if (!error)
//    {
//        // Initialization failed
//        ServiceStatus.dwCurrentState =
//            SERVICE_STOPPED;
//        ServiceStatus.dwWin32ExitCode = -1;
//        SetServiceStatus(hStatus, &ServiceStatus);
//        return;
//    }
//    // We report the running status to SCM.
//    ServiceStatus.dwCurrentState = SERVICE_RUNNING;
//    SetServiceStatus(hStatus, &ServiceStatus);
//
//
//    //启动工作循环。每5秒钟查询一个可用物理内存并将结果写入日志文件
//    MEMORYSTATUS memory;
//    // The worker loop of a service
//    while (ServiceStatus.dwCurrentState == SERVICE_RUNNING)
//    {
//        //char buffer[16];
//        //GlobalMemoryStatus(&memory);
//        ///*DWORD dwLength; 使用之前先令其等于结构的大小
//        //dwMemoryLoad:内存负载率,其实也就是内存使用率
//        //dwTotalPhys:总的物理内存,我在我的512MB虚拟机上测试为536330240bytes,比512MB少540672bytes,其实这部分被用作引导进程
//        //dwAvailPhys:可用的物理内存=dwTotalPhys*(1-dwMemoryLoad)
//        //dwTotalPageFile:总的页面文件的大小,其实就是物理内存加虚拟内存的总大小,但是这里有个问题,物理内存少了一部分*/
//        //sprintf_s(buffer, "%d", memory.dwAvailPhys);//memory.dwAvailPhys:可用的物理内存=dwTotalPhys*(1-dwMemoryLoad)
//        //int result = WriteToLog(buffer);
//        //if (result)
//        //{
//        //    ServiceStatus.dwCurrentState = SERVICE_STOPPED;
//        //    ServiceStatus.dwWin32ExitCode = -1;
//        //    SetServiceStatus(hStatus, &ServiceStatus);
//        //    return;
//        //}
//        //Sleep(SLEEP_TIME);
//        LightingBar_control();
//    }
//    return;
//}

/*在第二步中,你用 ServiceMain 函数注册了控制处理器函数。控制处理器与处理各种 Windows 消息的窗口回调函数非常类似。它检查 SCM 发送了什么请求并采取相应行动。
  每次你调用 SetServiceStatus 函数的时候,必须指定服务接收 STOP 和 SHUTDOWN 请求。Listing 2 示范了如何在 ControlHandler 函数中处理它们。
  STOP 请求是 SCM 终止服务的时候发送的。例如,如果用户在“ 服务” 控制面板中手动终止服务。SHUTDOWN 请求是关闭机器时,由 SCM 发送给所有运行中服务的请求*/
//void ControlHandler(DWORD request)
//{
//    switch (request)
//    {
//    case SERVICE_CONTROL_STOP:
//        WriteToLog("Monitoring stopped.");
//        ServiceStatus.dwWin32ExitCode = 0;
//        ServiceStatus.dwCurrentState = SERVICE_STOPPED;
//        SetServiceStatus(hStatus, &ServiceStatus);
//        return;
//
//
//    case SERVICE_CONTROL_SHUTDOWN:
//        WriteToLog("Monitoring stopped.");
//        ServiceStatus.dwWin32ExitCode = 0;
//        ServiceStatus.dwCurrentState = SERVICE_STOPPED;
//        SetServiceStatus(hStatus, &ServiceStatus);
//        return;
//
//    default:
//        break;
//    }
//
//    // Report current status
//    SetServiceStatus(hStatus, &ServiceStatus);
//    return;
//}

//将内存查询输出到文件
//int WriteToLog(const char* str) {
//    FILE* log;
//    errno_t err;
//    err = fopen_s(&log, LOGFILE, "a+");
//    if (log == NULL) {
//        return -1;
//    }
//    fprintf(log, "%s\n", str);
//    fclose(log);
//    return 0;
//
//}
//
//int InitService() {
//    WriteToLog("Monitoring started.");
//    return true;
//}


//void LightingBar_control() {
//
//}

// Run program: Ctrl + F5 or Debug > Start Without Debugging menu
// Debug program: F5 or Debug > Start Debugging menu

// Tips for Getting Started:
//   1. Use the Solution Explorer window to add/manage files
//   2. Use the Team Explorer window to connect to source control
//   3. Use the Output window to see build output and other messages
//   4. Use the Error List window to view errors
//   5. Go to Project > Add New Item to create new code files, or Project > Add Existing Item to add existing code files to the project
//   6. In the future, to open this project again, go to File > Open > Project and select the .sln file
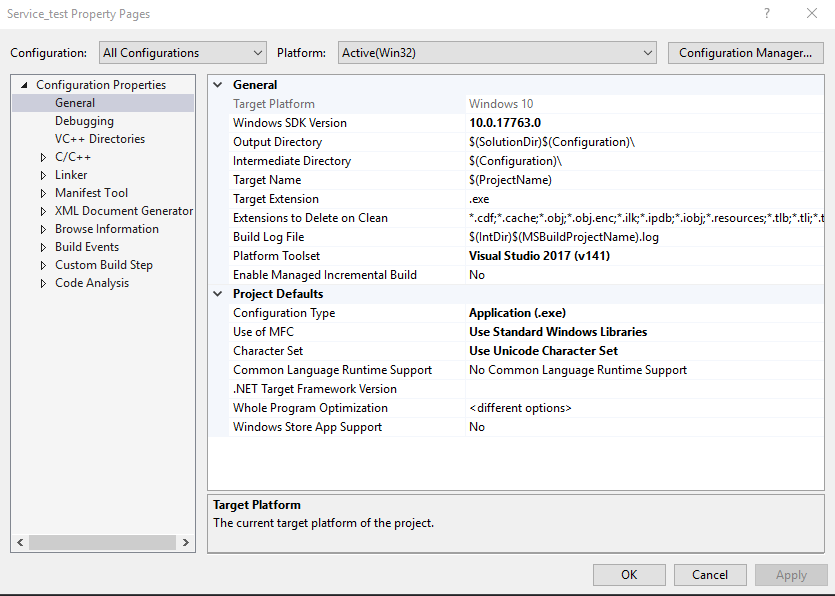
设置情况