基于Redis的Session共享示例
在单机情况下,Session可由部署在服务器上的Web容器来管理 (如Tomcat、JBoss)。
在负载均衡的集群环境下,负载均衡可能将请求分发到不同的服务器上去,在这种情况,需要将有状态的session统一管理起来。
本文将给出一个简单的示例,将session存放到Redis统一管理。因为只是一个示例,所以Nginx只用1台,Tomcat使用2台,Redis一个或者简单的主从。
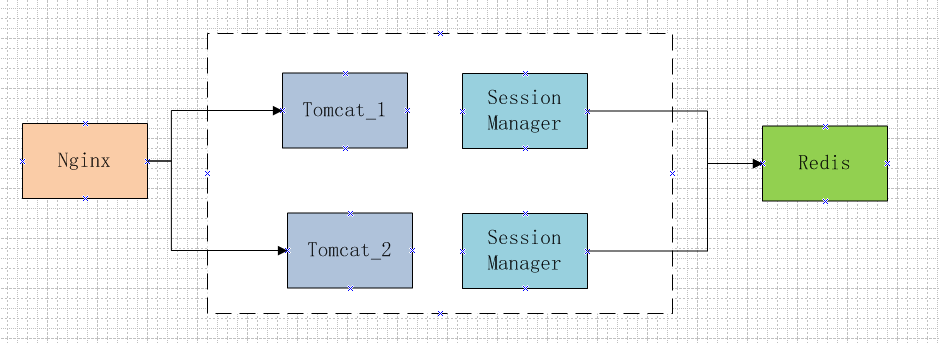
环境准备
准备Redis
下载redis-3.2.3.tar.gz (Redis.io下载)
解压缩redis
tar -zvxf redis-3.2.3.tar.gz
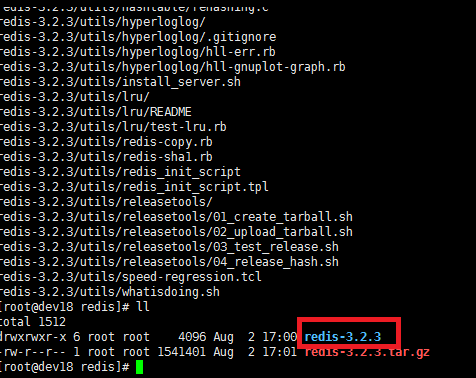
将解压缩后的redis文件名改成好记点的6379 (可以不重命名)。
然后使用make && make install 完成安装。
[root@dev18 redis]# mv redis-3.2.3 6379
[root@dev18 redis]# cd 6379
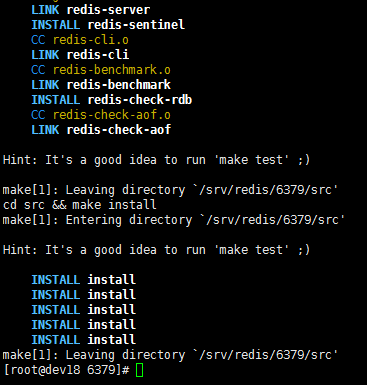
[root@dev18 6379]# make && make install
安装成功之后,出现如下显示:
因为本版本使用的Redis版本是3.2.3, 在这个版本中,有protected mode的属性(默认是yes),进入6379目录,修改redis.conf配置文件。从而,其它网段的程序可以去访问,否则可能会出现如下的错误。
Exception in thread "main" redis.clients.jedis.exceptions.JedisDataException: DENIED Redis is running in protected mode because protected mode is enabled, no bind address was specified, no authentication password is requested to clients. In this mode connections are only accepted from the loopback interface. If you want to connect from external computers to Redis you may adopt one of the following solutions: 1) Just disable protected mode sending the command 'CONFIG SET protected-mode no' from the loopback interface by connecting to Redis from the same host the server is running, however MAKE SURE Redis is not publicly accessible from internet if you do so. Use CONFIG REWRITE to make this change permanent. 2) Alternatively you can just disable the protected mode by editing the Redis configuration file, and setting the protected mode option to 'no', and then restarting the server. 3) If you started the server manually just for testing, restart it with the '--protected-mode no' option. 4) Setup a bind address or an authentication password. NOTE: You only need to do one of the above things in order for the server to start accepting connections from the outside.
        at redis.clients.jedis.Protocol.processError(Protocol.java:117)
	at redis.clients.jedis.Protocol.process(Protocol.java:151)
        at redis.clients.jedis.Protocol.read(Protocol.java:205)
        at redis.clients.jedis.Connection.readProtocolWithCheckingBroken(Connection.java:297)
        at redis.clients.jedis.Connection.getIntegerReply(Connection.java:222)
        at redis.clients.jedis.Jedis.sadd(Jedis.java:1057)
        at jedis.example.Main.main(Main.java:36)
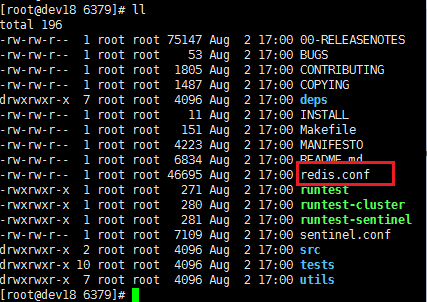
修改后保存。
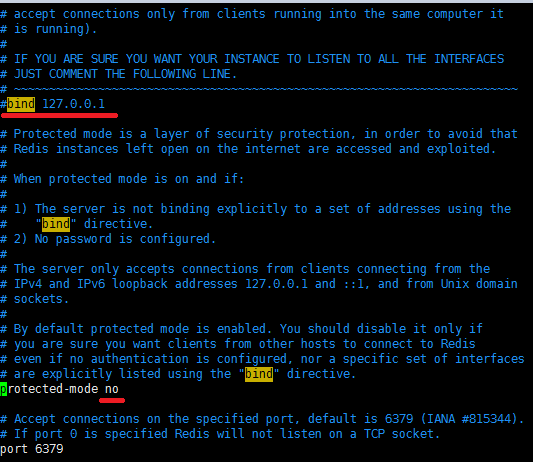
进入src目录,启动Redis服务
[root@dev18 6379]# cd src
[root@dev18 src]# ./redis-server
成功启动显示如下:
[root@dev18 src]# ./redis-server
10051:C 22 Dec 09:50:59.653 # Warning: no config file specified, using the default config. In order to specify a config file use ./redis-server /path/to/redis.conf
                _._
           _.-``__ ''-._
      _.-``    `.  `_.  ''-._           Redis 3.2.3 (00000000/0) 64 bit
  .-`` .-```.  ```\/    _.,_ ''-._
 (    '      ,       .-`  | `,    )     Running in standalone mode
 |`-._`-...-` __...-.``-._|'` _.-'|     Port: 6379
 |    `-._   `._    /     _.-'    |     PID: 10051
  `-._    `-._  `-./  _.-'    _.-'
 |`-._`-._    `-.__.-'    _.-'_.-'|
 |    `-._`-._        _.-'_.-'    |           http://redis.io
  `-._    `-._`-.__.-'_.-'    _.-'
 |`-._`-._    `-.__.-'    _.-'_.-'|
 |    `-._`-._        _.-'_.-'    |
  `-._    `-._`-.__.-'_.-'    _.-'
      `-._    `-.__.-'    _.-'
          `-._        _.-'
              `-.__.-'

10051:M 22 Dec 09:50:59.656 # Server started, Redis version 3.2.3
10051:M 22 Dec 09:50:59.656 # WARNING overcommit_memory is set to 0! Background save may fail under low memory condition. To fix this issue add 'vm.overcommit_memory = 1' to /etc/sysctl.conf and then reboot or run the command 'sysctl vm.overcommit_memory=1' for this to take effect.
10051:M 22 Dec 09:50:59.656 # WARNING you have Transparent Huge Pages (THP) support enabled in your kernel. This will create latency and memory usage issues with Redis. To fix this issue run the command 'echo never > /sys/kernel/mm/transparent_hugepage/enabled' as root, and add it to your /etc/rc.local in order to retain the setting after a reboot. Redis must be restarted after THP is disabled.
10051:M 22 Dec 09:50:59.656 * The server is now ready to accept connections on port 6379
准备Tomcat
下载tomcat,并解压缩为两个tomcat,并修改各自server.xml中的端口,保证两者不冲突。
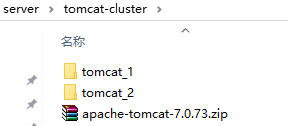
本示例中,tomcat_1的端口为8082
    <Connector port="8082" protocol="HTTP/1.1"
               connectionTimeout="20000"
               redirectPort="8443" />
tomcat_2的端口为8083
    <Connector port="8083" protocol="HTTP/1.1"
               connectionTimeout="20000"
               redirectPort="8443" />
准备Session-Manager
大家可以通过如下路径获取Session-Manager的jar包和相关的依赖包,包括common-pool2和Jedis。
https://pan.baidu.com/s/1geZVozx

下载好之后,我们首先将这三个jar包,放到Tomcat目录下的lib文件夹中。
配置Context.xml,添加如下内容,具体的host和port由自己的环境决定。
	<Valve className="com.orangefunction.tomcat.redissessions.RedisSessionHandlerValve" />
	<Manager className="com.orangefunction.tomcat.redissessions.RedisSessionManager"
         host="xxx.xx.xx.xxx"
         port="6379"
         database="0"
         maxInactiveInterval="60" />
然后准备一个项目,为了方便,我直接将测试的war中的文件替换了
Tomcat_Home/webapps中的ROOT的内容。也可以通过tomcat自带的examples示例来测试session。
如:http://localhost:8082/examples/servlets/servlet/SessionExample
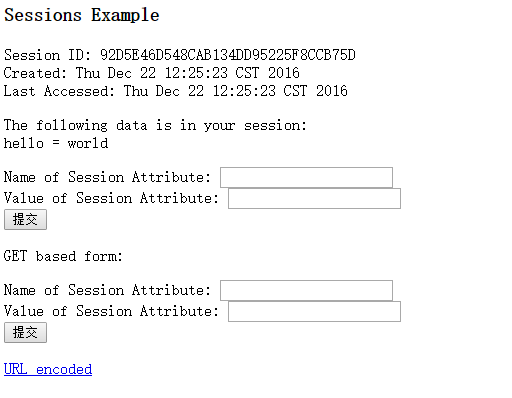
至此,两个测试的tomat就准备好了,并且已经配置了session管理,由redis来存储。接下来,我们就需要一个Nginx用于负载,配置两个tomcat的信息即可。
准备Nginx
下载Nginx,解压,然后进入Nginx的conf目录,修改nginx.conf文件内容,找到http的部分,添加upstream,就是我们上述提到的两个tomcat。
http {
        upstream tomcat  {
			server localhost:8082;
			server localhost:8083;
	}
本文Nginx的端口为8899, 自己设定了一个。
 server {
        listen       8899;
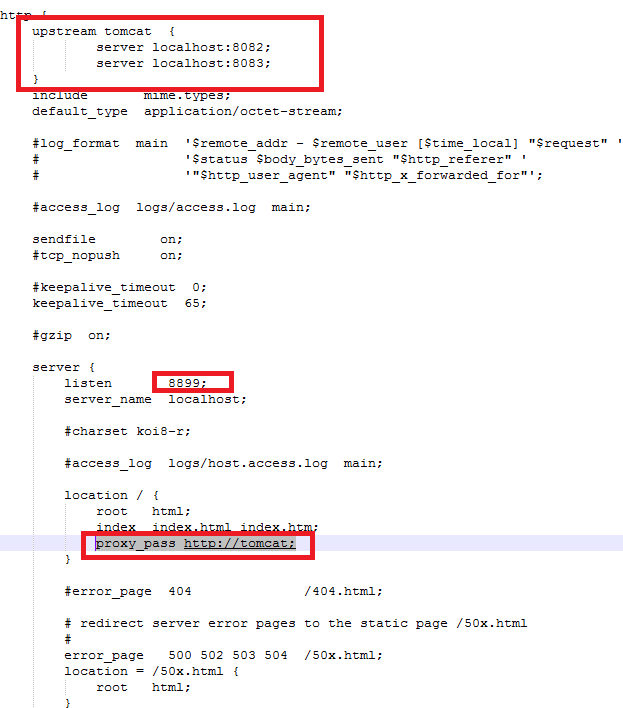
至此Nginx, Tomcat, Session-Manager, Redis相关的环境就全部准备好了。
接下来,要做的就是启动Nginx, Tomcat, Redis,来看看 session是否存入到Redis中,自己的Web工程能不能正常运行等。
启动Nginx和Tomcat
进入NGINX_HOME/使用 nginx命令启动Nginx服务器。

进入两个tomcat_1和tomcat_2,分别启动tomcat。登录自己在ROOT中放置的WEB工程,可以看到session在Redis中存储下来了。
通过Redis-Desktop Manager查看Redis中session的信息。

配置一个Redis从服务器
通过Redis-Desktop Manager查看Redis中session的信息。
为上面的6379主服务器配置一个从服务器6380。
在6380的redis.conf中指定 是6379的slave,如:
slaveof 127.0.0.1 6379
启动从服务器:
[root@dev18 src]# ./redis-server ../redis.conf
                _._
           _.-``__ ''-._
      _.-``    `.  `_.  ''-._           Redis 3.2.3 (00000000/0) 64 bit
  .-`` .-```.  ```\/    _.,_ ''-._
 (    '      ,       .-`  | `,    )     Running in standalone mode
 |`-._`-...-` __...-.``-._|'` _.-'|     Port: 6380
 |    `-._   `._    /     _.-'    |     PID: 14302
  `-._    `-._  `-./  _.-'    _.-'
 |`-._`-._    `-.__.-'    _.-'_.-'|
 |    `-._`-._        _.-'_.-'    |           http://redis.io
  `-._    `-._`-.__.-'_.-'    _.-'
 |`-._`-._    `-.__.-'    _.-'_.-'|
 |    `-._`-._        _.-'_.-'    |
  `-._    `-._`-.__.-'_.-'    _.-'
      `-._    `-.__.-'    _.-'
          `-._        _.-'
              `-.__.-'


 14302:S 22 Dec 12:02:55.810 # Server started, Redis version 3.2.3
 14302:S 22 Dec 12:02:55.810 # WARNING overcommit_memory is set to 0! Background save may fail under low memory condition. To fix this issue add 'vm.overcommit_memory = 1' to /etc/sysctl.conf and then reboot or run the command 'sysctl vm.overcommit_memory=1' for this to take effect.
 14302:S 22 Dec 12:02:55.810 # WARNING you have Transparent Huge Pages (THP) support enabled in your kernel. This will create latency and memory usage issues with Redis. To fix this issue run the command 'echo never > /sys/kernel/mm/transparent_hugepage/enabled' as root, and add it to your /etc/rc.local in order to retain the setting after a reboot. Redis must be restarted after THP is disabled.
 14302:S 22 Dec 12:02:55.810 * The server is now ready to accept connections on port 6380
 14302:S 22 Dec 12:02:55.810 * Connecting to MASTER 127.0.0.1:6379
 14302:S 22 Dec 12:02:55.810 * MASTER <-> SLAVE sync started
 14302:S 22 Dec 12:02:55.810 * Non blocking connect for SYNC fired the event.
 14302:S 22 Dec 12:02:55.811 * Master replied to PING, replication can continue...
 14302:S 22 Dec 12:02:55.811 * Partial resynchronization not possible (no cached master)
 14302:S 22 Dec 12:02:55.815 * Full resync from master: c5038d1cbe197bbd8c8fee0e719370eac42bd6bc:1
 14302:S 22 Dec 12:02:55.865 * MASTER <-> SLAVE sync: receiving 2741 bytes from master
 14302:S 22 Dec 12:02:55.865 * MASTER <-> SLAVE sync: Flushing old data
 14302:S 22 Dec 12:02:55.865 * MASTER <-> SLAVE sync: Loading DB in memory
 14302:S 22 Dec 12:02:55.866 * MASTER <-> SLAVE sync: Finished with success
使用Redis-Desktop Manager
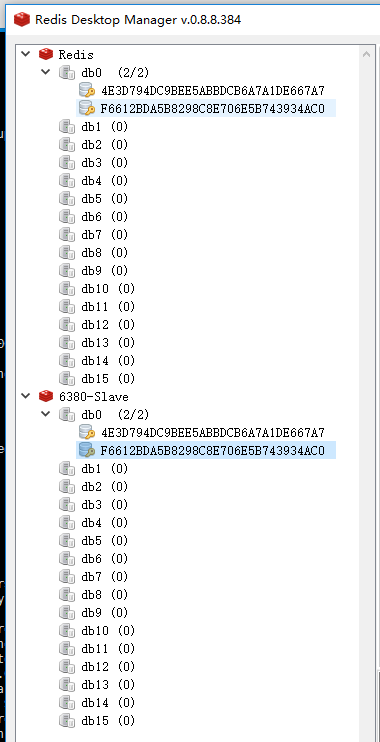
可以看到,主服务6379和从服务6380都包含session的相关信息。
文章转自:https://my.oschina.net/wangmengjun/blog/810179

 浙公网安备 33010602011771号