
Spring的定时任务
最近项目需要用到一些定时任务,于是开发之余学习并整理了一下Spring下的定时任务
主要有三种:
- java自带类Timer
- Spring集成Quartz
- Spring自带Task
下面一一介绍并简单使用:
1.java.util.Timer类
Java自带的java.util.Timer类,这个类允许你调度一个java.util.TimerTask任务。使用这种方式
可以让你的程序按照某一个频度执行,但不能在指定时间运行,一般用的较少。下面是两个例子:
①
import java.text.SimpleDateFormat;
import java.util.Date;
import java.util.Timer;
import java.util.TimerTask;

public class TeskTimer {

    public static void main(String args[]){
        SimpleDateFormat df = new SimpleDateFormat("yyyy-MM-dd HH:mm:ss");
        System.out.println(df.format(new Date())+" About to schedule task.");
        new Reminder(5);
        System.out.println(df.format(new Date())+" Task scheduled.");
    }
    public static class Reminder{
        SimpleDateFormat df = new SimpleDateFormat("yyyy-MM-dd HH:mm:ss");
        Timer timer;

        public Reminder(int sec){
            timer = new Timer();
            timer.schedule(new TimerTask(){
                public void run(){
                    System.out.println(df.format(new Date())+" Time's up!");
                    timer.cancel();
                }
            }, sec*1000);//五秒后执行一次Timber
        }
    }
}

②
import java.text.SimpleDateFormat;
import java.util.Date;
import java.util.Timer;
import java.util.TimerTask;

/**
 * Created by Administrator on 2018/12/13.
 */
public class TestTimerTask {

    public static String getCurrentTime() {
        Date date = new Date();
        SimpleDateFormat sdf = new SimpleDateFormat("yyyy-MM-dd HH:mm:ss");
        return sdf.format(date);
    }

    public static void main(String[] args) throws InterruptedException {
        System.out.println("main方法开始时间:"+getCurrentTime());
        startTimer();
    }

    public static void startTimer(){
        TimerTask task = new TimerTask() {
            @Override
            public void run() {
                System.out.println("Timer执行时间:"+getCurrentTime());
                try {
                    Thread.sleep(1000*2);
                } catch (InterruptedException e) {
                    e.printStackTrace();
                }
            }
        };
        Timer timer = new Timer();
        timer.schedule(task, 1000*5,1000*10);//延迟5秒后执行,每隔10秒重复执行一次
    }
}

2.Quartz
Quartz官网(http://www.quartz-scheduler.org/)对Quartz的解释:
什么是Quartz作业调度库?
Quartz是一个功能丰富的开源作业调度库,可以集成到任何Java应用程序中——从最小的独立应用程序到
最大的电子商务系统。Quartz可以用于创建简单或复杂的时间表,以执行数十个、数百个甚至数万个作业;将任
务定义为标准Java组件的作业,这些组件实际上可以执行您编写的任何任务。Quartz调度器包含许多企业级特性,
例如对JTA事务和集群的支持。
Quartz是免费可用的,在Apache 2.0许可下获得许可。
Quartz有两种使用方法:
① 继承特定的基类 QuartzJobBean
1> 导入相应的包或引入pom :
    <dependency>
           <groupId>org.quartz-scheduler</groupId>
           <artifactId>quartz</artifactId>
           <version>2.2.1</version>
    </dependency>
2> 定义任务类
public class TaskList extends QuartzJobBean {

    private int timeout;
    private static int i = 0;
    //调度工厂实例化后,经过timeout时间开始执行调度
    public void setTimeout(int timeout) {
        this.timeout = timeout;
    }
    /**
     * 要调度的具体任务
     */
    @Override
    protected void executeInternal(JobExecutionContext context)
            throws JobExecutionException {
        System.out.println("Quzrtz任务执行中.....");
    }

}
3> Spring配置文件中配置作业类JobDetailFactoryBean
<bean name="job1" class="org.springframework.scheduling.quartz.JobDetailFactoryBean">
     <property name="jobClass" value="com.sinosoft.access.webservice.TaskList" /><!--jobClass及任务类-->
     <property name="jobDataAsMap"><!--任务类中注入的属性值-->
         <map>
             <entry key="timeout" value="0" />
         </map>
     </property>
</bean>
4> 配置作业调度的触发方式(触发器)
Quartz的作业触发器有两种,分别是
SimpleTriggerFactoryBean 和 ConTriggerFactoryBean
SimpleTriggerFactoryBean,只支持按照一定频度调用任务,如每隔30分钟运行一次。
配置方式如下:
<bean id="simpleTrigger" class="org.springframework.scheduling.quartz.SimpleTriggerFactoryBean">
        <property name="jobDetail" ref="job1" />
        <property name="startDelay" value="0" /><!-- 调度工厂实例化后,经过0秒开始执行调度 -->
        <property name="repeatInterval" value="2000" /><!-- 每2秒调度一次 -->
</bean>
ConTriggerFactoryBean ,支持指定时间运行一次,如每天12:00运行一次。
配置方式如下:
<bean id="cronTrigger" class="org.springframework.scheduling.quartz.CronTriggerFactoryBean">
        <property name="jobDetail" ref="job1" />
        <property name="cronExpression" value="0 20 18 * * ?" /><!--每天18:20运行一次 -->
</bean>
5> 配置调度工厂
<bean class="org.springframework.scheduling.quartz.SchedulerFactoryBean">
        <property name="triggers">
            <list>
                <!--<ref bean="simpleTrigger" />-->  <!--调用SimpleTriggerFactoryBean触发器-->
                <ref bean="cronTrigger" /><!--调用CronTriggerFactoryBean触发器-->
            </list>
        </property>
</bean>
6>分别调用两种触发器,启动tomcat分别如下:


②不继承基类
1>编写任务类
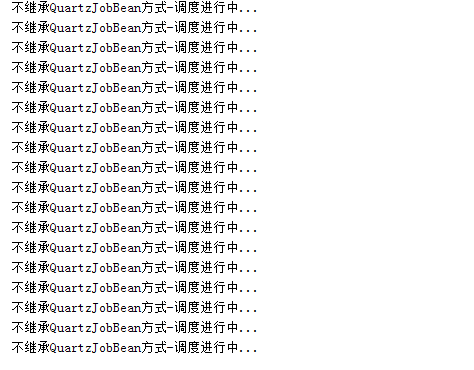
public class TaskList {
    public void doJob2() {
        System.out.println("不继承QuartzJobBean方式-调度进行中...");
    }
}
2>配置作业类
<bean id="job2" class="org.springframework.scheduling.quartz.MethodInvokingJobDetailFactoryBean">
        <property name="targetObject">
            <bean class="com.sinosoft.access.webservice.TaskList" /><!--指定任务类-->
        </property>
        <property name="targetMethod" value="doJob2" /><!--指定方法-->
        <property name="concurrent" value="false" /><!-- 作业不并发调度 -->
</bean>
3>配置触发器(与继承QuartzJobBean的方法一样),如下
   <bean id="simpleTrigger" class="org.springframework.scheduling.quartz.SimpleTriggerFactoryBean">
        <property name="jobDetail" ref="job2" />
        <property name="startDelay" value="0" /><!-- 调度工厂实例化后,经过0秒开始执行调度 -->
        <property name="repeatInterval" value="2000" /><!-- 每2秒调度一次 -->
    </bean>

    <bean id="cronTrigger" class="org.springframework.scheduling.quartz.CronTriggerFactoryBean">
        <property name="jobDetail" ref="job2" />
        <property name="cronExpression" value="0 25 9 * * ?" /><!--每天9:25运行一次 -->
    </bean>
4>配置调度工厂(与继承QuartzJobBean的方法一样),如下
  <bean class="org.springframework.scheduling.quartz.SchedulerFactoryBean">
        <property name="triggers">
            <list>
                <ref bean="simpleTrigger" />
                <!--<ref bean="cronTrigger" />-->
            </list>
        </property>
    </bean>
5>分别调用两种触发器,启动tomcat分别如下:

3.Spring自带的task
Spring3.0以后自带的task,可以将它看成一个轻量级的Quartz,而且使用起来比Quartz简单许多。有两种方法:
① 使用注解形式
在Spring配置文件(我的叫application-context.xml)中,添加如下标记红色的配置
<?xml version="1.0" encoding="UTF-8"?>
<beans xmlns="http://www.springframework.org/schema/beans"
    xmlns:xsi="http://www.w3.org/2001/XMLSchema-instance" xmlns:aop="http://www.springframework.org/schema/aop"
    xmlns:jdbc="http://www.springframework.org/schema/jdbc" xmlns:tx="http://www.springframework.org/schema/tx"
    xmlns:context="http://www.springframework.org/schema/context"
    xmlns:cache="http://www.springframework.org/schema/cache"
       xmlns:task="http://www.springframework.org/schema/task"
       xsi:schemaLocation="
          http://www.springframework.org/schema/beans
          http://www.springframework.org/schema/beans/spring-beans-3.1.xsd
          http://www.springframework.org/schema/tx
          http://www.springframework.org/schema/tx/spring-tx-3.1.xsd
          http://www.springframework.org/schema/context
          http://www.springframework.org/schema/context/spring-context-3.1.xsd
          http://www.springframework.org/schema/jdbc
          http://www.springframework.org/schema/jdbc/spring-jdbc-3.1.xsd
          http://www.springframework.org/schema/aop
          http://www.springframework.org/schema/aop/spring-aop-3.1.xsd
          http://www.springframework.org/schema/cache
          http://www.springframework.org/schema/cache/spring-cache-3.1.xsd
          http://www.springframework.org/schema/task
          http://www.springframework.org/schema/task/spring-task-3.1.xsd"
    >
    <!--启动定时任务-->
    <task:annotation-driven/>
    <context:annotation-config/>
        <bean class="org.springframework.beans.factory.annotation.AutowiredAnnotationBeanPostProcessor"/>
    <context:component-scan base-package="com.sinosoft"/><!--自动扫描包下的定时任务-->


</beans>
配置所需执行的任务类:
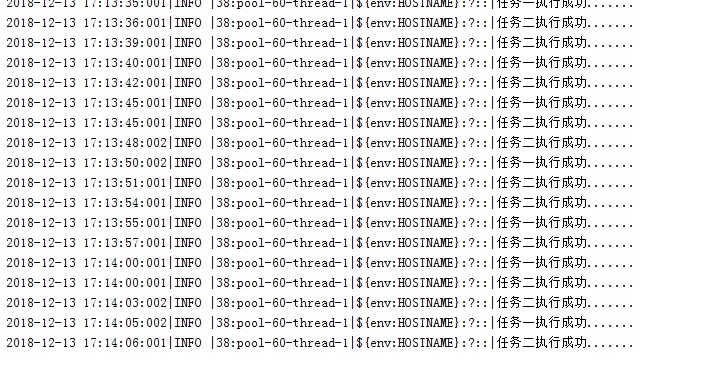
@Component
public class TaskList {

        private static final Logger log = Logger.getLogger(TaskList.class);
        @Scheduled(cron = "0/5 * * * * ? ")//每5秒执行一次
        public  void  firstTask() throws Exception {
            log.info("任务一执行成功.......");
        }

        @Scheduled(cron="0/3 * * * * ? ")//每3秒执行一次
        public  void  secondTask() throws Exception {
            log.info("任务二执行成功.......");
        }


}
启动tomcat项目,会自动执行定时任务,结果如下:
②使用配置文件方式
在Spring配置文件中,添加如下标记红色配置:
<?xml version="1.0" encoding="UTF-8"?> <beans xmlns="http://www.springframework.org/schema/beans" xmlns:xsi="http://www.w3.org/2001/XMLSchema-instance" xmlns:aop="http://www.springframework.org/schema/aop" xmlns:jdbc="http://www.springframework.org/schema/jdbc" xmlns:tx="http://www.springframework.org/schema/tx" xmlns:context="http://www.springframework.org/schema/context" xmlns:cache="http://www.springframework.org/schema/cache" xmlns:task="http://www.springframework.org/schema/task" xsi:schemaLocation=" http://www.springframework.org/schema/beans http://www.springframework.org/schema/beans/spring-beans-3.1.xsd http://www.springframework.org/schema/tx http://www.springframework.org/schema/tx/spring-tx-3.1.xsd http://www.springframework.org/schema/context http://www.springframework.org/schema/context/spring-context-3.1.xsd http://www.springframework.org/schema/jdbc http://www.springframework.org/schema/jdbc/spring-jdbc-3.1.xsd http://www.springframework.org/schema/aop http://www.springframework.org/schema/aop/spring-aop-3.1.xsd http://www.springframework.org/schema/cache http://www.springframework.org/schema/cache/spring-cache-3.1.xsd http://www.springframework.org/schema/task http://www.springframework.org/schema/task/spring-task-3.1.xsd" >
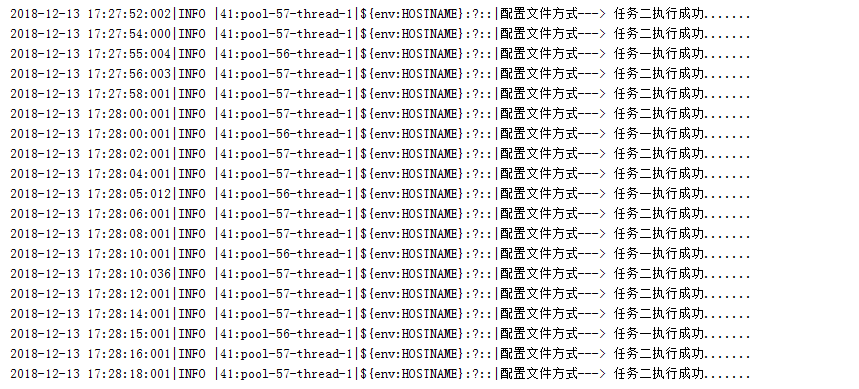
<context:component-scan base-package=" com.sinosoft.access.webservice " /> <task:scheduled-tasks> <task:scheduled ref="taskList" method="firstTask" cron = "0/5 * * * * ? "/><!--ref指向任务类(默认首字母小写即可),method指向方法--> </task:scheduled-tasks> <task:scheduled-tasks> <task:scheduled ref="taskList" method="secondTask" cron = "0/2 * * * * ? "/> </task:scheduled-tasks> </beans>
任务类:
@Service
public class TaskList {

        private static final Logger log = Logger.getLogger(TaskList.class);

        public  void  firstTask() throws Exception {
            log.info("配置文件方式---> 任务一执行成功.......");
        }

        public  void  secondTask() throws Exception {
            log.info("配置文件方式---> 任务二执行成功.......");
        }


}
启动执行结果:
总结对比:spring自带Task 较于Quartz来说,比较简单易用。
