JumpServer安装及应用
1|0jumpserver安装
1|1安装所需软件包
1|2启动mariadb服务设置开机自启动
1|3创建jumpserver数据库
1|4上传redis和jumpserver软件包并解压
1|5编译安装redis
1|6添加一块1000G硬盘
1|7编辑redis.conf文件
1|8启动redis
1|9查看防火墙
1|10配置jumpserver
1|11安装jumpserver
1|12启动jumpserver
1|13web浏览
用户名:admin
密码:admin
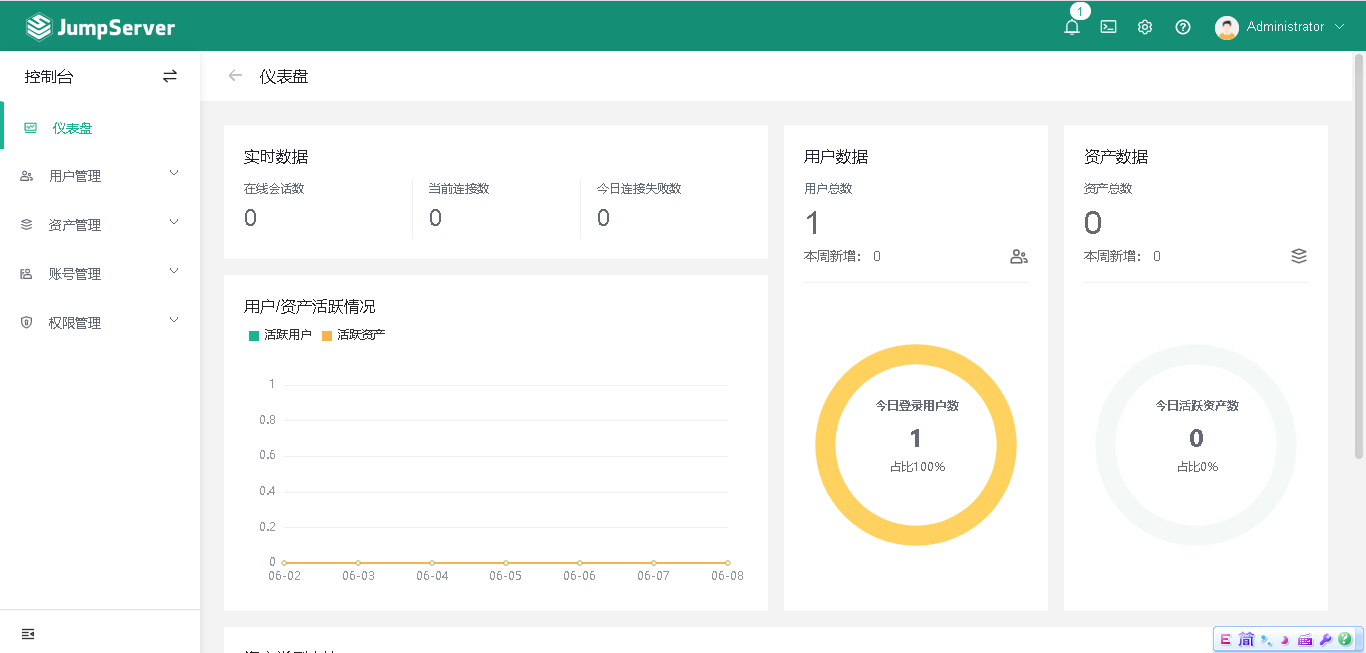
2|0jumpserver应用
2|1停止jumpserver,启动redis,再重新启动
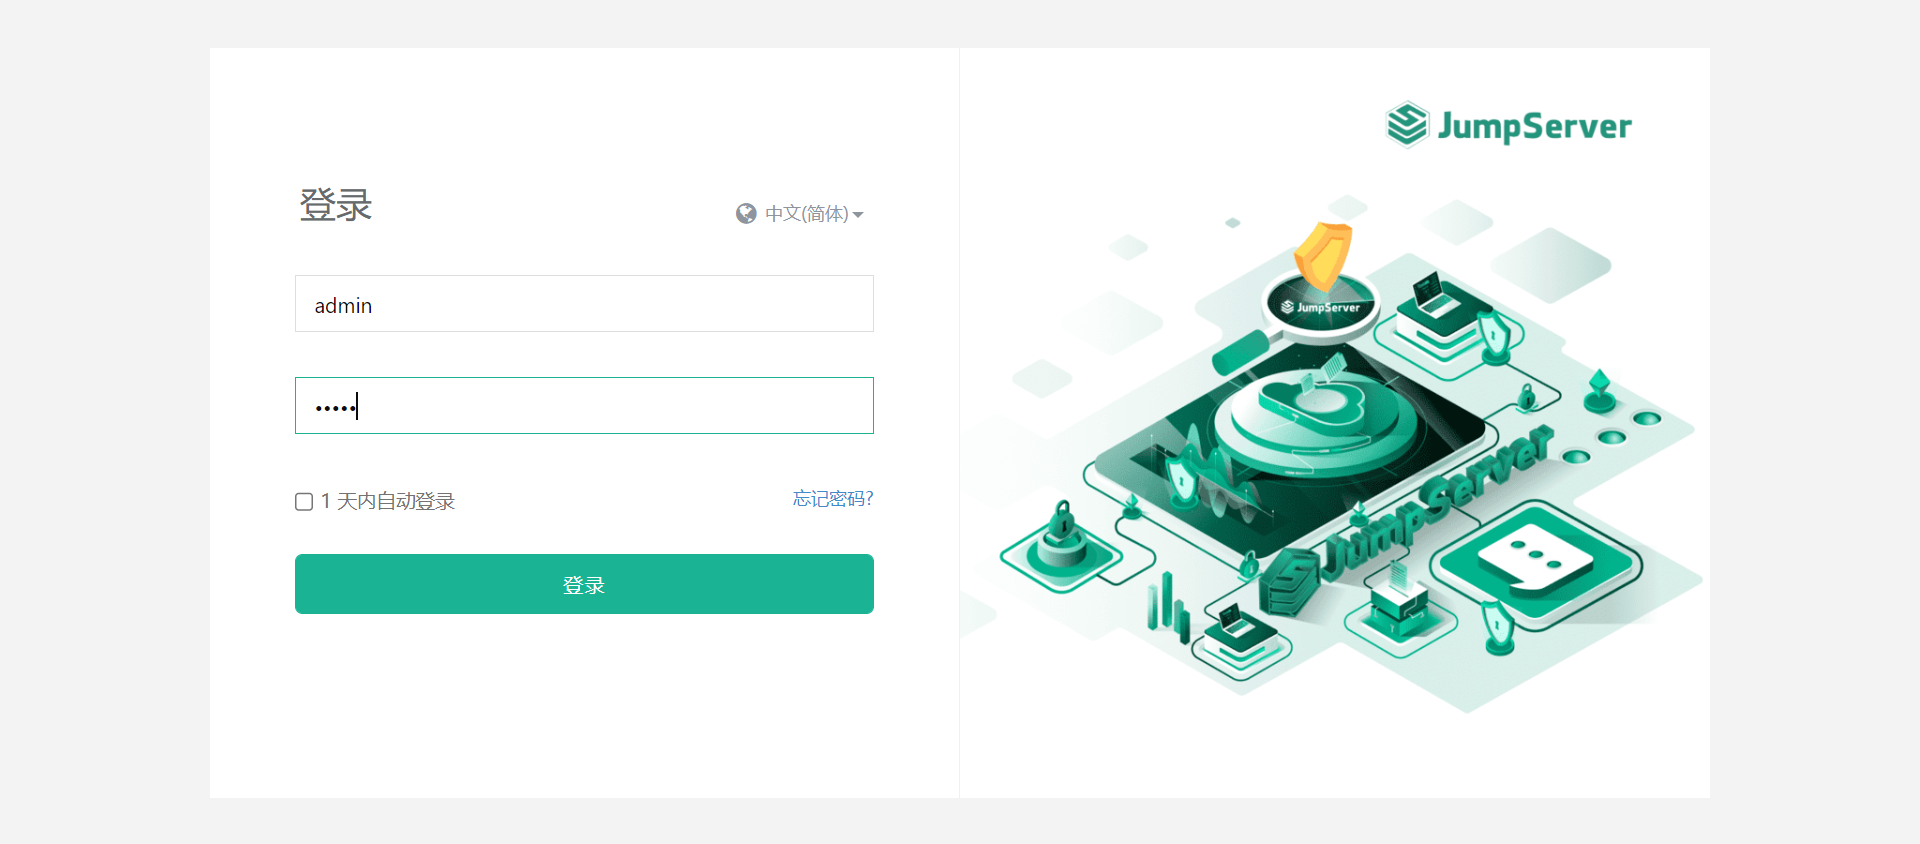
2|2登录,设置密码:111111
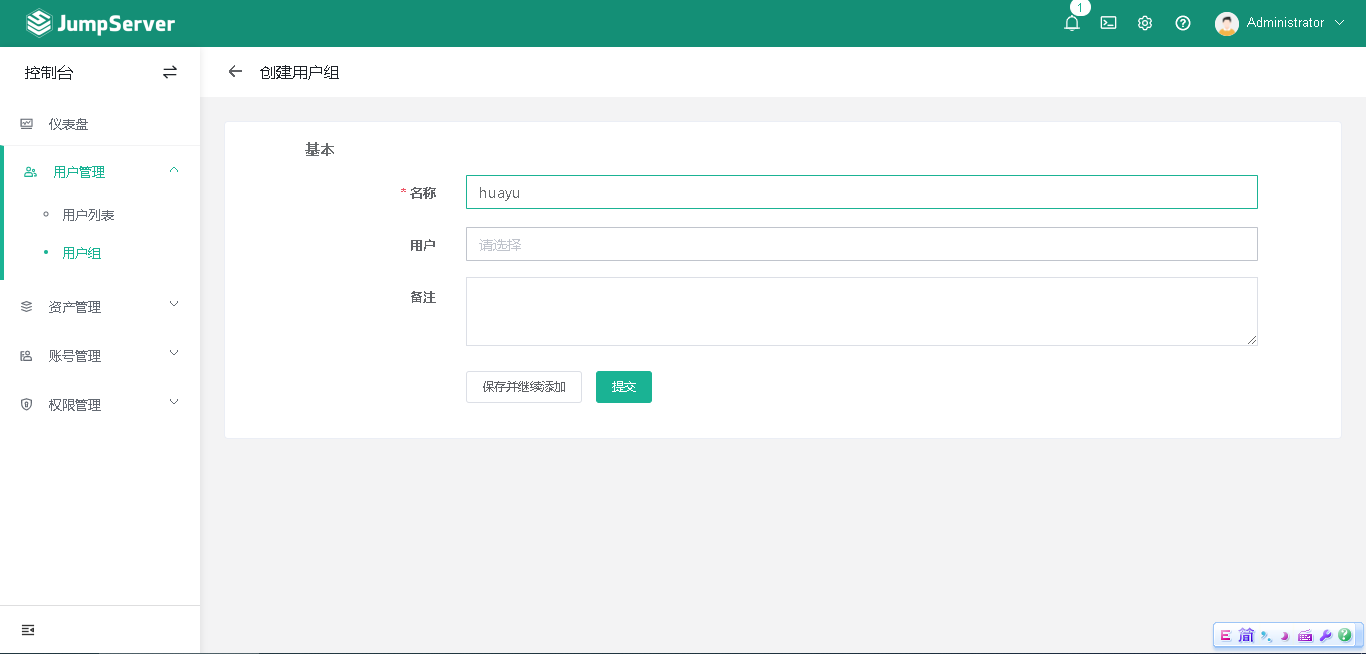
2|3创建用户组
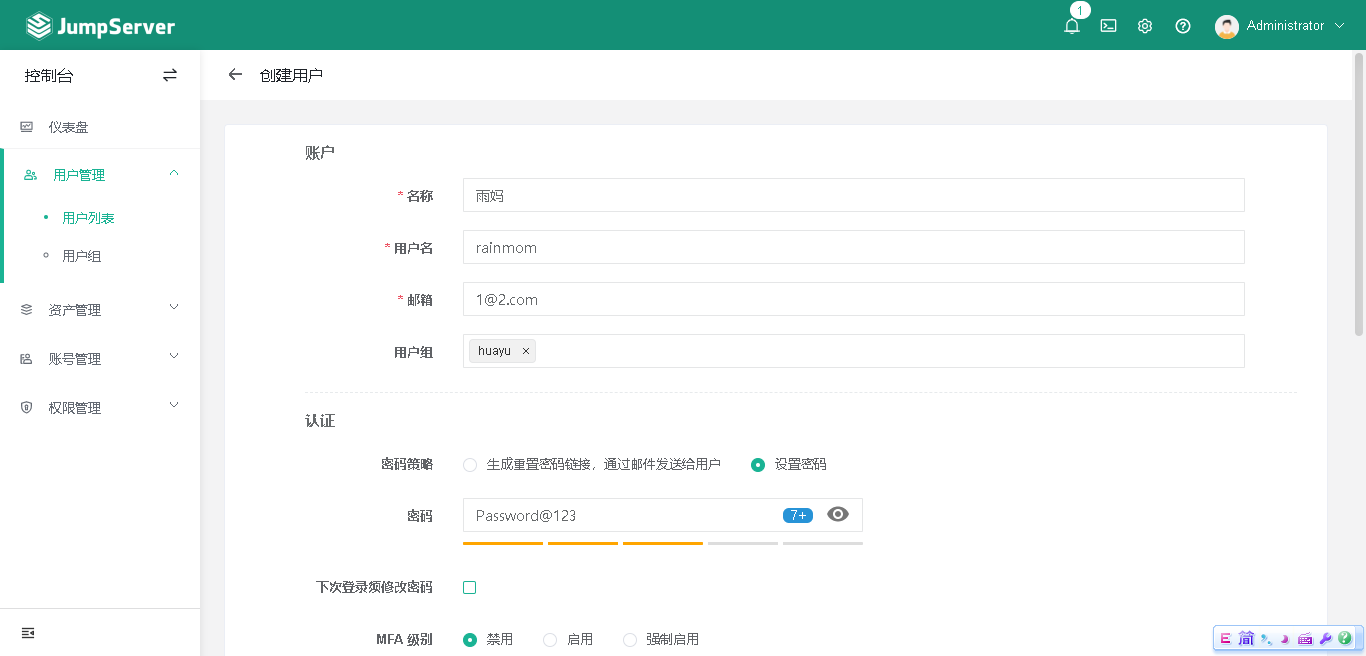
2|4创建用户
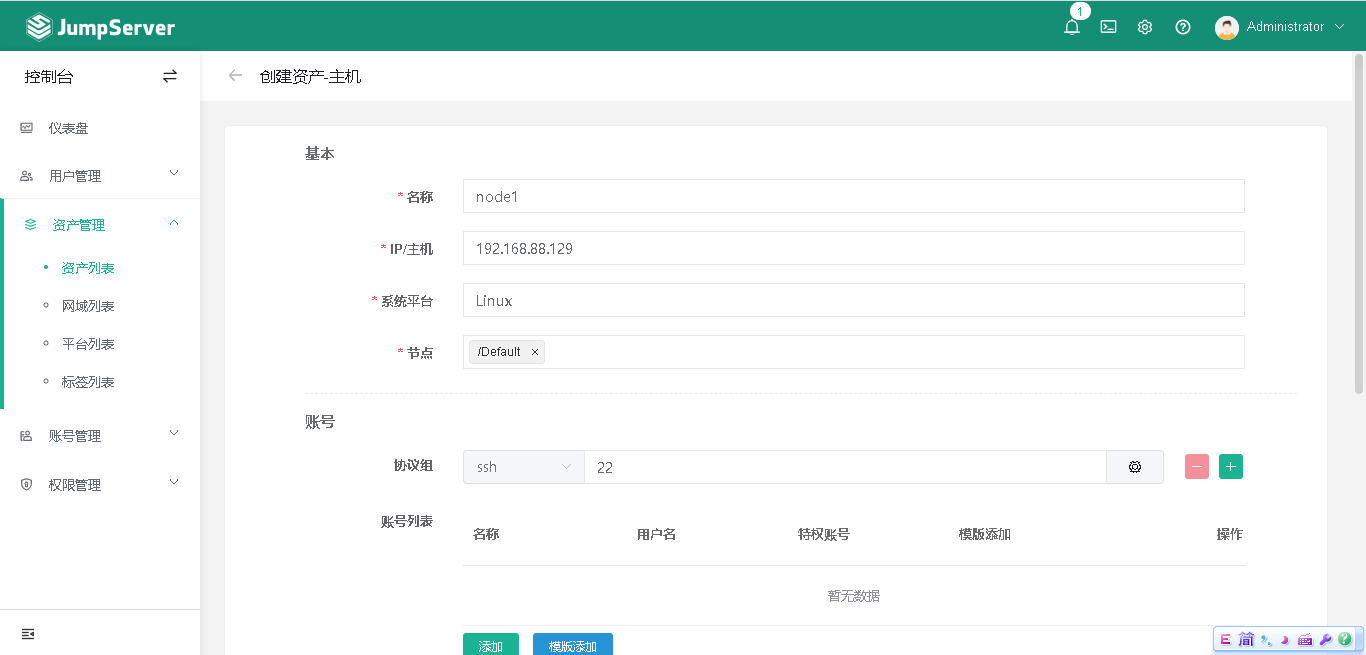
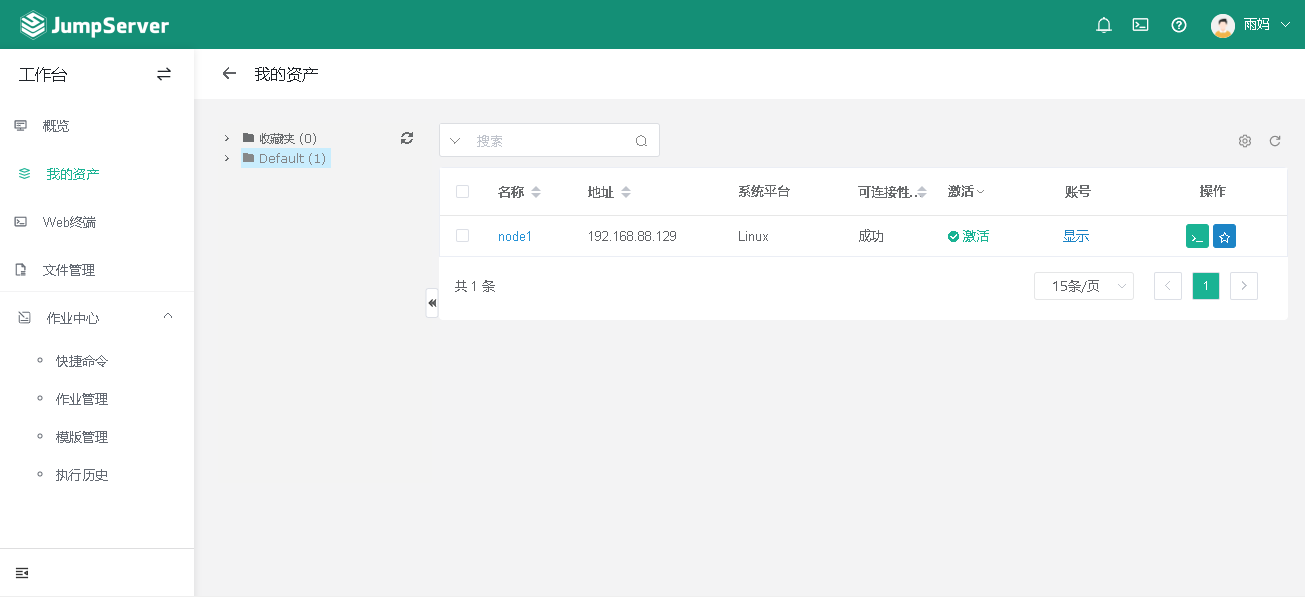
2|5另启一台虚拟机作为被管理的虚拟,创建资产
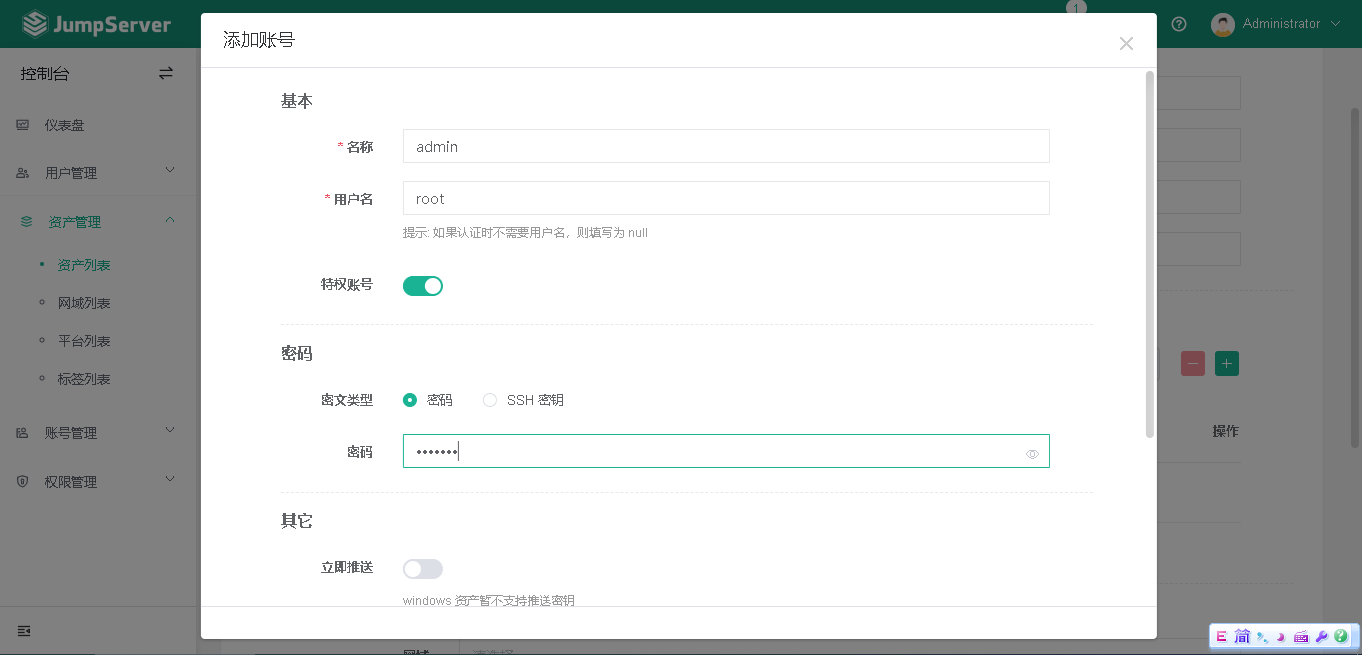
2|6添加账号
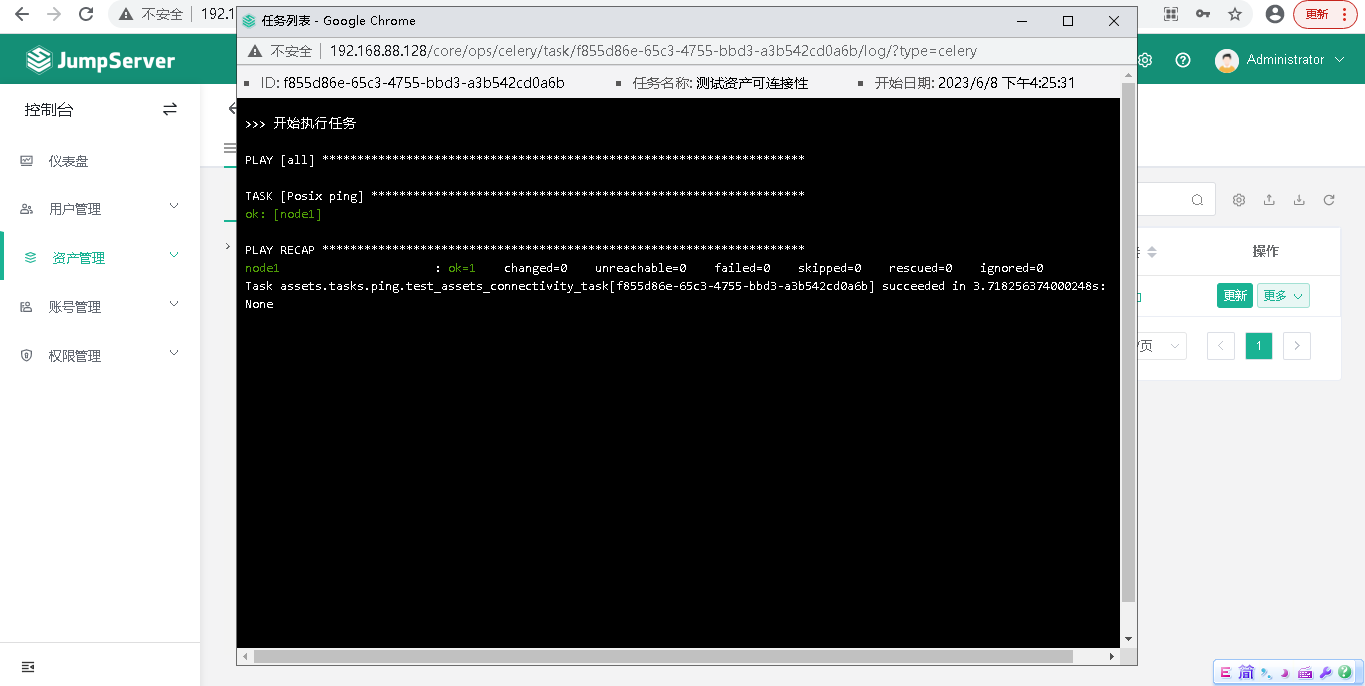
2|7测试
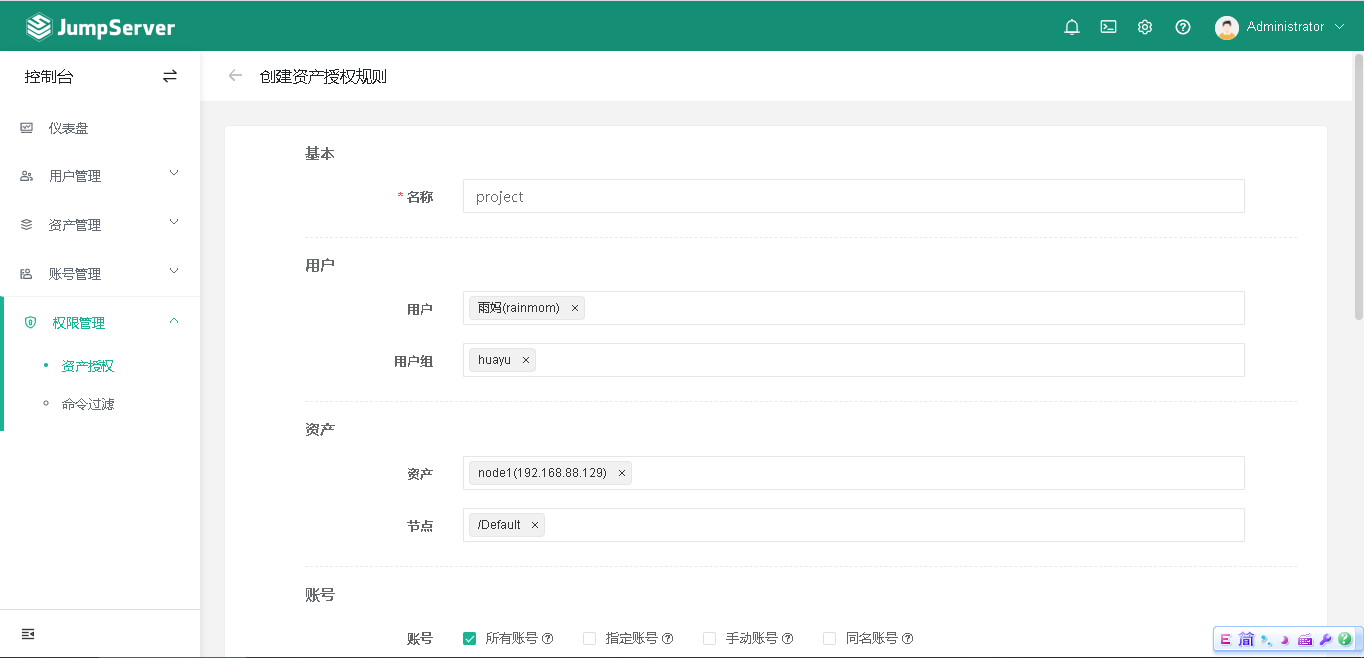
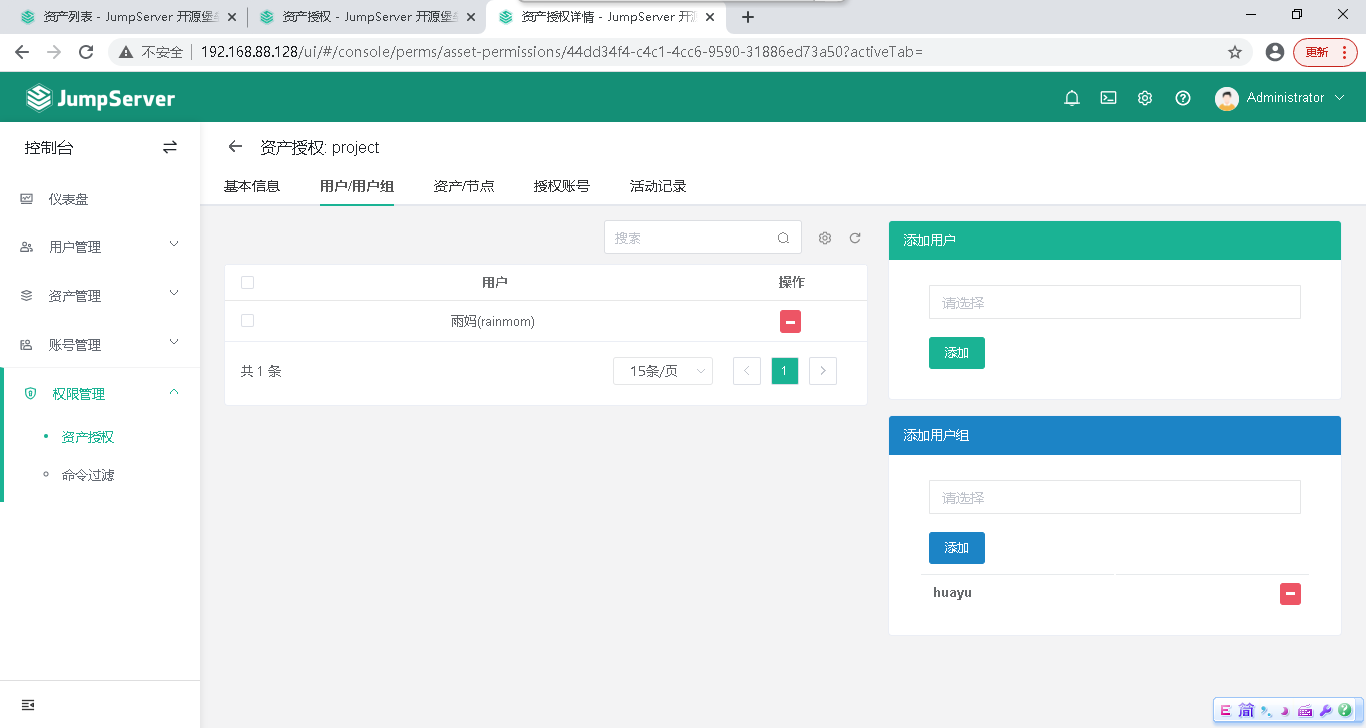
2|8资产授权
2|9登录新建用户(密码:Password@123),查看
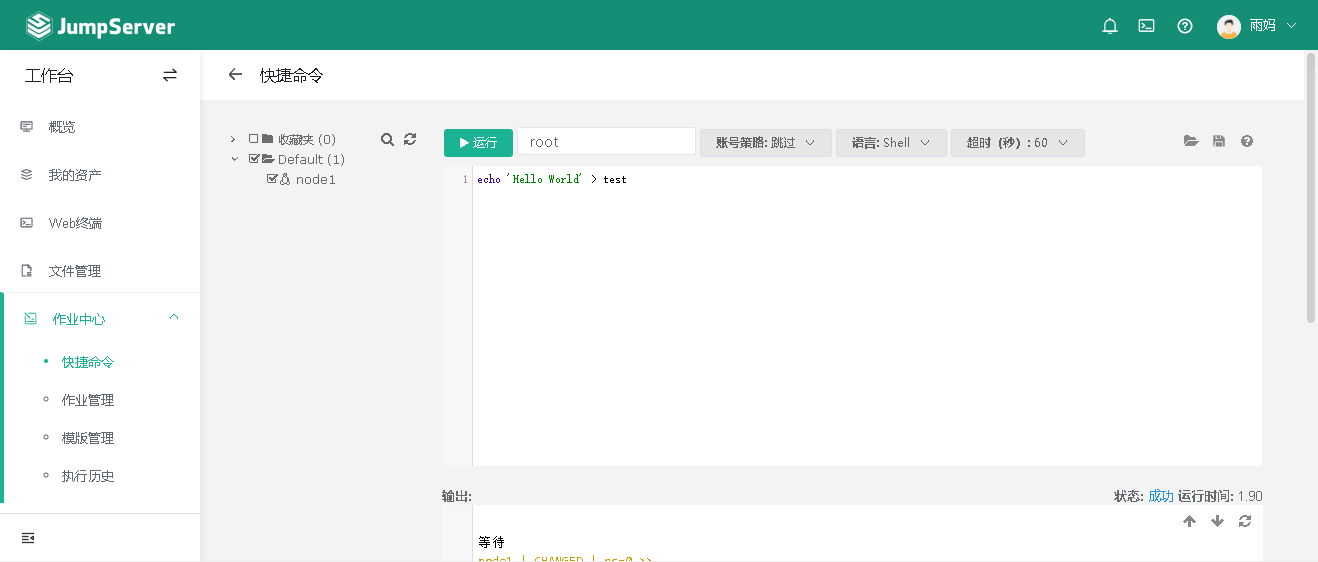
2|10测试快捷命令
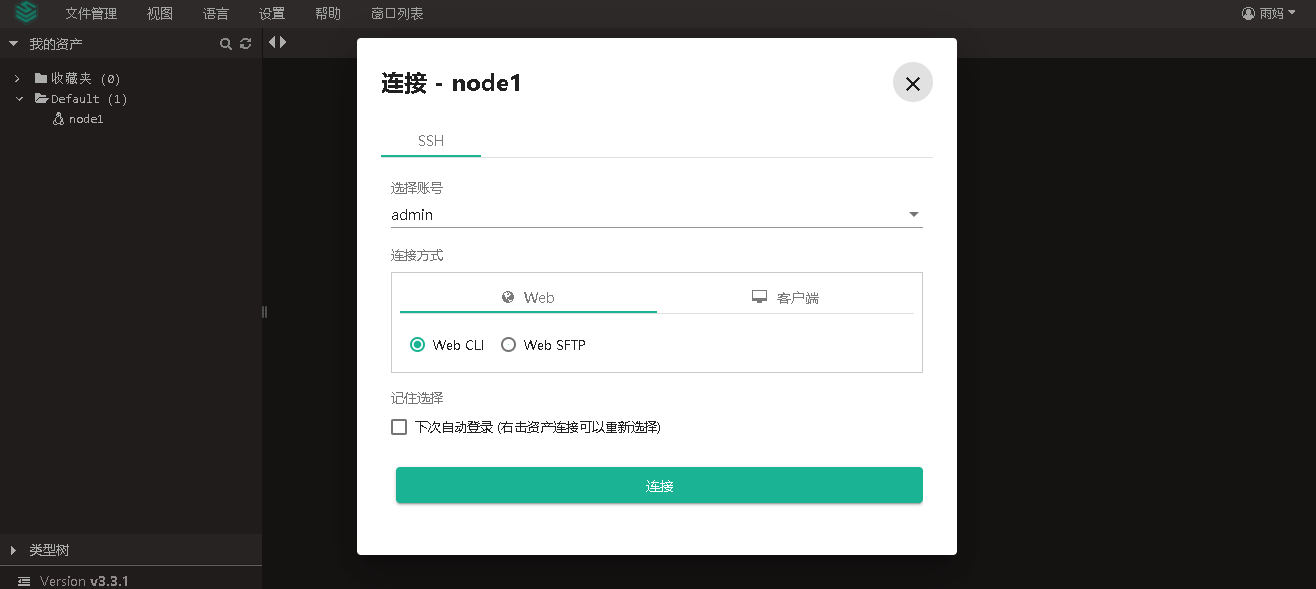
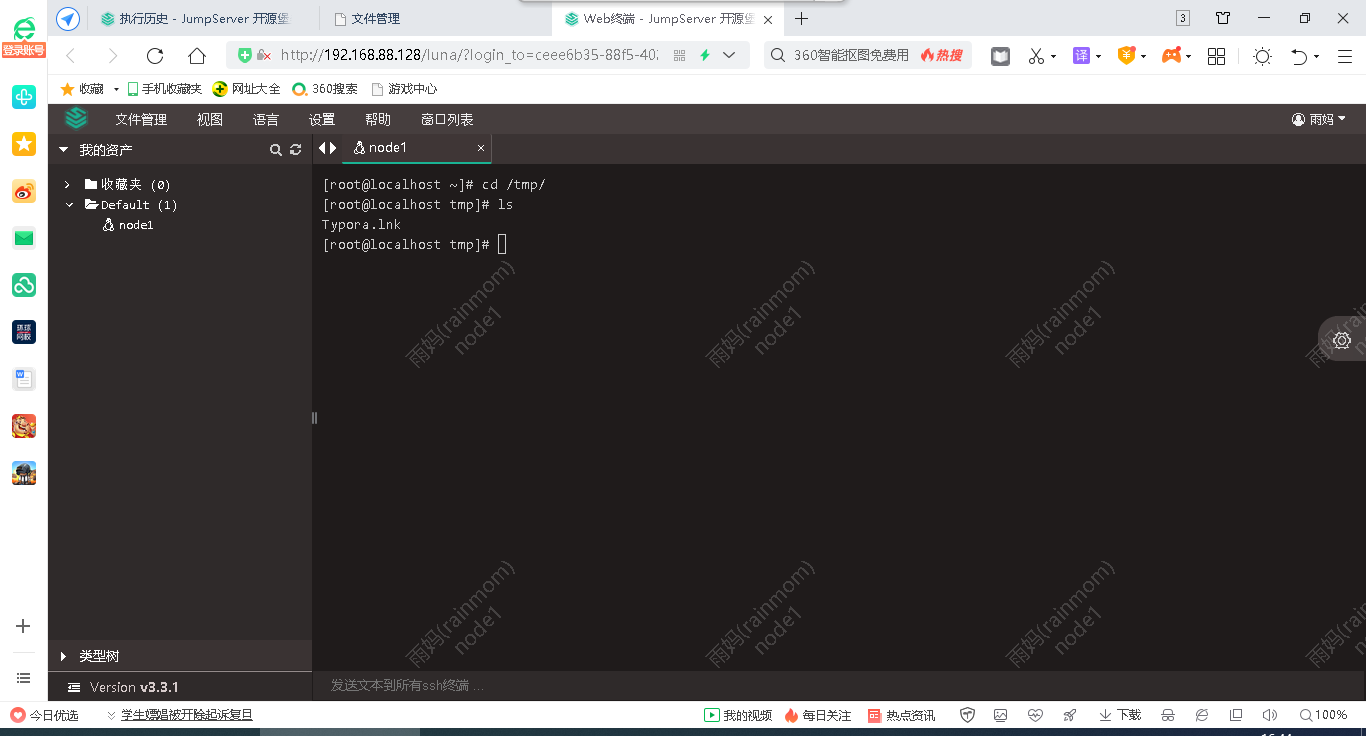
2|11连接web终端
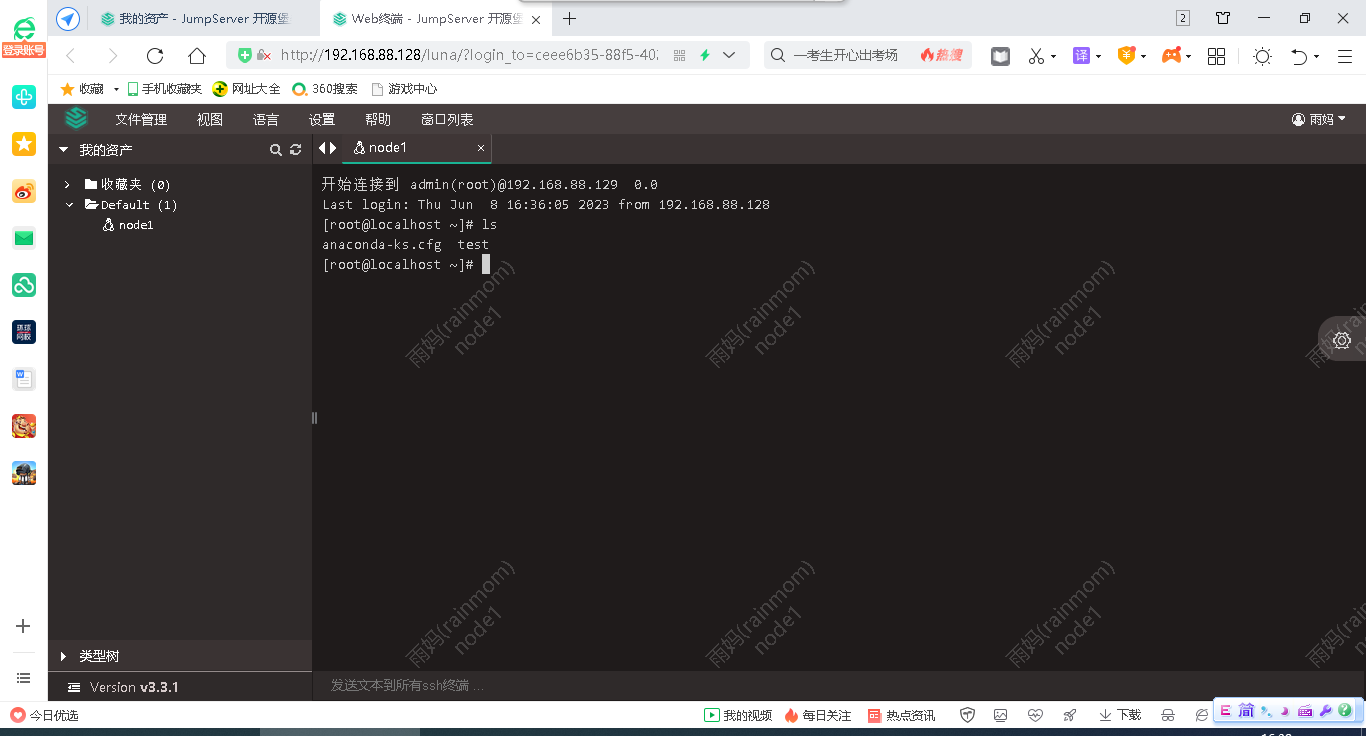
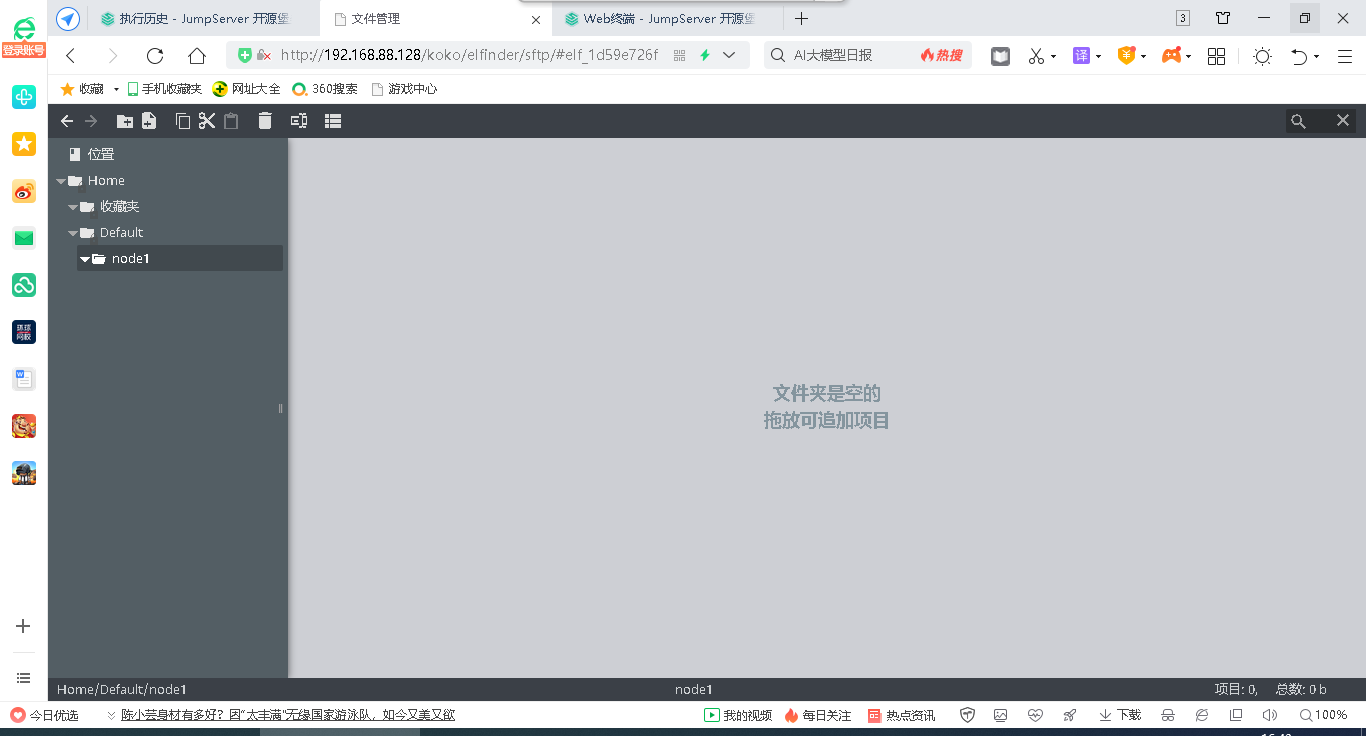
2|12可上传文件
2|13Xshell连接(用户名:admin,格式:ssh admin@192.168.88.128:2222,密码:111111)
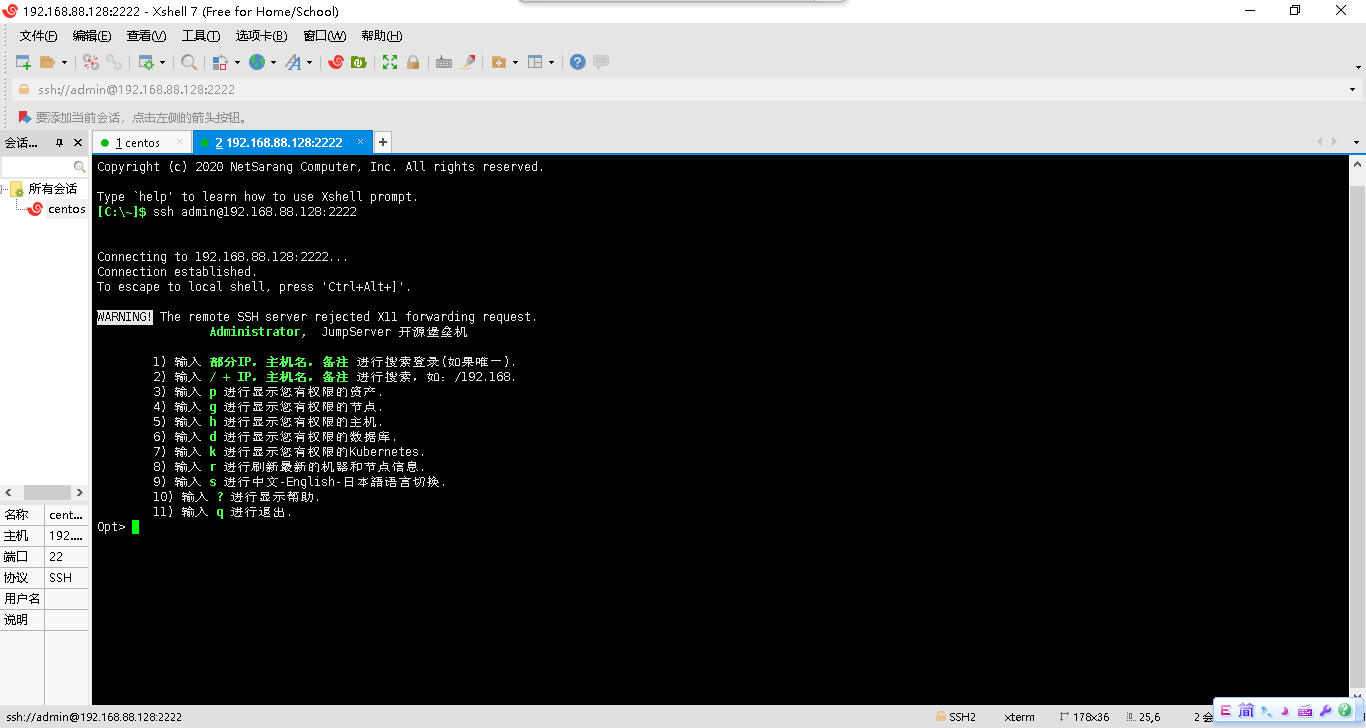
2|14查看资产(未授权的原因,看不到资产)
WARNING! The remote SSH server rejected X11 forwarding request.
		Administrator,  JumpServer 开源堡垒机

	1) 输入 部分IP,主机名,备注 进行搜索登录(如果唯一).
	2) 输入 / + IP,主机名,备注 进行搜索,如:/192.168.
	3) 输入 p 进行显示您有权限的资产.
	4) 输入 g 进行显示您有权限的节点.
	5) 输入 h 进行显示您有权限的主机.
	6) 输入 d 进行显示您有权限的数据库.
	7) 输入 k 进行显示您有权限的Kubernetes.
	8) 输入 r 进行刷新最新的机器和节点信息.
	9) 输入 s 进行中文-English-日本?语言切换.
	10) 输入 ? 进行显示帮助.
	11) 输入 q 进行退出.
Opt> p
没有资产
搜索:
[Host]>
2|15切换用户登录(用户名:rainmom,格式:ssh rainmom@192.168.88.128:2222,密码:Password@123)
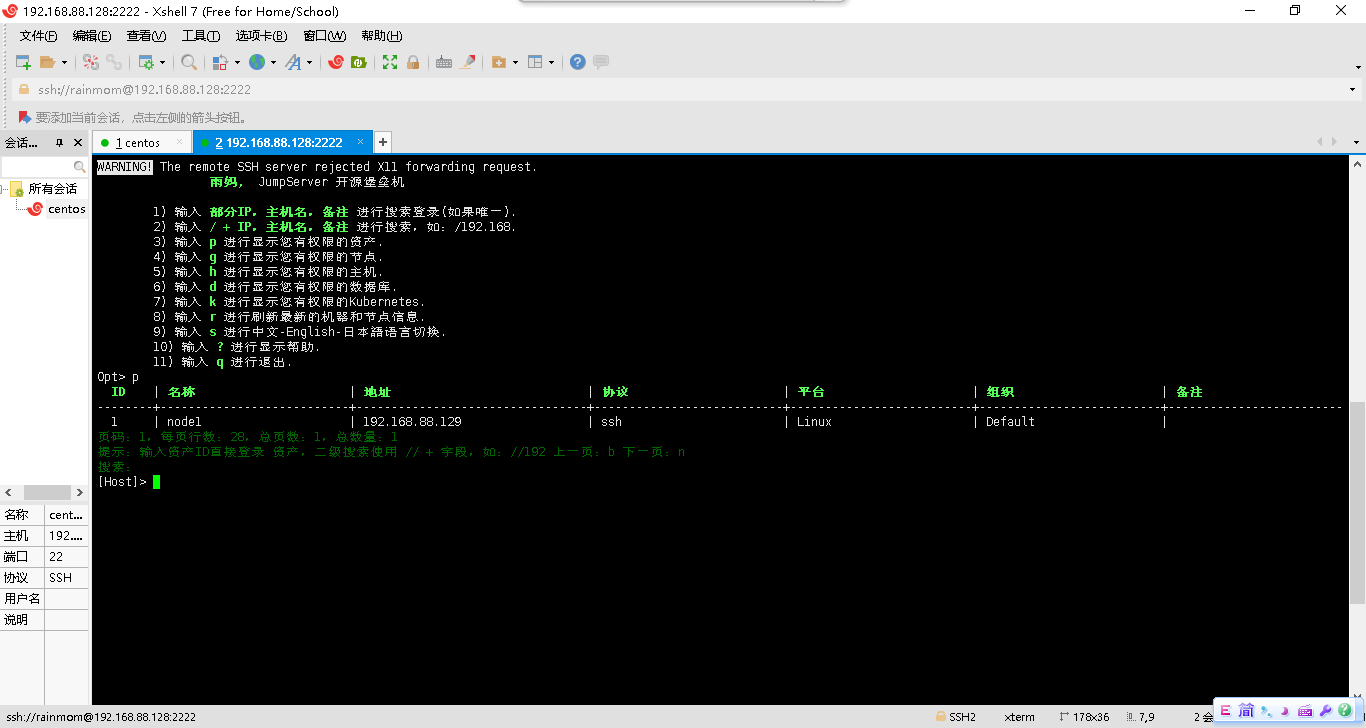
2|16在当前页面上输入ID号,即可登录该虚拟机
2|17可添加授权
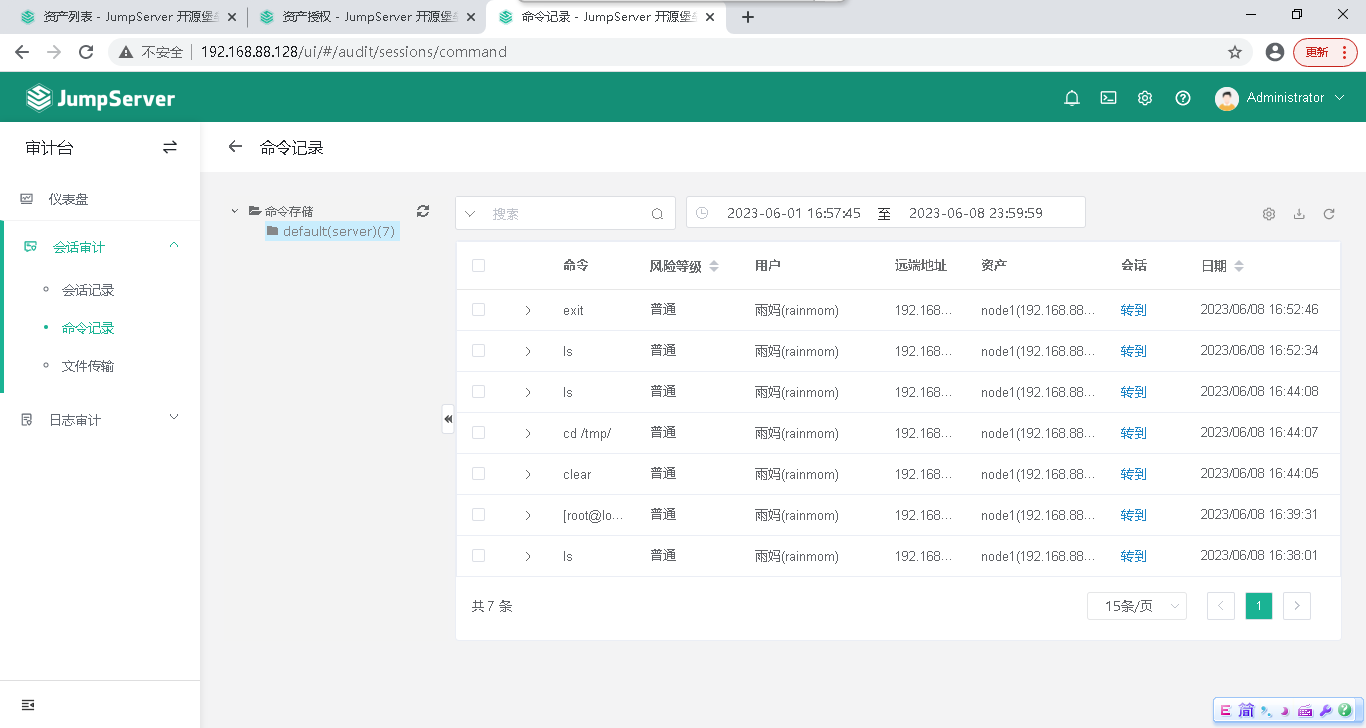
2|18切换审计台,可查看记录
__EOF__

本文作者:SkyRainmom
本文链接:https://www.cnblogs.com/skyrainmom/p/17473477.html
关于博主:评论和私信会在第一时间回复。或者直接私信我。
版权声明:本博客所有文章除特别声明外,均采用 BY-NC-SA 许可协议。转载请注明出处!
声援博主:如果您觉得文章对您有帮助,可以点击文章右下角【推荐】一下。您的鼓励是博主的最大动力!
本文链接:https://www.cnblogs.com/skyrainmom/p/17473477.html
关于博主:评论和私信会在第一时间回复。或者直接私信我。
版权声明:本博客所有文章除特别声明外,均采用 BY-NC-SA 许可协议。转载请注明出处!
声援博主:如果您觉得文章对您有帮助,可以点击文章右下角【推荐】一下。您的鼓励是博主的最大动力!


【推荐】国内首个AI IDE,深度理解中文开发场景,立即下载体验Trae
【推荐】编程新体验,更懂你的AI,立即体验豆包MarsCode编程助手
【推荐】抖音旗下AI助手豆包,你的智能百科全书,全免费不限次数
【推荐】轻量又高性能的 SSH 工具 IShell:AI 加持,快人一步
· 无需6万激活码!GitHub神秘组织3小时极速复刻Manus,手把手教你使用OpenManus搭建本
· Manus爆火,是硬核还是营销?
· 终于写完轮子一部分:tcp代理 了,记录一下
· 别再用vector<bool>了!Google高级工程师:这可能是STL最大的设计失误
· 单元测试从入门到精通