学生管理之Bootstrap初体验
Bootstrap,来自 Twitter,是目前比较受欢迎的前端框架。Bootstrap 是基于 HTML、CSS、JAVASCRIPT 的,它简洁灵活,使得 Web 开发更加快捷。
Bootstrap使用起来非常方便,官方文档比较全面。我们以把学生管理系统中的【修改】使用模态框实现。过程如下:
一、导入bootstrap文件
导入bootstrap.css文件:
<link rel="stylesheet" href="/static/bootstrap.min.css">
导入bootstrap.js文件:
<script type="text/javascript" src="/static/jquery-1.12.4.js"></script>
<script type="text/javascript" src="/static/bootstrap.min.js"></script>
二、使用模态框
1、添加修改按钮(button)
 <table border="1">
            <thead>
                <tr>
                    <th>ID</th>
                    <th>标题</th>
                    <th>操作</th>
                    <th>修改</th>
                </tr>
            </thead>
            <tbody>
                {% for item in cls_list %}
                    <tr>
                        <td alex="id">{{ item.id }}</td>
                        <td alex="caption">{{ item.caption }}</td>
                        <td>
                            <a class="td-edit">编辑</a>| <a target="_blank" href="/edit_classes.html?nid={{ item.id }}">跳转编辑</a> | <a class="td-delete" href="/delete_classes.html?nid={{ item.id }}" onclick="return confirm('确定删除吗?');">删除</a>
                        </td>
                        <td>
     <button type="button" class="btn btn-xs btn-primary" data-toggle="modal" data-target="#update-classes" data-caption="{{ item.caption }}" data-classid="{{item.id}}">修改</button>
                        </td>
                    </tr>
                {% endfor %}
            </tbody>
        </table>
注意:data-target指定目标模态框,模态框的id必须设置为它。按钮里面的数据通过data-item方式传递。
2、添加模态框
<div class="modal fade" id="update-classes" tabindex="-1" role="dialog" aria-labelledby="exampleModalLabel">
     <div class="modal-dialog" role="document">
      <div class="modal-content">
             <div class="modal-header">
                <button type="button" class="close" data-dismiss="modal" aria-label="Close"><span aria-hidden="true">×</span></button>
                <h4 class="modal-title" id="exampleModalLabel">修改信息</h4>
            </div>
         <div class="modal-body">
          <form>
              <div class="form-group">

                <input type="hidden" class="form-control" id="class-id" readonly="readonly">
              </div>

              <div class="form-group">
                <label for="caption" class="control-label">班级名</label>
                <input type="text" class="form-control" id="caption">
              </div>
          </form>
        </div>
         <div class="modal-footer">
            <button type="button" class="btn btn-default" data-dismiss="modal">关闭</button>
            <button type="button" class="btn btn-primary" id="password-commit">更新</button>
        </div>
     </div>
    </div>
</div>
注意:设定modal的id为update-classes,且设定class-id和caption,以便后续提取和回显数据。
三、使用ajax修改信息
<script>
jQuery(document).ready(function() {
jQuery('#update-classes').on('show.bs.modal', function (event) {
//show.bs.modal调用之后立即触发该事件。如果是通过点击某个作为触发器的元素,则此元素可以通过事件的 relatedTarget 属性进行访问。
var button = jQuery(event.relatedTarget); //触发button
var caption = button.data('caption'); //通过button获取班级名
var classid = button.data('classid'); //通过button获取班级ID
console.log(caption)
jQuery('#class-id').val(classid); //设置id=classid的值为从button获取的class-id
jQuery('#caption').val(caption); //设置id=caption值为从button获取的caption
});
jQuery('#password-commit').on('click', function(){
//id为password-commit的控件触发后,执行操作
var params = {};
params['classid'] = jQuery('#class-id').val(); //获取id=password-userid的值
params['caption'] = jQuery('#caption').val(); //获取id=password-manager-password的值
console.log(params); //控制台显示
//通过ajax更新用户密码
jQuery.post('/update_classes.html',
params,
function(data) {
console.log(data)
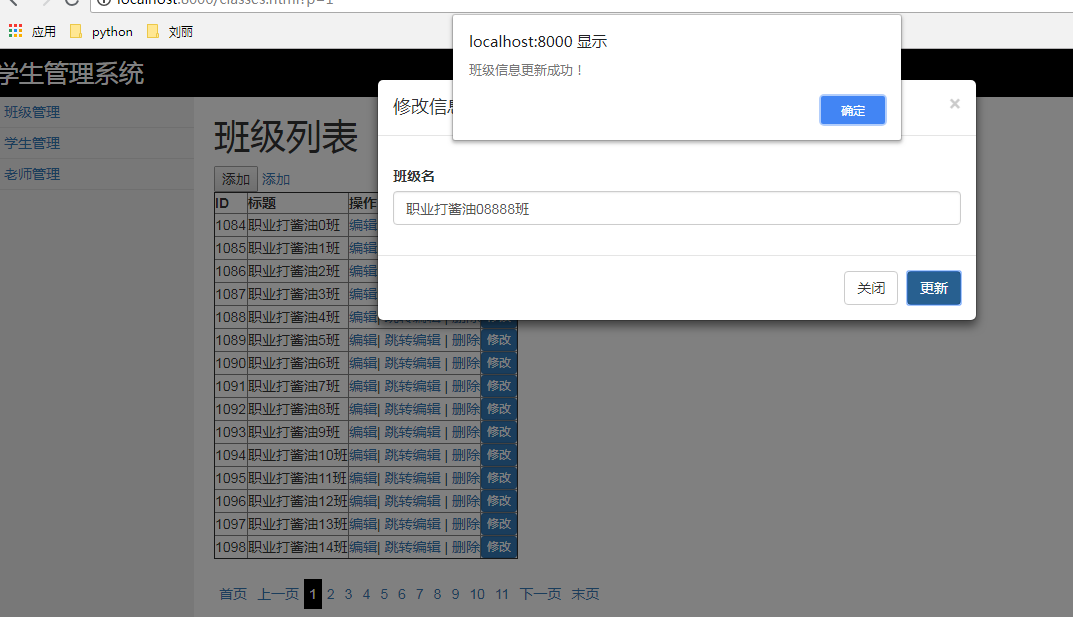
if(data['status']){
alert('班级信息更新成功!');
jQuery('#update-classes').modal('hide');
//window.location.replace('/update_classes.html');
window.location.reload();
} else {
alert(data['error']);
}
},
'json'
);
});
});
</script>
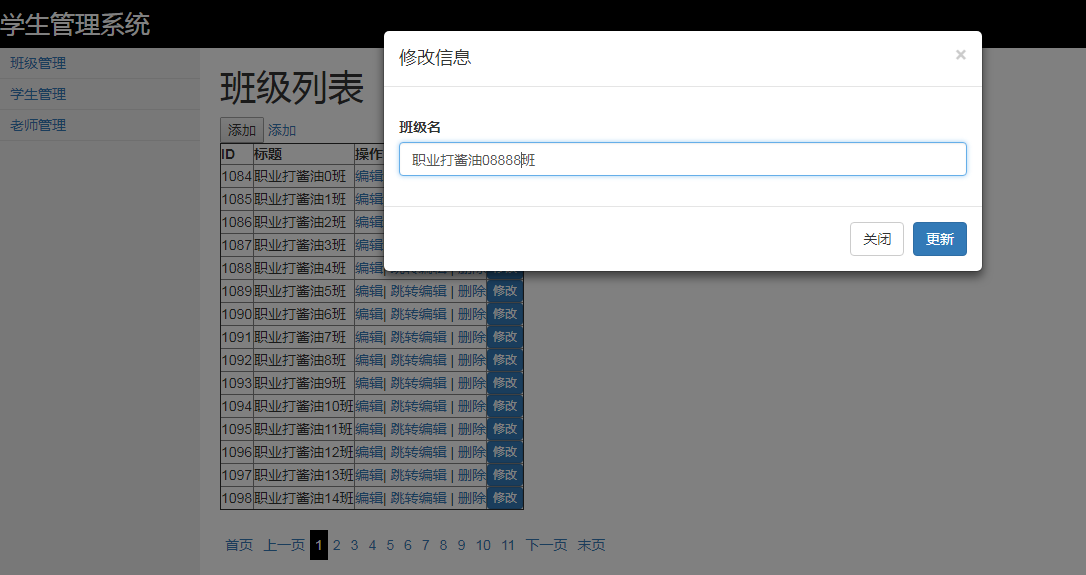
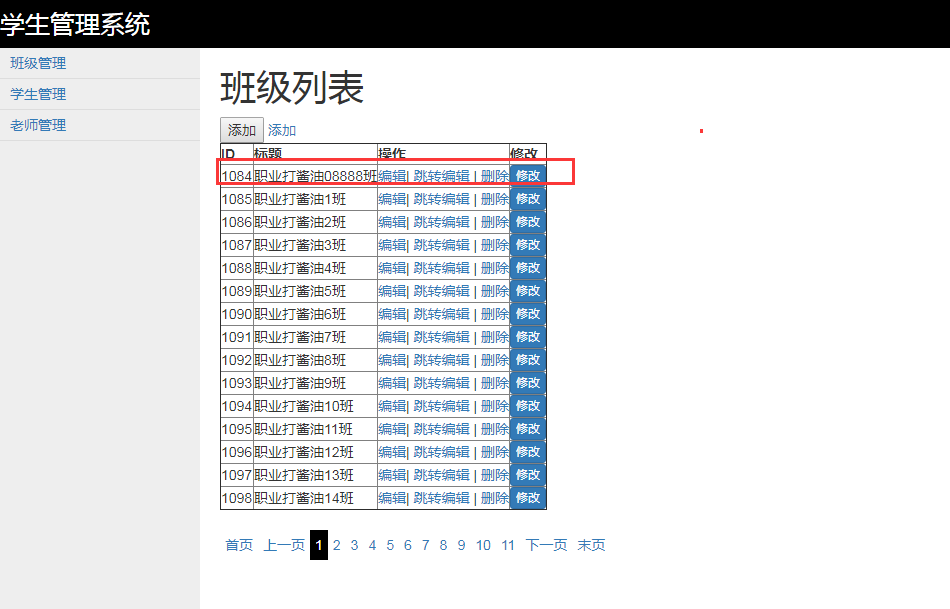
四、效果图

修改数据:
参考文献:
https://v3.bootcss.com/javascript/#modals

 浙公网安备 33010602011771号