(三)Fegin声明式服务调用
上一篇,讲了SpringClound中的消费者采用Ribbon+Rest来实现,这回我们用组件Feign来实现服务的消费者,Fegin中也是默认集成了Ribbon的;和Eureka结合也能实现负载均衡;
概括来说,Fegin的区别就是基于注解来实现,具备可插拔的特性;
依赖前文说的Eureka,service-hello(一个项目,注册两个实例)

创建Fegin项目;
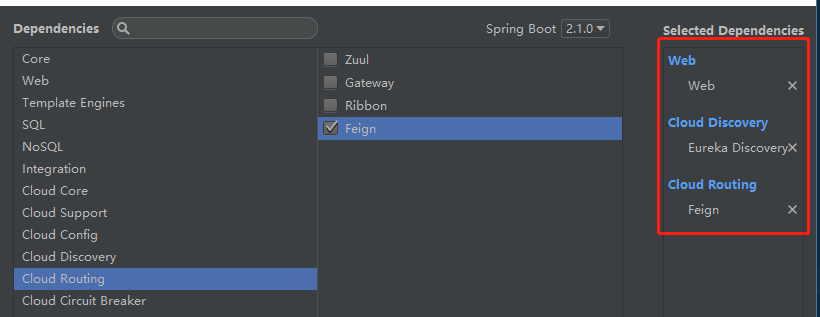
在Idea里,新建项目,选择Spring initializer.

下面的pom
	<dependencies>
		<dependency>
			<groupId>org.springframework.boot</groupId>
			<artifactId>spring-boot-starter-web</artifactId>
		</dependency>
		<dependency>
			<groupId>org.springframework.cloud</groupId>
			<artifactId>spring-cloud-starter-netflix-eureka-client</artifactId>
		</dependency>
		<dependency>
			<groupId>org.springframework.cloud</groupId>
			<artifactId>spring-cloud-starter-openfeign</artifactId>
		</dependency>

		<dependency>
			<groupId>org.springframework.boot</groupId>
			<artifactId>spring-boot-starter-test</artifactId>
			<scope>test</scope>
		</dependency>
	</dependencies>
配置properties文件参数;
#服务端口
server.port=8886

#注册服务中心地址
eureka.client.service-url.defaultZone=http://localhost:8882/eureka/

#注册服务名
spring.application.name=service-feign
启动类如下:
@EnableDiscoveryClient
@EnableFeignClients      //开启Feign的功能:
@SpringBootApplication
public class SpringCloundEurekaFeginExampleApplication {

	public static void main(String[] args) {
		SpringApplication.run(SpringCloundEurekaFeginExampleApplication.class, args);
	}
}
然后我们定义一个fegin的接口,在这个接口中我们通过@ FeignClient(“服务名”)来实现消费服务提供者;
//代表改接口用费"service-hello"的服务 提供
@FeignClient(value = "service-hello")
public interface IFeginService {

    @RequestMapping(value = "/index")
    public String index();
}
我们再在fegin项目中暴露一个访问接口,controller;
@RestController
public class FeginController {

    @Autowired
    private IFeginService feginService;

    @RequestMapping("/index")
    public String index(){
        return feginService.index();
    }
}
代码基本编写完成,下面我们来启动项目;Eureka,service-hello(两个实例),最后启动service-fegin;


Feign整合了Ribbon和Hystrix,此外,Spring Cloud还对Feign提供了Spring MVC注解的支持,也使得我们在Web中可以使用同一个HttpMessageConverter
总起来说,Feign具有如下特性:
- 可插拔的注解支持,包括Feign注解和JAX-RS注解;
- 支持可插拔的HTTP编码器和解码器;
- 支持Hystrix和它的Fallback;
- 支持Ribbon的负载均衡;
- 支持HTTP请求和响应的压缩。


