spring boot 整合freemarker(好用!!!!)
springboot整合freemarker
1.pom依赖
    <!-- 引入freeMarker的依赖包. -->
    <dependency>
        <groupId>org.springframework.boot</groupId>
        <artifactId>spring-boot-starter-freemarker</artifactId>
  </dependency>
2.配置application.properties
spring.freemarker.template-loader-path=classpath:/templates/
spring.freemarker.cache=false
spring.freemarker.charset=UTF-8
spring.freemarker.check-template-location=true
spring.freemarker.content-type=text/html
spring.freemarker.expose-request-attributes=true
spring.freemarker.expose-session-attributes=true
spring.freemarker.request-context-attribute=request
spring.freemarker.suffix=.ftl
3.代码实现
1) 控制层代码
@RequestMapping("/freemarker")
    public String freemarker(Map<String, Object> map) {
        map.put("name", "我是谁");
        map.put("sex", 1);
  } // sex:性别,1:男;0:女;
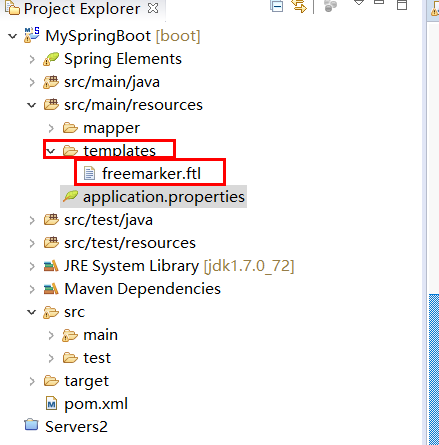
2)在main\resources\templates 目录下 新建 freemarker.ftl 文件,,内容如下:

文件内容:
<!DOCTYPE html>
<html xmlns="http://www.w3.org/1999/xhtml" xmlns:th="http://www.thymeleaf.org"
      xmlns:sec="http://www.thymeleaf.org/thymeleaf-extras-springsecurity3">
    <head>
        <title>Hello World!</title>
    </head>
    <body>
       <center>
       <p>
           welcome ${name} to freemarker!
       </p>

       <p>性别:
           <#if sex==0>
                  女
           <#elseif sex==1>
                  男
           <#else>
                  保密
           </#if>
        </p>
     </body>
</html>
3)在浏览器中访问 http:127.0.0.1:8080/freemarker,即可跳转到 到页面,如下:

声明注意事项(必看不然可能会错):
controller层写注解的时候不能使用@restController @responseBody,不然会报错。
springboot freemarker整合


