
1 写在前面
动力:
之前编写的 Spring Boot 程序把所有的代码都塞在一个整体的源文件目录下,不利于后续的编码。再加之前端使用了 Angular 组织代码,后台也将重构成模块化形式;
局限:
由于编写模块化代码需要对模块化代码有一定基础了解(比如 JDK9 与前端的模块化),与 Maven 了解,并且对 Spring Boot 的架构有一定了解,所以在没有足够的学习之前,是不能完成模块化 这一目标的。
2 从零构建一个模块化 Web 工程
2.1 代码结构分析
我们将编写一个简单的 司机与车辆 vehicleSys
首先我们的代码将分为几个模块:
- vs-domain: 用于定义 实体类;
- vs-dao: 用于定义数据库访问接口;
- vs-service: 用于定义处理服务;
- vs-web: 用于定义与前端的数据交互;
2.2 工程结构构建
2.2.1 主 Project
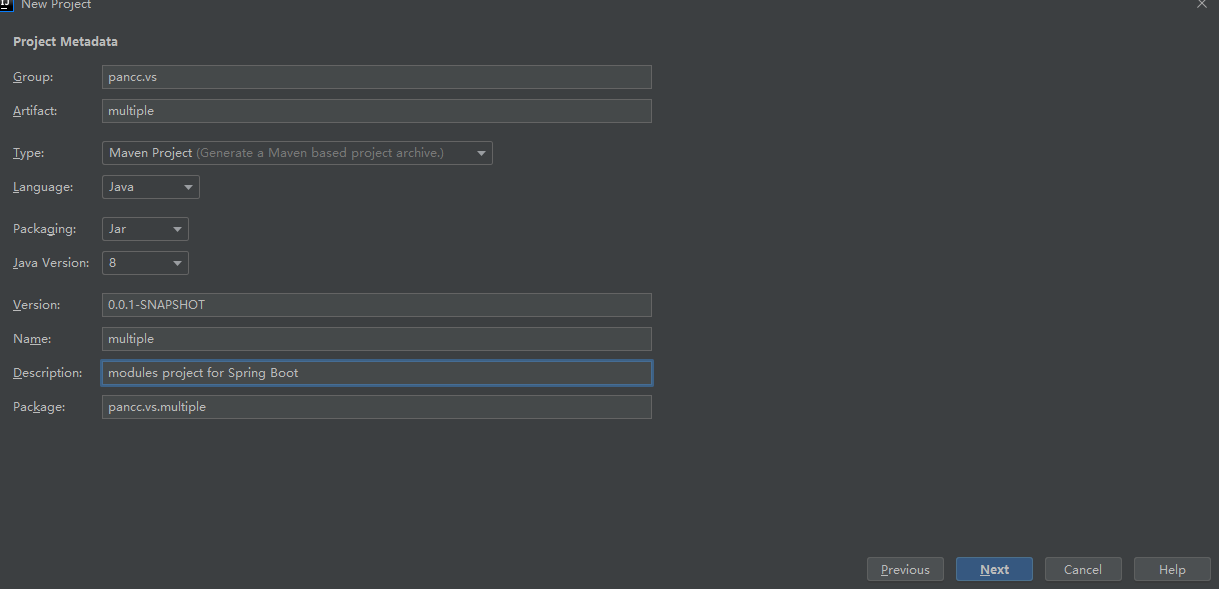
首先新建一个工程:
我们的工程目录并不存放任何实际代码,而是管理各种模块,因此在 Spring Initializr 初始化项目时,我们不需要勾选任何依赖,只有 Maven Type 需要使用 POM
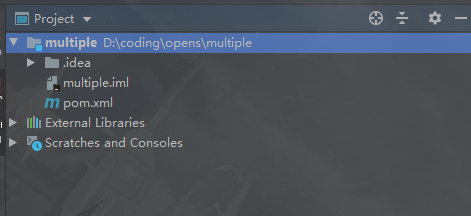
可以看到 Spring 为我们生成了以下结构:
浏览它生成的依赖:
    <dependencies>
        <dependency>
            <groupId>org.springframework.boot</groupId>
            <artifactId>spring-boot-starter</artifactId>
        </dependency>

        <dependency>
            <groupId>org.springframework.boot</groupId>
            <artifactId>spring-boot-starter-test</artifactId>
            <scope>test</scope>
            <exclusions>
                <exclusion>
                    <groupId>org.junit.vintage</groupId>
                    <artifactId>junit-vintage-engine</artifactId>
                </exclusion>
            </exclusions>
        </dependency>
    </dependencies>
可以看到 Spring 为我们添加了主要使用的测试依赖,由于 Springboot 2.2.1 开始默认提供了 JUNIT5,所以我们将在之后的测试中使用它(如果有测试的话):
并且也添加了各种核心依赖,这里只列出当前工程使用到的核心依赖:
- spring-core:Spring 核心;
- snakeyaml:解析 Resources 下的 y(a)ml 配置文件;
- jakarta.annotation-api:JAVA 注解包,包括 security 和 sql ;
- jakarta.servlet-api:Servlet 核心;
- spring-boot-starter-logging:提供包括 log-back(默认),slf4j 的日志支持;
- spring-boot-autoconfigure:完成 Spring Boot 自动配置魔法的核心依赖;
- jackson/gson:序列化工具,默认使用 jackson
2.2.2 vs-domain
在项目根目录下右键,new - Module,需要注意的是我们这次将使用 Maven ,新建 vs-domain 模块,一直 next 完成;
并且编写 Driver 类与 Car 类,这里使用了 Lombok 简化代码,请在 vs-domain 的 POM 文件中添加 lombok 依赖
 1 package pancc.vs.domain;
 2
 3 import lombok.*;
 4
 5 import java.io.Serializable;
 6 import java.util.Set;
 7
 8 /**
 9  * @author pancc
10  * @version 1.0
11  */
12 @Getter
13 @Setter
14 @Builder
15 @EqualsAndHashCode
16 @NoArgsConstructor
17 @AllArgsConstructor
18 public class Driver implements Serializable {
19     private static final long serialVersionUID = -5208610208917077981L;
20
21     private Long id;
22     private String name;
23     private Integer age;
24
25
26     @EqualsAndHashCode.Exclude
27     private Set<Car> cars;
28 }
package pancc.vs.domain;

import lombok.*;

import java.io.Serializable;

/**
 * @author pancc
 * @version 1.0
 */
@Getter
@Setter
@Builder
@EqualsAndHashCode
@NoArgsConstructor
@AllArgsConstructor
public class Car implements Serializable {

    private static final long serialVersionUID = 1925499860719739118L;

    private Long id;
    private String name;
    private Long price;

}
2.2.3 vs-dao
跟 vs-domain 一样,我们在工程下添加 vs-domain 模块,并且编写代码,需要注意的是我们现在暂时将重点放在模块化上,所以 dao 只是 mock,并且由于我们需要用到之前编写的 vs-domain 模块中的实体类,因此需要在 vs-dao 模块的 POM 文件中添加依赖:
1     <dependencies>
2         <dependency>
3             <groupId>pancc.vs</groupId>
4             <artifactId>vs-domain</artifactId>
5             <version>0.0.1-SNAPSHOT</version>
6             <scope>compile</scope>
7         </dependency>
8     </dependencies>
然后编写 mock 的 DriverDao:
 1 package pancc.vs.dao;
 2
 3 import org.springframework.stereotype.Component;
 4 import pancc.vs.domain.Car;
 5 import pancc.vs.domain.Driver;
 6
 7 import java.util.Arrays;
 8 import java.util.Collections;
 9 import java.util.HashSet;
10 import java.util.Set;
11
12
13 /**
14  * @author pancc
15  * @version 1.0
16  */
17 @Component
18 public class DriverDao {
19     private static final Set<Driver> DRIVER_SET;
20
21     static {
22         DRIVER_SET = Collections.unmodifiableSet(
23                 Collections.singleton(
24                         Driver.builder().id(250L).name("Kate").cars(
25                                 new HashSet<>(
26                                         Arrays.asList(
27                                                 Car.builder().id(1L).name("Ben").price(2500L).build(),
28                                                 Car.builder().id(2L).name("Tesla").price(30000L).build()))
29                         ).build()));
30     }
31
32     public Set<Driver> queryAll() {
33         return DRIVER_SET;
34     }
35 }
2.2.4 vs-service
vs-service 模块与 vs-dao 的编写过程没有区别,这里只贴出代码:
 1 package pancc.vs.service;
 2
 3 import org.springframework.stereotype.Service;
 4 import pancc.vs.dao.DriverDao;
 5 import pancc.vs.domain.Driver;
 6
 7 import java.util.Set;
 8
 9 /**
10  * @author pancc
11  * @version 1.0
12  */
13 @Service
14 public class DriverService {
15
16     private final DriverDao driverDao;
17
18     public DriverService(DriverDao driverDao) {
19         this.driverDao = driverDao;
20     }
21
22     public Set<Driver> queryAll() {
23         return this.driverDao.queryAll();
24     }
25 }
有一点令人不快的是,对于习惯了以前的 Spring Boot 编程的人,此时的 idea 并没有在 @Autowire 注解导航可用的 bean,这个问题将在之后解决;
2.2.5 vs-web
从这里开始我们必须注意,由于从主工程的 POM 文件中继承的 spring-boot-starter-parent 并不包含 web 依赖,我们必须手动添加,同时也要添加使用到的 vs-service :
 1     <dependencies>
 2         <dependency>
 3             <groupId>pancc.vs</groupId>
 4             <artifactId>vs-service</artifactId>
 5             <version>0.0.1-SNAPSHOT</version>
 6             <scope>compile</scope>
 7         </dependency>
 8
 9         <dependency>
10             <groupId>org.springframework.boot</groupId>
11             <artifactId>spring-boot-starter-web</artifactId>
12             <version>2.1.11.RELEASE</version>
13         </dependency>
14     </dependencies>
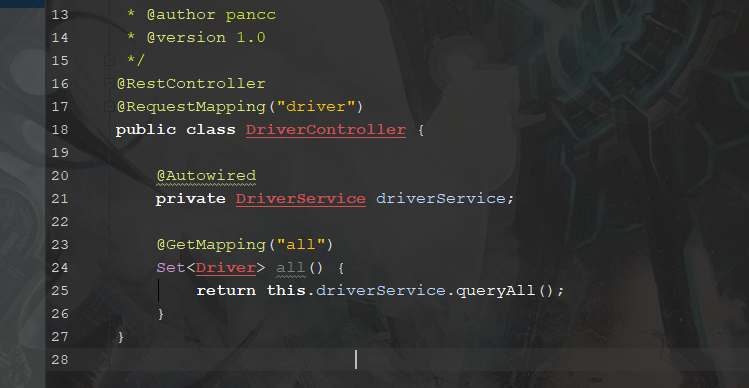
编写 DriverController :
 1 package pancc.vs.web.controller;
 2
 3 import org.springframework.beans.factory.annotation.Autowired;
 4 import org.springframework.web.bind.annotation.GetMapping;
 5 import org.springframework.web.bind.annotation.RequestMapping;
 6 import org.springframework.web.bind.annotation.RestController;
 7 import pancc.vs.domain.Driver;
 8 import pancc.vs.service.DriverService;
 9
10 import java.util.Set;
11
12 /**
13  * @author pancc
14  * @version 1.0
15  */
16 @RestController
17 @RequestMapping("driver")
18 public class DriverController {
19
20     @Autowired
21     private DriverService driverService;
22
23     @GetMapping("all")
24     Set<Driver> all() {
25         return this.driverService.queryAll();
26     }
27 }
可以看到,此时 IDEA 仍旧没有为:@Autowired 注解导航 Bean
我们的目的是在 web 环境下使用, 让我们为 vs-web 编写启动类 :
 1 package pancc.vs.web;
 2
 3 import org.springframework.boot.SpringApplication;
 4 import org.springframework.boot.autoconfigure.SpringBootApplication;
 5
 6 /**
 7  * @author pancc
 8  * @version 1.0
 9  */
10 @SpringBootApplication
11 public class App {
12     public static void main(String[] args) {
13         SpringApplication.run(App.class, args);
14     }
15 }
请注意 App 所在的 Package ,这为解决接下来的问题很有帮助。
2.3 构建之后的问题
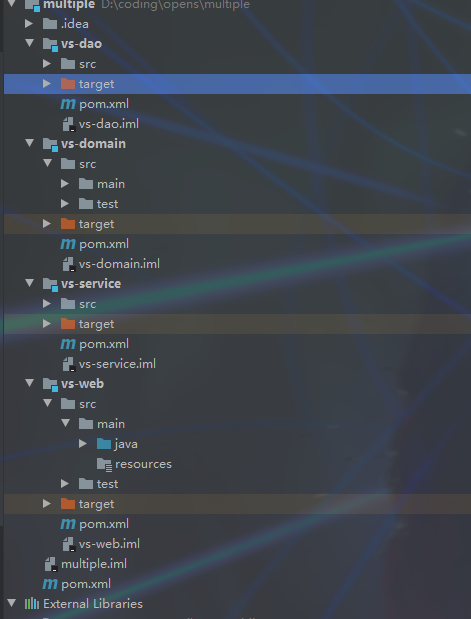
现在我们的 vs-web 的目录结构是这样的:
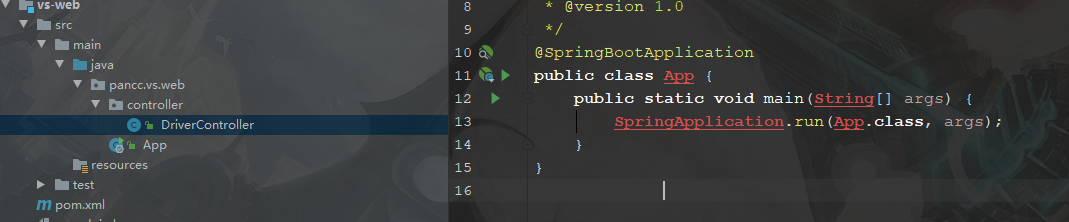
同时, IDEA 也标识了这是一个 Spring Boot 应用。运行它,很好,我们得到了一个运行错误:
Field driverService in pancc.vs.web.controller.DriverController required a bean of type 'pancc.vs.service.DriverService' that could not be found.
让我们先查看 Controller,哦豁完蛋:

没问题,我们将在下一节修复它;
2.3.1 回顾 Spring Boot
在着手解决上边的问题之前,让我们来复习一下 Spring Boot 的核心注解:
When a class does not include a
packagedeclaration, it is considered to be in the “default package”. The use of the “default package” is generally discouraged and should be avoided. It can cause particular problems for Spring Boot applications that use the@ComponentScan,@ConfigurationPropertiesScan,@EntityScan, or@SpringBootApplicationannotations, since every class from every jar is read.
与
We generally recommend that you locate your main application class in a root package above other classes. The
@SpringBootApplicationannotation is often placed on your main class, and it implicitly defines a base “search package” for certain items. For example, if you are writing a JPA application, the package of the@SpringBootApplicationannotated class is used to search for@Entityitems. Using a root package also allows component scan to apply only on your project.
这两段话简要来说就是 @SpringBootApplication 注解会将自身所在包作为默认包扫描各种组件:Entity, Repository, Service, Controller....
2.3.2 修复错误
让我们梳理一下几个类的包位置:
- App: pancc.vs.web
- DriverController: pancc.vs.web.controller
- DriverService: pancc.vs.service
- DriverDao: pancc.vs.dao
- Driver: pancc.vs.domain
- Car: pancc.vs.domain
可以看到,只有 DriverController 在 App 的包下,因此只有 DriverController 可以被扫描到;其他类则处于不同包下不能被扫描;
让我们先修复 DriverService ,这是最近需要修复的:
修改在 App 上的注释: @SpringBootApplication(scanBasePackages = { "pancc.vs.service"})
现在我们得到了一个没有报错的 DriverController ,同时也没有起到 Controller 作用的 普通类:

继续运行 App , 会得到另一个错误:
Parameter 0 of constructor in pancc.vs.service.DriverService required a bean of type 'pancc.vs.dao.DriverDao' that could not be found.
请不要忽视了添加 App 所在的包扫描,修改成下面的任意 1 项:
@SpringBootApplication(scanBasePackages = { "pancc.vs.service"},scanBasePackageClasses = {App.class})
@SpringBootApplication(scanBasePackages = {"pancc.vs.web", "pancc.vs.service"})
现在我们的 IDEA 能很好地导航 DriverController 依赖的 DriverService ,不要忘记我们的问题还没有修复完整,DriverService 内的 Bean 依赖 DriverDao 也需要修复,继续修改 启动注解:
@SpringBootApplication(scanBasePackages = {"pancc.vs.web", "pancc.vs.service","pancc.vs.dao"})
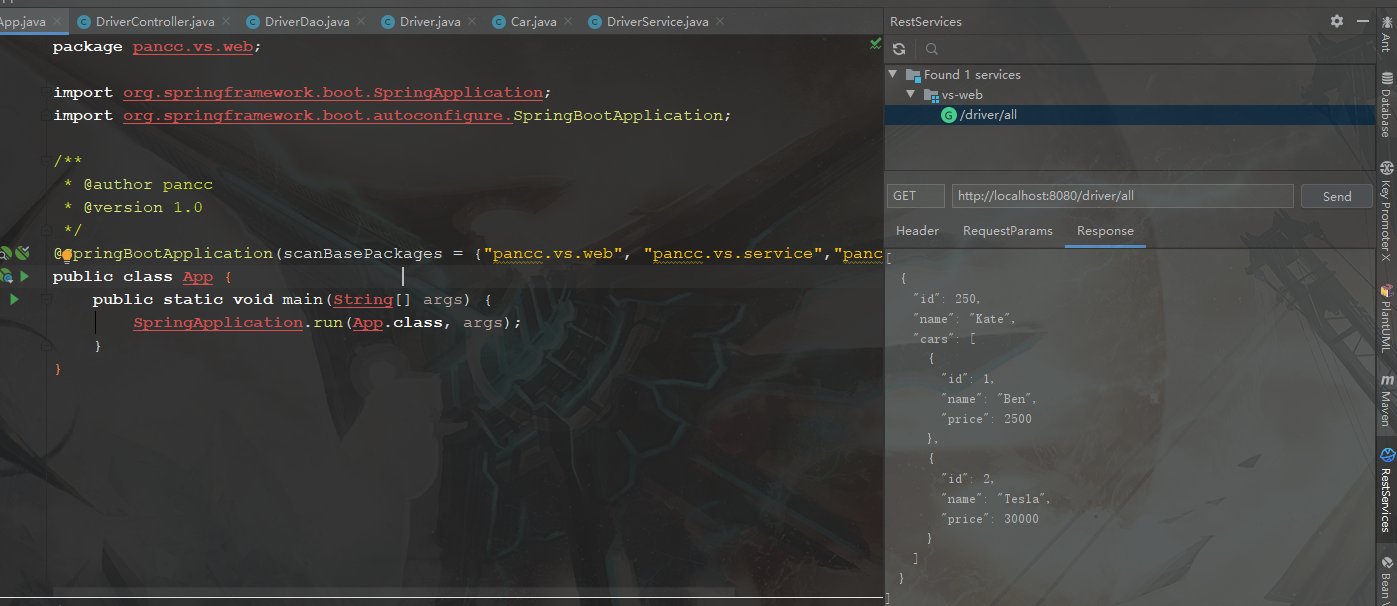
现在我们的程序可以运行了,启动它并用 IDEA 的 RestServices 测试端口 /driver/all
2.3.3 懒人向修复
1 通配符:你可以使用通配符匹配包扫描路径。
@SpringBootApplication(scanBasePackages = {"pancc.vs.*"}) 可以避免重复劳动。
2 转移启动类到包顶层:就像 2.3.1 Spring Boot 文档中描述的一样,将 App 置于顶层中
将 App 置于 包 pancc.vs 中,现在我们的包结构变成了:
- App: pancc.vs
- DriverController: pancc.vs.web.controller
- DriverService: pancc.vs.service
- DriverDao: pancc.vs.dao
- Driver: pancc.vs.domain
- Car: pancc.vs.domain
你可以删掉 scanBasePackages 属性了
2.4 打包
2.4.1 在打包之前
让我们看看 spring-boot-starter-web 依赖中有哪些需要注意的内容
- spring-boot-starter:spring 核心
- spring-boot-starter-json:rest 支持
- spring-boot-starter-tomcat:内置 web 容器
- hibernate-validator:验证注解
- spring-web:web 支持
- spring-webmvc:mvc 支持
2.4.2 使用外部容器
spring-boot-starter-web 依赖中存在 scope 为 compile 的 spring-boot-starter-tomcat ,所以我们在打包的时候需要将内置容器排除,同时在开发的时候需要使用内置容器,所以使用 provided :
1         <dependency>
2             <groupId>org.springframework.boot</groupId>
3             <artifactId>spring-boot-starter-tomcat</artifactId>
4             <scope>provided</scope>
5         </dependency>
同时,需要设置打包方式为 war ,可以设置打包的输出名字:
 1     <packaging>war</packaging>
 2
 3     <!--Maven >= 3-->
 4     <build>
 5         <finalName>vs-web</finalName>
 6     </build>
 7
 8     <!--Maven < 3-->
 9 <!--
10     <plugin>
11         <groupId>org.apache.maven.plugins</groupId>
12         <artifactId>maven-jar-plugin</artifactId>
13         <version>2.3.2</version>
14         <configuration>
15             <finalName>vs-web</finalName>
16         </configuration>
17     </plugin>
18     -->
同时由于使用外部容器,我们需要让启动类 App 继承 SpringBootServletInitializer,以便将 Servlet,Filter,ServletContextInitializer Beans 绑定到外部容器上:
 1 package pancc.vs.web;
 2
 3 import org.springframework.boot.SpringApplication;
 4 import org.springframework.boot.autoconfigure.SpringBootApplication;
 5 import org.springframework.boot.builder.SpringApplicationBuilder;
 6 import org.springframework.boot.web.servlet.support.SpringBootServletInitializer;
 7
 8 /**
 9  * @author pancc
10  * @version 1.0
11  */
12 @SpringBootApplication(scanBasePackages = {"pancc.vs.*"})
13 public class App extends SpringBootServletInitializer {
14
15
16     @Override
17     protected SpringApplicationBuilder configure(SpringApplicationBuilder builder) {
18         return builder.sources(App.class);
19     }
20
21     public static void main(String[] args) {
22         SpringApplication.run(App.class, args);
23     }
24 }
设置完,在 vs-web 模块目录下执行 mvn clean && mvn package:

可以看到 maven 同时编译了依赖各个模块的的 class 同时在 vs-web 模块的 target 下生成了 vs-web.war 包
查看 vs-web.war 包的结构,可以看到依赖的各个模块被很好的打包进去了:
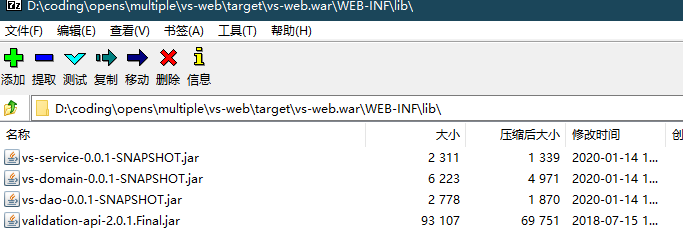
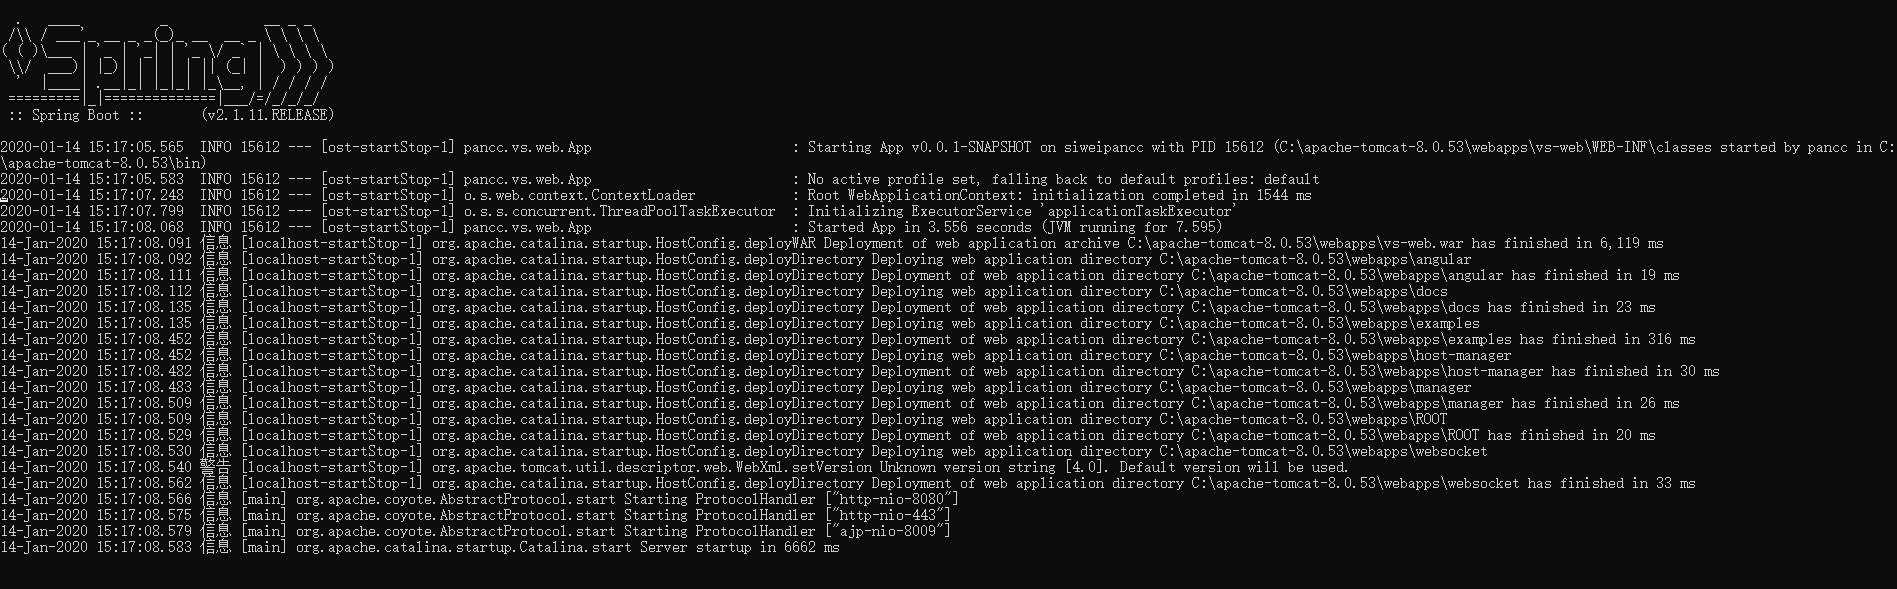
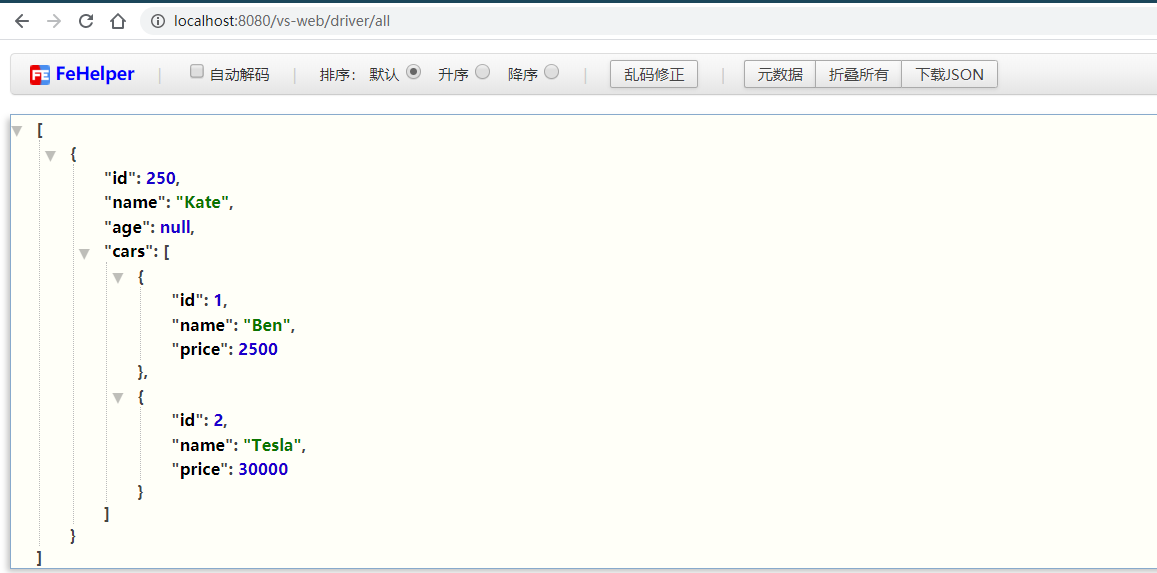
将 vs-web.war 复制到 ~\tomcat\webapps 目录下,执行启动程序并访问 链接 http://localhost:8080/vs-web/driver/all:
2.4.3 使用可执行 jar 包
由于目标是可执行 Jar 包,所以 vs-web 需要保留内置的 Tomcat 容器,此时我们的 App 不需要继承 SpringBootServletInitializer, 并且需要使用到 spring-boot-maven-plugin 插件,用于重新打包 Maven 打包好的 Jar 包。
现在我们的 POM 文件变成了:
 1 <?xml version="1.0" encoding="UTF-8"?>
 2 <project xmlns="http://maven.apache.org/POM/4.0.0"
 3          xmlns:xsi="http://www.w3.org/2001/XMLSchema-instance"
 4          xsi:schemaLocation="http://maven.apache.org/POM/4.0.0 http://maven.apache.org/xsd/maven-4.0.0.xsd">
 5     <parent>
 6         <artifactId>multiple</artifactId>
 7         <groupId>pancc.vs</groupId>
 8         <version>0.0.1-SNAPSHOT</version>
 9     </parent>
10     <modelVersion>4.0.0</modelVersion>
11     <artifactId>vs-web</artifactId>
12
13     <dependencies>
14         <dependency>
15             <groupId>pancc.vs</groupId>
16             <artifactId>vs-service</artifactId>
17             <version>0.0.1-SNAPSHOT</version>
18             <scope>compile</scope>
19         </dependency>
20
21         <dependency>
22             <groupId>org.springframework.boot</groupId>
23             <artifactId>spring-boot-starter-web</artifactId>
24             <version>2.1.11.RELEASE</version>
25         </dependency>
26     </dependencies>
27
28     <packaging>jar</packaging>
29
30     <build>
31         <plugins>
32             <plugin>
33                 <groupId>org.springframework.boot</groupId>
34                 <artifactId>spring-boot-maven-plugin</artifactId>
35                 <configuration>
36                     <layout>JAR</layout>
37                     <mainClass>pancc.vs.web.App</mainClass>
38                 </configuration>
39                 <executions>
40                     <execution>
41                         <goals>
42                             <goal>repackage</goal>
43                         </goals>
44                     </execution>
45                 </executions>
46             </plugin>
47         </plugins>
48         <finalName>vs-web</finalName>
49     </build>
50 </project>
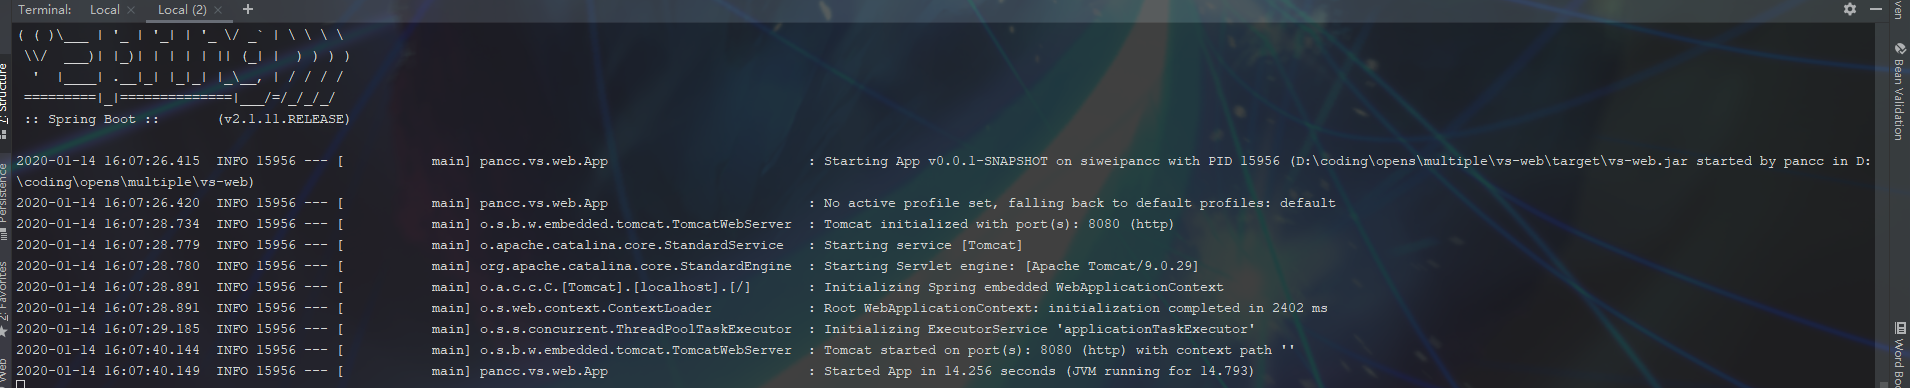
在 vs-web 模块目录下执行 mvn clean && mvn package && java -jar ./target/vs-web.jar, 可以看到程序正确执行,之后便可以愉快的测试了:
访问 http://localhost:8080/driver/all 查看结果吧

2.5 我们漏了什么?
请注意 2.4.3 中 打包的可执行 JAR 包的结构,它的主类变成了 org.springframework.boot.loader.JarLauncher,我们将在之后抽点时间来分析它的源码;
在 2.3.1 与 2.3.2 中我们分析了 Spring Boot 注解的包扫描问题,其中注解扫描的内容还包括 @Entity ,这是属于 javax.persistence 的注解,我们将在 Spring Boot 项目 (二) 中使用它

 浙公网安备 33010602011771号