场分布换层和加点
记录的步骤 |
|
此文件包含记录的所有步骤和信息以帮助你向其他人描述记录的步骤。 在共享此文件之前,应验证以下内容:
除了你使用的函数和快捷键之外,不会记录你键入的密码或任何其他文本。 你可以执行以下操作: |
步骤 |
|
上一个 下一个 |
|
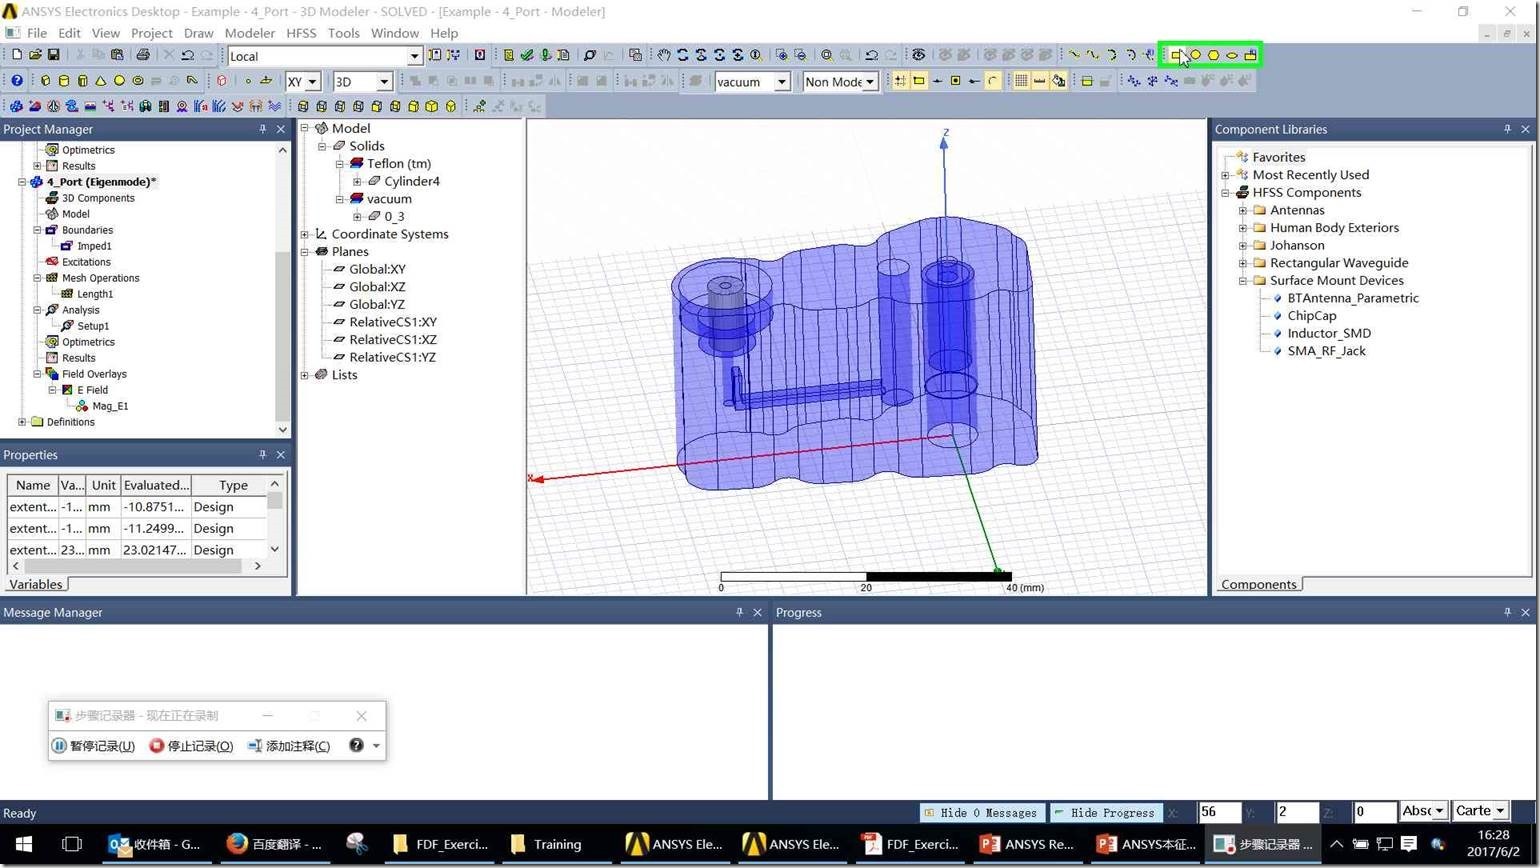
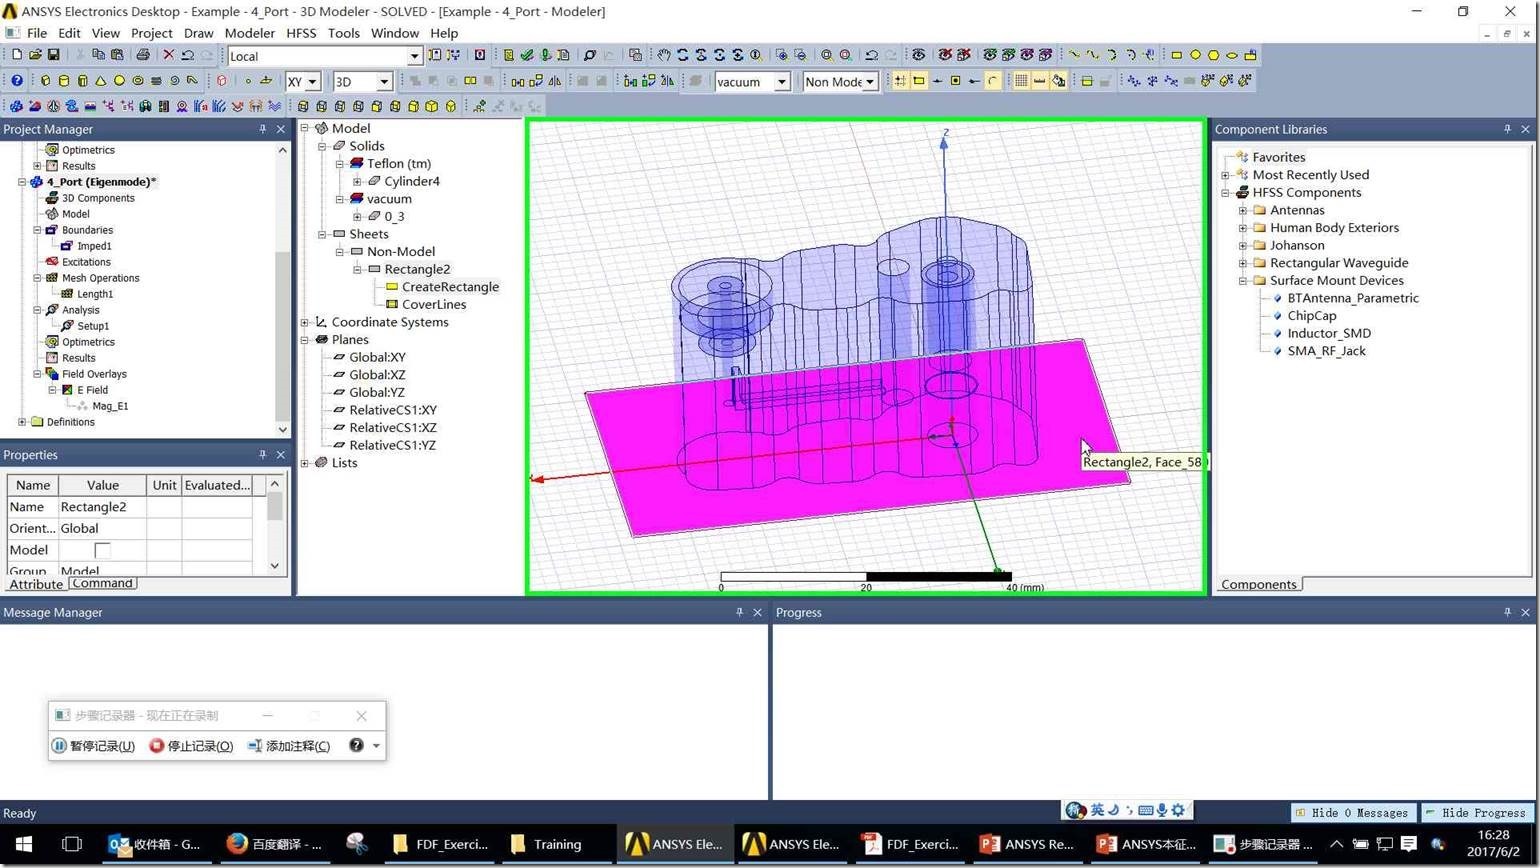
步骤 1: (2017/6/2 16:28:37) 用户在"Draw rectangle (按钮)"上左键单击(在"ANSYS Electronics Desktop - Example - 4_Port - 3D Modeler - SOLVED - [Example - 4_Port - Modeler]"中) |
|
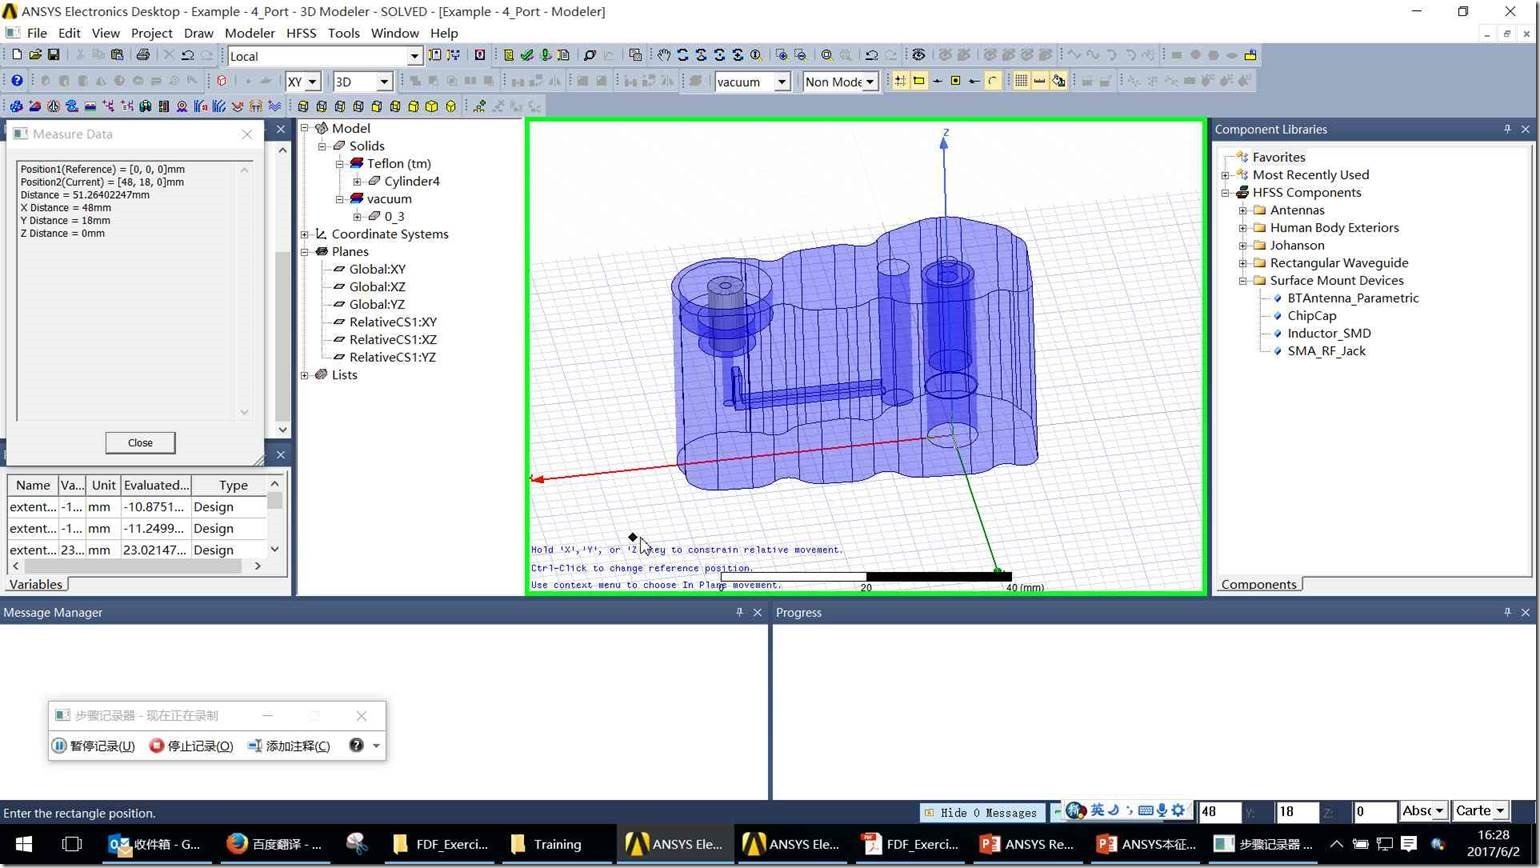
步骤 2: (2017/6/2 16:28:38) 用户在"Example - 4_Port - Modeler (窗口)"上左键单击(在"ANSYS Electronics Desktop - Example - 4_Port - 3D Modeler - SOLVED - [Example - 4_Port - Modeler]"中) |
|
步骤 3: (2017/6/2 16:28:40) 用户在"Example - 4_Port - Modeler (窗口)"上左键单击(在"ANSYS Electronics Desktop - Example - 4_Port - 3D Modeler - SOLVED - [Example - 4_Port - Modeler]"中) |
|
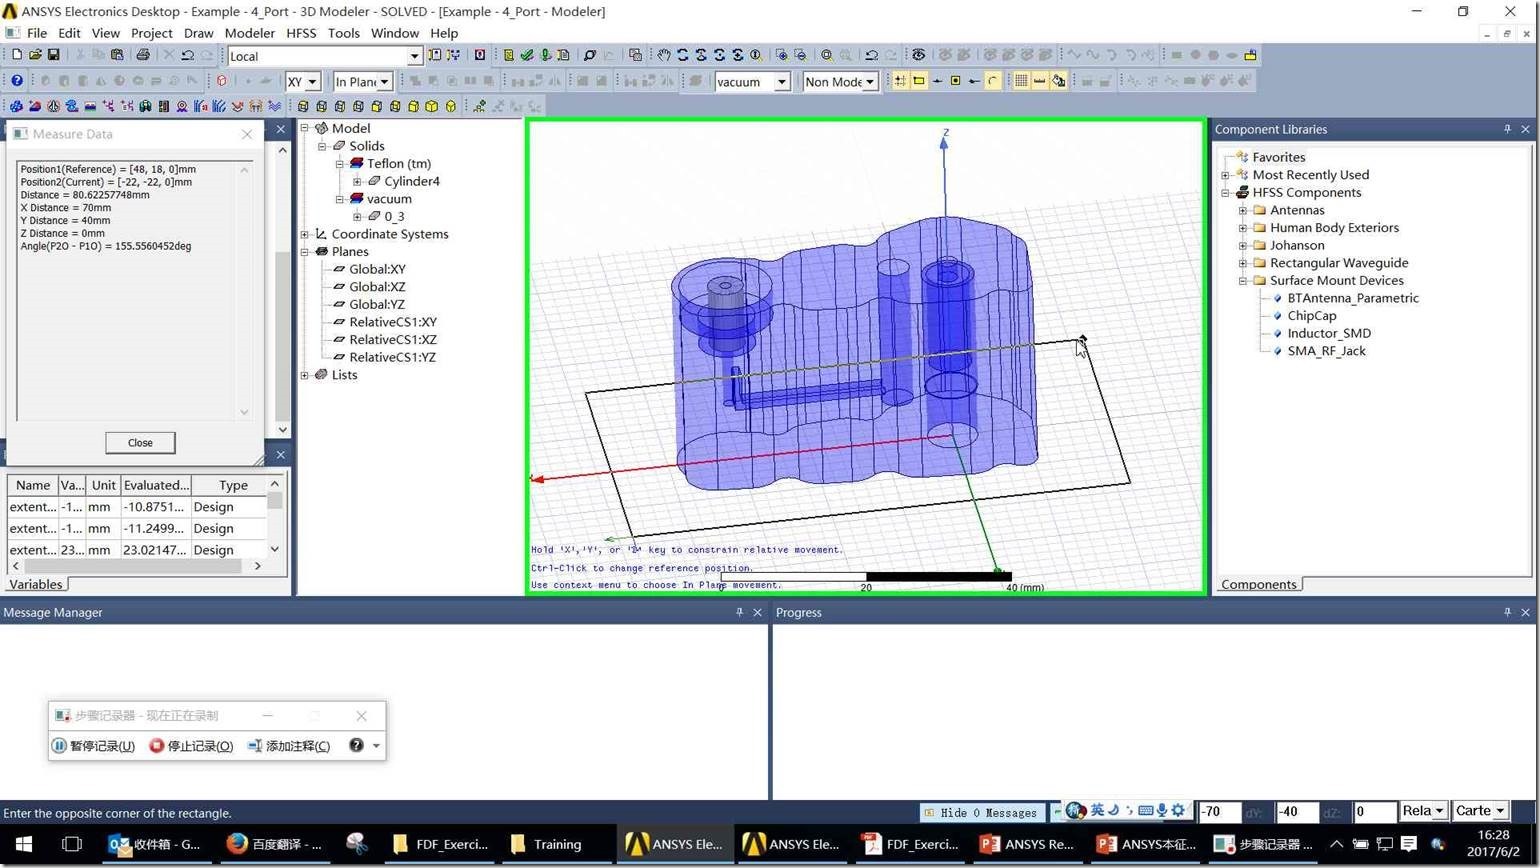
步骤 4: (2017/6/2 16:28:46) 用户在"Example - 4_Port - Modeler (窗口)"上键盘输入(在"ANSYS Electronics Desktop - Example - 4_Port - 3D Modeler - SOLVED - [Example - 4_Port - Modeler]"中) [...] |
|
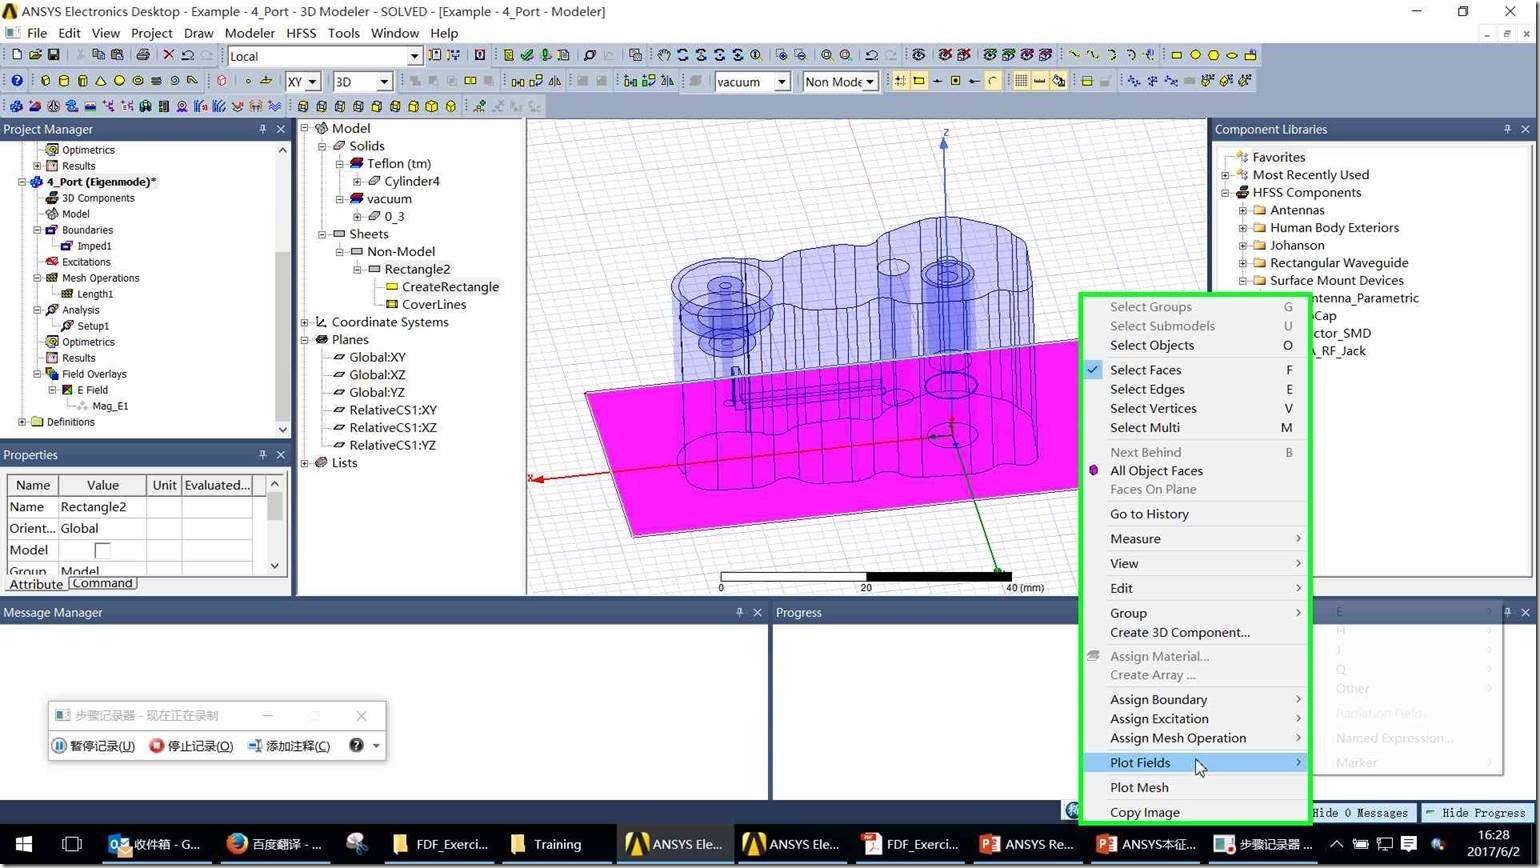
步骤 5: (2017/6/2 16:28:46) 用户在"Example - 4_Port - Modeler (窗口)"上右键单击(在"ANSYS Electronics Desktop - Example - 4_Port - 3D Modeler - SOLVED - [Example - 4_Port - Modeler]"中) |
|
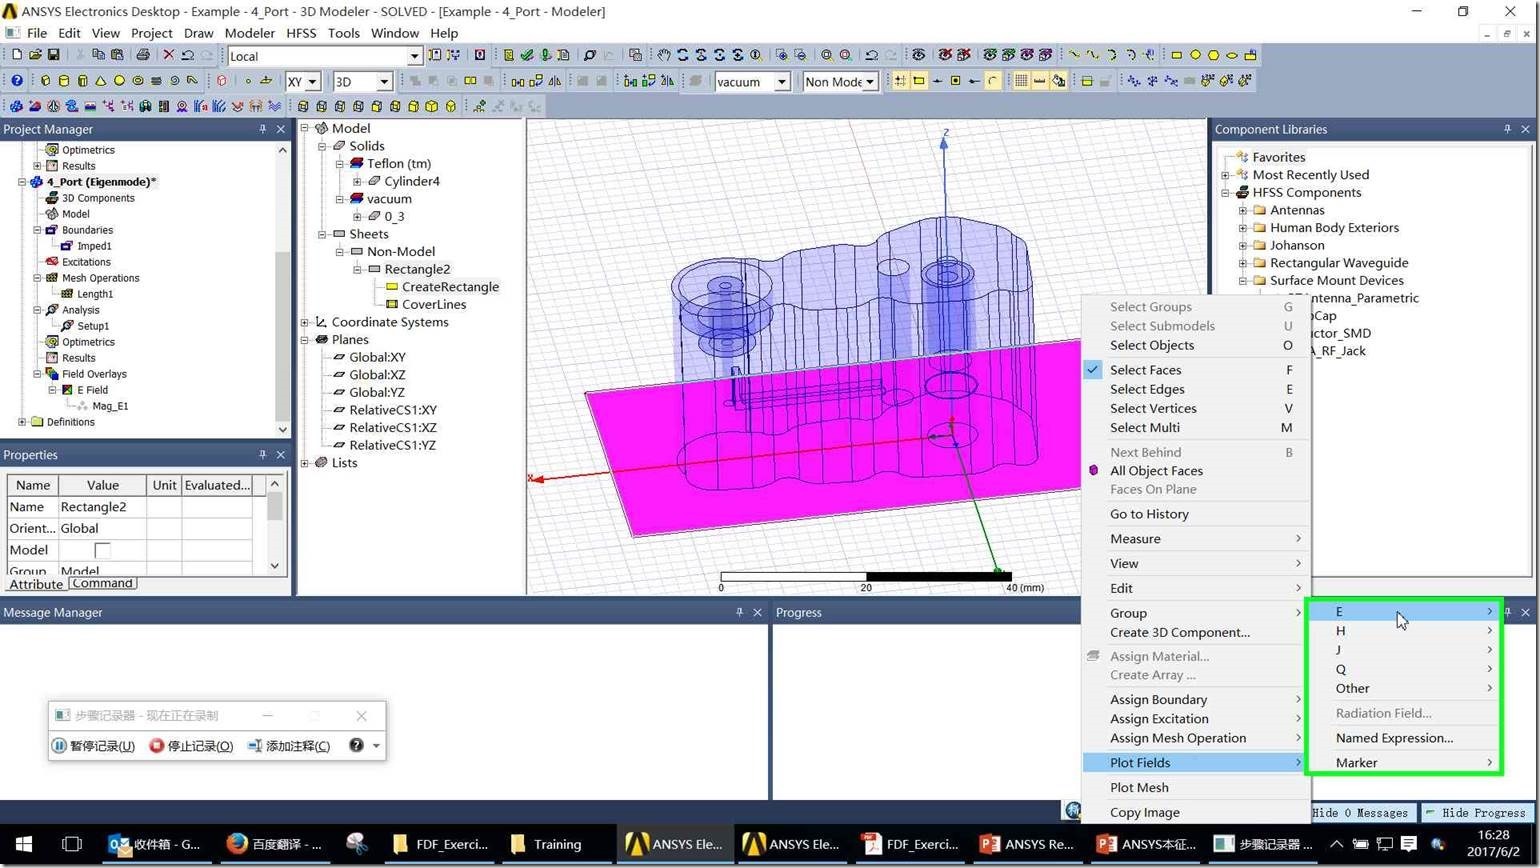
步骤 6: (2017/6/2 16:28:48) 用户在"Plot Fields (菜单项目)"上左键单击 |
|
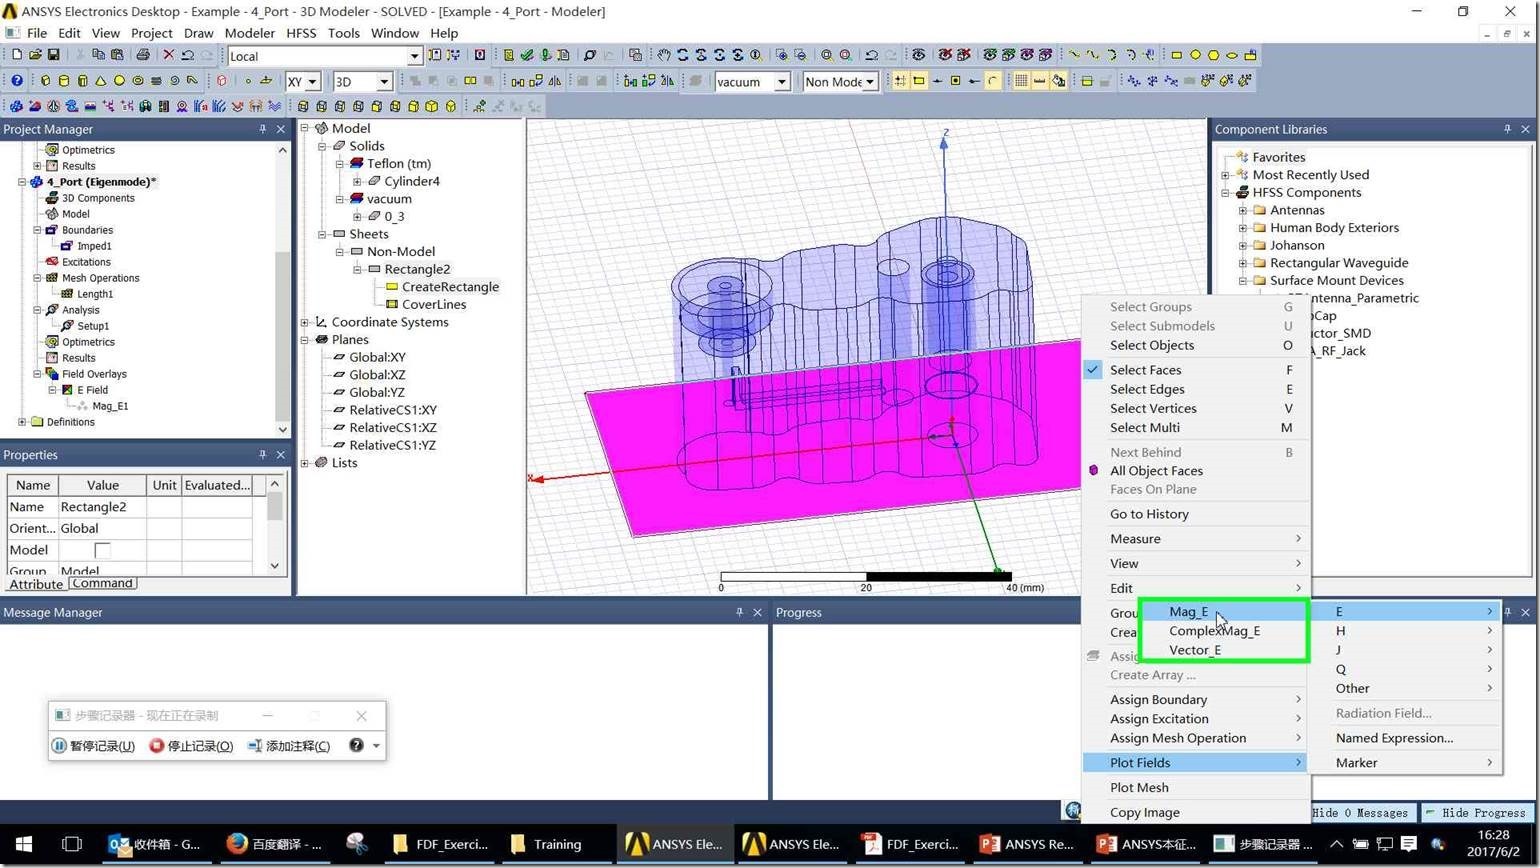
步骤 7: (2017/6/2 16:28:49) 用户在"E (菜单项目)"上左键单击 |
|
步骤 8: (2017/6/2 16:28:51) 用户在"Mag_E (菜单项目)"上左键单击 |
|
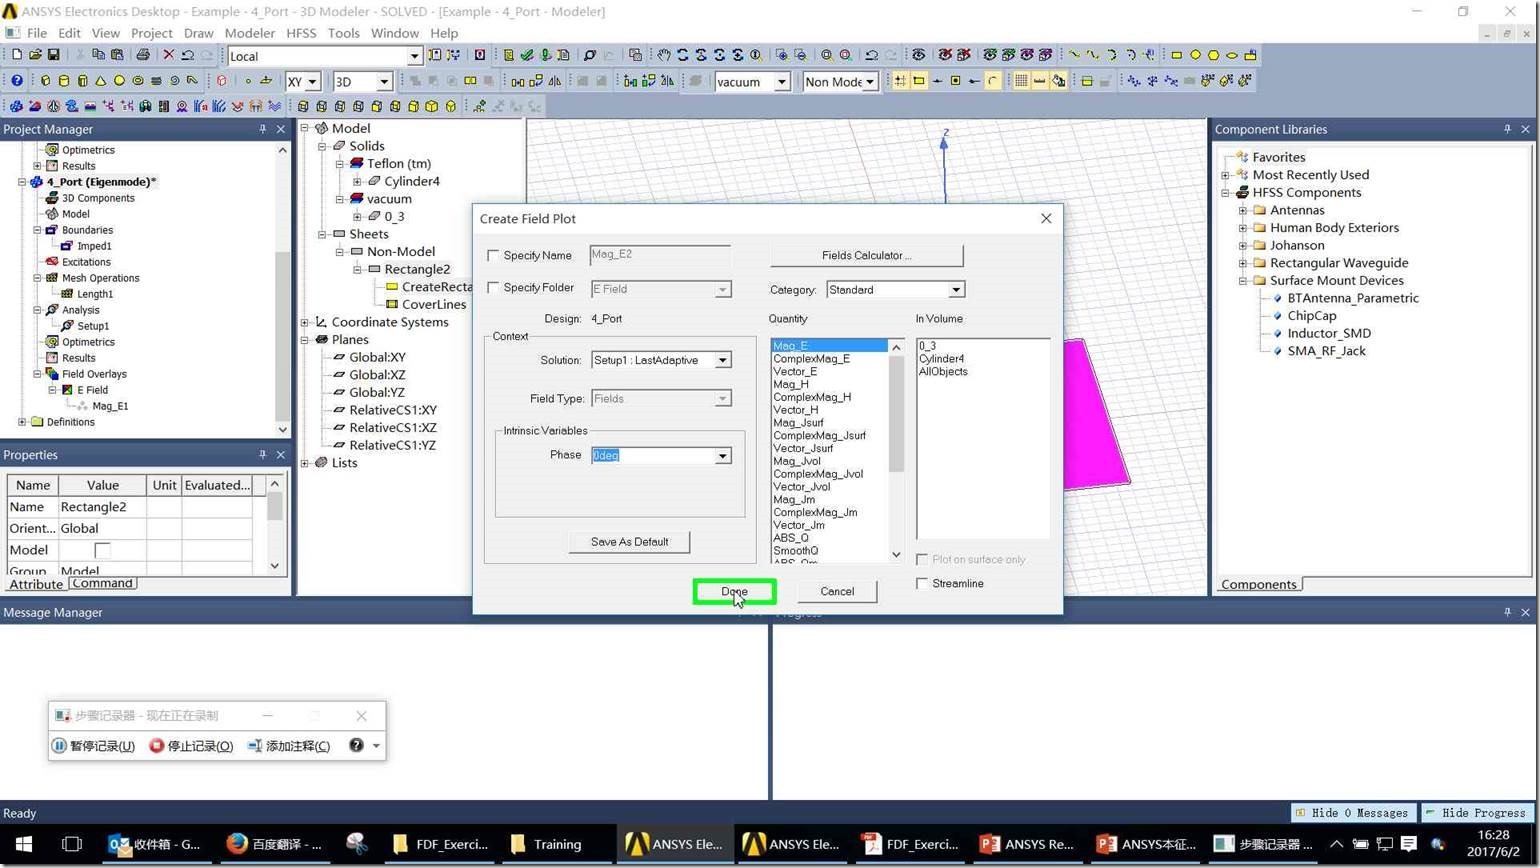
步骤 9: (2017/6/2 16:28:53) 用户在"Done (按钮)"上左键单击(在"Create Field Plot"中) |
|
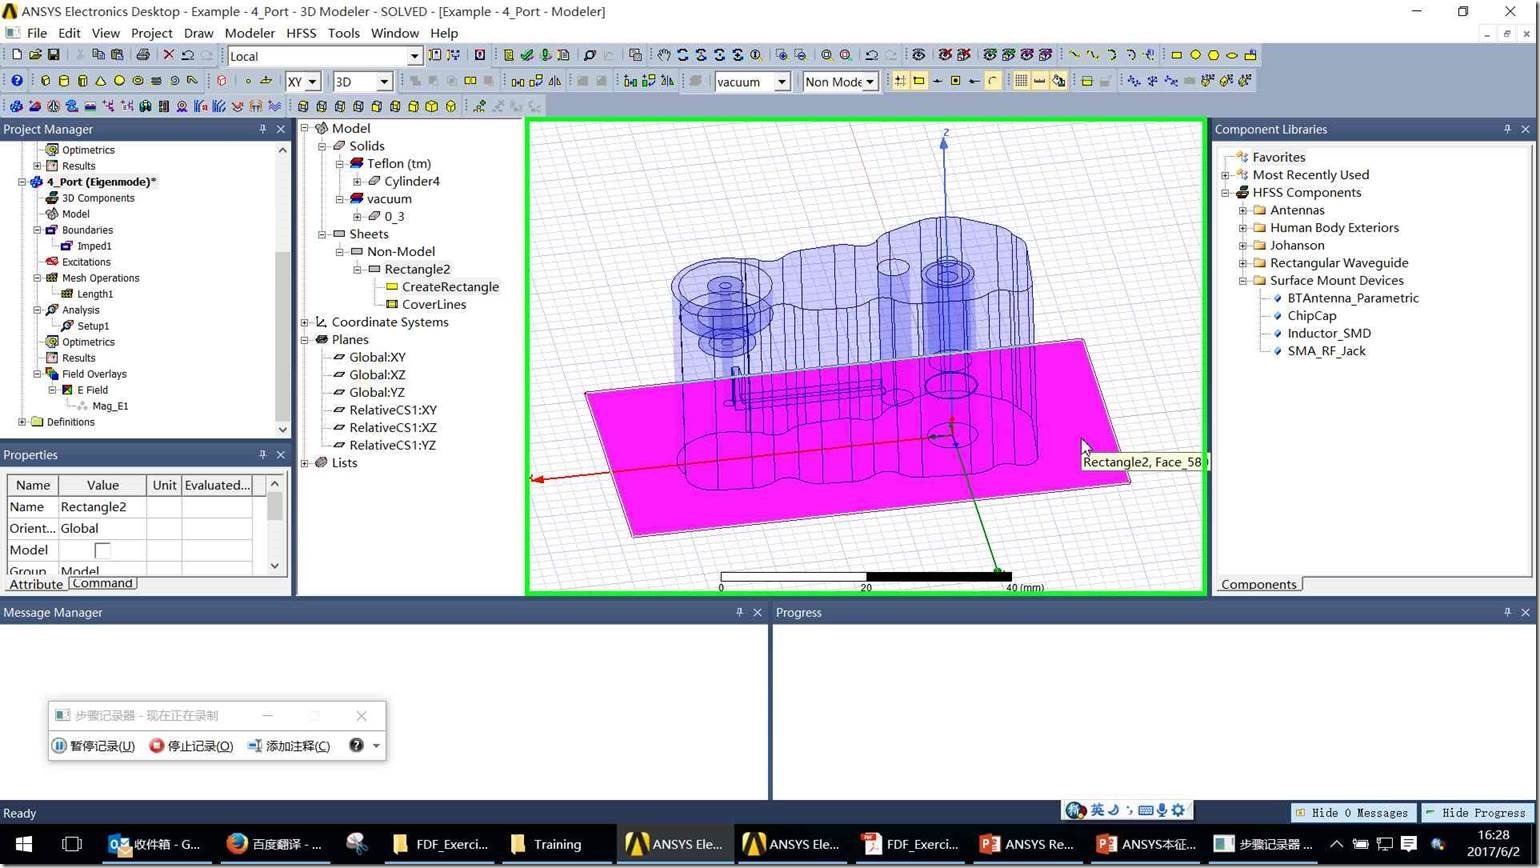
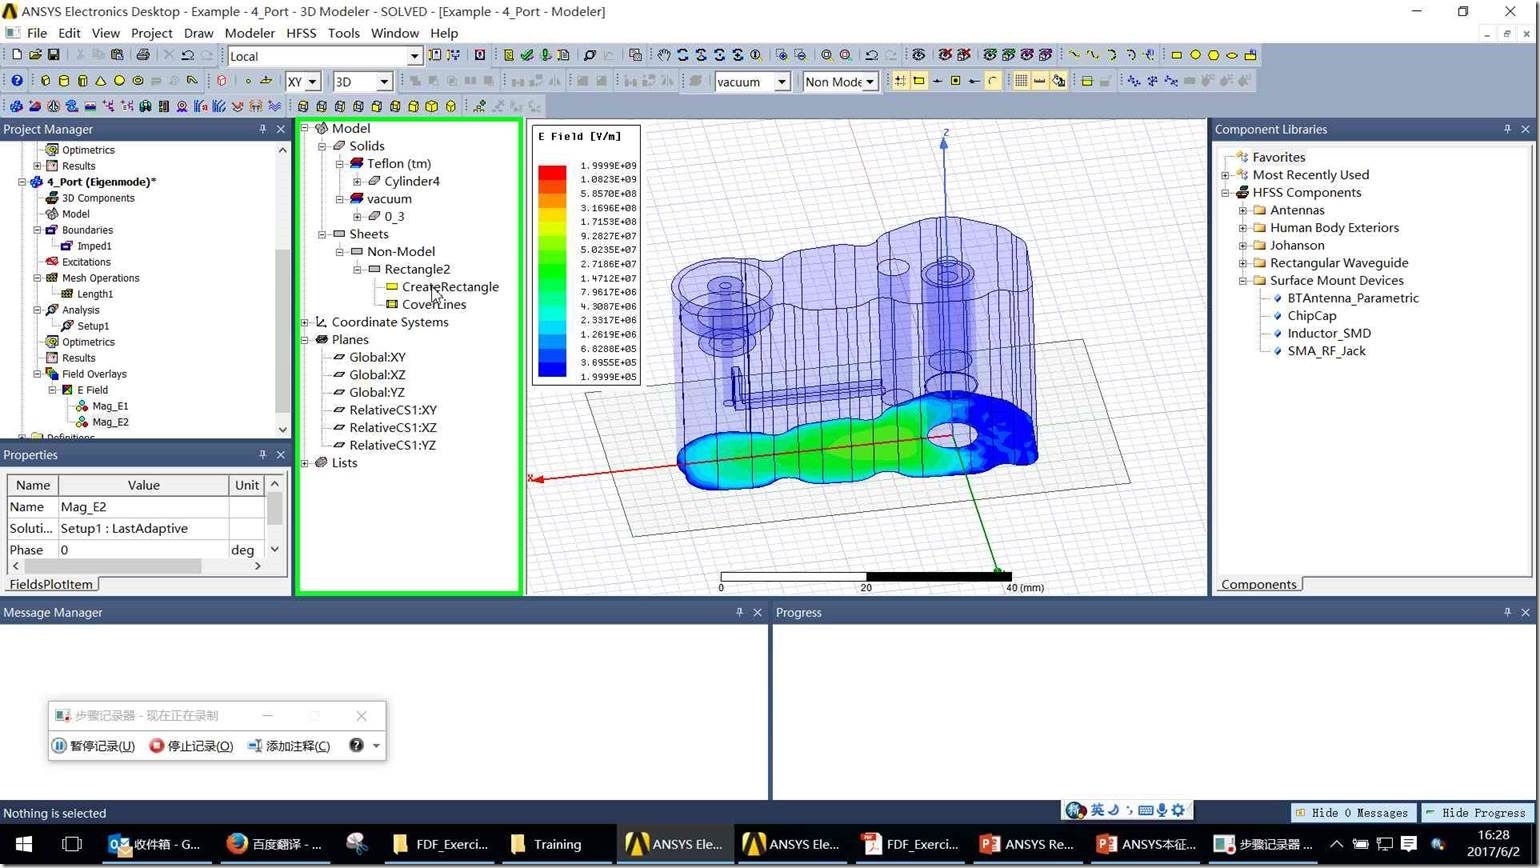
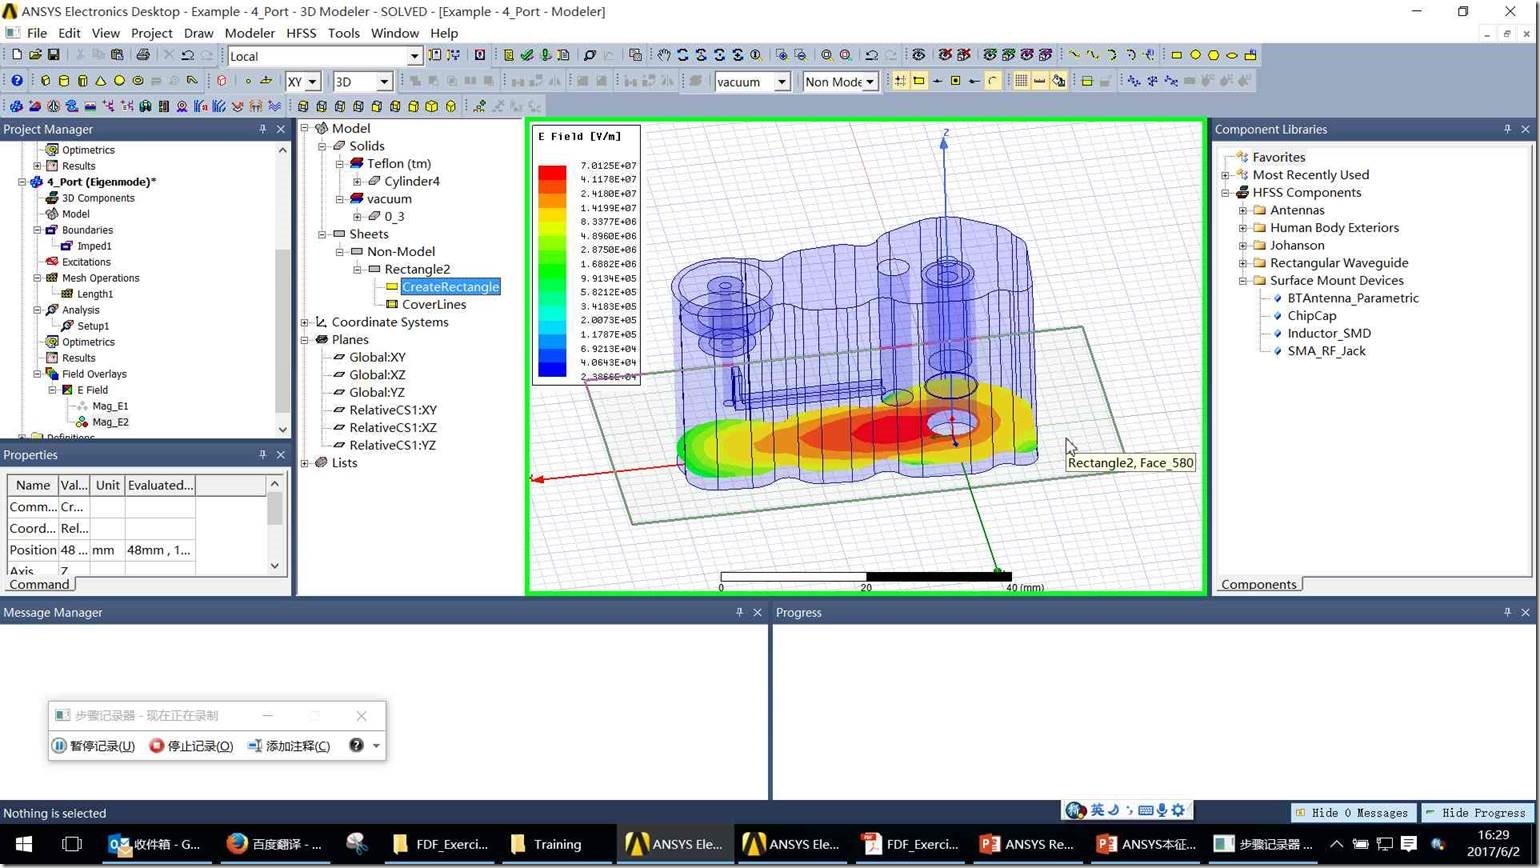
步骤 10: (2017/6/2 16:28:58) 用户在"CreateRectangle (树项目)"上左键双击(在"ANSYS Electronics Desktop - Example - 4_Port - 3D Modeler - SOLVED - [Example - 4_Port - Modeler]"中) |
|
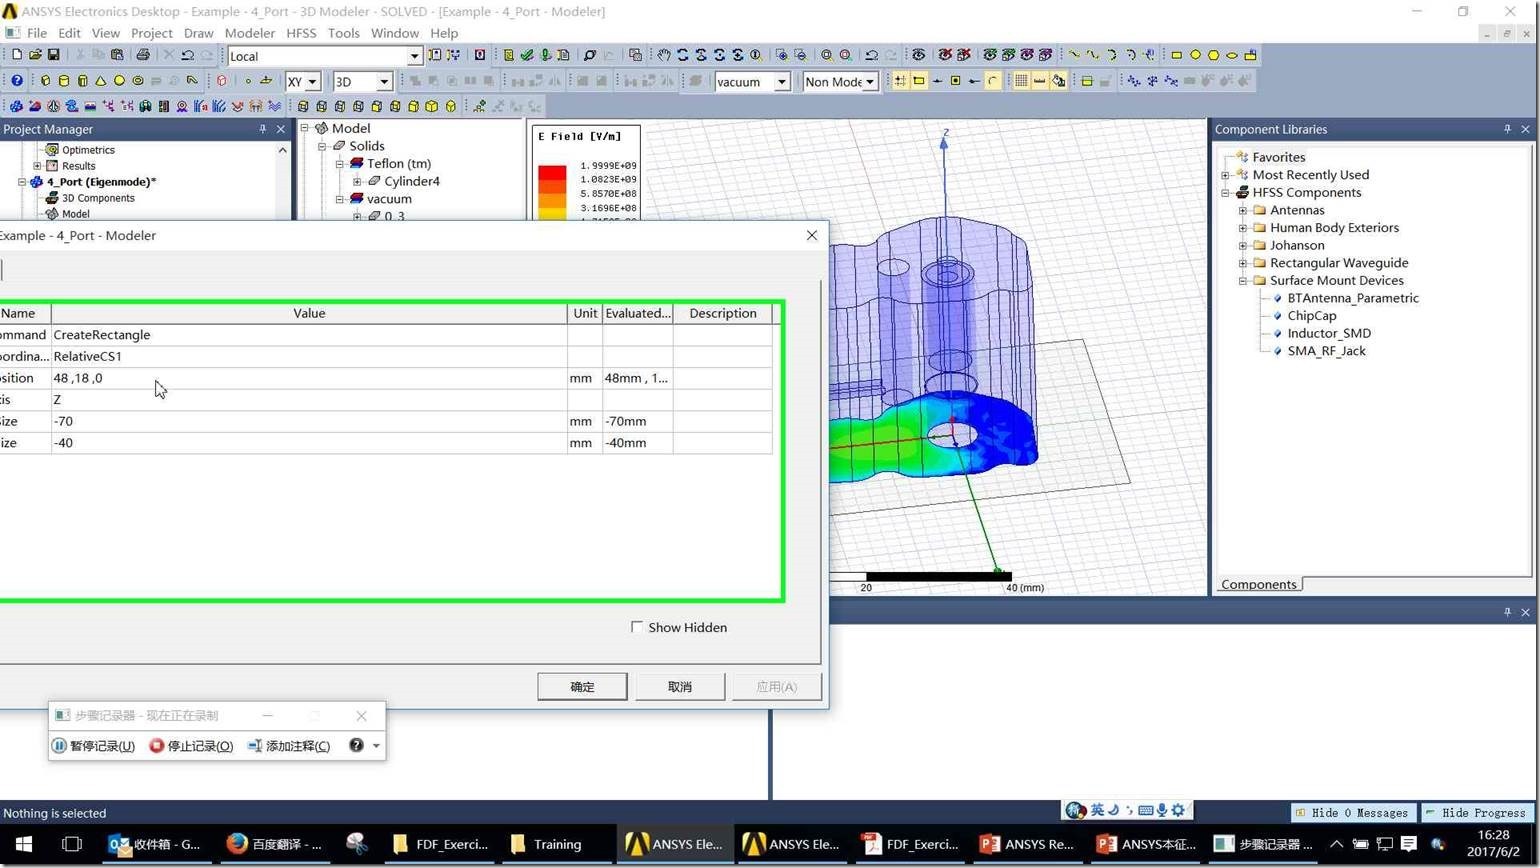
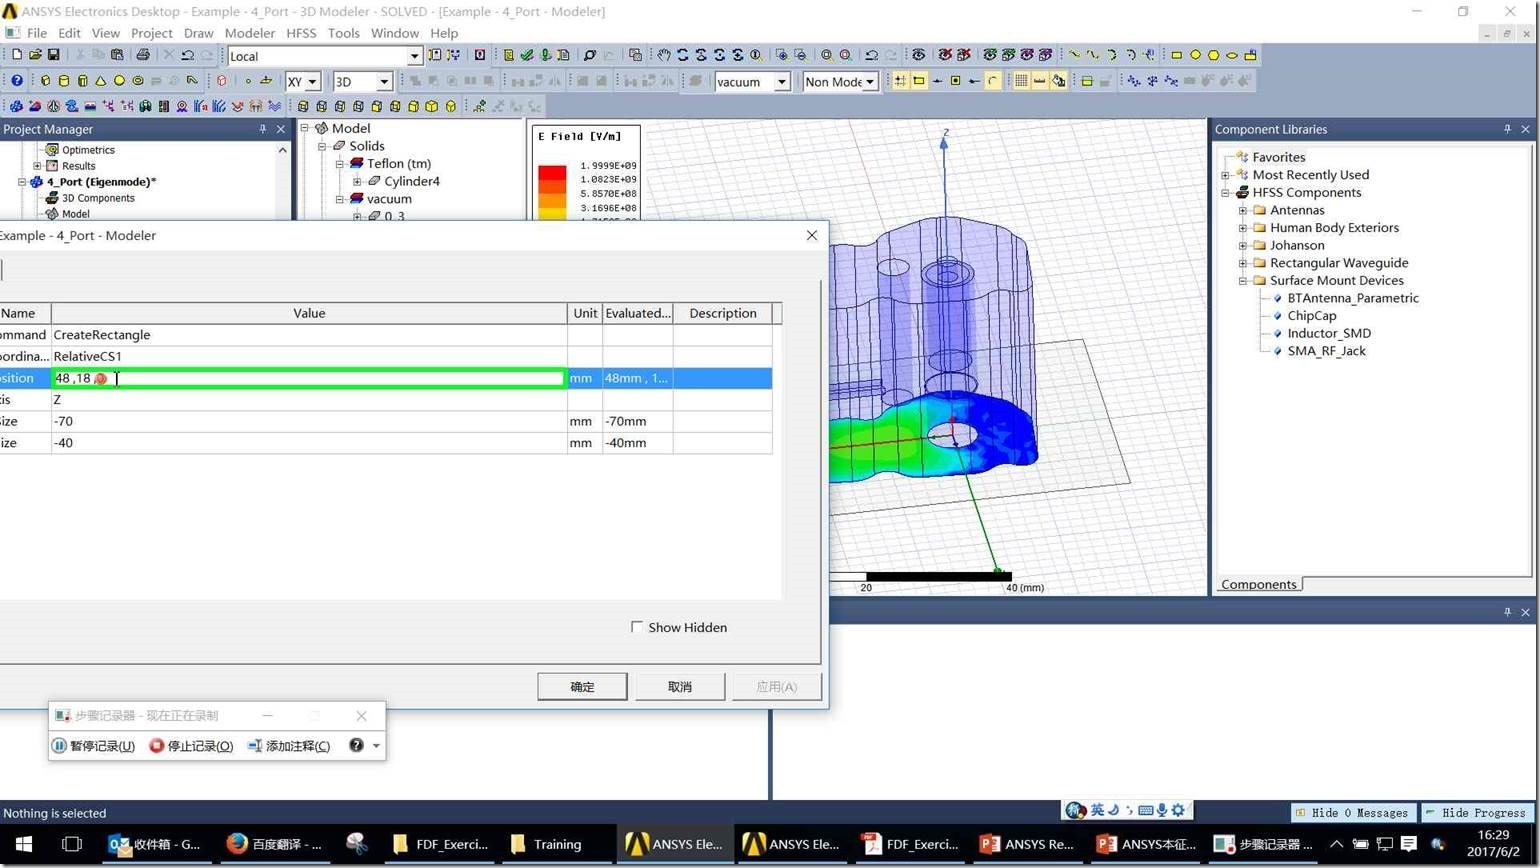
步骤 11: (2017/6/2 16:29:00) 用户在"Properties (对话框)"上左键单击(在"Properties: Example - 4_Port - Modeler"中) |
|
步骤 12: (2017/6/2 16:29:00) 用户在"Properties (对话框)"上鼠标拖动开始(在"Properties: Example - 4_Port - Modeler"中) |
|
步骤 13: (2017/6/2 16:29:01) 用户在"Properties (对话框)"上鼠标拖动结束(在"Properties: Example - 4_Port - Modeler"中) |
|
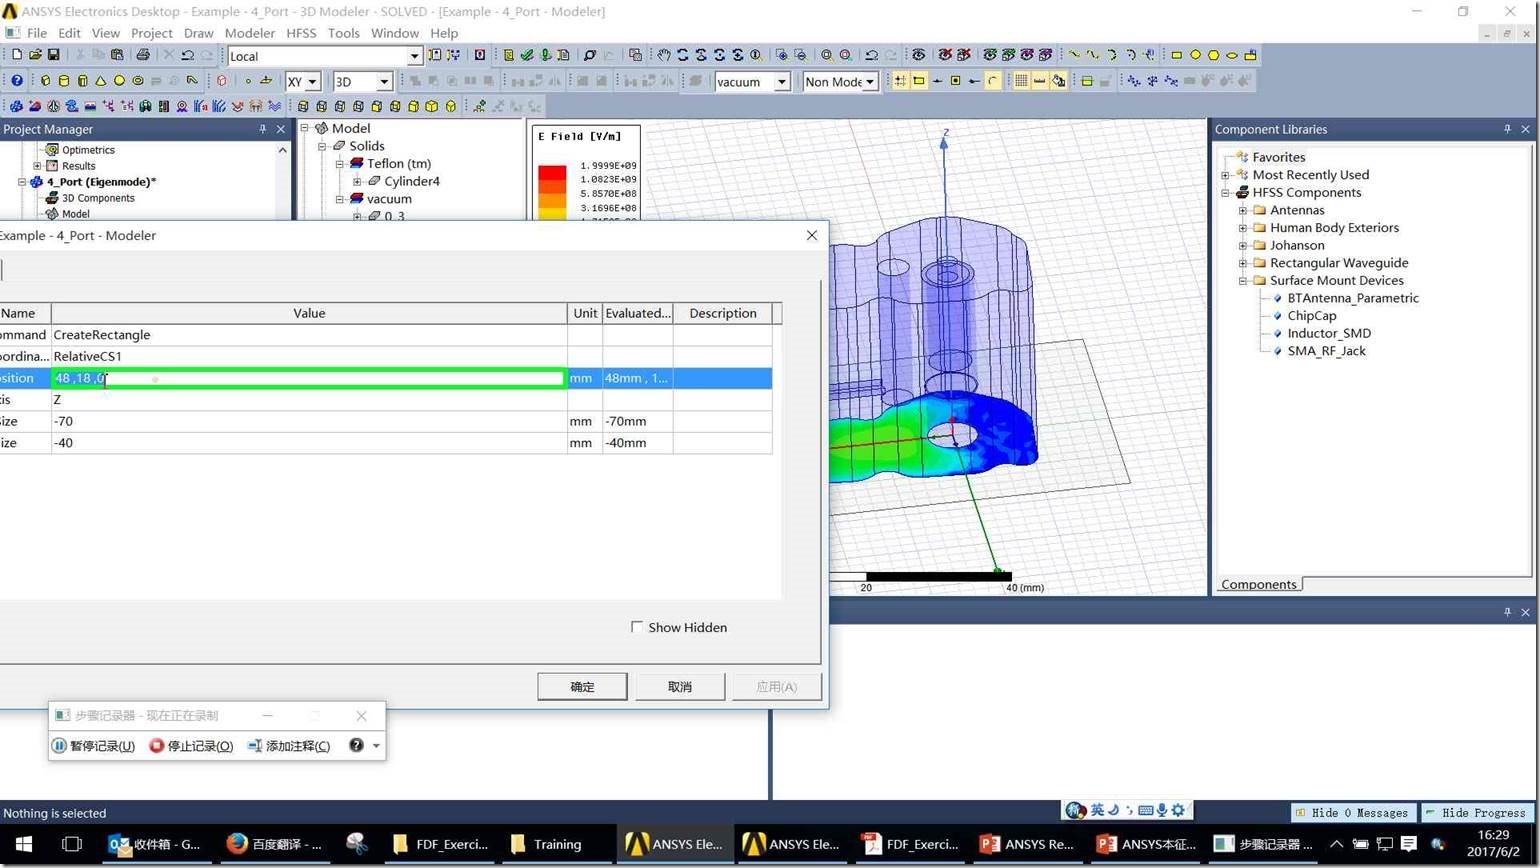
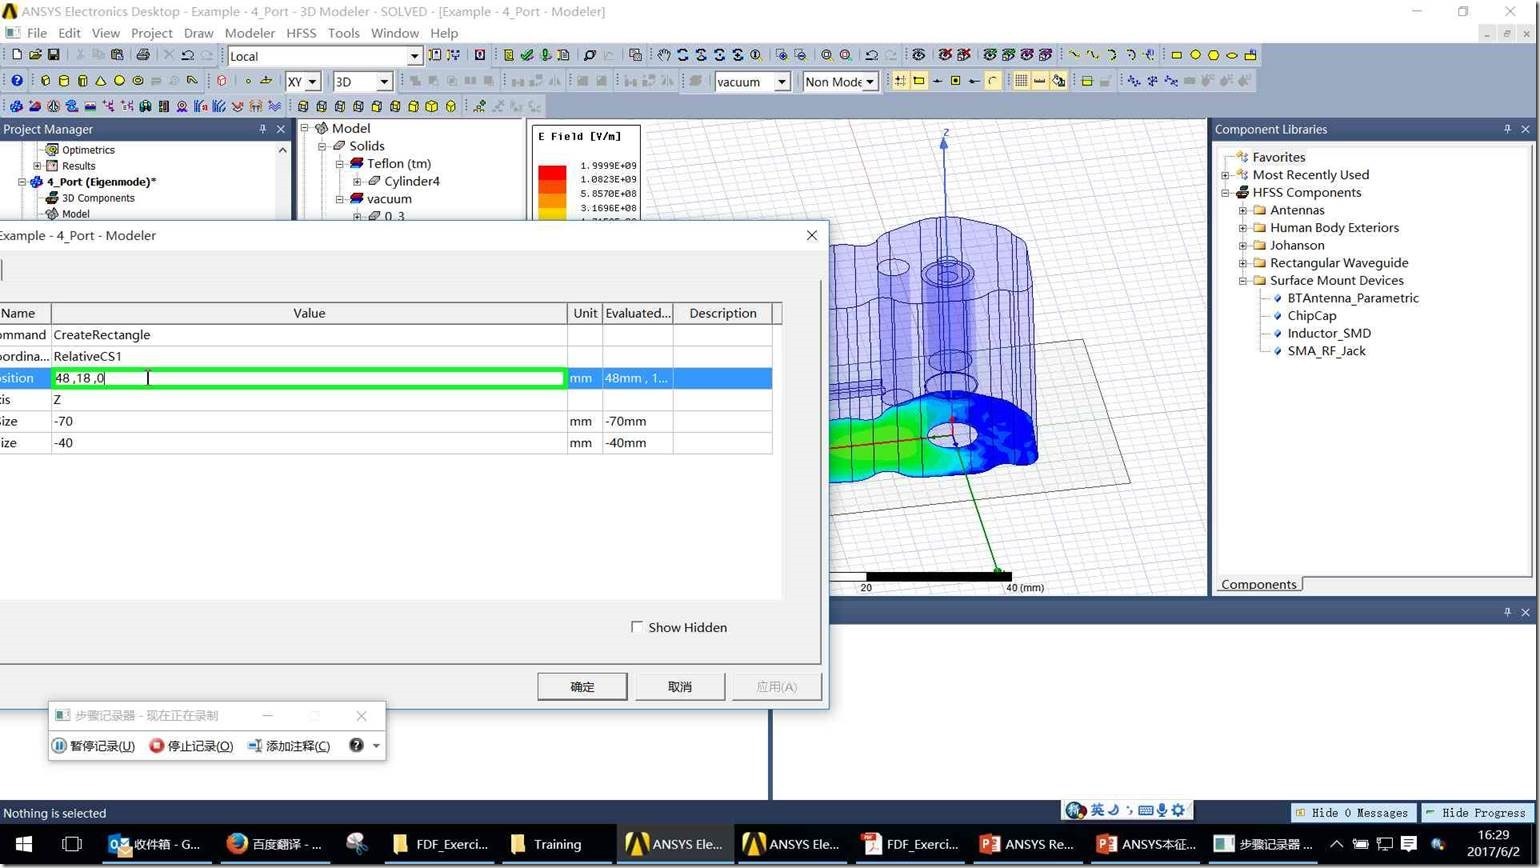
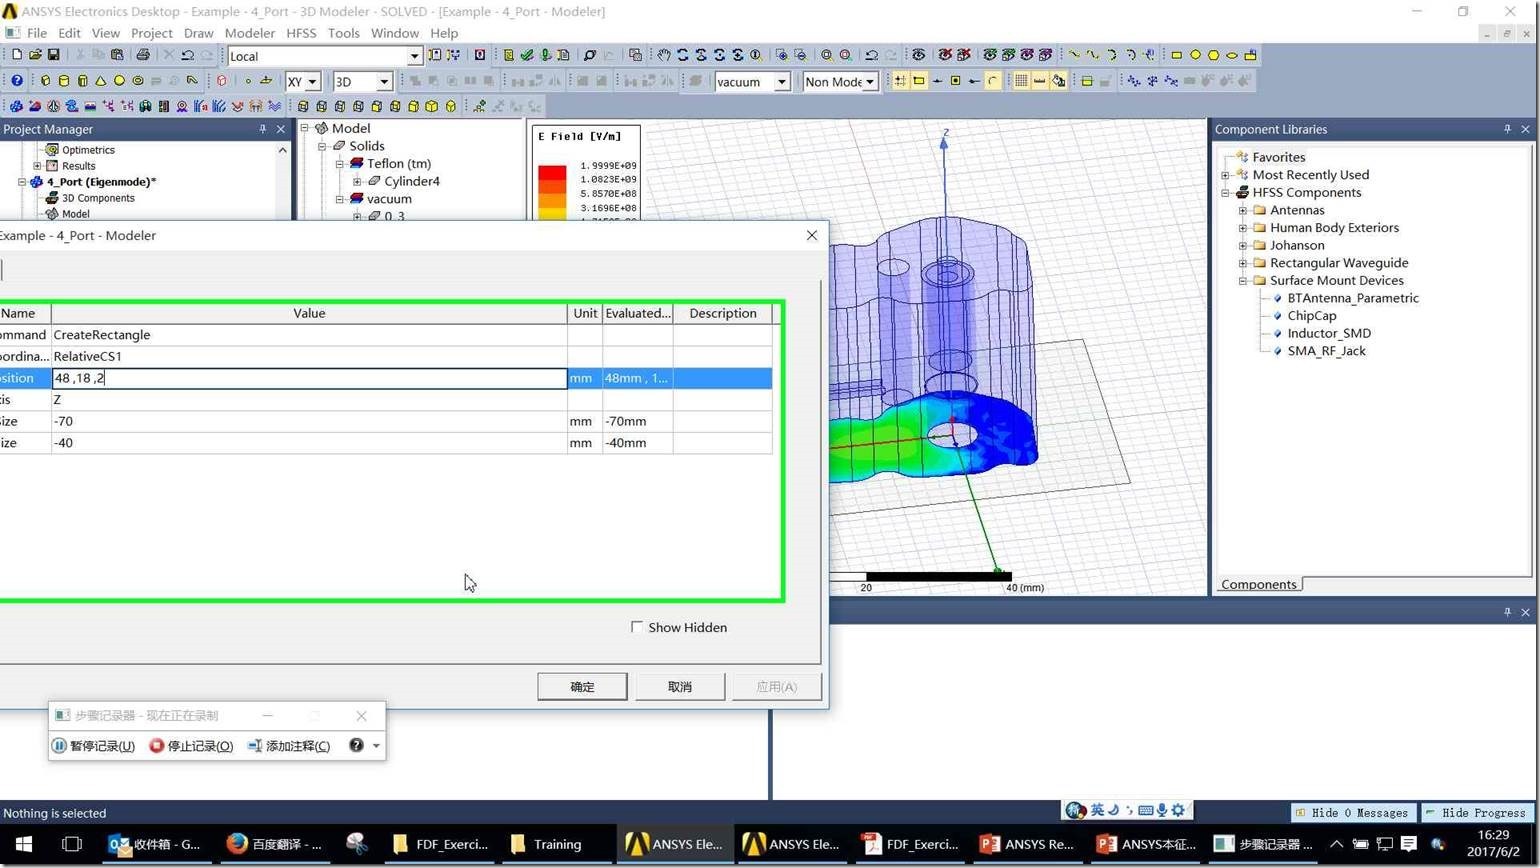
步骤 14: (2017/6/2 16:29:04) 用户在"Properties (对话框)"上键盘输入(在"Properties: Example - 4_Port - Modeler"中) [Backspace ...] |
|
步骤 15: (2017/6/2 16:29:06) 用户在"Properties (对话框)"上左键单击(在"Properties: Example - 4_Port - Modeler"中) |
|
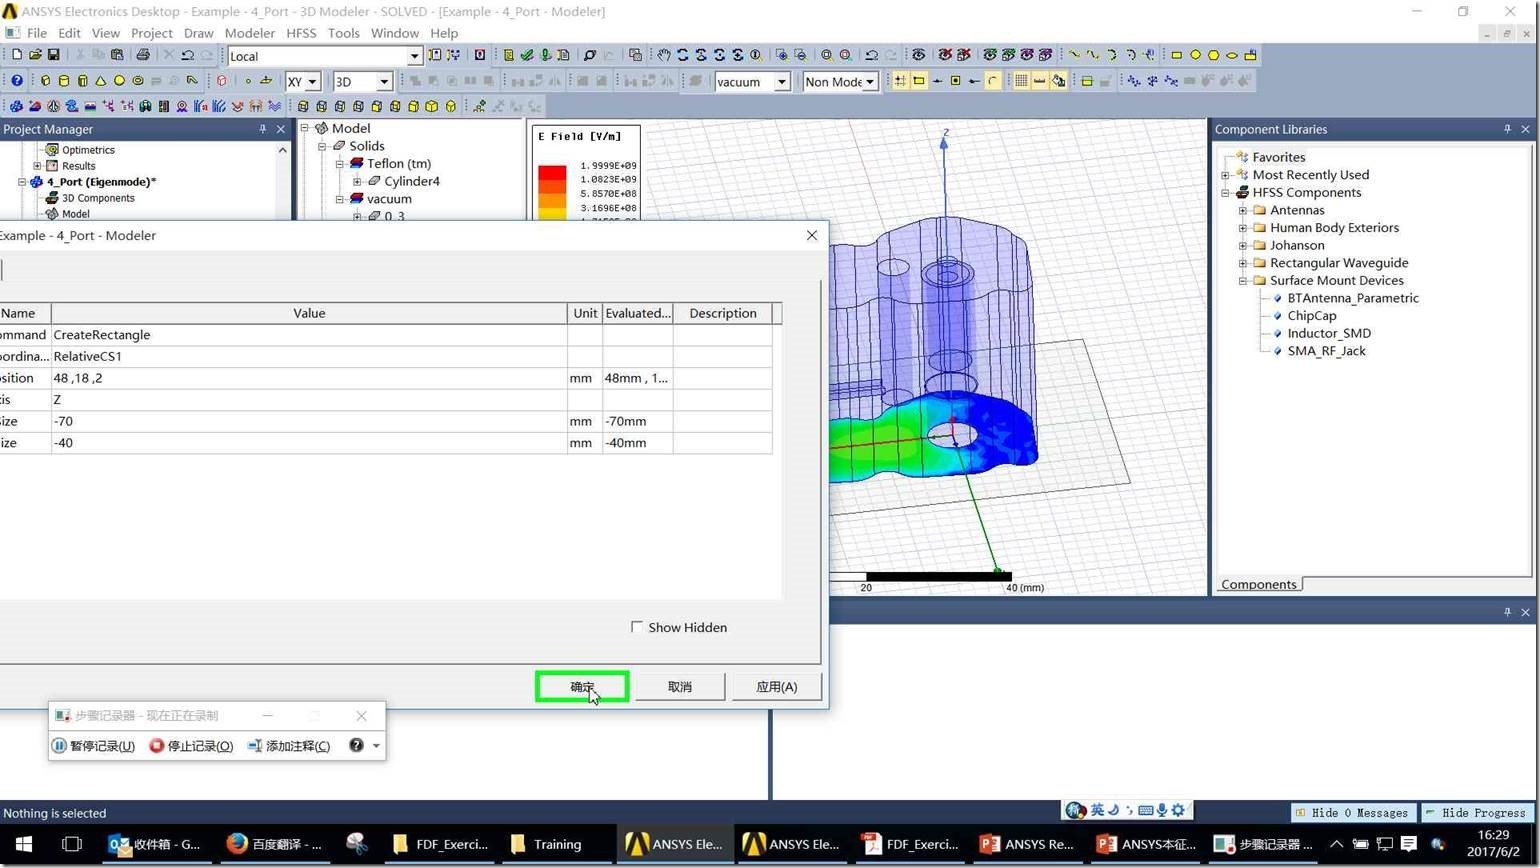
步骤 16: (2017/6/2 16:29:08) 用户在"确定 (按钮)"上左键单击(在"Properties: Example - 4_Port - Modeler"中) |
|
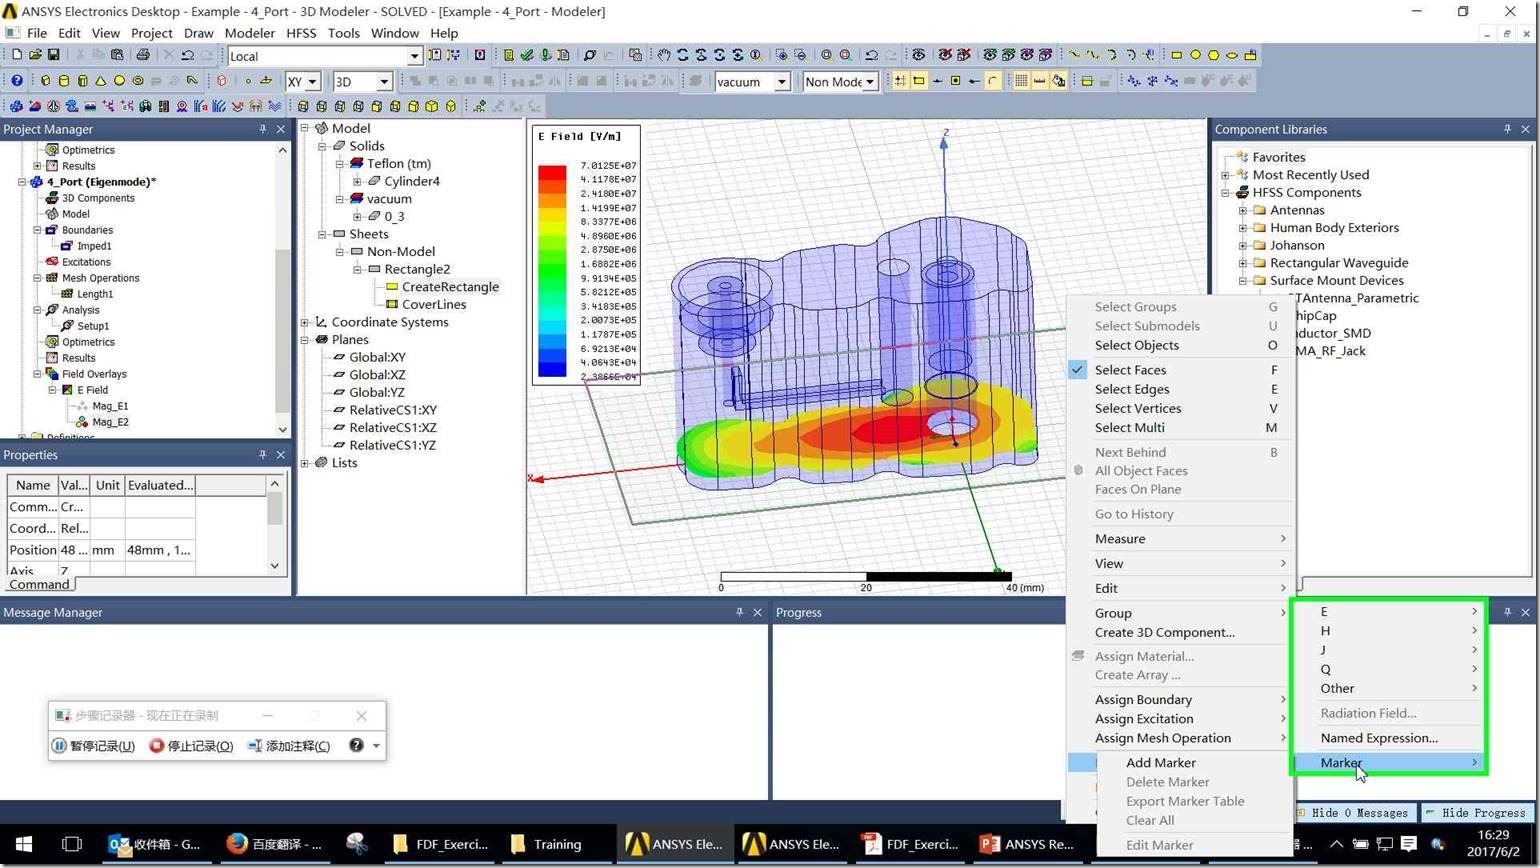
步骤 17: (2017/6/2 16:29:13) 用户在"Example - 4_Port - Modeler (窗口)"上右键单击(在"ANSYS Electronics Desktop - Example - 4_Port - 3D Modeler - SOLVED - [Example - 4_Port - Modeler]"中) |
|
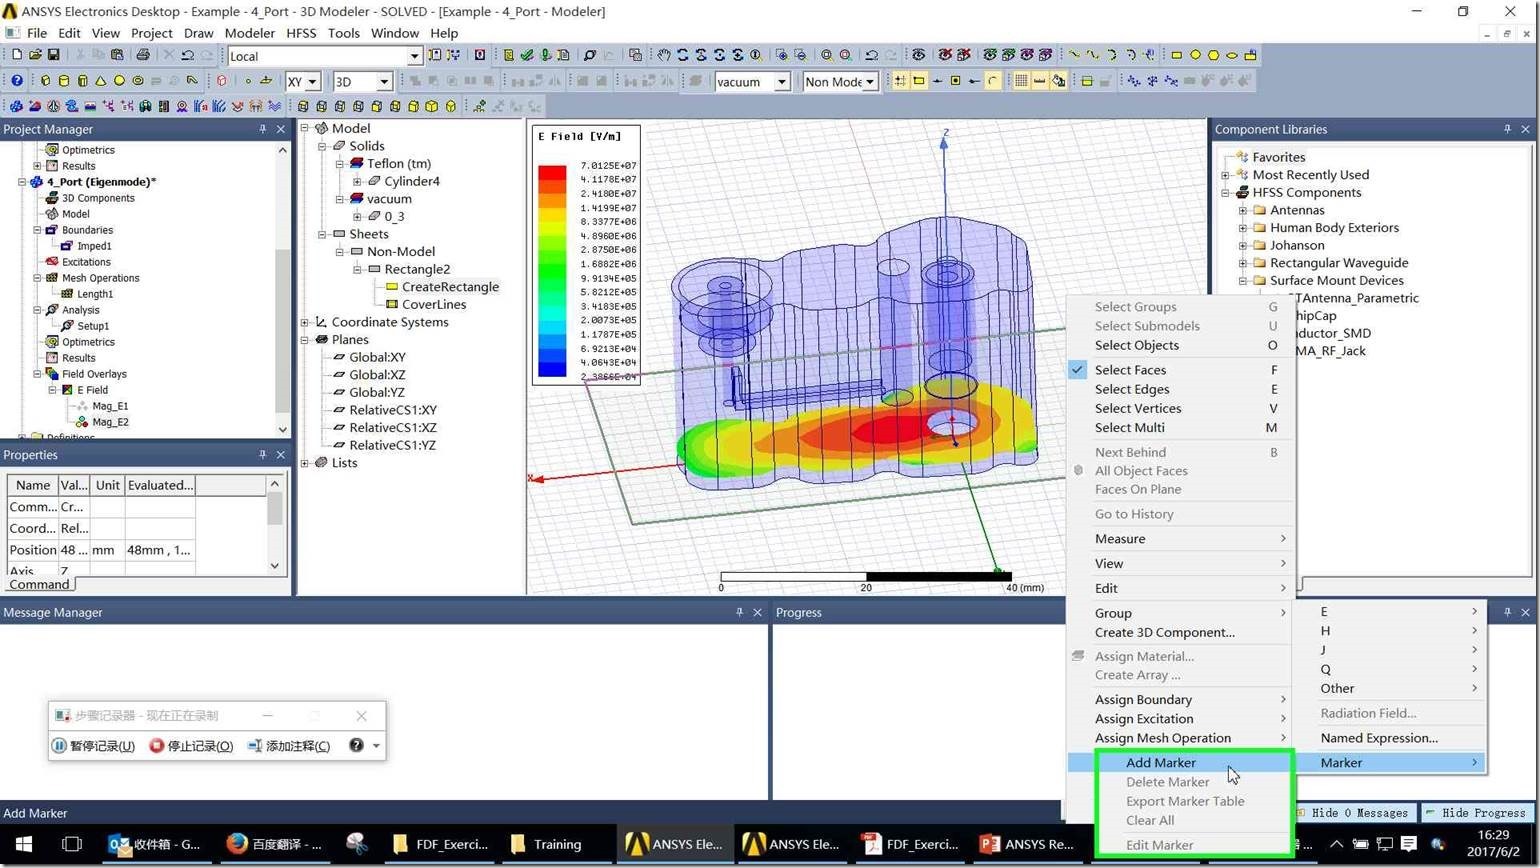
步骤 18: (2017/6/2 16:29:19) 用户在"Marker (菜单项目)"上左键单击 |
|
步骤 19: (2017/6/2 16:29:21) 用户在"Add Marker (菜单项目)"上左键单击 |
|
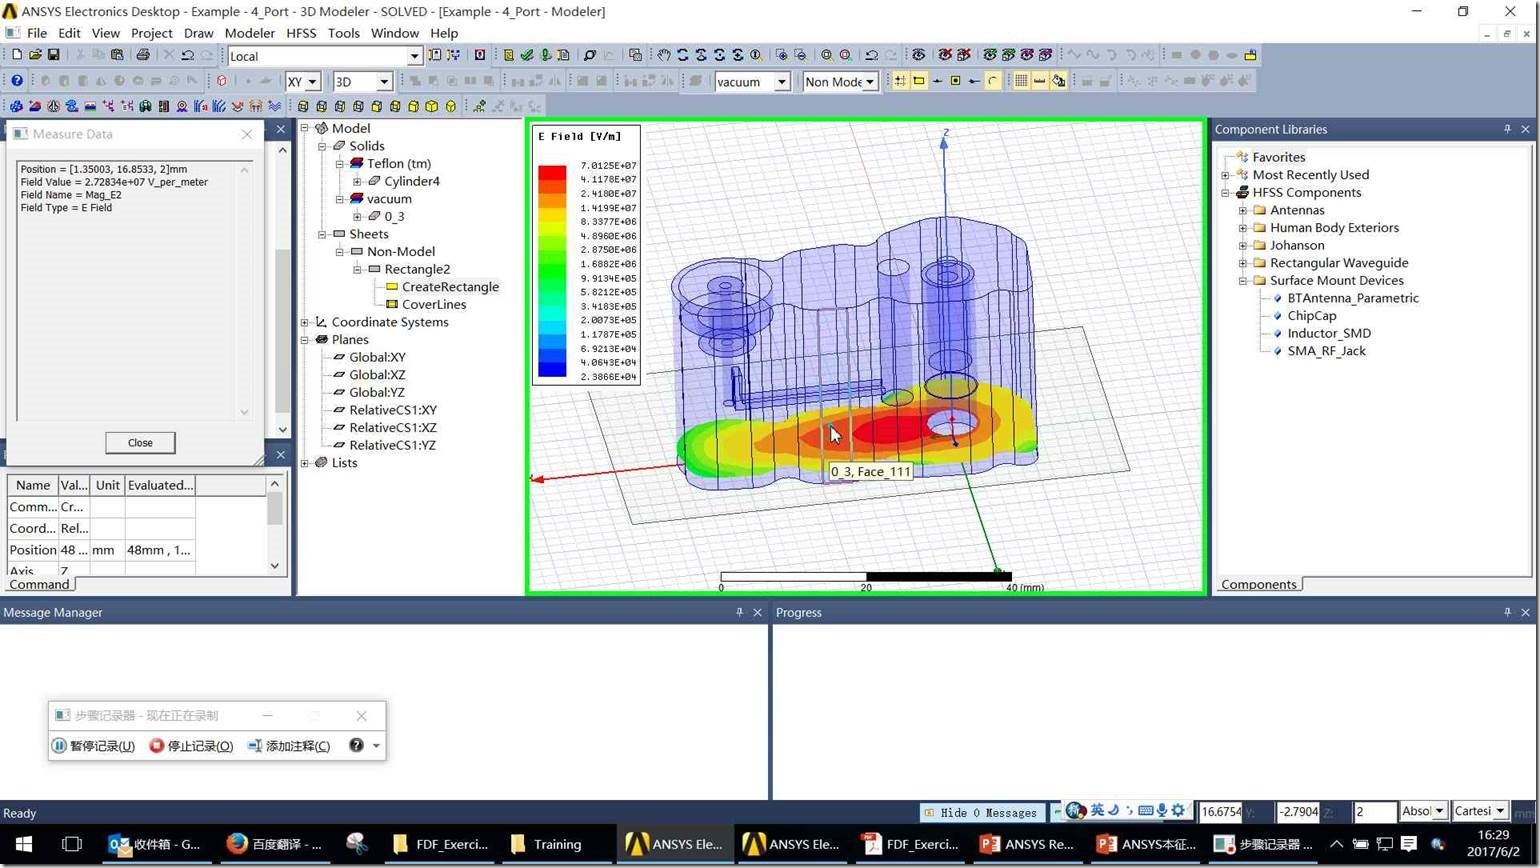
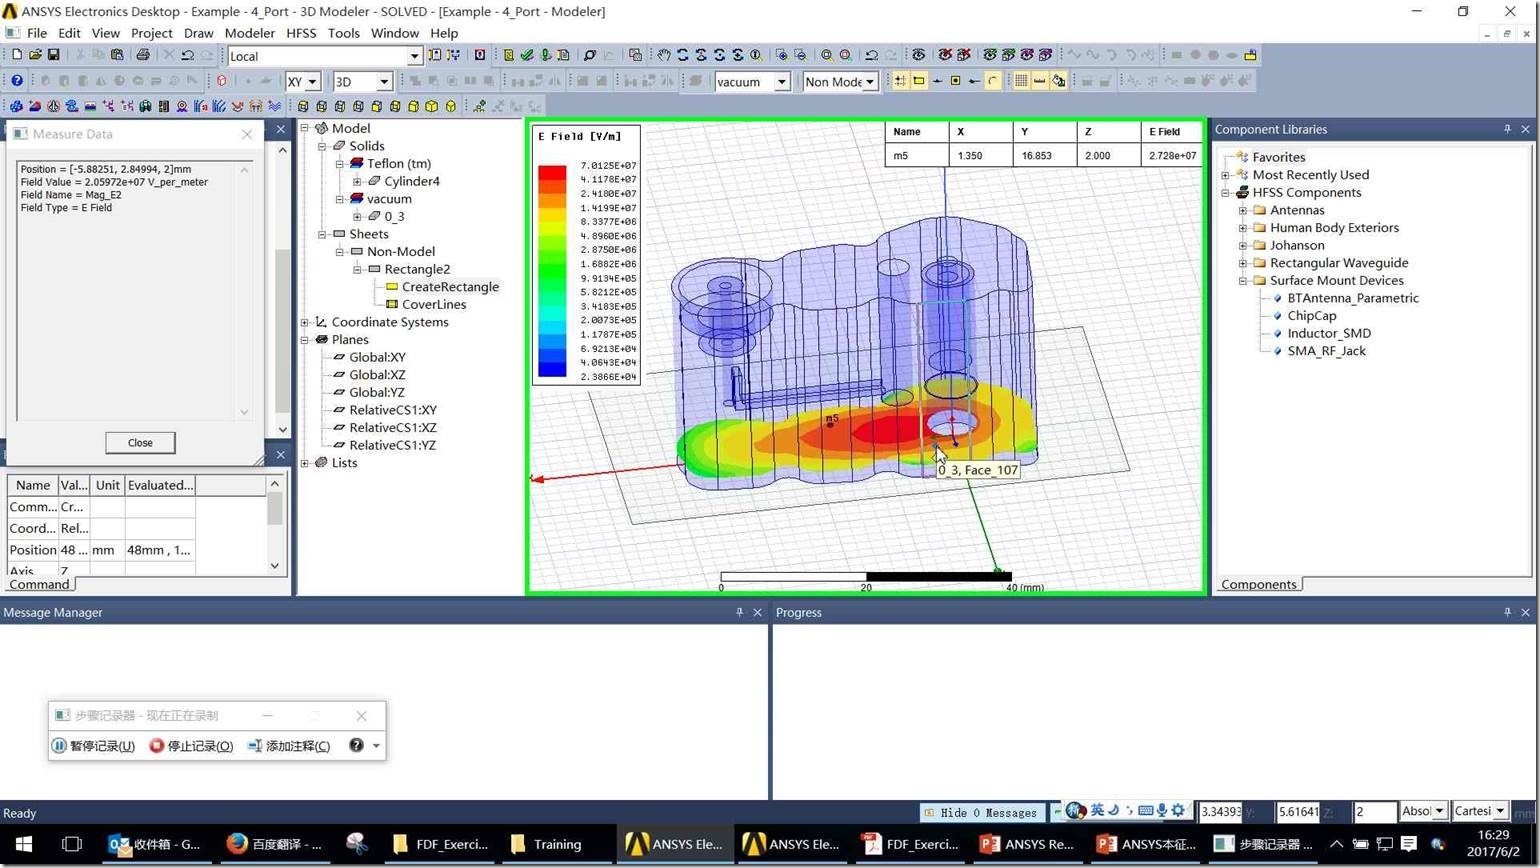
步骤 20: (2017/6/2 16:29:30) 用户在"Example - 4_Port - Modeler (窗口)"上左键单击(在"ANSYS Electronics Desktop - Example - 4_Port - 3D Modeler - SOLVED - [Example - 4_Port - Modeler]"中) |
|
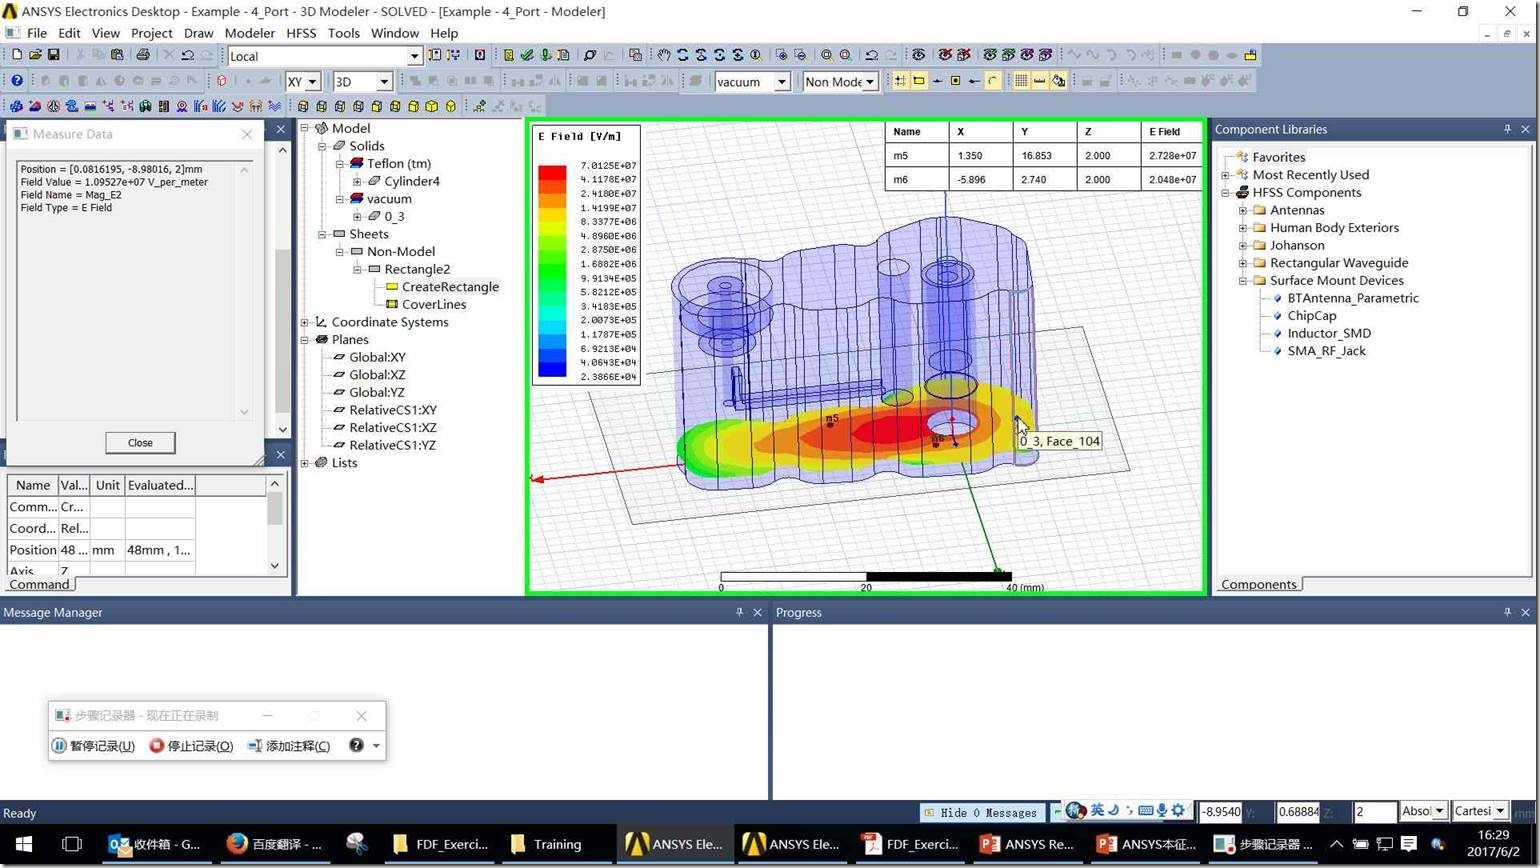
步骤 21: (2017/6/2 16:29:32) 用户在"Example - 4_Port - Modeler (窗口)"上左键单击(在"ANSYS Electronics Desktop - Example - 4_Port - 3D Modeler - SOLVED - [Example - 4_Port - Modeler]"中) |
|
上一个 下一个 |
|
步骤 22: (2017/6/2 16:29:34) 用户在"Example - 4_Port - Modeler (窗口)"上左键单击(在"ANSYS Electronics Desktop - Example - 4_Port - 3D Modeler - SOLVED - [Example - 4_Port - Modeler]"中) |


 浙公网安备 33010602011771号