操作系统的基础配置(CentOS 7)
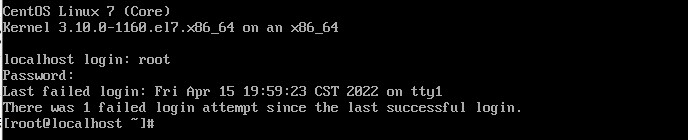
操作系统安装完成重启后,进入登录界面,在登录界面输入用户名root与之前设置的密码(密码不显示),然后按<Enter>键进行登录
操作系统安装完成后,做一些简单的配置,让服务器可以与其它终端正常连接,还可以正常访问互联网
1.修改默认主机名
默认主机名是localhost,如修改为test可用命令
[root@localhost ~]# hostname test
[root@localhost ~]# bash
[root@test ~]#
上面是临时修改主机名,重启后会失效。若要永久修改,可使用命令
[root@localhost ~]# hostnamectl set-hostname test
[root@localhost ~]# bash
[root@test ~]#
2.配置IP地址
IP地址的配置文件在/etc/sysconfig/network-scripts/目录下
[root@test ~]# vim /etc/sysconfig/network-scripts/ifcfg-ens32
[root@test ~]#
TYPE="Ethernet"
PROXY_METHOD="none"
BROWSER_ONLY="no"
BOOTPROTO="static"         #将DHCP改为none或者static
DEFROUTE="yes"
IPV4_FAILURE_FATAL="no"
IPV6INIT="yes"
IPV6_AUTOCONF="yes"
IPV6_DEFROUTE="yes"
IPV6_FAILURE_FATAL="no"
IPV6_ADDR_GEN_MODE="stable-privacy"
NAME="ens32"
UUID="9dc360e5-9220-456c-a49d-a2af3c4cfe91"
DEVICE="ens32"
ONBOOT="yes"        #将no改为yes
IPADDR=192.168.1.211    #IP地址与物理机在同一网段
PREFIX=24               #子网掩码
GATEWAY=192.168.1.2     #网关
DNS1=8.8.8.8            #DNS网关
DNS2=144.144.144.144
通过”ping“命令测试网络的连通性
[root@test ~]# ping www.baidu.com
PING www.wshifen.com (103.235.46.39) 56(84) bytes of data.
64 bytes from 103.235.46.39 (103.235.46.39): icmp_seq=1 ttl=128 time=202 ms
64 bytes from 103.235.46.39 (103.235.46.39): icmp_seq=2 ttl=128 time=205 ms
^C
--- www.wshifen.com ping statistics ---
4 packets transmitted, 4 received, 0% packet loss, time 3005ms
rtt min/avg/max/mdev = 202.728/204.372/205.662/1.376 ms
[root@test ~]#
3.为系统添加操作用户
安装完系统后,尽量避免使用root用户登录操作,降低不必要的风险,根据日常维护需要添加操作用户
[root@test ~]# useradd snoopy      #添加用户snoopy
[root@test ~]# passwd snoopy       #设置该用户密码
Changing password for user snoopy.
New password:
BAD PASSWORD: The password is shorter than 8 characters
Retype new password:
passwd: all authentication tokens updated successfully.
[root@test ~]#
4.安装常用的软件
通过 yum install 进行安装常用软件
[root@test ~]# yum install -y wget lrzsz vim telnet5.配置yum源
由于自带的yum源下载速度可能比较慢,因此需要更换到其他的yum源,方便后期下载软件。推荐的有阿里、网易、搜狐等
yum源的配置文件在/etc/yum.repo.d/目录下。
[root@test ~]# cd /etc/yum.repos.d/
[root@test yum.repos.d]# wget http://mirrors.163.com/.help/CentOS7-Base-163.repo
[root@test yum.repos.d]# ll CentOS7-Base-163.repo
-rw-r--r--. 1 root root 1572 Dec  1  2016 CentOS7-Base-163.repo
[root@test yum.repos.d]# mv CentOS-Base.repo CentOS-Base.repo.bak     #在替换原来的yum源配置文件前,对原配置文件进行备份
[root@test yum.repos.d]# mv CentOS7-Base-163.repo CentOS-Base.repo
也可以使用下面命令一键替换为阿里yum源
[root@test ~]# wget -O /etc/yum.repos.d/CentOS-Base.repo http://mirrors.aliyun.com/repo/Centos-7.repo6.关闭防火墙
[root@test ~]# systemctl stop firewalld
[root@test ~]# systemctl disable firewalld
7.关闭SELinux服务
SELinux的配置文件为/etc/selinux/config
将SELINUX=enforcing改为SELINUX=disable
[root@test ~]# vim /etc/selinux/config
[root@test ~]#
# This file controls the state of SELinux on the system.
# SELINUX= can take one of these three values:
#     enforcing - SELinux security policy is enforced.
#     permissive - SELinux prints warnings instead of enforcing.
#     disabled - No SELinux policy is loaded.
SELINUX=disable
# SELINUXTYPE= can take one of three values:
#     targeted - Targeted processes are protected,
#     minimum - Modification of targeted policy. Only selected processes are protected.
#     mls - Multi Level Security protection.
SELINUXTYPE=targeted
修改完成后重启使其永久生效
8.修改SSH服务默认配置
为增强系统的安全性,对SSH服务的默认配置进行修改
SSH服务的配置文件为/etc/ssh/sshd_config
[root@test ~]# cd /etc/ssh/
[root@test ssh]# cp sshd_config sshd_config.bak     #备份
#不修改默认配置的情况下,也可以直接在配置文件中添加下面的配置
###config for sshd by root at 2022-04-16
Port 2345                  #将默认端口22变成2345
PermitRootLogin no         #不允许使用root用户登录
PermitEmptyPasswords no    #不允许使用空密码登录
USeDNS no                  #不允许使用DNS解析
###end
9.修改文件描述符
默认文件描述符是1024,使用“ulimit -n”命令查看
[root@test ~]# ulimit -n
1024
[root@test ~]# echo "* - nofile 12345">>/etc/security/limits.conf
[root@test ~]# logout   # 修改完成退出,重新登录使其生效
[root@test ~]# ulimit -n
12345
10.登录超时退出
“登录超时退出”配置项是为了加强系统的安全
“登录超时退出”临时生效的配置如下
[root@test ~]# export TMOUT=10   #默认单位为s
[root@test ~]# timed out waiting for input:auto-logout
上述配置项表示10s后会提示超时自动退出登录
“登录超时退出”永久生效的配置如下
[root@test ~]# echo "export TMOUT=300">>/etc/profile
[root@test ~]# source /etc/profile
 浙公网安备 33010602011771号