
docker Ubuntu wasm 环境配置 浏览器debug c/c++
执行下面命令启动docker Ubuntu
docker container run -it -p 80:8000 ubuntu
进入Ubuntu容器中
root@6c76b77bfdb4:apt update
root@6c76b77bfdb4:apt install vim xz-utils bzip2 iputils-ping net-tools nginx cmake git python3.10
root@6c76b77bfdb4:update-alternatives --install /usr/bin/python python /usr/bin/python3.10 1
root@6c76b77bfdb4:mkdir /home/wasm
root@6c76b77bfdb4:cd /home/wasm
root@6c76b77bfdb4:git clone https://github.com/emscripten-core/emsdk.git
root@6c76b77bfdb4:cd emsdk/
root@6c76b77bfdb4:/home/wasm/emsdk# ./emsdk install latest
root@6c76b77bfdb4:/home/wasm/emsdk# ./emsdk activate latest
root@6c76b77bfdb4:/home/wasm/emsdk# source ./emsdk_env.sh
root@6c76b77bfdb4:/home/wasm/emsdk# mkdir -p /home/emsdk/test
root@6c76b77bfdb4:/home/wasm/emsdk# cd /home/emsdk/test
root@6c76b77bfdb4:/home/emsdk/test# vim hello .c
root@6c76b77bfdb4:echo "source /home/wasm/emsdk/emsdk_env.sh" >>~/.bashrc #省的以后都需要手动激活环境
emcc hello.c -o hello.html

emrun --no_browser --port 8000 hello.html
安装调试环境
在chrome了浏览器中输入 https://goo.gle/wasm-debugging-extension
在chrome浏览器中 安装 这个扩展
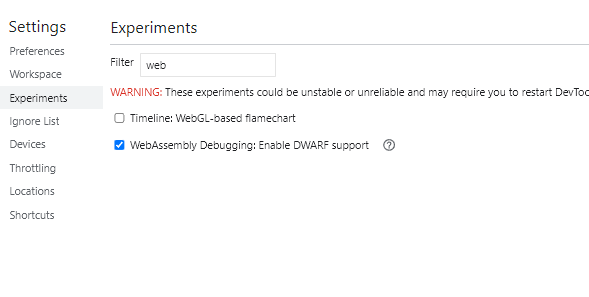
在检查-> 设置(Settings)->实验(Experiments)->过滤(Filter)中输入web
勾选 WebAssembly Debugging:Enable DWARF support 选项

重新编译
emcc -g test.c -fdebug-compilation-dir='.' -o test.html
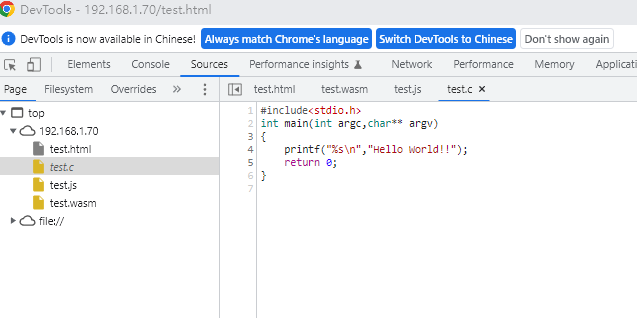
设置完成之后刷新页面 在source里面即可看到test.c
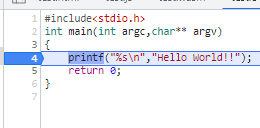
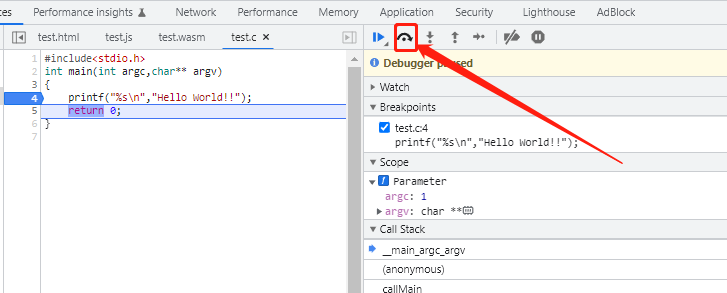
使用光标点击test.c中的代码前面的行数那里之后既可以打断点如下图所示 给printf处打的断点
刷新页面之后如下图
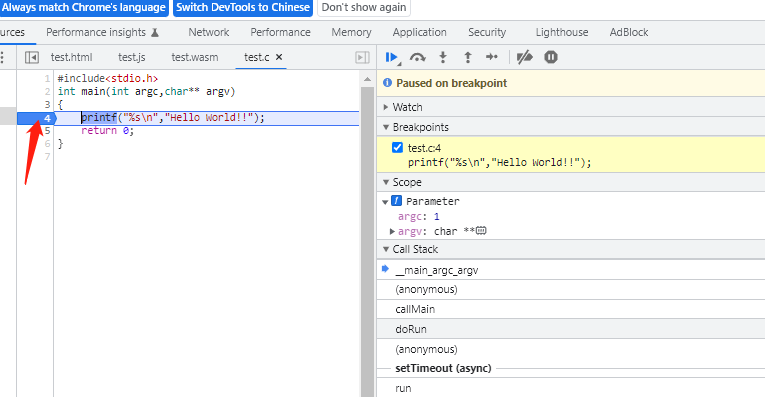
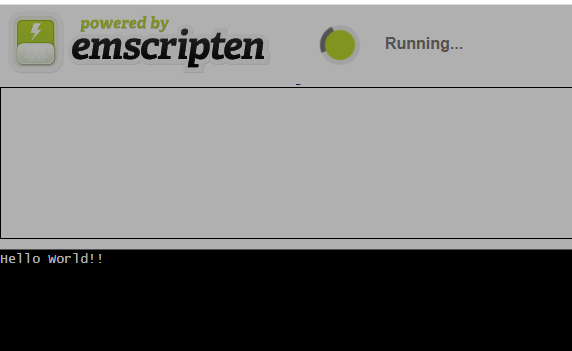
点击如下图中按钮进行单步调试 之后 浏览器中会输出结果
结果1
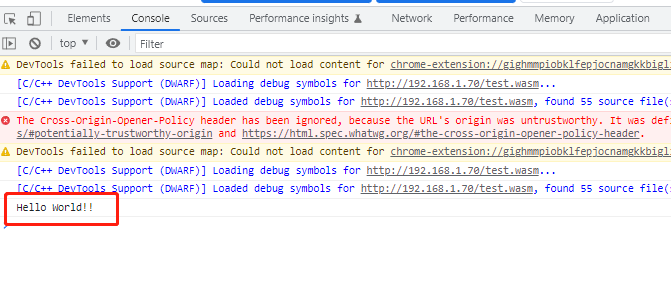
结果2

 浙公网安备 33010602011771号