
Cmake基础知识
最近要使用到cmake,花了几天学习和整理了下,简单记录下笔记,方便日后查看。强烈建议跟着下面cmake-examples这个github实践一遍,再结合官方手册查询下相关命令含义。
本篇笔记主要参考资源:
https://github.com/ttroy50/cmake-examples
官方Cmake 手册:https://cmake.org/cmake/help/v3.23/
官方Cmake Tutorial: https://cmake.org/cmake/help/latest/guide/tutorial/index.html
https://zhuanlan.zhihu.com/p/550128139
另外,其他有用资源:
Cmake Tutorial翻译:https://juejin.cn/post/6844904000484016135
https://github.com/Akagi201/learning-cmake/
https://gist.github.com/mbinna/c61dbb39bca0e4fb7d1f73b0d66a4fd1
1. 环境
首先查询下自己linux的工具版本,命令如下:
g++ -v
make - v
cmake -version
我这里的版本为: gcc 9.2.1, GNU Make 4.2.1, cmake 3.13.4
2. 基础知识
2.1 最基本的CmakeList.txt
假设项目只有一个main.cpp,项目文件结构如下:
.
├── CMakeLists.txt
└── main.cpp
CmakeList.txt文件如下:
# Set the minimum version of CMake that can be used
cmake_minimum_required(VERSION 3.5)    # 需要cmake最低版本为3.5

# Set the project name
project (hello_cmake)   # 设置此项目的名称为hello_cmake

# Add an executable
add_executable(hello_cmake main.cpp)    # 将main.cpp源文件,生成可执行文件hello_cmake
前两个命令很简单, 最后一个命令需要学习下,官方手册上该命令的参数含义如下:
官方手册:https://cmake.org/cmake/help/v3.23/command/add_executable.html?highlight=add_executable
add_executable(<name> [WIN32] [MACOSX_BUNDLE]
               [EXCLUDE_FROM_ALL]
               [source1] [source2 ...])
中间WIN32,MACOSX_BUNDLE,EXCLUDE_FROM_ALL三个很少设置,一般就关注第一个参数name, 和最后一个源文件的参数,其含义如下:
- name: 最后生成的可执行文件的名字, 有时候也会采用项目名称,如:
${PROJECT_NAME} - [source1] [source2 ...]: 参与编译的cpp文件名列表,即可以有多个cpp文件
一个多cpp文件示例:
add_executable(${PROJECT_NAME} main.cpp helper.cpp)
2.2 添加源码
CMake中预定义了一些变量,可以获得一些系统的信息,和路径相关的一些变量和含义如下:
| Variable | Info |
|---|---|
| CMAKE_SOURCE_DIR | The root source directory |
| CMAKE_CURRENT_SOURCE_DIR | The current source directory if using sub-projects and directories. |
| PROJECT_SOURCE_DIR | The source directory of the current cmake project. |
| CMAKE_BINARY_DIR | The root binary / build directory. This is the directory where you ran the cmake command. |
| CMAKE_CURRENT_BINARY_DIR | The build directory you are currently in. |
| PROJECT_BINARY_DIR | The build directory for the current project. |
一般项目中都还会有其他代码文件,假设项目文件结构如下,main.cpp文件会使用hello.cpp文件中的类:
├── CMakeLists.txt
├── include
│ └── hello.h
└── src
├── hello.cpp
└── main.cpp
main.cpp代码如下:
#include "Hello.h"

int main(int argc, char *argv[])
{
    Hello hi;
    hi.print();
    return 0;
}
CMakeLists.txt内容如下:
cmake_minimum_required(VERSION 3.5)
project (hello_headers)

# Create a sources variable with a link to all cpp files to compile
set(SOURCES
    src/Hello.cpp
    src/main.cpp
)

# Add an executable with the above sources
add_executable(hello_headers ${SOURCES})

# Set the directories that should be included in the build command for this target
# when running g++ these will be included as -I/directory/path/
target_include_directories(hello_headers
    PRIVATE
        ${PROJECT_SOURCE_DIR}/include
)
上面涉及到两个命令: set(), target_include_directories(), 其使用如下:
set()命令
set命令用来定义普通变量(Normal Variable),环境变量( Environment Variable)和缓存入口变量(cache entry), 其命令参数如下:
官方手册:https://cmake.org/cmake/help/v3.23/command/set.html
设置普通变量(Normal Variable)
set(<variable> <value>... [PARENT_SCOPE])
设置环境变量
set(ENV{<variable>} [<value>])
在上述CMakeLists.txt文件中,set命令设置SOURCES变量指代src/Hello.cpp和src/main.cpp两个cpp文件,如果cpp文件特别多,也可以采用如下命令:
file(GLOB SOURCES "src/*.cpp") # 通过GLOB来正则匹配src路径下的所有cpp文件
target_include_directories()命令
target_include_directories()命令添加include文件路径,即编译时经常设置的 -I 选项。其命令参数如下:
官方手册:https://cmake.org/cmake/help/v3.23/command/target_include_directories.html
target_include_directories(<target> [SYSTEM] [AFTER|BEFORE]
  <INTERFACE|PUBLIC|PRIVATE> [items1...]
  [<INTERFACE|PUBLIC|PRIVATE> [items2...] ...])
: 需要添加include路径的目标名称 , 即编译target时,会去include路径里搜索头文件 - <INTERFACE|PUBLIC|PRIVATE>:设置scope
- PRIVATE:the directory is added to this target's include directories
- INTERFACE:the directory is added to the include directories for any targets that link this library.
- PUBLIC:it is included in this library and also any targets that link this library
- item:文件路径
2.3 添加静态库
上面第2.2节中编译时,Hello.h和hello.cpp直接通过源码的方式添加到项目中,也可以先将Hello.h和hello.cpp编译成静态库,再添加到项目中。
假设项目文件结构如下,main.cpp文件会使用hello.cpp文件中的类:
```
├── CMakeLists.txt
├── include
│ └── static
│ └── Hello.h
└── src
├── Hello.cpp
└── main.cpp
```
main.cpp代码如下:
#include "static/Hello.h"

int main(int argc, char *argv[])
{
    Hello hi;
    hi.print();
    return 0;
}
CMakeLists.txt文件内容如下:
cmake_minimum_required(VERSION 3.5)

project(hello_library)

############################################################
# Create a library
############################################################

#Generate the static library from the library sources
add_library(hello_library STATIC
    src/Hello.cpp
)   # make执行后,会在build路径下创建一个库文件:libhello_library.a

target_include_directories(hello_library
    PUBLIC
        ${PROJECT_SOURCE_DIR}/include
)

# Add an executable with the above sources
add_executable(hello_binary
    src/main.cpp
)

# link the new hello_library target with the hello_binary target
target_link_libraries( hello_binary
    PRIVATE
        hello_library
)
上面CMakeLists.txt文件中多了两个命令:add_library和target_link_libraries
add_library()命令
add_library命令通过提供的源码文件,建立库文件(静态库或者动态库),其参数含义如下:
官方手册:https://cmake.org/cmake/help/v3.23/command/add_library.html
add_library(<name> [STATIC | SHARED | MODULE]
            [EXCLUDE_FROM_ALL]
            [<source>...])
: 建立的库文件名字,例如静态库lib .a; 动态库lib .so; - [STATIC | SHARED | MODULE]: 库的类型
- STATIC:静态库
- SHARED:共享库/动态库
- MODULE:
target_link_libraries()命令
如果项目依赖某个库文件,在创建可执行文件时,需要链接这些库文件 ,target_link_libraries命令指明库文件的路径,其参数含义如下:
官方手册:https://cmake.org/cmake/help/v3.23/command/target_link_libraries.html
target_link_libraries(<target>
                      <PRIVATE|PUBLIC|INTERFACE> <item>...
                     [<PRIVATE|PUBLIC|INTERFACE> <item>...]...)
: 需要链接库文件的目标名称 , 即生成target可执行文件时,会去link路径里搜索库文件 - <PRIVATE|PUBLIC|INTERFACE>: 设置scope, 同target_include_directories命令
- :库文件路径
2.4 添加共享库(动态库)
上面2.3节中,将Hello.h和hello.cpp编译成静态库,再添加到项目中,也可以编译成动态库。
假设项目文件结构如下,main.cpp文件会使用hello.cpp文件中的类:
```
├── CMakeLists.txt
├── include
│ └── shared
│ └── Hello.h
└── src
├── Hello.cpp
└── main.cpp
```
main.cpp代码如下:
#include "shared/Hello.h"

int main(int argc, char *argv[])
{
    Hello hi;
    hi.print();
    return 0;
}
CMakeLists.txt文件内容如下:
cmake_minimum_required(VERSION 3.5)
project(hello_library)

############################################################
# Create a library
############################################################

#Generate the shared library from the library sources
add_library(hello_library SHARED
    src/Hello.cpp
)   #make后,在build文件夹下,创建共享库文件:libhello_library.so
add_library(hello::library ALIAS hello_library)  #为hello_library创建一个别名hello::library

target_include_directories(hello_library
    PUBLIC
        ${PROJECT_SOURCE_DIR}/include
)

# Add an executable with the above sources
add_executable(hello_binary
    src/main.cpp
)

# link the new hello_library target with the hello_binary target
target_link_libraries( hello_binary
    PRIVATE
        hello::library
)
基本和添加静态库一样,只是将STATIC变成SHARED ,同时add_library的另外一个用法如下:
官方手册:https://cmake.org/cmake/help/v3.23/command/add_library.html?highlight=alias targets#alias-libraries
add_library(<name> ALIAS <target>)
- 为
创建一个别名 , 此命令后可以用 指代target
2.5 生成安装文件
2.5.1 直接安装
CMake能生成安装文件,通过 make install 命令能安装对应的可执行文件,库文件和其他文件
假设项目文件结构如下,main.cpp文件会使用hello.cpp文件中的类:
```
├── cmake-examples.conf
├── CMakeLists.txt
├── include
│ └── installing
│ └── Hello.h
├── README.adoc
└── src
├── Hello.cpp
└── main.cpp
```
main.cpp中代码如下:
#include "installing/Hello.h"

int main(int argc, char *argv[])
{
    Hello hi;
    hi.print();
    return 0;
}
CMakeLists.txt文件内容如下:
cmake_minimum_required(VERSION 3.5)
project(cmake_examples_install)

#Generate the shared library from the library sources
add_library(cmake_examples_inst SHARED
    src/Hello.cpp
)

target_include_directories(cmake_examples_inst
    PUBLIC
        ${PROJECT_SOURCE_DIR}/include
)

# Add an executable with the above sources
add_executable(cmake_examples_inst_bin
    src/main.cpp
)

# link the new hello_library target with the hello_binary target
target_link_libraries( cmake_examples_inst_bin
    PRIVATE
        cmake_examples_inst
)

############################################################
# Install
############################################################

# Binaries
install (TARGETS cmake_examples_inst_bin
    DESTINATION bin)

# Library
# Note: may not work on windows
install (TARGETS cmake_examples_inst
    LIBRARY DESTINATION lib)

# Header files
install(DIRECTORY ${PROJECT_SOURCE_DIR}/include/
    DESTINATION include)

# Config
install (FILES cmake-examples.conf
    DESTINATION etc)
上面主要使用了install命令来设置安装时的相关选项,其参数如下:
官方手册:https://cmake.org/cmake/help/v3.23/command/install.html
install(TARGETS <target>... [...])
install(IMPORTED_RUNTIME_ARTIFACTS <target>... [...])
install({FILES | PROGRAMS} <file>... [...])
install(DIRECTORY <dir>... [...])
install(SCRIPT <file> [...])
install(CODE <code> [...])
install(EXPORT <export-name> [...])
install(RUNTIME_DEPENDENCY_SET <set-name> [...])
备注:具体的安装路径是由变量CMAKE_INSTALL_PREFIX控制,其默认值为/usr/local, 可以进行设置, 如:cmake .. -DCMAKE_INSTALL_PREFIX=/install/location
可执行文件安装路径设置:
install (TARGETS cmake_examples_inst_bin
    DESTINATION bin)  #将可执行文件cmake_examples_inst_bin安装到${CMAKE_INSTALL_PREFIX}/bin 目录
库文件安装路径
install (TARGETS cmake_examples_inst
    LIBRARY DESTINATION lib) #将库文件安装到${CMAKE_INSTALL_PREFIX}/lib 目录
头文件安装路径:
install(DIRECTORY ${PROJECT_SOURCE_DIR}/include/
    DESTINATION include)  #将头文件安装到${CMAKE_INSTALL_PREFIX}/include 目录
配置文件安装路径
install (FILES cmake-examples.conf
    DESTINATION etc)  #将配置文件cmake-examples.conf安装到${CMAKE_INSTALL_PREFIX}/etc 目录
对于上述CMakeLists.txt典型的编译和安装命令如下:
 mkdir build
 cd build
 cmake ..
 make
 sudo make install
2.5.2 CPack
除了直接进行安装,通过采用Cpack,CMake可以生成不同平台的安装文件。Cpack可以生成linux系统的RMP,dep,gzip安装包(二进制或者源码),也可以生成windows的NSIS文件。下面是一个生成linux deb安装文件示例:
假设项目文件结构如下,main.cpp文件会使用hello.cpp文件中的类:
├── cmake-examples.conf
├── CMakeLists.txt
├── include
│ └── Hello.h
└── src
├── Hello.cpp
└── main.cpp
main.cpp代码如下:
#include "Hello.h"

int main(int argc, char *argv[])
{
    Hello hi;
    hi.print();
    return 0;
}
CMakeLists.txt文件内容如下:
cmake_minimum_required(VERSION 3.5)
project(cmake_examples_deb)

# set a project version
set (deb_example_VERSION_MAJOR 0)
set (deb_example_VERSION_MINOR 2)
set (deb_example_VERSION_PATCH 2)
set (deb_example_VERSION "${deb_example_VERSION_MAJOR}.${deb_example_VERSION_MINOR}.${deb_example_VERSION_PATCH}")

#Generate the shared library from the library sources
add_library(cmake_examples_deb SHARED src/Hello.cpp)

target_include_directories(cmake_examples_deb
    PUBLIC
        ${PROJECT_SOURCE_DIR}/include
)

# Add an executable with the above sources
add_executable(cmake_examples_deb_bin src/main.cpp)

# link the new hello_library target with the hello_binary target
target_link_libraries( cmake_examples_deb_bin
    PUBLIC
        cmake_examples_deb
)

############################################################
# Install
############################################################

# Binaries
install (TARGETS cmake_examples_deb_bin
    DESTINATION bin)

# Library
# Note: may not work on windows
install (TARGETS cmake_examples_deb
    LIBRARY DESTINATION lib)

# Config
install (FILES cmake-examples.conf
    DESTINATION etc)

############################################################
# Create DEB
############################################################

# Tell CPack to generate a .deb package
set(CPACK_GENERATOR "DEB")

# Set a Package Maintainer.
# This is required
set(CPACK_DEBIAN_PACKAGE_MAINTAINER "Thom Troy")

# Set a Package Version
set(CPACK_PACKAGE_VERSION ${deb_example_VERSION})

# Include CPack
include(CPack)
上面CMakeLists.txt文件中Cpack使用包括三步:
- 设置Cpack产生安装包的格式:
set(CPACK_GENERATOR "DEB"): 生成deb格式的安装包
-
设置Cpack相关属性
set(CPACK_DEBIAN_PACKAGE_MAINTAINER "Thom Troy")   # 设置安装包维护者信息
set(CPACK_PACKAGE_VERSION ${deb_example_VERSION})  # 设置安装包版本信息
其他设置的属性如下:
https://gitlab.kitware.com/cmake/community/-/wikis/doc/cpack/PackageGenerators
Variable Info CPACK_DEBIAN_PACKAGE_MAINTAINER Maintainer information CPACK_PACKAGE_DESCRIPTION_SUMMARY Package short description CPACK_PACKAGE_DESCRIPTION Package description CPACK_DEBIAN_PACKAGE_DEPENDS For advanced users to add custom scripts. CPACK_DEBIAN_PACKAGE_CONTROL_EXTRA The build directory you are currently in. CPACK_DEBIAN_PACKAGE_SECTION Package section (see here) CPACK_DEBIAN_PACKAGE_VERSION Package version -
包含Cpack
include(CPack) # 让Cmake包含CPack
典型产生linux deb安装包命令如下:
mkdir build
cd build
# make help
make package
2.6 build相关设置
Cmake可以设置build时的一些属性,常用的设置如下:
CMAKE_BUILD_TYPE
CMAKE_BUILD_TYPE 变量表示build时的类型,可以设置四种:Debug, Release, RelWithDebInfo,MinSizeRel,设置如下:
cmake .. -DCMAKE_BUILD_TYPE=Release # 设置build类型为release
CMAKE_C_FLAGS
CMAKE_CXX_FLAGS和CMAKE_C_FLAGS变量可以设置g++/gcc编译器flag/defintion,如下:
cmake .. -DCMAKE_CXX_FLAGS="-DEX3" # 预定义一个EX3的变量?
也可以用命令target_compile_definitions来设置编译器flag/defintion,如下:
target_compile_definitions(target PRIVATE EX3)
指定C++11/14
cmake可以指定编译器采用的c++版本,如c++11,c++14等,下面是两种常用方式:
cmake 3.1之后版本:
cmake_minimum_required(VERSION 3.1)
# Set the project name
project (hello_cpp11)

# set the C++ standard to C++ 11
set(CMAKE_CXX_STANDARD 11)

# Add an executable
add_executable(hello_cpp11 main.cpp)
cmake 2.8之后版本:
cmake_minimum_required(VERSION 2.8)

# Set the project name
project (hello_cpp11)

# try conditional compilation
include(CheckCXXCompilerFlag)
CHECK_CXX_COMPILER_FLAG("-std=c++11" COMPILER_SUPPORTS_CXX11)
CHECK_CXX_COMPILER_FLAG("-std=c++0x" COMPILER_SUPPORTS_CXX0X)

# check results and add flag
if(COMPILER_SUPPORTS_CXX11)#
    set(CMAKE_CXX_FLAGS "${CMAKE_CXX_FLAGS} -std=c++11")
elseif(COMPILER_SUPPORTS_CXX0X)#
    set(CMAKE_CXX_FLAGS "${CMAKE_CXX_FLAGS} -std=c++0x")
else()
    message(STATUS "The compiler ${CMAKE_CXX_COMPILER} has no C++11 support. Please use a different C++ compiler.")
endif()

# Add an executable
add_executable(hello_cpp11 main.cpp)
2.7 寻找第三方库
当使用第三方库时,如Boost,需要寻找其对应的头文件和库文件
假设项目文件结构如下,main.cpp会使用boost库中的代码:
```
├── CMakeLists.txt
├── main.cpp
```
main.cpp代码如下:
#include <iostream>
#include <boost/shared_ptr.hpp>
#include <boost/filesystem.hpp>

int main(int argc, char *argv[])
{
    std::cout << "Hello Third Party Include!" << std::endl;

    // use a shared ptr
    boost::shared_ptr<int> isp(new int(4));

    // trivial use of boost filesystem
    boost::filesystem::path path = "/usr/share/cmake/modules";
    if(path.is_relative())
    {
        std::cout << "Path is relative" << std::endl;
    }
    else
    {
        std::cout << "Path is not relative" << std::endl;
    }

   return 0;
}
CMakeLists.txt文件内容如下:
cmake_minimum_required(VERSION 3.5)
project (third_party_include)

# find a boost install with the libraries filesystem and system
find_package(Boost 1.46.1 REQUIRED COMPONENTS filesystem system)

# check if boost was found
if(Boost_FOUND)
    message ("boost found")
else()
    message (FATAL_ERROR "Cannot find Boost")
endif()

# Add an executable
add_executable(third_party_include main.cpp)

# link against the boost libraries
target_link_libraries( third_party_include
    PRIVATE
        Boost::filesystem
)  # Boost::filesystem相当于${Boost_FILESYSTEM_LIBRARY}
上面有一个命令find_package()用来寻找Boos的库文件,其参数含义如下:
官方手册:https://cmake.org/cmake/help/v3.23/command/find_package.html
find_package(<PackageName> [version] [EXACT] [QUIET] [MODULE]
             [REQUIRED] [[COMPONENTS] [components...]]
             [OPTIONAL_COMPONENTS components...]
             [NO_POLICY_SCOPE])
-
: 第三方库名字 -
[version]:第三方库版本号
-
[MODULE]:默认情况下先采用Module mode寻找第三方库,失败时再采用config mode寻找。MODULE如果设置, 表示只采用Module mode寻找。(Module mode和Config mode含义上面官方链接
-
[REQUIRED]:REQUIRED设置时,找不到第三方库会报错,并停止编译
-
[[COMPONENTS] [components...]]: COMPONENTS设置时,表示第三方库必须包含设置的components,否则算查找失败
另外,当一个第三方库被找到时,第三方库通常会定义一些变量供使用(定义在FindXXX.cmake文件中),常用的一些变量及含义如下:
官方手册:https://cmake.org/cmake/help/v3.23/manual/cmake-developer.7.html#find-modules
- Xxx_FOUND:Xxx库是否找到
- Xxx_INCLUDE_DIRS:Xxx库头文件路径(include) (find_path()命令)
- Xxx_LIBRARIES: Xxx库库文件路径(lib) (find_library()命令)
- Xxx_EXECUTABLE: Xxx库可执行文件路径 (find_program()命令)
- Xxx_ROOT_DIR: Xxx库路径
- Xxx_Yy_FOUND:Xxx库中的Yy component是否找到
- Xxx_Yy_INCLUDE_DIR:Xxx库中的Yy component头文件路径
- Xxx_Yy_LIBRARY:Xxx库中的Yy component库路径
如下面的使用示例:
# Include the boost headers
target_include_directories( third_party_include
    PRIVATE ${Boost_INCLUDE_DIRS}
)

# link against the boost libraries
target_link_libraries( third_party_include
    PRIVATE
    ${Boost_SYSTEM_LIBRARY}
    ${Boost_FILESYSTEM_LIBRARY}
)
2.8 子项目
一些大型项目会由多个子项目组成,每个子项目都有自己的CMakeLists.txt,最外层的CMakeLists.txt需要包含子项目。
假设项目文件结构如下,包含三个子项目,subbinary为主项目,其main函数会使用子项目sublibrary1和sublibrary2中定义的类:
```
├── CMakeLists.txt
├── subbinary
│ ├── CMakeLists.txt
│ └── main.cpp
├── sublibrary1
│ ├── CMakeLists.txt
│ ├── include
│ │ └── sublib1
│ │ └── sublib1.h
│ └── src
│ └── sublib1.cpp
└── sublibrary2
├── CMakeLists.txt
└── include
└── sublib2
└── sublib2.h
```
上面项目中包含三个子项目:
- subbinary:包含main函数,是主项目,最后会生成可执行文件
- sublibrary1: 生成静态库,主项目中会使用
- sublibrary2:只包含头文件的库,主项目中会使用
main.cpp内容如下:
#include "sublib1/sublib1.h"
#include "sublib2/sublib2.h"

int main(int argc, char *argv[])
{
    sublib1 hi;
    hi.print();

    sublib2 howdy;
    howdy.print();

    return 0;
}
项目CMakeLists.txt
项目最外层的CMakeLists.txt文件内容如下:
cmake_minimum_required (VERSION 3.5)

project(subprojects)

# Add sub directories
add_subdirectory(sublibrary1)
add_subdirectory(sublibrary2)
add_subdirectory(subbinary)
通过add_subdirectory()命令包含三个子项目,add_subdirectory会使用子项目中的CMakeLists.txt文件,其参数含义如下:
官方:https://cmake.org/cmake/help/v3.23/command/add_subdirectory.html
add_subdirectory(source_dir [binary_dir] [EXCLUDE_FROM_ALL])
- source_dir: 包含CMakeLists.txt和代码的子项目路径,可以是相对路径或绝对路径
- [binary_dir]:编译产生的文件路径(即build路径),可以是相对路径或绝对路径
每个单独的项目在编译时,都会产生一些预定义的变量供其他项目(或者自己)使用常见的变量如下:
| Variable | Info |
|---|---|
| PROJECT_NAME | The name of the project set by the current project(). (对于sublibrary子项目, 就是sublibrary;对于sublibrary1项目就是sublibrary1) |
| CMAKE_PROJECT_NAME | the name of the first project set by the project() command, i.e. the top level project. |
| PROJECT_SOURCE_DIR | The source director of the current project. |
| PROJECT_BINARY_DIR | The build directory for the current project. |
| name_SOURCE_DIR | The source directory of the project called "name". In this example the source directories created would be sublibrary1_SOURCE_DIR, sublibrary2_SOURCE_DIR, and subbinary_SOURCE_DIR |
| name_BINARY_DIR | The binary directory of the project called "name". In this example the binary directories created would be sublibrary1_BINARY_DIR, sublibrary2_BINARY_DIR, and subbinary_BINARY_DIR |
例如在sublibrary子项目中,可以通过下面两个变量得到sublibrary1和sublibrary2的项目信息:
${sublibrary1_SOURCE_DIR}  # 项目sublibrary1的源码路径
${sublibrary2_SOURCE_DIR}  # 项目sublibrary2的源码路径
sublibrary1子项目CMakeLists.txt**
sublibrary1会生成静态库,供主项目sublibrary使用,其CMakeLists.txt文件内容如下:
# Set the project name
project (sublibrary1)

# Add a library with the above sources
add_library(${PROJECT_NAME} src/sublib1.cpp)   # 利用src/sublib1.cpp生成库文件(默认为静态库?)
add_library(sub::lib1 ALIAS ${PROJECT_NAME})   # 创建别名sub::lib1 指代静态库文件

target_include_directories( ${PROJECT_NAME}
    PUBLIC ${PROJECT_SOURCE_DIR}/include
)
sublibrary2子项目CMakeLists.txt
sublibrary2只包含头文件,在add_library()命令中,可以通过关键字INTERFACE来指明,创建一个只包含头文件的库(Interface Library) ,其CMakeLists.txt文件内容如下:
关于interface library:https://cmake.org/cmake/help/v3.4/command/add_library.html#interface-libraries
# Set the project name
project (sublibrary2)

add_library(${PROJECT_NAME} INTERFACE)   # 创建interface library
add_library(sub::lib2 ALIAS ${PROJECT_NAME})  # 创建别名sub::lib2指代库文件

target_include_directories(${PROJECT_NAME}
    INTERFACE
        ${PROJECT_SOURCE_DIR}/include
)
subbinary主项目CMakeLists.txt
主项目中使用到了其他项目sublibrary1和sublibrary2中的内容,需要进行链接,其CMakeLists.txt文件内容如下:
project(subbinary)

# Create the executable
add_executable(${PROJECT_NAME} main.cpp)

# Link the static library from subproject1 using its alias sub::lib1
# Link the header only library from subproject2 using its alias sub::lib2
# This will cause the include directories for that target to be added to this project
target_link_libraries(${PROJECT_NAME}
    sub::lib1   # 链接sublibrary1项目库文件
    sub::lib2   # 链接sublibrary2项目库文件
)
3. 常用命令
message()
官方手册:https://cmake.org/cmake/help/v3.23/command/message.html
一般用来打印日志信息, 有两种用法,参数如下:
General messages
  message([<mode>] "message text" ...)

Reporting checks
  message(<checkState> "message text" ...)
General messages
message([<mode>] "message text" ...)
: 决定日志信息的等级,可以设置成如下: - FATAL_ERROR:CMake Error,会停止处理,不进行生成
- SEND_ERROR:CMake Error,会继续处理,跳过生成
- WARNING:CMake Warning,继续处理
- STATUS:用户感兴趣的日志信息
- VERBOSE
- DEBUG
- TRACE
- "message text": 打印的字符串信息(多个字符串时,会连接成一个字符串)
使用示例:
message(STATUS "Found TensorRT headers at ${TENSORRT_INCLUDE_DIR}")
Reporting checks
message(<checkState> "message text" ...)
: check的状态 - CHECK_START:开始check
- CHECK_PASS:check通过
- CHECK_FAIL:check失败
cmake 3.17引入的新功能,cmake常需要check某项工作是否完成,以往的写法如下:
message(STATUS "Looking for someheader.h")
#... do the checks, set checkSuccess with the result
if(checkSuccess)
  message(STATUS "Looking for someheader.h - found")
else()
  message(STATUS "Looking for someheader.h - not found")
endif()
现在的写法:
message(CHECK_START "Looking for someheader.h")
#... do the checks, set checkSuccess with the result
if(checkSuccess)
  message(CHECK_PASS "Looking for someheader.h - found")
else()
  message(CHECK_FAIL "Looking for someheader.h - not found")
endif()
aux_source_directory()
官方手册:https://cmake.org/cmake/help/v3.23/command/aux_source_directory.html
aux_source_directory(<dir> <variable>) # 寻找dir路径下的所有源文件,并存储到变量variable中
使用示例:
aux_source_directory(src SRC_LIST)    # 寻找当前路径src文件夹下所有cpp文件, 存储到SRC_LIST
message(STATUS "source file list: ${SRC_LIST}")
add_executable(target ${SRC_LIST})  # 编译src文件夹下所有cpp文件
find_path()
官方手册:https://cmake.org/cmake/help/v3.23/command/find_path.html
一般用来查找头文件路径
find_path (<VAR> name1 [path1 path2 ...]) # 查找包含name1文件的文件夹路径,并将查找到的路径添加到变量VAR中
find_path所有参数如下:
find_path (
          <VAR>
          name | NAMES name1 [name2 ...]
          [HINTS [path | ENV var]... ]
          [PATHS [path | ENV var]... ]
          [PATH_SUFFIXES suffix1 [suffix2 ...]]
          [DOC "cache documentation string"]
          [NO_CACHE]
          [REQUIRED]
          [NO_DEFAULT_PATH]
          [NO_PACKAGE_ROOT_PATH]
          [NO_CMAKE_PATH]
          [NO_CMAKE_ENVIRONMENT_PATH]
          [NO_SYSTEM_ENVIRONMENT_PATH]
          [NO_CMAKE_SYSTEM_PATH]
          [CMAKE_FIND_ROOT_PATH_BOTH |
           ONLY_CMAKE_FIND_ROOT_PATH |
           NO_CMAKE_FIND_ROOT_PATH] )
-
:存储查找的结果,未找到时,VAR的值是-NOTFOUND
-
NAMES: 需要查找的文件名(可以为多个,可以指定版本)
-
HINTS, PATHS: 在默认查找路径的基础上,添加新的查找路径
-
PATH_SUFFIXES:指定HINTS PATHS的子目录
-
REQUIRED:未找到时,停止查找并报错
使用示例:
find_path(TENSORRT_INCLUDE_DIR NvInfer.h
        HINTS ${TENSORRT_ROOT} PATH_SUFFIXES include/) # 在{TENSORRT_ROOT}/include路径中查找NvInfer.h文件,将查找结果存储在变量TENSORRT_INCLUDE_DIR中
find_path(myHeaders NMAES header.h PATHS /code/include/myHeaders)
find_library()
官方手册:https://cmake.org/cmake/help/v3.23/command/find_library.html
一般用来查找库文件路径
find_library (<VAR> name1 [path1 path2 ...]) # 查找名字为name1的库文件,并将查找到的路径添加到变量VAR中
find_library所有参数如下:
find_library (
          <VAR>
          name | NAMES name1 [name2 ...] [NAMES_PER_DIR]
          [HINTS [path | ENV var]... ]
          [PATHS [path | ENV var]... ]
          [PATH_SUFFIXES suffix1 [suffix2 ...]]
          [DOC "cache documentation string"]
          [NO_CACHE]
          [REQUIRED]
          [NO_DEFAULT_PATH]
          [NO_PACKAGE_ROOT_PATH]
          [NO_CMAKE_PATH]
          [NO_CMAKE_ENVIRONMENT_PATH]
          [NO_SYSTEM_ENVIRONMENT_PATH]
          [NO_CMAKE_SYSTEM_PATH]
          [CMAKE_FIND_ROOT_PATH_BOTH |
           ONLY_CMAKE_FIND_ROOT_PATH |
           NO_CMAKE_FIND_ROOT_PATH]         )
-
:存储查找的结果,未找到时,VAR的值是-NOTFOUND
-
NAMES: 需要查找的库名字(可以为多个,可以指定版本)
-
HINTS PATHS: 在默认查找路径的基础上,添加新的查找路径
-
PATH_SUFFIXES:指定HINTS PATHS的子目录
-
REQUIRED:未找到时,停止查找并报错
使用示例:
find_library(TENSORRT_LIBRARY_INFER nvinfer
        HINTS ${TENSORRT_ROOT} ${TENSORRT_BUILD} ${CUDA_TOOLKIT_ROOT_DIR}
        PATH_SUFFIXES lib lib64 lib/x64)  # 查找${TENSORRT_ROOT} ${TENSORRT_BUILD} ${CUDA_TOOLKIT_ROOT_DIR}路径下,子目录lib,lib64,lib/x64中, 寻找nvinfer库文件
find_library(my_lib libmylib.so ./) # 在当前路径下查找libmylib.so动态库
include_directories()
一般用来添加编译器头文件搜索路径
官方手册:https://cmake.org/cmake/help/v3.23/command/include_directories.html
include_directories([AFTER|BEFORE] [SYSTEM] dir1 [dir2 ...]) # 将指定目录添加到编译器的头文件搜索路径之下
其和target_include_directories()的区别如下:
-
include_directories:当前
CMakeList.txt中的所有目标以及所有在其调用点之后的所有目标将具有此头文件搜索路径。 -
target_include_directories:指定目标包含的头文件路径
link_directories()
一般用来添加编译器库文件搜索路径
官方手册:https://cmake.org/cmake/help/v3.23/command/link_directories.html
link_directories([AFTER|BEFORE] directory1 [directory2 ...]) # 将指定路径添加到编译器库文件搜索路径中 (可以是相对路径)
其和target_link_directories()的区别在于是否指定单个target。
备注:对于第三方库文件很少使用此命令,一般通过find_library()找到库文件的绝对路径,在通过target_link_libraries()命令添加。自己写的动态库文件放在当前目录下时,可以用该指令指定该目录的路径以便工程能够找到,如下:
link_directories(lib)
4. 实战
4.1 windows下使用yaml-cpp库
参考:https://blog.csdn.net/sinat_38602176/article/details/105640629
想在windows开发环境下,使用yaml-cpp库,需要对yaml-cpp源码进行编译成库文件,供代码中使用。我这里使用cmake和visual studio 2019, 基本步骤如下
cmake产生项目文件
-
利用cmake产生visual studio可以编译的项目文件, 即.sln文件。(这一步就可以理解为上面说的产生linux下makefile文件)
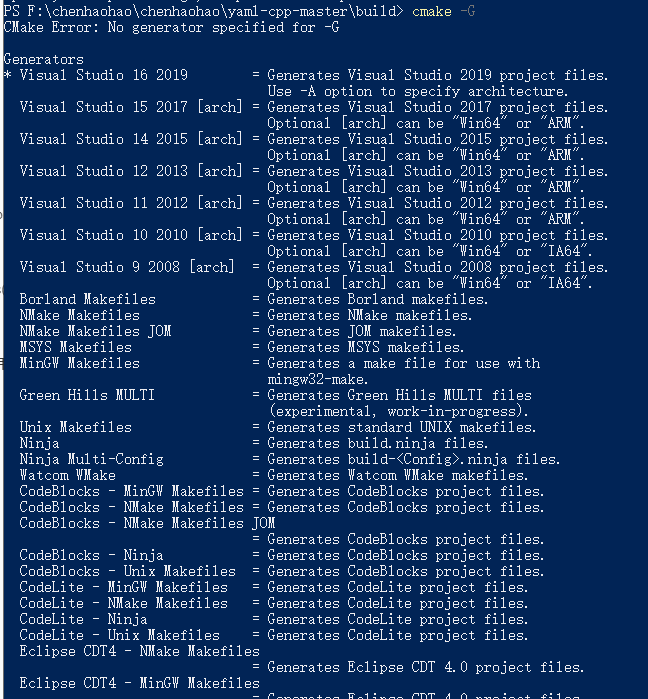
# mkdir build 在yaml-cpp路径下,创建一个build文件夹
# cd build   #进入build文件夹
cmake -G "Visual Studio 16 2019" ..    # 开始生成项目文件
上面命令中-G指定采用的generator,我这里用的是visual studio 2019, 通过下面命令可以查看所有支持的geneartor列表:
cmake -G
visual studio 2019编译
visual studio 2019打开生成的YAML-CPP.sln文件,选择release模式,右键ALL_BUILD项目进行生成,之后在build的Release文件夹下就会生成yaml-cpp.lib,将生成的lib和include下面的头文件拷贝到你需要的地方即可。


【推荐】国内首个AI IDE,深度理解中文开发场景,立即下载体验Trae
【推荐】编程新体验,更懂你的AI,立即体验豆包MarsCode编程助手
【推荐】抖音旗下AI助手豆包,你的智能百科全书,全免费不限次数
【推荐】轻量又高性能的 SSH 工具 IShell:AI 加持,快人一步
· TypeScript + Deepseek 打造卜卦网站:技术与玄学的结合
· Manus的开源复刻OpenManus初探
· AI 智能体引爆开源社区「GitHub 热点速览」
· 从HTTP原因短语缺失研究HTTP/2和HTTP/3的设计差异
· 三行代码完成国际化适配,妙~啊~