
(十五)SpringBoot之使用Redis做缓存数据
一、添加Redis依赖
<?xml version="1.0" encoding="UTF-8"?>
<project xmlns="http://maven.apache.org/POM/4.0.0" xmlns:xsi="http://www.w3.org/2001/XMLSchema-instance"
    xsi:schemaLocation="http://maven.apache.org/POM/4.0.0 http://maven.apache.org/xsd/maven-4.0.0.xsd">
    <modelVersion>4.0.0</modelVersion>

    <groupId>com.shyroke.redis</groupId>
    <artifactId>springboot_redis</artifactId>
    <version>0.0.1-SNAPSHOT</version>
    <packaging>war</packaging>

    <name>springboot_redis</name>
    <description>Demo project for Spring Boot</description>

    <parent>
        <groupId>org.springframework.boot</groupId>
        <artifactId>spring-boot-starter-parent</artifactId>
        <version>1.4.7.RELEASE</version>
        <relativePath/> <!-- lookup parent from repository -->
    </parent>

    <properties>
        <project.build.sourceEncoding>UTF-8</project.build.sourceEncoding>
        <project.reporting.outputEncoding>UTF-8</project.reporting.outputEncoding>
        <java.version>1.8</java.version>
    </properties>

    <dependencies>
        <dependency>
            <groupId>org.springframework.boot</groupId>
            <artifactId>spring-boot-starter-cache</artifactId>
        </dependency>
        <dependency>
            <groupId>org.springframework.boot</groupId>
            <artifactId>spring-boot-starter-data-jpa</artifactId>
        </dependency>
        <dependency>
            <groupId>org.springframework.boot</groupId>
            <artifactId>spring-boot-starter-data-redis</artifactId>
        </dependency>
        <dependency>
            <groupId>org.springframework.boot</groupId>
            <artifactId>spring-boot-starter-web</artifactId>
        </dependency>

        <dependency>
            <groupId>org.springframework.boot</groupId>
            <artifactId>spring-boot-devtools</artifactId>
            <scope>runtime</scope>
        </dependency>
        <dependency>
            <groupId>mysql</groupId>
            <artifactId>mysql-connector-java</artifactId>
            <scope>runtime</scope>
        </dependency>
        <dependency>
            <groupId>org.springframework.boot</groupId>
            <artifactId>spring-boot-starter-tomcat</artifactId>
            <scope>provided</scope>
        </dependency>
        <dependency>
            <groupId>org.springframework.boot</groupId>
            <artifactId>spring-boot-starter-test</artifactId>
            <scope>test</scope>
        </dependency>
    </dependencies>

    <build>
        <plugins>
            <plugin>
                <groupId>org.springframework.boot</groupId>
                <artifactId>spring-boot-maven-plugin</artifactId>
            </plugin>
        </plugins>
    </build>


</project>
二、 application配置
server.port=8888

#数据库连接配置
spring.datasource.url=jdbc:mysql://localhost/db_boot?useUnicode=true&characterEncoding=utf-8
spring.datasource.username=root
spring.datasource.password=
spring.datasource.driver-class-name=com.mysql.jdbc.Driver

# JPA
spring.jpa.show-sql=true
spring.jpa.hibernate.ddl-auto= update

#redis
spring.cache.type=redis
spring.redis.host=localhost
spring.redis.port=6379
#spring.redis.password=
#spring.redis.database=0
#spring.redis.pool.max-active=8
#spring.redis.pool.max-idle=8
#spring.redis.pool.max-wait=-1
#spring.redis.pool.min-idle=0
#spring.redis.timeout=0
三、 redis缓存配置类
package com.shyroke.config;

import com.fasterxml.jackson.annotation.JsonAutoDetect;
import com.fasterxml.jackson.annotation.PropertyAccessor;
import com.fasterxml.jackson.databind.ObjectMapper;
import org.springframework.cache.CacheManager;
import org.springframework.cache.annotation.CachingConfigurerSupport;
import org.springframework.cache.annotation.EnableCaching;
import org.springframework.cache.interceptor.KeyGenerator;
import org.springframework.context.annotation.Bean;
import org.springframework.context.annotation.Configuration;
import org.springframework.data.redis.cache.RedisCacheManager;
import org.springframework.data.redis.connection.RedisConnectionFactory;
import org.springframework.data.redis.core.RedisTemplate;
import org.springframework.data.redis.core.StringRedisTemplate;
import org.springframework.data.redis.serializer.Jackson2JsonRedisSerializer;

import java.lang.reflect.Method;

@Configuration
public class RedisConfig extends CachingConfigurerSupport {

    /*
     * 定义缓存数据 key 生成策略的bean 包名+类名+方法名+所有参数
     */
     @Bean
     public KeyGenerator wiselyKeyGenerator(){
     return new KeyGenerator() {
     @Override
     public Object generate(Object target, Method method, Object... params) {
     StringBuilder sb = new StringBuilder();
     sb.append(target.getClass().getName());
     sb.append(method.getName());
     for (Object obj : params) {
     sb.append(obj.toString());
     }
     return sb.toString();
     }
     };

     }

    /*
     * 要启用spring缓存支持,需创建一个 CacheManager的 bean,CacheManager 接口有很多实现,这里Redis 的集成,用
     * RedisCacheManager这个实现类 Redis 不是应用的共享内存,它只是一个内存服务器,就像 MySql 似的,
     * 我们需要将应用连接到它并使用某种“语言”进行交互,因此我们还需要一个连接工厂以及一个 Spring 和 Redis 对话要用的
     * RedisTemplate, 这些都是 Redis 缓存所必需的配置,把它们都放在自定义的 CachingConfigurerSupport 中
     */
    @Bean
    public CacheManager cacheManager(@SuppressWarnings("rawtypes") RedisTemplate redisTemplate) {
        RedisCacheManager cacheManager = new RedisCacheManager(redisTemplate);
        // cacheManager.setDefaultExpiration(60);//设置缓存保留时间(seconds)
        return cacheManager;
    }

    // 1.项目启动时此方法先被注册成bean被spring管理,如果没有这个bean,则redis可视化工具中的中文内容(key或者value)都会以二进制存储,不易检查。
    @Bean
    public RedisTemplate<String, String> redisTemplate(RedisConnectionFactory factory) {
        StringRedisTemplate template = new StringRedisTemplate(factory);
        Jackson2JsonRedisSerializer jackson2JsonRedisSerializer = new Jackson2JsonRedisSerializer(Object.class);
        ObjectMapper om = new ObjectMapper();
        om.setVisibility(PropertyAccessor.ALL, JsonAutoDetect.Visibility.ANY);
        om.enableDefaultTyping(ObjectMapper.DefaultTyping.NON_FINAL);
        jackson2JsonRedisSerializer.setObjectMapper(om);
        template.setValueSerializer(jackson2JsonRedisSerializer);
        template.afterPropertiesSet();
        return template;
    }
}
四、在springboot启动类中添加缓存支持
@SpringBootApplication
@EnableCaching
public class SpringbootRedisApplication {

    public static void main(String[] args) {
        SpringApplication.run(SpringbootRedisApplication.class, args);
    }
}
五、编写控制类
package com.shyroke.controller;

import org.springframework.beans.factory.annotation.Autowired;
import org.springframework.stereotype.Controller;
import org.springframework.web.bind.annotation.RequestMapping;
import org.springframework.web.bind.annotation.ResponseBody;

import com.shyroke.bean.UserBean;
import com.shyroke.mapper.UserMapper;
import com.shyroke.service.UserServiceI;
import com.shyroke.util.DateUtil;

@Controller
@RequestMapping(value = "/")
public class IndexController {

    @Autowired
    private UserServiceI userService;

    @ResponseBody
    @RequestMapping(value = "/get")
    public UserBean get() {

        return userService.getUserById(1);

    }


    @ResponseBody
    @RequestMapping(value="/update")
    public UserBean update() {

        UserBean user=userService.getUserById(1);
        user.setCreateTime(DateUtil.getDataFormat());
        user.setUserName("test");
        return userService.update(user);
    }

    @ResponseBody
    @RequestMapping(value="/del")
    public String del() {
        return userService.del(1);
    }

}
六、Service层接口及其实现
package com.shyroke.service;

import com.shyroke.bean.UserBean;

public interface UserServiceI {

    UserBean getUserById(int i);

    UserBean update(UserBean user);

    String del(int id);

}
- 实现类
package com.shyroke.service.impl;

import org.springframework.beans.factory.annotation.Autowired;
import org.springframework.cache.annotation.CacheConfig;
import org.springframework.cache.annotation.CacheEvict;
import org.springframework.cache.annotation.CachePut;
import org.springframework.cache.annotation.Cacheable;
import org.springframework.stereotype.Service;

import com.shyroke.bean.UserBean;
import com.shyroke.mapper.UserMapper;
import com.shyroke.service.UserServiceI;

@Service
@CacheConfig(cacheNames="users")
public class UserServiceImpl implements UserServiceI {

    @Autowired
    private UserMapper userMapper;

    @Cacheable(key="'userCache'")
    @Override
    public UserBean getUserById(int i) {
        System.out.println("执行这里,说明缓存中读取不到数据,直接读取数据库....");
        return userMapper.findOne(i);
    }

    @CachePut(key="'userCache'")
    @Override
    public UserBean update(UserBean user) {
        System.out.println("执行这里,更新数据库,更新缓存....");
        return userMapper.save(user);
    }

    @CacheEvict(key="'userCache'")
    @Override
    public String del(int id) {
        userMapper.delete(id);
        return "删除成功!!!!";
    }


}
- 注意:
- @CacheConfig(cacheNames="users") 注解指的是该类中的缓存的名称都是users
-
@CachePut(key=" 'userCache' ")中userCache要加‘’单引号,表示这是一个字符串。
-
@Cacheable能够根据方法的请求参数对其结果进行缓存(缓存的是方法的返回结果),一般用于insert()操作
- @CachePut(key="'userCache'")主要针对方法配置,能够根据方法的请求参数对其结果进行缓存,和 @Cacheable 不同的是,它每次都会触发真实方法的调用,一般用于update()操作
- @CacheEvict(key="'userCache'")主要针对方法配置,能够根据一定的条件对缓存进行清空,一般用于delete()操作
- 本例中的@Cacheable和@CachePut和@CacheEvict的key值必须都是同一个缓存的key,因为这样当update的时候缓存的时候,get方法的得到的才是最新数据,而当删除的时候@CacheEvict,也必须把该key的缓存删除。
七、编写mapper
package com.shyroke.mapper;

import org.springframework.data.jpa.repository.JpaRepository;
import org.springframework.stereotype.Repository;

import com.shyroke.bean.UserBean;

@Repository
public interface UserMapper extends JpaRepository<UserBean,Integer> {

}
八、实验结果
- 启动springboot会在数据库中根据bean的定义自动创建一个表数据。插入一条测试数据

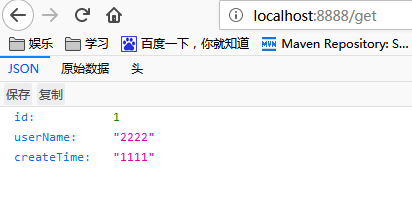
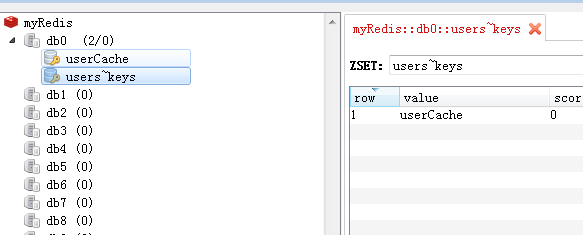
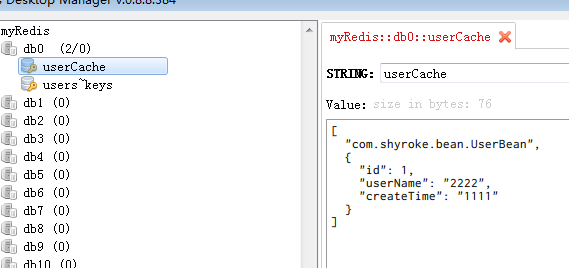
- 如下访问http://localhost:8888/get ,获取结果,并生成一个缓存。

- 如下 访问 http://localhost:8888/update ,更新数据,更新缓存,


- 执行上一步更新缓存后,如下我们再访问http://localhost:8888/get,获取的是最新数据,且没有没有发出sql语句说明是从缓存中读取的数据。

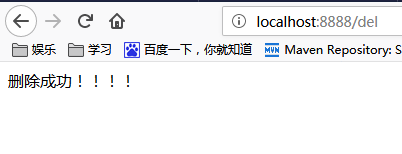
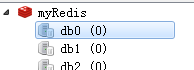
- 如下访问http://localhost:8888/del,缓存被清空。
九、总结
要缓存的 Java 对象必须实现 Serializable 接口,因为 Spring 会将对象先序列化再存入 Redis,如果不实现 Serializable 的话将会遇到类似这种错误:nested exception is java.lang.IllegalArgumentException: DefaultSerializer requires a Serializable payload but received an object of type。。。

 浙公网安备 33010602011771号