js使用layDate移动端日期选择器
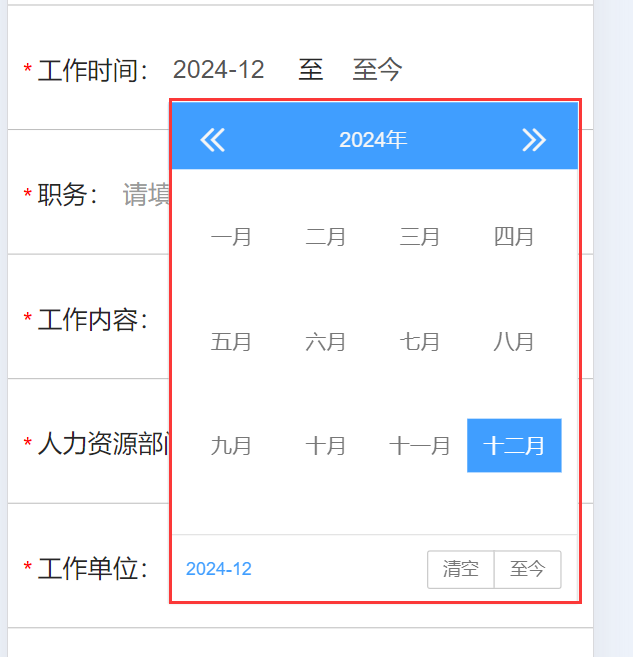
1. 先看下效果图
这里选用组件:layui的layDate
至今按钮是自定义功能,忽略

2. 官网文档:
layui: https://www.bejson.com/doc/layui/doc/index.html
layDate: https://www.bejson.com/doc/layui/laydate/index.html
3. 实现:
用的是js原生、jq写法
引入:在线使用方式
<!-- 引入 layui 样式文件 -->
<link rel="stylesheet" href="https://www.layuicdn.com/layui/css/layui.css">

<!-- 引入 layui.js -->
<script src="https://www.layuicdn.com/layui/layui.js"></script>
html部分:
    <div class="control-group">
            <label class="control-label"><span class="help-inline"><font color="red">*</font> </span>工作时间:</label>
            <div class="flexDateBox" style="width: calc(100vw - 290px);">
                <input type="text" style="width:203px;line-height: 100px;height:100px" id="expertUnitList0_startDate"
                       placeholder="开始时间" readonly class="required">
                <div class="flexDateTip">
                    至
                </div>
                <input type="text" style="width:203px;line-height: 100px;margin-left:28px;height:100px"
                       id="expertUnitList0_endDate" readonly
                       class="required" placeholder="结束时间">
            </div>
            <form:hidden id="expertUnitList0_jobDate" path="expertUnitList[0].jobDate"/>
        </div>
js部分:
    var laydate = layui.laydate;
    var $ = layui.jquery;

    layui.use(['laydate', 'jquery'], function () {
        laydate.render({
            elem: '#expertUnitList0_startDate', // 绑定元素
            type: 'month', // 设置类型为年月选择
            theme: '#409eff',
            done: function (value, date, endDate) {
                // 开始时间选中后的回调
            },
            value: '',
            btns: ['clear', 'now'], // 自定义按钮

        });

        laydate.render({
            elem: '#expertUnitList0_endDate', // 绑定元素
            type: 'month', // 设置类型为年月选择
            theme: '#409eff',
            btns: ['clear', 'now'], // 自定义按钮
            done: function (value, date, endDate) {
                // 结束时间选中后的回调
            },

        });
    });
css 部分:
    .layui-laydate-footer span:hover {
        color: #409eff;
    }

    .layui-laydate-preview {
        color: #409eff !important;
    }


【推荐】国内首个AI IDE,深度理解中文开发场景,立即下载体验Trae
【推荐】编程新体验,更懂你的AI,立即体验豆包MarsCode编程助手
【推荐】抖音旗下AI助手豆包,你的智能百科全书,全免费不限次数
【推荐】轻量又高性能的 SSH 工具 IShell:AI 加持,快人一步
· 阿里最新开源QwQ-32B,效果媲美deepseek-r1满血版,部署成本又又又降低了!
· SQL Server 2025 AI相关能力初探
· AI编程工具终极对决:字节Trae VS Cursor,谁才是开发者新宠?
· 开源Multi-agent AI智能体框架aevatar.ai,欢迎大家贡献代码
· Manus重磅发布:全球首款通用AI代理技术深度解析与实战指南