
SpringCloud搭建记录(二)Eureka服务注册
在注册中心成功启动之后,需要将我们的服务注册进去,以便其它的服务能够通过此中心进行服务发现与调用。
一、通过IDEA建立服务模块 service-demo-c

按照上一篇提过的方式进行选择,然后得到服务模块的pom文件:
<?xml version="1.0" encoding="UTF-8"?>
<project xmlns="http://maven.apache.org/POM/4.0.0"
         xmlns:xsi="http://www.w3.org/2001/XMLSchema-instance"
         xsi:schemaLocation="http://maven.apache.org/POM/4.0.0 http://maven.apache.org/xsd/maven-4.0.0.xsd">
    <parent>
        <artifactId>boc-hn</artifactId>
        <groupId>com.boc.hn.zt</groupId>
        <version>0.0.1-SNAPSHOT</version>
    </parent>
    <modelVersion>4.0.0</modelVersion>

    <artifactId>service-demo-c</artifactId>

</project>
向其中添加eureka客户端依赖、spring web模块依赖等,为了方便统一版本管理,防止因client端版本不一致导致的调用问题,我们在父pom文件boc.pom的依赖管理<dependencyManagement> ... </dependencyManagement>中添加上述依赖的版本:
            <dependency>
                <groupId>org.springframework.cloud</groupId>
                <artifactId>spring-cloud-starter-netflix-eureka-client</artifactId>
                <version>2.2.2.RELEASE</version>
            </dependency>
            <dependency>
                <groupId>org.springframework.boot</groupId>
                <artifactId>spring-boot-starter-web</artifactId>
                <version>1.3.8.RELEASE</version>
            </dependency>
然后在子pom中(service-demo-c.pom)添加引用
        <dependency>
            <groupId>org.springframework.boot</groupId>
            <artifactId>spring-boot-starter-web</artifactId>
        </dependency>
        <dependency>
            <groupId>org.springframework.cloud</groupId>
            <artifactId>spring-cloud-starter-netflix-eureka-client</artifactId>
        </dependency>
然后编写模块启动类:ServiceCcApplication.java
import org.springframework.boot.SpringApplication;
import org.springframework.boot.autoconfigure.SpringBootApplication;
import org.springframework.cloud.netflix.eureka.EnableEurekaClient;

@SpringBootApplication
@EnableEurekaClient
public class ServiceCcApplication {

    public static void main(String []args){

        SpringApplication.run(ServiceCcApplication.class,args);
    }
}
再添加一个rest接口测试:
package com.boc.hn;

import org.springframework.web.bind.annotation.RequestMapping;
import org.springframework.web.bind.annotation.RestController;

@RestController
public class ServiceCcController {

    @RequestMapping("/c/hello")
    public String CtoHello(){
        return "Cc to hello";
    }
}
配置文件配置如下:
server:
  # 服务端口号
  port: 8666
spring:
  application:
    # 服务名称 - 服务之间使用名称进行通讯
    name: service-object-c
eureka:
  client:
    service-url:
      # 填写注册中心服务器地址
      defaultZone: http://localhost:8888/eureka
    # 是否需要将自己注册到注册中心
    register-with-eureka: true
    # 是否需要搜索服务信息
    fetch-registry: true
  instance:
    # 使用ip地址注册到注册中心
    prefer-ip-address: true
    # 注册中心列表中显示的状态参数
    instance-id: ${spring.cloud.client.ip-address}:${server.port}
整个模块目录如下所示
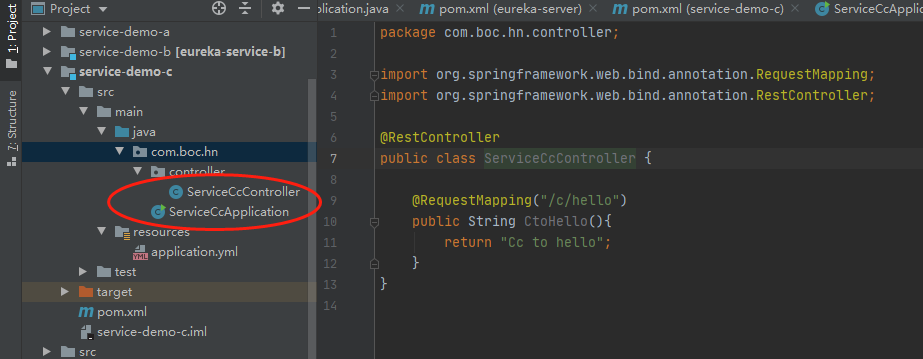
这里注意启动类需要放在其他类所在包的最上层,否则spring默认的扫描配置会把其他类忽略。
按照类似的过程,添加service-demo-b模块,然后启动这两个模块,再访问注册中心模块查看这个服务是否注册成功:
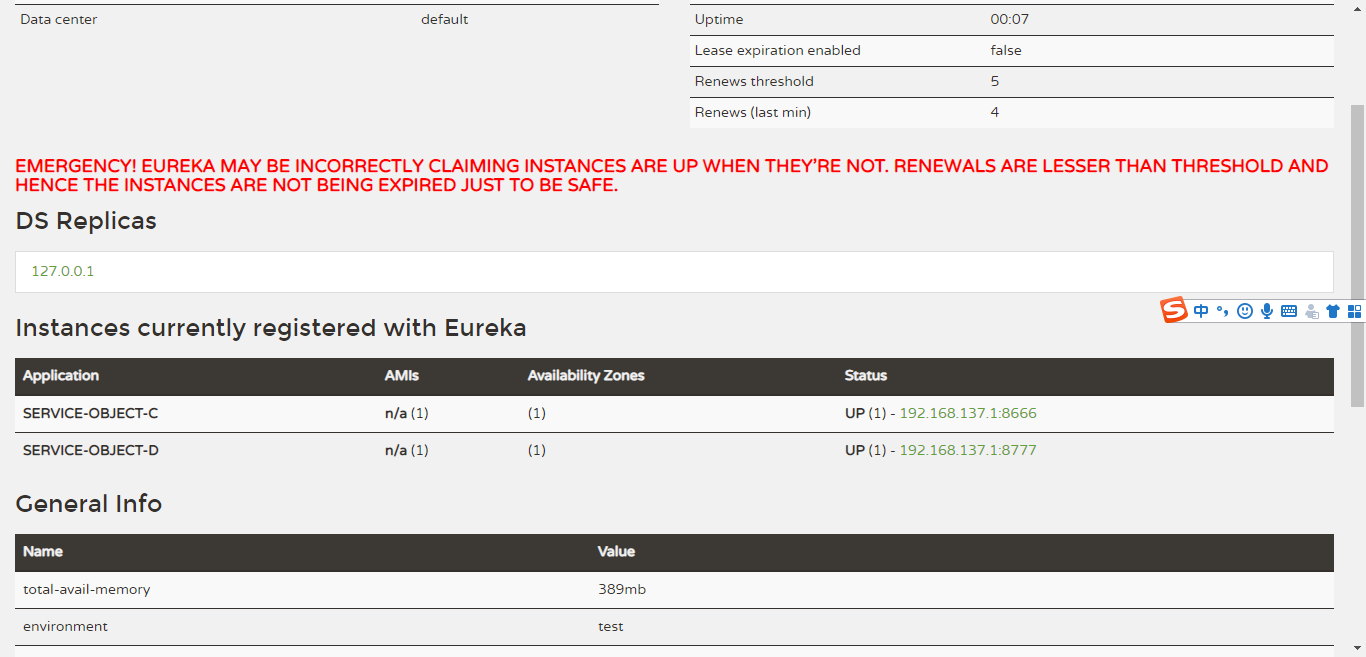
从上图可以看到,service-c和service-d都已经注册成功。分别访问其rest端口api:
http://localhost:8777/d/hello 也能够获取到结果。整个服务注册也成功了。下一步将是服务间的调用,比如c调用d的某个服务。
