Window10环境下,Stable Diffusion的本地部署与效果展示
Diffusion相关技术最近也是非常火爆,看看招聘信息,岗位名称都由AI算法工程师变成了AIGC算法工程师,本周跟大家分享一些Diffusion算法相关的内容。
Window10环境下,Stable Diffusion的本地部署与效果展示
我选用的版本是:

在Windows下安装部署,只需要:
- Install Python 3.10.6, checking "Add Python to PATH"
- Install git.
- Download the stable-diffusion-webui repository, for example by running git clone https://github.com/AUTOMATIC1111/stable-diffusion-webui.git.
- Place stable diffusion checkpoint (model.ckpt) in the models/Stable-diffusion directory (see dependencies for where to get it).
- Run webui-user.bat from Windows Explorer as normal, non-administrator, user.
安装过程中,除了一些包因为网络问题下载不下来,进行了手动下载,还遇到了这个问题
网络问题,可以参考错误处理进行处理。
raise RuntimeError("Cannot add middleware after an application has started")
解决办法是,在powershell中执行下面的命令,重新执行即可:[来自Issues中]
.\venv\Scripts\python.exe -m pip install --upgrade fastapi==0.90.1
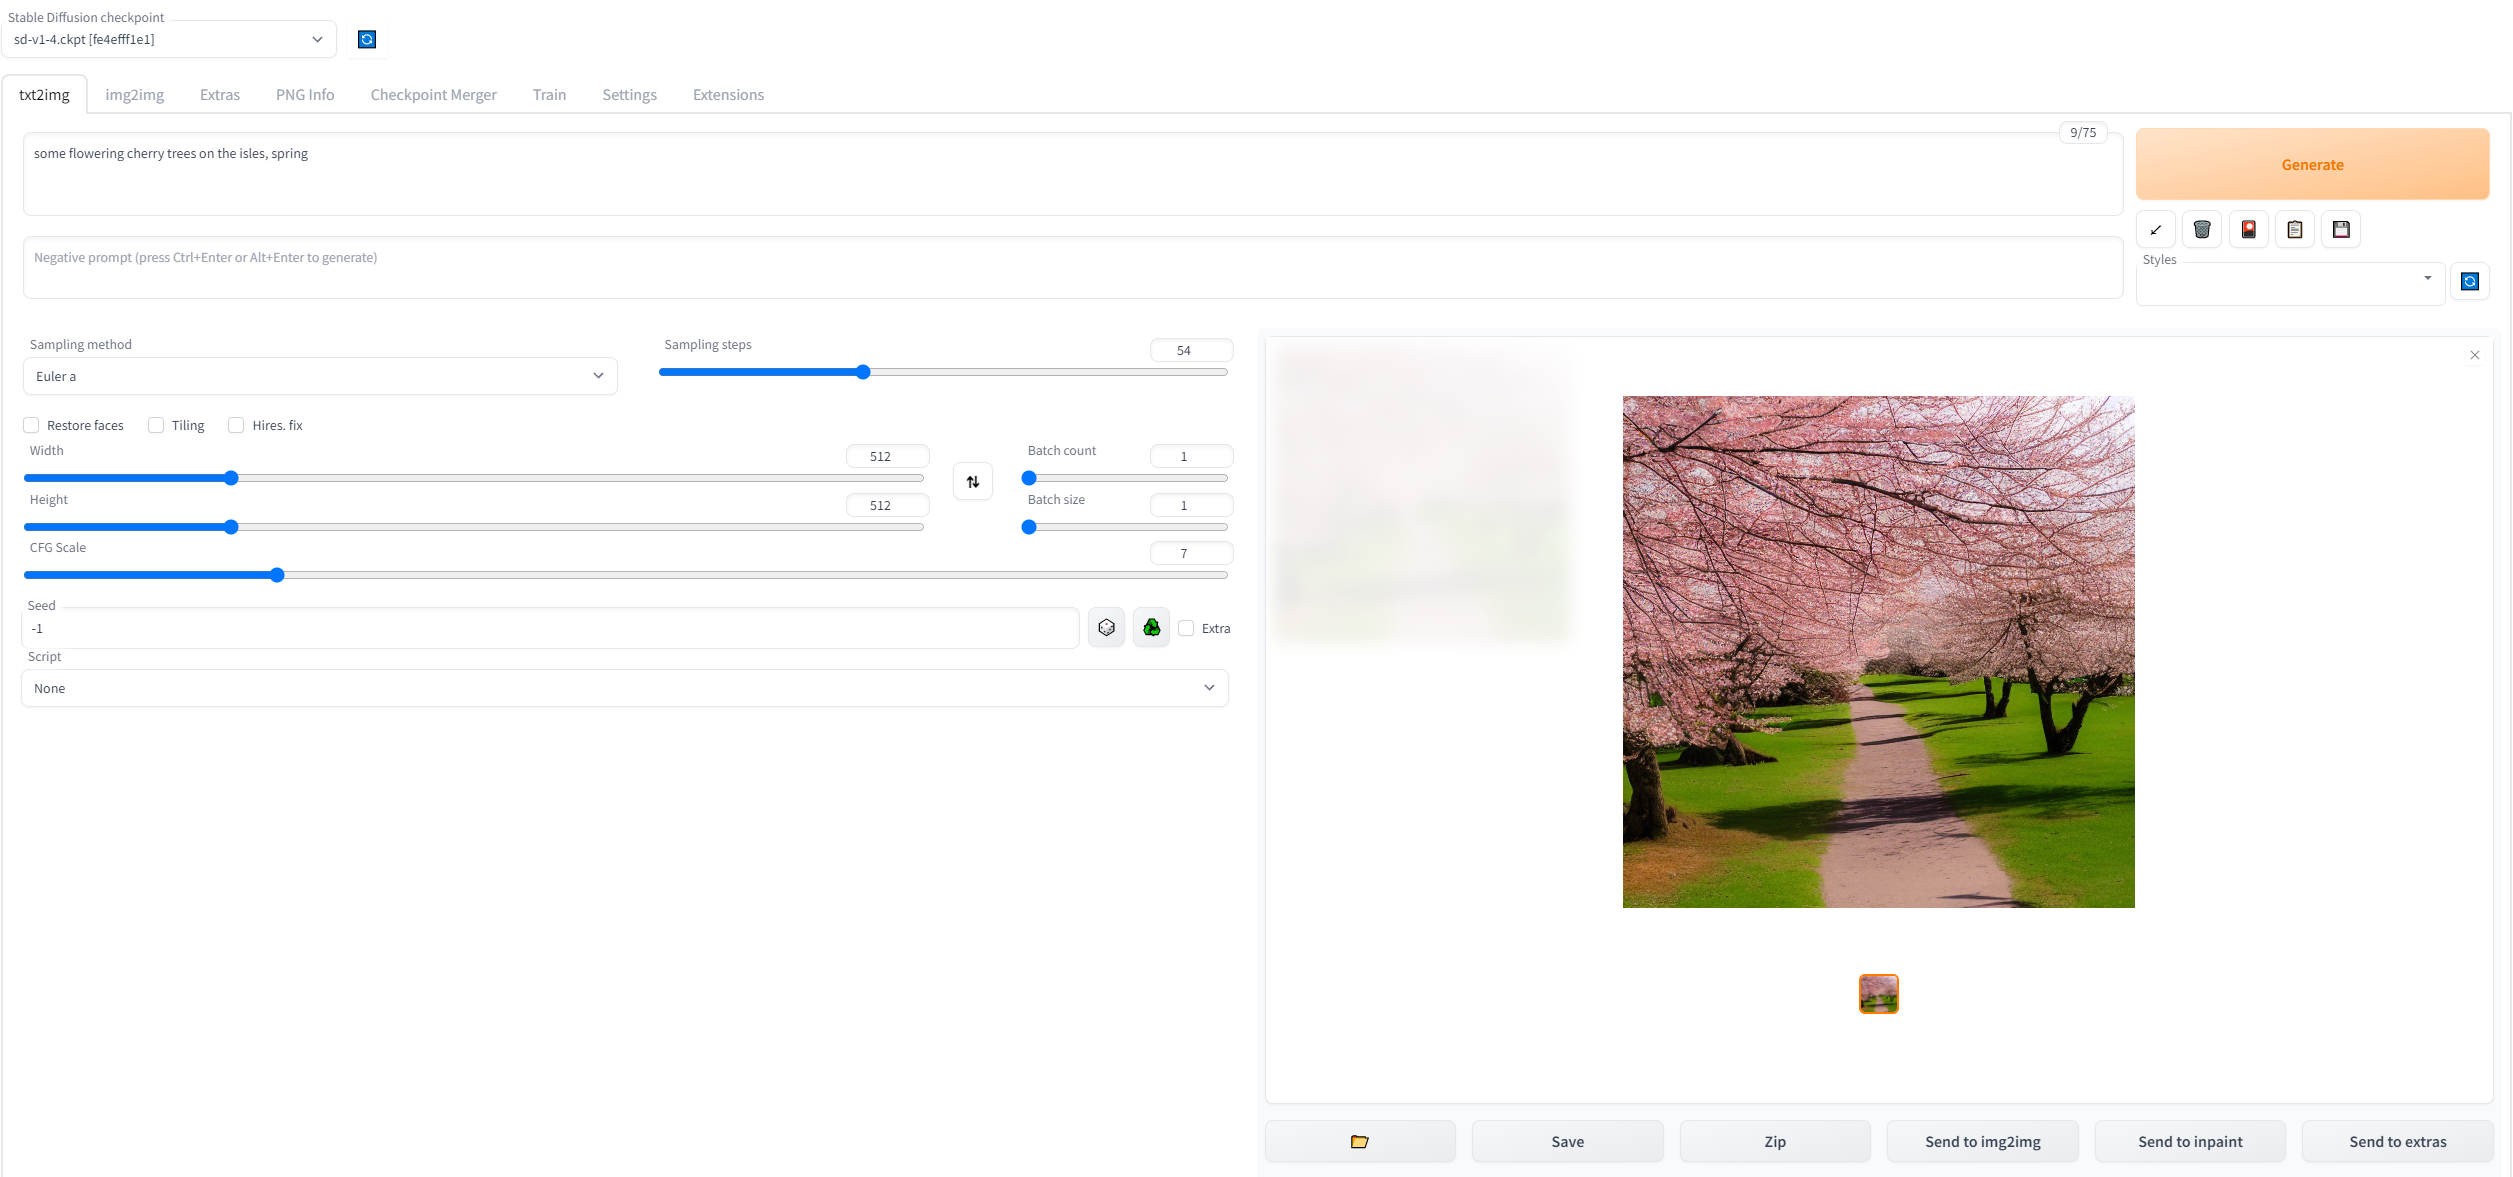
正常启动后,在浏览器中输入窗口提示的URL,即可看到下面的画面:


一起来效果吧:
Parametes:
- Step 54
- Sampling method: Euler a
- Width: 512
- Height: 512
Input:some flowering cherry trees on the isles, spring

Input: 草原上一只可爱的小兔子在奔跑,一个萌萌的大眼睛小女孩在追它

他放飞了,生成的东西与想要的完全不搭边儿了。
Input:将上面那句话翻译成英文:A cute little rabbit is running on the grassland, and a cute little girl with big eyes is chasing it

额,感觉它把后半句给丢了,小女孩儿呢?但是,终究兔子是出来了。看来其中的语言模型还是对英文理解更好一些。
下次跟大家分享文章原理,敬请期待。

关注我的公众号 不定期推送资讯,接受私信许愿
作者:iSherryZhang
本文版权归作者和博客园共有,欢迎转载,但未经作者同意必须保留此段声明,且在文章页面明显位置给出原文连接,否则保留追究法律责任的权利。


【推荐】国内首个AI IDE,深度理解中文开发场景,立即下载体验Trae
【推荐】编程新体验,更懂你的AI,立即体验豆包MarsCode编程助手
【推荐】抖音旗下AI助手豆包,你的智能百科全书,全免费不限次数
【推荐】轻量又高性能的 SSH 工具 IShell:AI 加持,快人一步
· 无需6万激活码!GitHub神秘组织3小时极速复刻Manus,手把手教你使用OpenManus搭建本
· Manus爆火,是硬核还是营销?
· 终于写完轮子一部分:tcp代理 了,记录一下
· 别再用vector<bool>了!Google高级工程师:这可能是STL最大的设计失误
· 单元测试从入门到精通