API网关Kong系列(四)认证配置
目前根据业务需要先介绍2种认证插件:Key Authentication 及 HMAC-SHA1 认证
![]() Key Authentication
Key Authentication
向API添加密钥身份验证(也称为API密钥)。 然后,消费者可以在 querystring 参数或 Header 头中添加其密钥,以验证其请求。
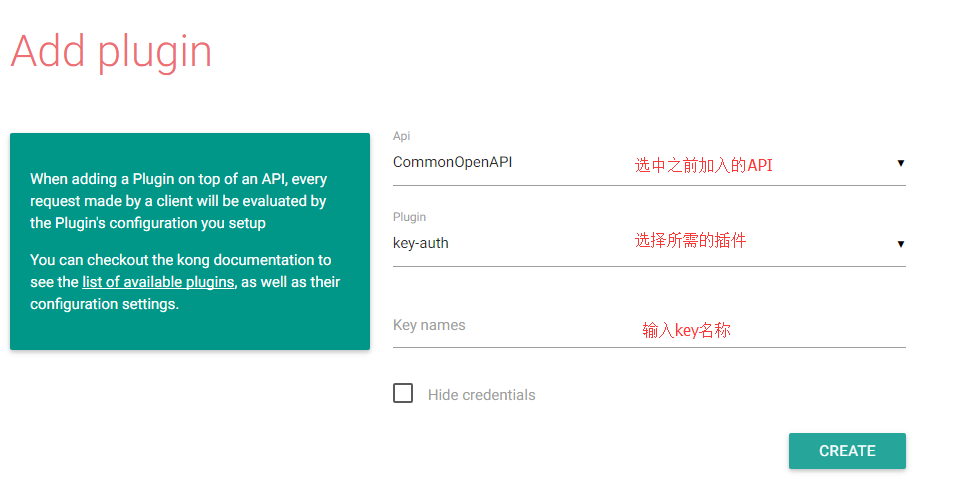
进入之前部署好的kong-ui,选择plugins,点击+号

按需求输入参数
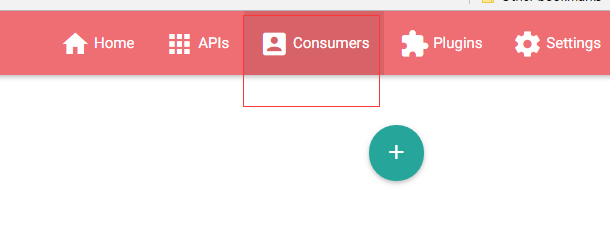
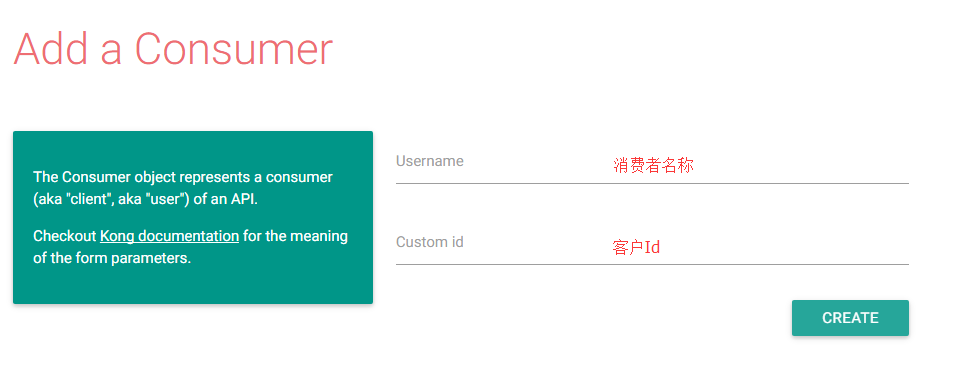
同样创建一个消费者
其中客户Id为选填
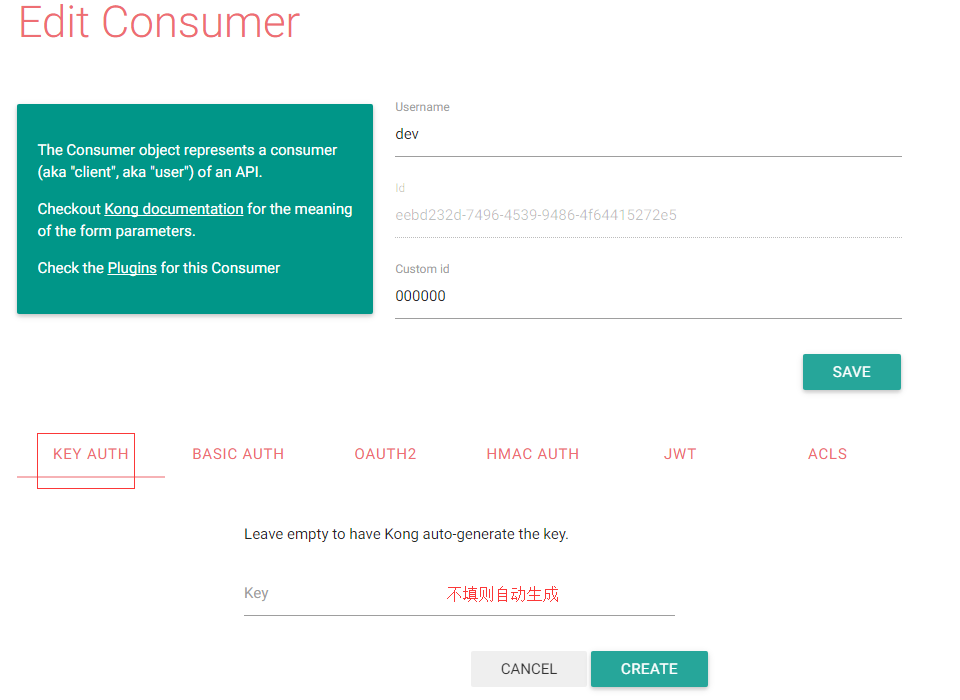
生成后进入消费者列表,编辑该用户,按一下操作生成对应的key。
同时我们可以看到消费者中包含有其他插件所需的属性等,可以按需自己生成。
添加后如下

使用起来也很简单,将key(之前添加插件是设置的key名称)插入header值即可

如果验证错误则返回403

为您的API添加HMAC签名身份验证以建立使用者的身份。 插件将在代理授权和授权Header中检查有效的签名(按此顺序)。 这个插件实现遵循draft-cavage-http-signatures-00草案略有改变的签名方案。
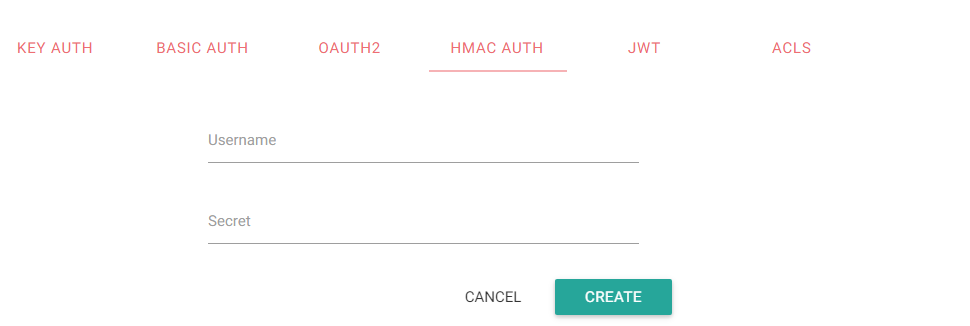
根据如上方法,同理增加HMAC认证凭证
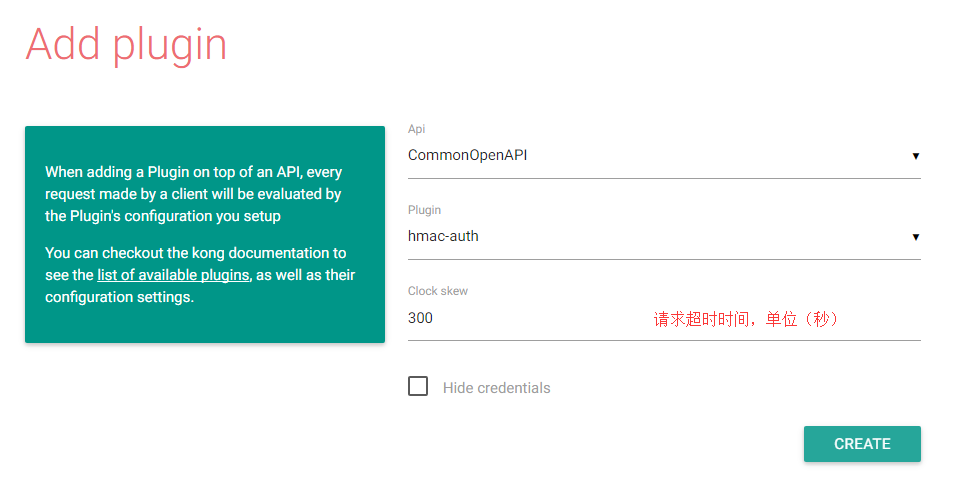
同理加入HMAC插件
HMAC-SHA1,C#代码实现:
using System;
using System.IO;
using System.Security.Cryptography;
using System.Text;

namespace Security.Cryptography
{
    public static class HMAC_SHA1
    {
        public static string Sign(string text, string key, string inputCharset = "utf-8")
        {
            Encoding _encode = Encoding.GetEncoding(inputCharset);
            byte[] _byteData = Encoding.GetEncoding(inputCharset).GetBytes(text);
            HMACSHA1 _hmac = new HMACSHA1(_encode.GetBytes(key));

            using (CryptoStream _cs = new CryptoStream(Stream.Null, _hmac, CryptoStreamMode.Write))
            {
                _cs.Write(_byteData, 0, _byteData.Length);
            }
            return Convert.ToBase64String(_hmac.Hash);
        }
    }
}
请求的时候主要是header中

Authorization 的构造,根据官方文档
Authorization: hmac username="bob", algorithm="hmac-sha1", headers="date content-md5", signature="Base64(HMAC-SHA1(signing string))"
如果有多个Header的话,header名称用空格隔开,注意官方文档中的"date"如今应该改成"x-date",date的格式请使用GMT时间诸如"Wed, 01 Mar 2017 05:05:24 GMT"
官方文档中加密字符串:
date: Fri, 09 Oct 2015 00:00:00 GMT\ncontent-md5: lCMsW4/JJy9vc6HjbraPzw==
注意也要将date修改成x-date,如果没有content-md5这个头,那就不用加\n,直接为
x-date: Fri, 09 Oct 2015 00:00:00 GMT
这边提供一组正确的加密字串,供大家实现算法后验证
secret:secret7496
加密前字符串:x-date: Wed, 01 Mar 2017 05:05:24 GMT
摘要字符串为:XefFQYm8HRXsocJHF4ibDEPWW3k=
重要备注:
这个HMAC主要碰到2类错误
1.HMAC signature cannot be verified, a valid date or x-date header is required for HMAC Authentication
这个错误主要2种情况都跟日期有关
1)服务器时间跟客户端发出去的x-date的间隔时间超过之前定义的clock skew秒数(通过docker容器安装的容易产生这个问题)
2)请确认是GMT时间格式
3)把date改成x-date
2.HMAC signature does not match
这个就是签名算法有问题了


 浙公网安备 33010602011771号